Jim's RCR GT-R build

Johan

Supporter
Can anyone tell me if this motor mount will work for a coyote. It came with the car and I am afraid it is for an LS. It is 8.5 inches high.
If it is for an LS can it easily be modified for a coyote?
I don’t think those are for LS, here is the LS mount.
 

Attachments

  • 25E3253F-754D-46CD-A8B9-AE3042427F78.jpeg
    25E3253F-754D-46CD-A8B9-AE3042427F78.jpeg
    391.3 KB · Views: 311
thanks for the reply. the ones I had were similar but different spacing. I was able to send mine back to Fran and exchange for coyote mounts. It should be here in a few days along with my trans completion kit. That should get me everything I need to hook the engine and trans together.
 
My son and daughter decided they want to autocross so no progress on my GT-R build. I had a single seater open wheel Fmod car, but that wasnt any fun with the family at events, so sold that and just got this so I would have 2 seats. It have a 1984 mustang drive train. I need to get the suspension dialed in.
 

Attachments

  • 349563328_269420675537531_3342502817419084567_n.jpg
    349563328_269420675537531_3342502817419084567_n.jpg
    216.9 KB · Views: 170
  • red racecar.jpg
    red racecar.jpg
    47.1 KB · Views: 163
in the next week I hope to have my final parts to mount my coyote engine and graz trans. I bought the trans Completion kit from RCR.
the couple builds I have read about say the bearing should fit into the flywheel without pressing it in, some even mentioned a couple stakes to help hold it in. the picture shows how far mine goes by hand. that is a dry fit but I dont think lubrication will do it. have others had this issue? did I get the right bearing?
My RCR trans Completion kit did not come with any bolts, did other people get bolts? I emailed RCR about it but no reply.
flywheel and bearing.jpg
 

Attachments

  • bearing.jpg
    bearing.jpg
    365.3 KB · Views: 139

Randy V

Moderator-Admin
Staff member
Admin
Lifetime Supporter
Heat the flywheel and chill the bearing.
I would use a heat lamp or a heat gun on the flywheel and chill the bearing in the freezer.
1) verify that the bearing fits the input shaft of the transmission first..
 
For bolts from the flywheel to coyote I went with arp-156-2801 as outlined on a nice build sheet from Kurtiss Build.
Thanks Steve,I saw a couple other build notes that said those ARP are too short and only had 0.20 in thread engagement. I just measured mine and I have 0.5 in so I should be good.
 
I am trying to find a place to store the front and rear upper fiberglass. what's the best way to knock down the gelcoat seam flash? I dont want to hit it and break off bigger chunks of gelcoat.
Is it safe to store the front upper fiberglass on the side (wheel well side down)? Or will it flex and warp?
 

Randy V

Moderator-Admin
Staff member
Admin
Lifetime Supporter
I am trying to find a place to store the front and rear upper fiberglass. what's the best way to knock down the gelcoat seam flash? I dont want to hit it and break off bigger chunks of gelcoat.
Is it safe to store the front upper fiberglass on the side (wheel well side down)? Or will it flex and warp?
I generally dig out the seams with 36g and then build back up with 3M HSRF or make my own with West Systems Epoxy and cut up a bunch of Fiberglass Cloth.. The big concern is having to make darned sure that you get out the air bubbles and any remaining mold release agent. Epoxy primer will reseal everything, so don’t be overly concerned about damaging the gelcoat.
Storage - In my opinion - The best way to store the clips and spider are either to build a buck that approximates the chassis or to leave them on the chassis..
 
I am trying to remove the rear steel structure but I can't figure out how to relieve the tension on the upper A arm boltany suggestions?
 

Attachments

  • IMG_20231104_212513_01.jpg
    IMG_20231104_212513_01.jpg
    451.3 KB · Views: 112
  • IMG_20231104_212513_02.jpg
    IMG_20231104_212513_02.jpg
    306.6 KB · Views: 137

Ian Anderson

Lifetime Supporter
first mark and then unwind the spring loading.

unbolt spring and shock absorber

thenmonto suspension bits

Ian
 

Chris Kouba

Supporter
What's on the back side of it Jim? Does the inboard side connect to something as well?

It looks like that bracket is putting a lateral load on the bolt (wants to pull it inward?). If it's by an amount as big as it looks, that may be a manufacturing mistake? In any case, it looks like some pressure needs to be applied outboard to the leg with the plate on it.
 
This shows how the tension is pulling the bolt outward and binding it. I released the coil over so it was loose, I removed the wheel, I tried jacking up the lower control arm ball joint. I tried prying the upper control arm inward and a strap to pull it inward.
I could pound the bolt out but I think it would ruin the threads and I would not be able to reassemble it.
I have been reviewing other GT-R threads for hints but no luck.
I figure I will be installing and removing the motor several times and it would make it so much easier.
 

Attachments

  • 20231106_153054.jpg
    20231106_153054.jpg
    323.5 KB · Views: 122

Joel K

Supporter
I am trying to remove the rear steel structure but I can't figure out how to relieve the tension on the upper A arm boltany suggestions?

Jim, I haven’t built a GT-R. My sense is that rear section is fabricated independently of the frame and the holes don’t line up perfectly and the rear structure needs some persuasion to install. Very similar to the roll hoop on the SLC.

Looking at the pics you can unwind the A-arm screw and it will back out. Maybe put a drop of oil on the threads. To put it back together leave a short amount of the bolt exposed and push pull the rear structure onto the bolt. You may need a strap and pull it or a hydraulic RAM and push the arm into place. I would also consider maybe cutting the flange off and re-welding it to make installation easier.

I would also call RCR and see what they recommend.
 
Last edited:

Chris Kouba

Supporter
Agreed with Joel. Without seeing the rest of it, I would think the flange slipped on the assembly jig or the hole location wasn't properly positioned.

A call to RCR might give you some direction but it's likely cutting off the tube and re-welding it slightly outboard of its present location might be the easiest way to clear this hurdle.
 
I was finally able to get the bracket off, I just needed to focus and take more stuff off. this will be much nicer to install and remove the motor multiple times as I install the support systems.
next step is to install the motor mounts and marry the engine and trans once I get a couple more parts
 
I am starting my build and also acquiring parts. What coyote engine did you go with? I have the same front motor mount frame. What motor mounts did you go with? I was planning on ordering FMS-M-6038-M50 this week.

I believe I have everything to join the engine and trans and planning on doing that by the end of the month. I need to make a brace to support torquing the flywheel bolts.
 
Steve, where are you located? Do you have a build link?
Mine is a gen3 crate motor with graziano.
What motor trans are you using?
Great timing, I was just posting on my motor mounts. I have these because they looked right to attach to my RCR motor mount.
I attached a picture of the mounts I am using. The issue I have is the frame side is 5/8" bolt and the engine side is 1/2". I am not sure if I need something in between or if I just need to open the hole. Hoping for som feedback from others
 

Attachments

  • IMG_20231110_224340_01.jpg
    IMG_20231110_224340_01.jpg
    417.3 KB · Views: 94
Jim,

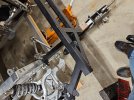
I am located in Michigan, about an hour north of RCR. Where are you? Using the 5.2 Aluminator engine and Graziano transaxle. Going to start build log soon.

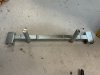
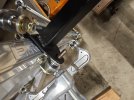
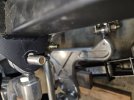
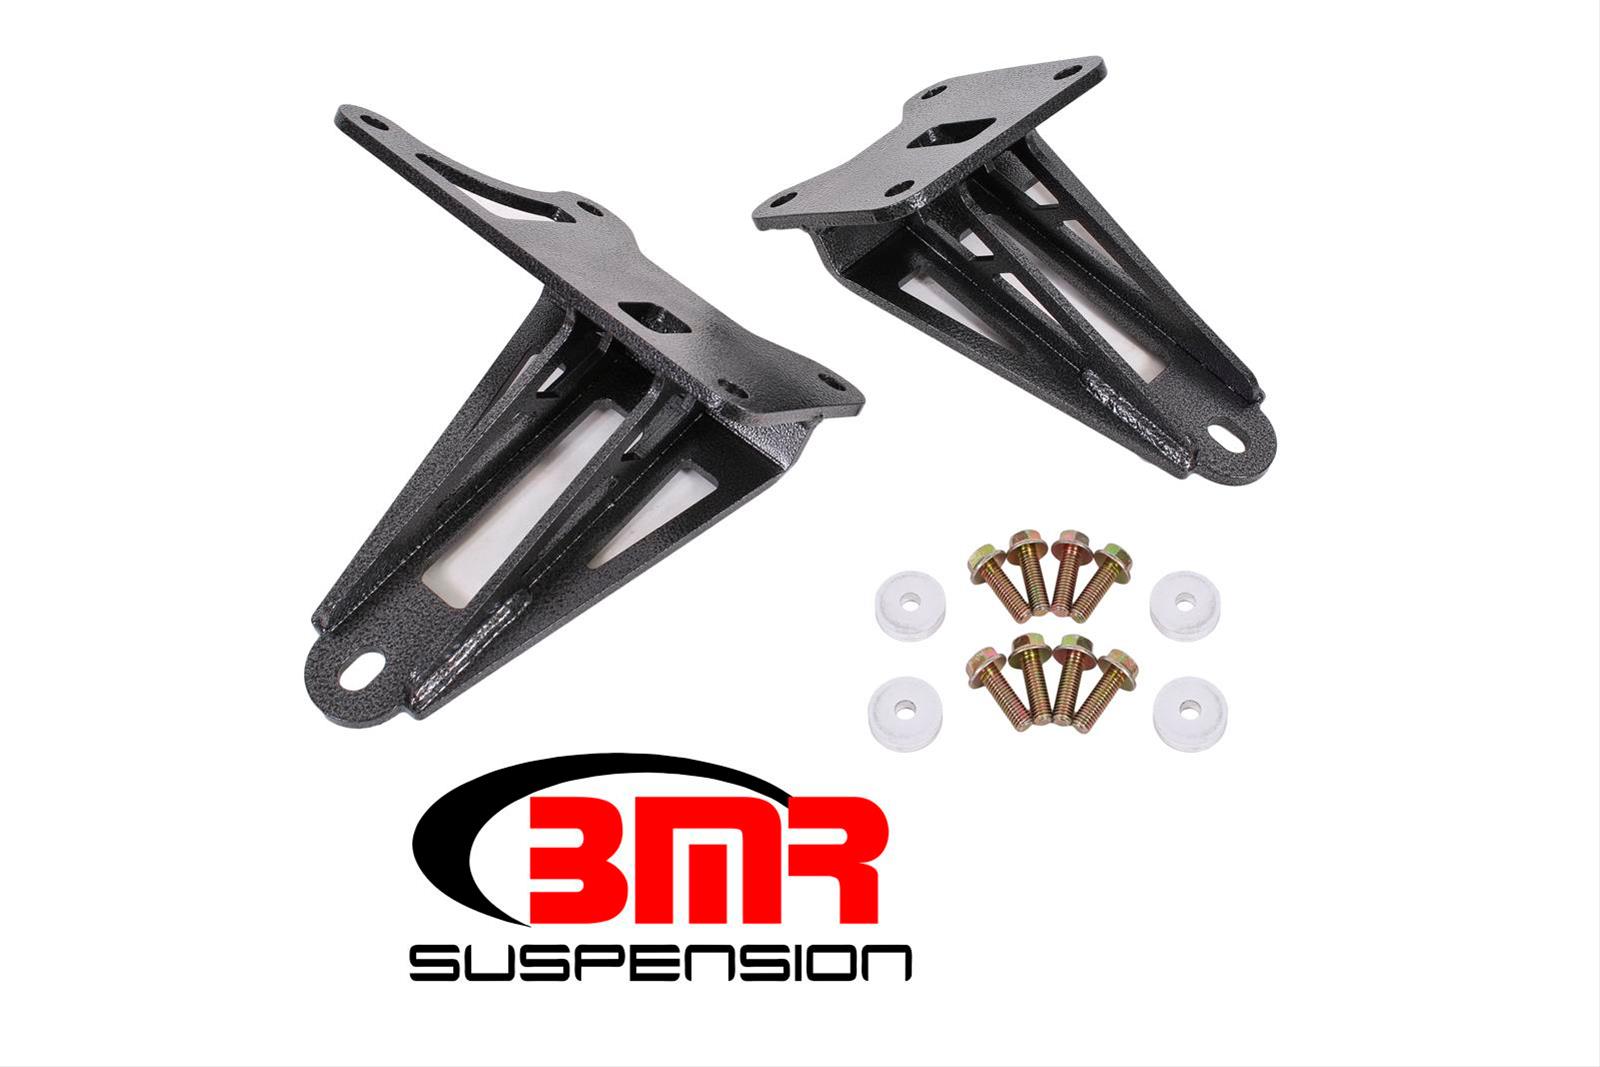
I was thinking about ordering those same engine mounts, but wondering the same thing on bolt sizing.

Would be happy to compare notes and plans as we are planning to put more time in on the build over the winter. Current open questions are around part options for the engine including:

1) Exhaust Headers - interested in Ceramic coated - buy BBK / other coated headers or build and have JET-Hot coated
2) Exhaust System/Routing - planning on using Cats
3) Fuel System - planning on the fuel tank modification and using a Holly hydramat or similar system

Steve
 
Back
Top