LBC Build Log - Apex

Yay or Nay on something like this on the rear fenders? I always thought the rear end looked like it extended out forever past the rear wheel...this kinda breaks it up. Don't laugh at my 20 second photoshop attempt. lol. As drawn that piece may be too small/weak.

 
Cleaned up the front end and put down some primer.


And put the front suspension on...now if I could get parts from Fran.


Castor is completely to the back right now and looks to be about 5.
 
Just working on odds and ends as I'm waiting on parts from Superlite to start on the steering rack / suspension.

The Apex was designed to drop the engine and transmission as one with a cradle. However the transmission sticks out the back of the rear subframe, with the engine fully forward, it is not possible to drop the cradle. I made the rear lower subframe tube removable so that the cradle can be lowered as one unit.


I'm also working on closing up the rear body work a little. This should help prevent fumes from entering the cabin. Unfortunately this wasn't incorporated into the original plan so when we cut off the rear of the eclipse we didn't have a straight plane that could be closed off. So we're adding some sheet metal back and then will close off the back. I think we might need to test fit the rear body to make sure this doesn't interfere.


In addition to the above, there are holes and openings all over the roof and floor pan sheet metal of the eclipse. I'm covering them with aluminum tape and then will fill most of the gaps in and around the bulkhead with foam. Again this is just to prevent fumes from entering other little holes in the cabin. Gonna try this stuff.

 
Really wish I could have had all the dimensions on the SLC steering rack first. I got it this week however the Ball center to Ball center measurement of the inner control arm is 35". Depending on the height placement of the steering rack in the Apex, the alignment of the upper and lower control arm pivot point puts the rack at 28.25+" ball center to ball center. That makes the SLC rack more then 6" too wide, I don't call that "fitting"...so this is going back. Contacting Maval and Unitsteer for a better (custom) solution. The original spec's had the Corvette steering rack used but the pinion interferes with the tube chassis. Seem that most angled (18*) racks will not work. There aren't too many 90* racks out there.
 
Heads came in...so can start rebuilding the engine. Advanced Induction high compression heads.


They weld up and reshape the combustion chamber

 
Quick pic of the finished internal roll cage. We tried to keep it as simple as possible because we are inexperienced with bending and was afraid of getting things uneven. Haven't got much else done because I'm still waiting for parts from Superlite. Rebuilding the engine and swapping cams right now. Pedals have been an issue. We tried to fit cockpit mounted tilton hanging pedals, it didn't work (firewall mounted doesn't work either). Steering column interferes with one and the front subframe interferes with the other (same reason original eclipse pedals don't work). I already knew pedals would be an issue as barely ANY eclipse have swapped pedals. Now we are going with floor mounted with the master cylinders pointed to the driver, its the only thing I see that will work. Pedals will be moved higher and closer to the driver as well. Planning to use longer steering wheel hub adapter as a result and move the seats back further as well. Nothing about building this car is easy.

 
Heres a pic of the engine back together.


Put the holes in the dash and got it back in.


Also cut holes in the bulkhead for the rollcage and got it back in.


Next will be making brackets for the Seat Harness so we can button up the bulkhead. Hopefully the cross bar on the rear subframe isn't too low for an attachment point. Otherwise we're going to have to add more tubing to the subframe. Just bought some seats (cobra imola's) so we can mock in seats/pedals/steering/shifter/harness together.
 
I mounted my accessory drive today to take some measurements and no good news. The C5 corvette alternator & bracket aren't going to work. I might have a few other choices, but I'm not 100% clear on whether they work with an LS1. Please chime in if you know. BTW my settup is WP and ALT only (no AC no PS).

Option 1...I can buy a CTS-v bracket and CTS-v (only) alternator. Seems I'd also need an idler. I recall seeing a large idler in photos, is this also a CTS-V part or are there options?

Second option is maybe the RCR accessory drive configuration. I think this is using any GM 8247 alternator with RCR spacers? But is there a bracket also? I see a smaller idler or tensioner used also. Is this sourced from RCR also?

Is one preferred over the other? cheaper?
 
I decided to go with an ICT Billet bracket. Part number for the C5 accessory is 551667-1. Can be had for 53.50 on Jet.com and uses same camaro/truck alternator as RCR setup (GM 8247 I think) I bought Alternator part 88877278 from Amazon.

ICT Billet Bracket

This way I can use my existing C5 tensioner. Belt wrap will be similar to this but instead of wasting weight and money on an unused PS pump, I'm going to build a bracket with an Idler ($13) on the head. You could skip this and go straight from the idler on the alternator bracket to the alternator and then to the crank pulley, but that doesn't leave enough wrap on the crank pulley IMO.

attachment.php


idler example
DD-LS-IOB-1.jpg
 
I put my seats in today to see the fit. It wasn't good. The seats I got were Cobra Imola GT's which aren't too wide at 21.5 at the outside of the seat base and 23.5 at the outside of the shoulder bolsters. But I'm going to return the GT's for the standard Imola's which are 19 and 22.5 respectively. That will help things out but even still those narrower seats still won't fit with the plastic door trim on. Even worse - my head is danger close to the roll cage. This is even without something like a "planted" seat base (I was going to weld in my own brackets). So what's that mean. I have to cut out the two floor pan cross supports and cut out part of the tunnel to bring in the seat further to the middle of the car.

pic of my seat
cob6001pro-fit.jpg


This is an idea of what I need to do

dsc_0169-jpg.302699
 
Sorry to hear about the seat fitment.
Have you tried Kirkey's? It looks like they sit lower than the Imola's which may help.
 
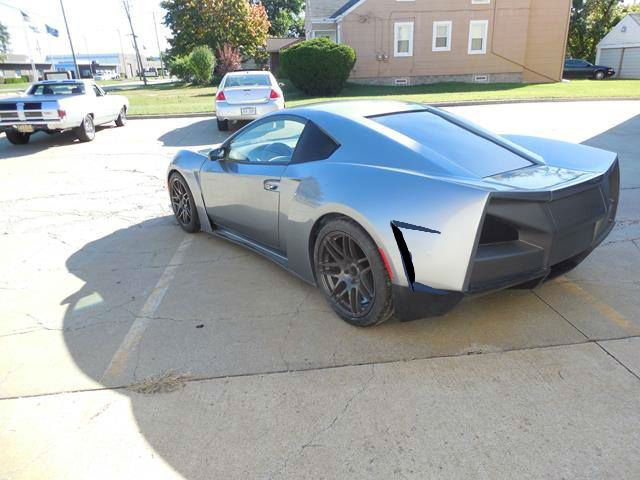
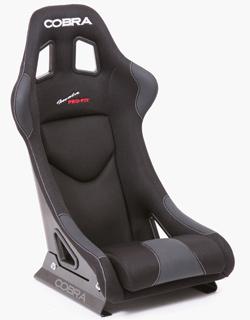
I looked online at Kirkeys but wasn't ever able to sit in them. I tried to sit in as many as possible but its somewhat difficult to find places that stock the seats that you can sit in. I also looked online at the Tillett B6f and like those for fitment as well, but also couldn't sit in them. In the end choose the Cobra based on price, quality, comfort and nearby location of Subesports. I had a feeling I'd be sending some back and didn't think return shipping several seats would be cost effective. In the end I may have to go with a Kirkey or Tillett but I'm going to have to eat a 20% restocking fee on $2k seats.
 
Your best bet for sitting in a Kirkey or Ultra Shield (similar to Kirkey), is at a racing supply shop that caters to dirt track. Here in the Dallas area that is Circle Track and Oval Track Parts For Sprint Cars, Late Models, Hobby Stocks, Street Stocks, and Mini Stocks .

In Long Beach, you probably do not have anyone close... But you might look for an outlaw kart supply - they also use those seats, though not the exact model you would use in your car. Outlaw Kart racing is big in some parts of CA.

We have used these types of seats for years in our race cars. MOST folks won't be happy with them in a street car. They have limited padding and are not adjustable in any way. You could mount them on sliders for fore/aft adjustment. They are meant to fit the driver, that is why they are available in so many widths. If you get one that is wide, a skinny driver will get slammed side to side in any hard cornering.

I personally would be fine with them, I have enough built in padding ;), and I'm not fussed about what a passenger thinks.
 
Hey Scott, just to rewind your thread a bit back to accessory drive... That alternator bracket you found is pretty cool, I've never seen it. Only downside to it that I see is that you don't get to take advantage of the side mounted 3rd bolt that the CTS-V setup has. If you already have an alternator then that would be a tempting choice otherwise I'd say just go with the full CTS-V setup which includes the alternator idler. The bracket/idler is surprisingly affordable. The top engine pic you have is from my engine and that's actually a fabricated idler bracket where the PS sits. I can give you some more detailed build pics if you like but I did that before Ken found a great solution you'd be silly to pass up on.

http://www.gt40s.com/forum/slc-clubhouse/38446-kens-slc-build-thread-24.html#post466577

Thanks. I was going to do the CTS-V route but the truck alternators seemed so much cheaper for a comparable amperage (and didn't realize at the time about the third bolt when I bought them). I hadn't heard of any issues with the two bolts units so I just went for it. I'll give it a good tug once I have it on and will add my own third bolt to the bracket if it seems like it needs it. I DID go with that camaro upper bracket Ken referenced in your link instead of making my own. Thanks for the info!!
 
Here's my solution for the horn. The eclipse uses a clock spring. It doesn't fit behind the hubs for mounting aftermarket steering wheels, like the Sparco one I'm using. I'm also using an NRG quick release. Between the Sparco hub and quick release, there are extra metal rings for your electrical connections so I used one behind the hub as well that I attached to two aluminum brackets I made. Hard to see but theres 4 small springs pushing the metal ring against the hub for constant contact. The screws do not come in contact with the hub.


Got started on the tunnel for seat fitment. Made a big hole.


Started to fill it.


Next issue I've come across is the proximity of the seat back to the firewall. My issue is mounting the harness to the firewall in such a way that the hardware is clear of the cutout in the seat. There's only a couple inches. I think Schroth has a pretty compact 2 bar slide that may work otherwise I may stitch on.

 
Back
Top