So I got a reliable , protocol for adjusting the radiator box.
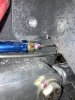
1. remove the footbox bolts on one side.
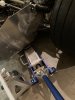
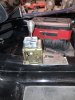
2.Place jack in the middle of the box, move up until the holes move up the desired distance so that the floor clearance is perfect (in my case was 5mm), re drill and tap the footbox,
2 Secure the footbox screws again. (I was worried that when I removed the jack there will be some spring back movement , but there was not , the floor stayed exactly at the same spot.)
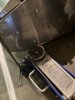
so the rear portion of the box is now perfect, but the front is still about 3mm too low, Which meant it has to be bent.
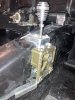
3. Slide the jack plate between the floor and the sidewall. move up util the floor past the desired height (this not enough)
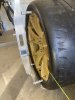
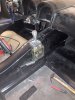
4. Get your teenage son (120 lbs) to Jump on the footbox desired corner, a strong jump yields 2mm, a slight jump moves the box down 1mm, (getting crudeness to a new level)
WORKS EVERYTIME. Now my radiator box floor clearance is within 1mm all the way around.
1. remove the footbox bolts on one side.
2.Place jack in the middle of the box, move up until the holes move up the desired distance so that the floor clearance is perfect (in my case was 5mm), re drill and tap the footbox,
2 Secure the footbox screws again. (I was worried that when I removed the jack there will be some spring back movement , but there was not , the floor stayed exactly at the same spot.)
so the rear portion of the box is now perfect, but the front is still about 3mm too low, Which meant it has to be bent.
3. Slide the jack plate between the floor and the sidewall. move up util the floor past the desired height (this not enough)
4. Get your teenage son (120 lbs) to Jump on the footbox desired corner, a strong jump yields 2mm, a slight jump moves the box down 1mm, (getting crudeness to a new level)
WORKS EVERYTIME. Now my radiator box floor clearance is within 1mm all the way around.