
You are using an out of date browser. It may not display this or other websites correctly.
You should upgrade or use an alternative browser.
You should upgrade or use an alternative browser.
Roaring Forties 66
- Thread starter otto69
- Start date


Clayton
Supporter
Cheers DaveLoving the detail Clayton.....i got so many ideas already...all i need is for my new car to turn up.....
I was never quite sure how much detail to put up.
I'll continue down this path for now.
Clayton
Clayton
Supporter
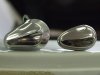
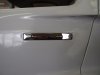
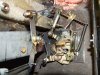
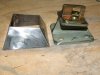
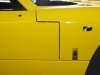
I intended to use the Rover door lock, but it seemed a tad too large for the space available.
Found a 50’s Ford lock that looks similar and fits well.
Located some S/S door handles on the web which had the look of the originals.
Cut them down a little and bent them to fit the door curvature.
Clayton
Found a 50’s Ford lock that looks similar and fits well.
Located some S/S door handles on the web which had the look of the originals.
Cut them down a little and bent them to fit the door curvature.
Clayton
Attachments
Clayton
Supporter
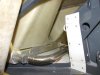
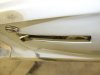
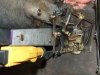
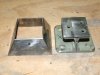
Onto the handle mechanism.
As our ADR’s require an immobiliser fitted. Took the opportunity to fit centre locking at the same time and saved me putting another key lock on the passenger’s door. There will be a pull cable override located in the door pocket if the actuators go haywire and auto lock while we’re in the car. Can’t find any photos of the internal linkages and handle yet.
Clayton
Attachments
Clayton
Supporter
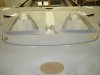
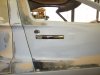
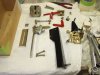
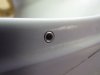
Light covers and side windows were next.
Used a self-threading S/S insert (M4 internal thread) for the covers and windows. Placed a small section O-Ring under the head of the screws to help stop the screws from vibrating out.
Clayton
Used a self-threading S/S insert (M4 internal thread) for the covers and windows. Placed a small section O-Ring under the head of the screws to help stop the screws from vibrating out.
Clayton
Attachments

Clayton
Supporter
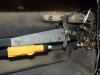
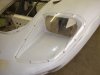
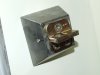
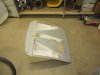
Made some cover plates for the door striker extensions. This allows adjustment by the four main blots under the cover and keeps the striker central in the bracket.
Clayton
Clayton
Attachments
Dr. Bob Woods
Supporter
Clayton,
Yes, please continue with all of the details. You are inspiring me... well you are actually costing me a lot of time to duplicate some of the things you are doing. Really good ideas. Thanks.
-Bob Woods
Yes, please continue with all of the details. You are inspiring me... well you are actually costing me a lot of time to duplicate some of the things you are doing. Really good ideas. Thanks.
-Bob Woods
Clayton
Supporter
Thanks BobClayton,
Yes, please continue with all of the details. You are inspiring me... well you are actually costing me a lot of time to duplicate some of the things you are doing. Really good ideas. Thanks.
-Bob Woods
Sorry to slow you down mate :laugh:
My thinking was, do it right the first time, well at least try anyway.
And have less regrets at the end of the build.
Clayton
Clayton
Supporter
Clayton
Supporter
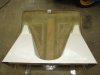
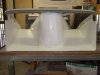
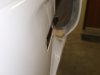
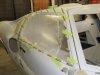
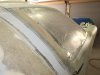
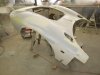
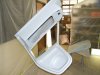
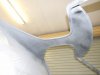
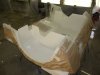
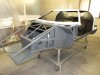
The painter recommended using a Hi-build (Re-face I think) over the raw glass areas. This was blocked out and redone in patches.
It amazing what you find with a long board.....:furious:
Clayton
It amazing what you find with a long board.....:furious:
Clayton
Attachments
Clayton
Supporter
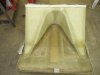
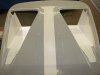
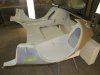
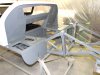
After that was done, I was told to spray Hi-fill undercoat and block it out progressively down to 800 with guide coats in between.
Removed the textured finish from the roof lining as well, now matches the finish under the doors.
That was not fun at all.
Clayton
Removed the textured finish from the roof lining as well, now matches the finish under the doors.
That was not fun at all.
Clayton
Attachments
Clayton
Supporter
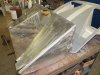
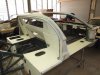
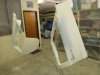
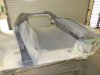
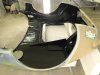
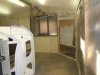
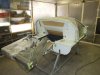
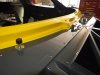
Painted under the front and rear clips with etch primer and satin black in 2 pack. Added a bit of gloss to the satin (8:1) to bring up the shine a tad.
Clayton
Clayton
Attachments
Clayton
Supporter
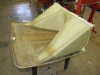
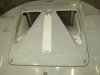
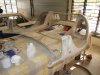
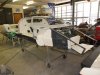
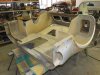
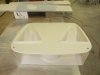
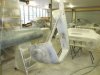
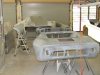
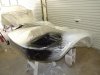
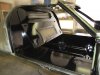
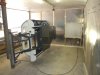
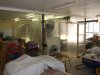
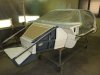
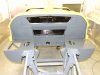
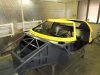
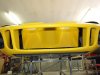
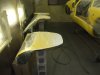
I took the individual panels to the paint shop for top coat in their booth. But as the chassis was a bit harder to move and I needed to paint 3 different colours on it, decided to build a spray booth of sorts and do the chassis at home.
First was the satin black in the cabin.
Clayton
First was the satin black in the cabin.
Clayton
Attachments

Clayton
Supporter
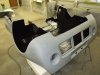
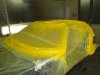
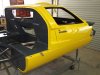
To keep the yellow finish as consistent as possible, I managed to talk the painter into laying the yellow on at home.
Clayton
Clayton
Attachments
Clayton
Supporter
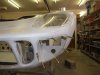
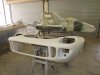
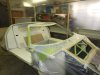
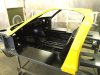
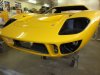
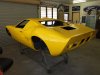
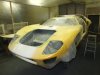
So after many years, the body is painted and ready for final assembly.
That was one of the major milestones in the project.
Clayton
That was one of the major milestones in the project.
Clayton
Attachments
-
 08.09.13 011.jpg137.6 KB · Views: 350
 -
 08.09.13 015.jpg110.8 KB · Views: 340
 -
 08.09.13 016.jpg136.3 KB · Views: 343
 -
 08.09.13 027.jpg124.8 KB · Views: 371
 -
 08.09.13 030.jpg115.5 KB · Views: 401
 -
 08.09.13 046.jpg70.1 KB · Views: 347
 -
 08.09.13 031.jpg131.3 KB · Views: 412
 -
 08.09.13 036.jpg120.4 KB · Views: 362
 -
 08.09.13 047.jpg100.9 KB · Views: 375
 -
 08.09.13 037.jpg76.4 KB · Views: 365
Clayton
Supporter
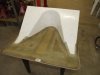
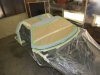
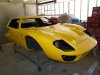
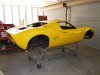
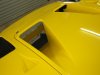
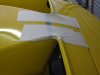
Nearly done with painting.......
Last job was to mask up for the stripes.
Tried out a few options for around the nostril vent, ended up going with the one below.
The white stripes will have a 1/4" black border done in vinyl.
Clayton
Last job was to mask up for the stripes.
Tried out a few options for around the nostril vent, ended up going with the one below.
The white stripes will have a 1/4" black border done in vinyl.
Clayton
Attachments
Similar threads
- Replies
- 37
- Views
- 12K
- Replies
- 38
- Views
- 10K