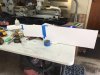
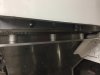
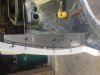
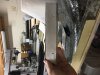
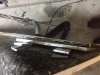
Made cardboard patterns for the front vertical panel extensions to fill the gap up to the clam and provide a ledge for the new return flanges on the clam to bolt to. Cut 3/16 aluminum pieces from the patterns and attached them to the front vertical pieces.

You are using an out of date browser. It may not display this or other websites correctly.
You should upgrade or use an alternative browser.
You should upgrade or use an alternative browser.
Rufus GT-R
- Thread starter rufusmathewsjr
- Start date
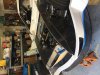
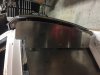
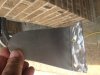
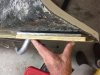
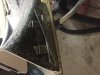
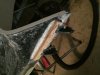
Added vertical plates in front of the door hinges to give the front clam an area to attach and also act as a seal/block in front of door. Fiber glassed plated into the front clam that will match up to the plates in front of the doors
Pictures
Attachments
-
 IMG_2831.JPG325.4 KB · Views: 641
 -
 IMG_2835.JPG190.6 KB · Views: 609
 -
 IMG_2836.JPG271.1 KB · Views: 605
 -
 IMG_2844.JPG405 KB · Views: 591
 -
 IMG_2845.JPG471.8 KB · Views: 618
 -
 IMG_2846.JPG401.2 KB · Views: 578
 -
 IMG_2878.JPG296.6 KB · Views: 572
 -
 IMG_2883.JPG584 KB · Views: 583
 -
 IMG_2884.JPG411.8 KB · Views: 581
 -
 IMG_2885.JPG354.2 KB · Views: 600
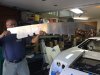
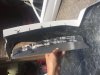
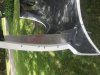
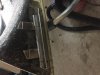
Fit the hood hinges to the hood and glassed in aluminum plates for anchor screws. Still need to clean up the glass work and then attach the hinges and fit the hood into the front clam
Attachments
-
 IMG_2942.JPG358.4 KB · Views: 585
 -
 IMG_2944.JPG341.5 KB · Views: 589
 -
 IMG_2945.JPG335.7 KB · Views: 590
 -
 IMG_2946.JPG377.3 KB · Views: 587
 -
 IMG_2947.JPG348.9 KB · Views: 581
 -
 IMG_2948.JPG325.9 KB · Views: 590
 -
 IMG_2949.JPG309.6 KB · Views: 589
 -
 IMG_2950.JPG408.1 KB · Views: 571
 -
 IMG_2951.JPG402.4 KB · Views: 613
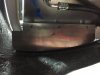
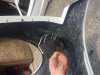
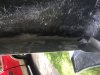
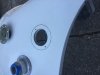
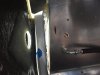
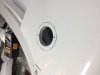
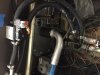
Had to relocate the fuel fill since the hood will open. Relocated to the passenger side so I can get out of the car when parked at a fuel pump. I will use the Sparko fill that came with the kit. Machined two reducers from 2" to 1-1/2: and welded them in to the fuel fill and a line to the tank. Bought some 1-1/2" aluminum tube form Speedway and rand the line to the new location. Built up the area under the new fuel fill location and will recess the fill into the clam.
Attachments

Working on the rear clam hinges that I got from H. Will post pictures later as the ones I took are somehow lost.
Home Depot
12 in. Stainless Steel, 4-Bar Hinge Casement or Projecting Window
12 in. Stainless Steel, 4-Bar Hinge Casement or Projecting Window
Michael Hampson
Supporter
Looks great, Rufus!!!
Here is another option on the hinges--Prime Line P/N 3628 on Amazon
First start of the Aluminator 5.2 XS
Don't know how to post the video--any help?
Don't know how to post the video--any help?
Michael Hampson
Supporter
Don't know… Post on YouTube and then post a link here?
Michael Hampson
Supporter
That's awesome! 
Fantastic Rufus. Congratulations!
Similar threads
- Replies
- 63
- Views
- 6K
- Replies
- 5
- Views
- 941