
You are using an out of date browser. It may not display this or other websites correctly.
You should upgrade or use an alternative browser.
You should upgrade or use an alternative browser.
Scotts build thread
- Thread starter Scott R.
- Start date
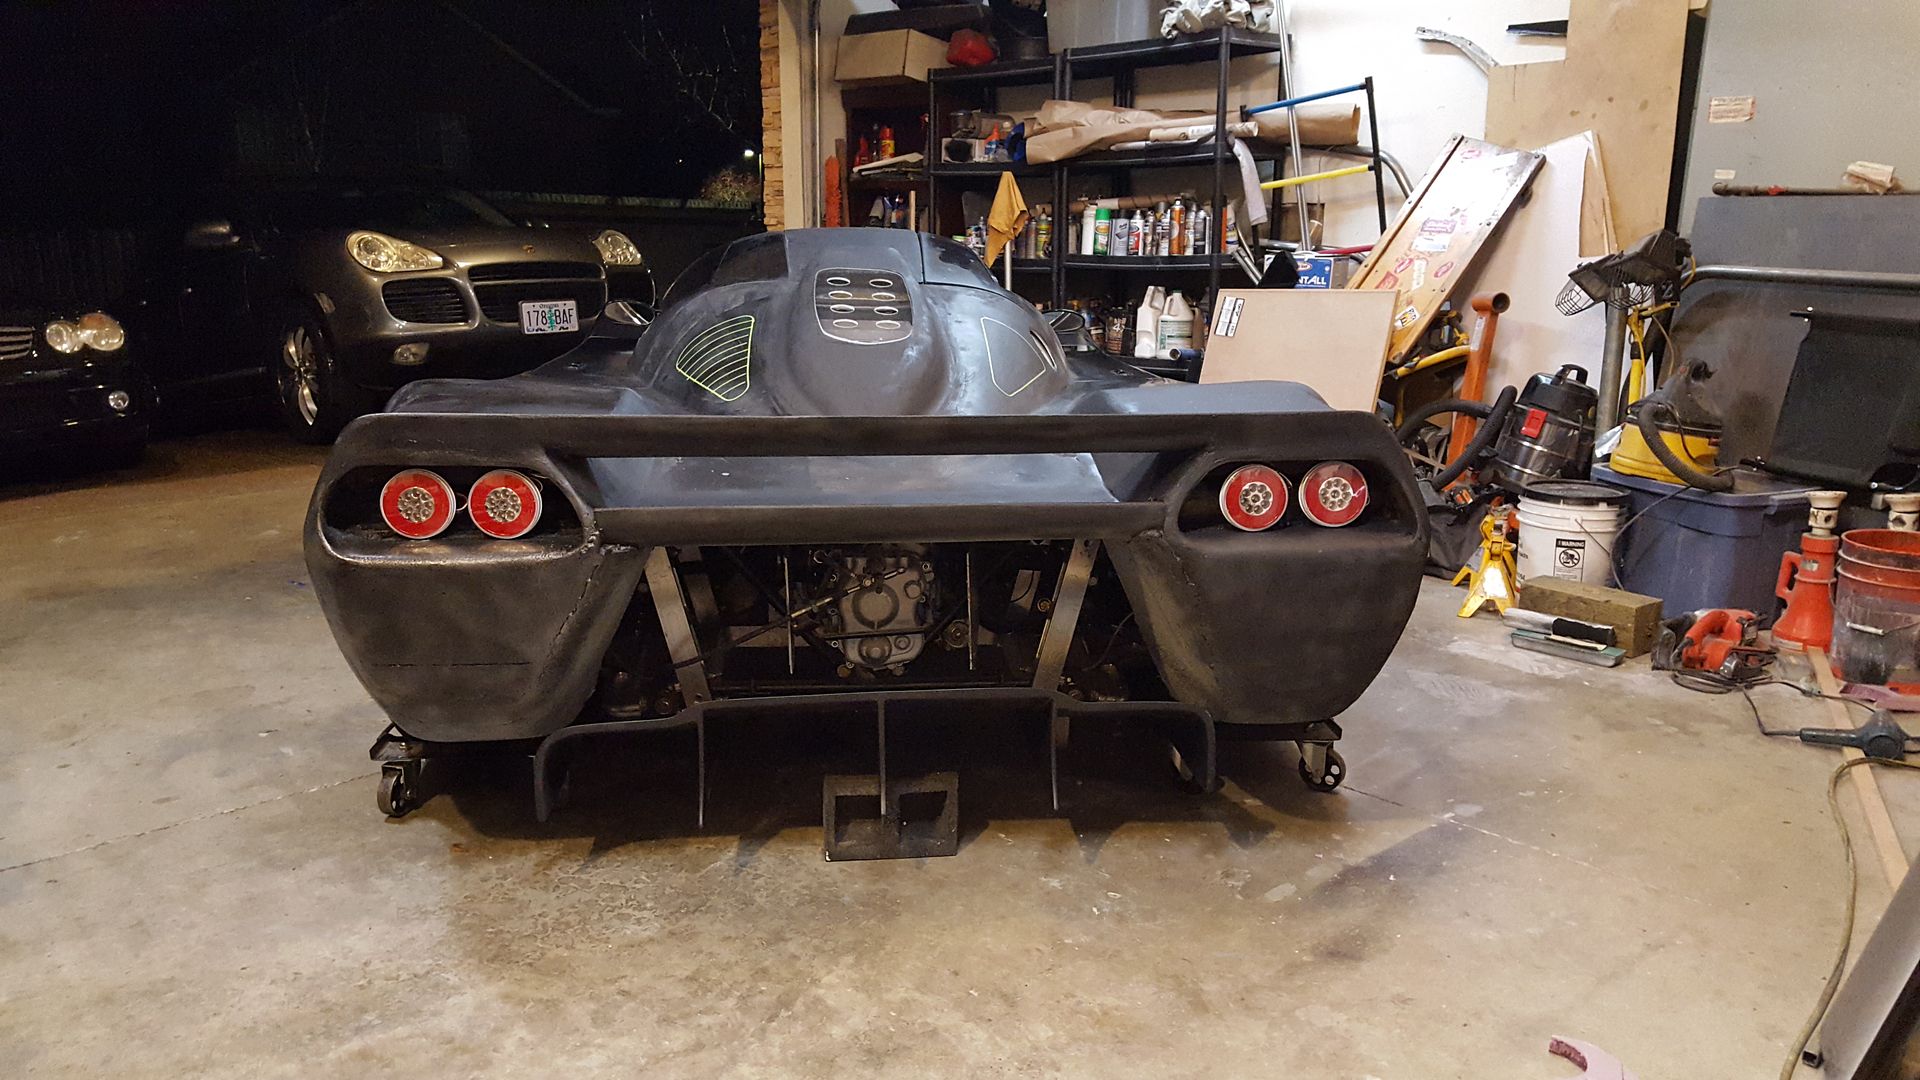
Something will go there. Just not sure if I want it recessed, or flush out with the sides. It will be the last part of the rear though. Still deciding wing stand offs, which may go through that back area, and probably going to widen the diffuser abit with add on sections behind the tires.
Just not sure if I want it recessed, or flush out with the sides.
Recessed! :nice:
...and probably going to widen the diffuser abit with add on sections behind the tires.
'Cannot recall ever seeing car with diffuser sections behind the rear wheels. I assume you'd do that for aesthetics rather than aero?
Recessed! :nice:
'Cannot recall ever seeing car with diffuser sections behind the rear wheels. I assume you'd do that for aesthetics rather than aero?
Just anticipating it may need something to fill that corner in. Will see.
Was having a real tough time trying to get the previous design tail light openings perfectly symmetrical, so decided to change them to an easier shape. Looks a little less space ship too.
Made the side splitters and front splitter extension (not in pic). Used 5mm underlayment plywood, with a layer of 1.5oz random weave on each side. Very strong, yet light for the strength.
Made the side splitters and front splitter extension (not in pic). Used 5mm underlayment plywood, with a layer of 1.5oz random weave on each side. Very strong, yet light for the strength.


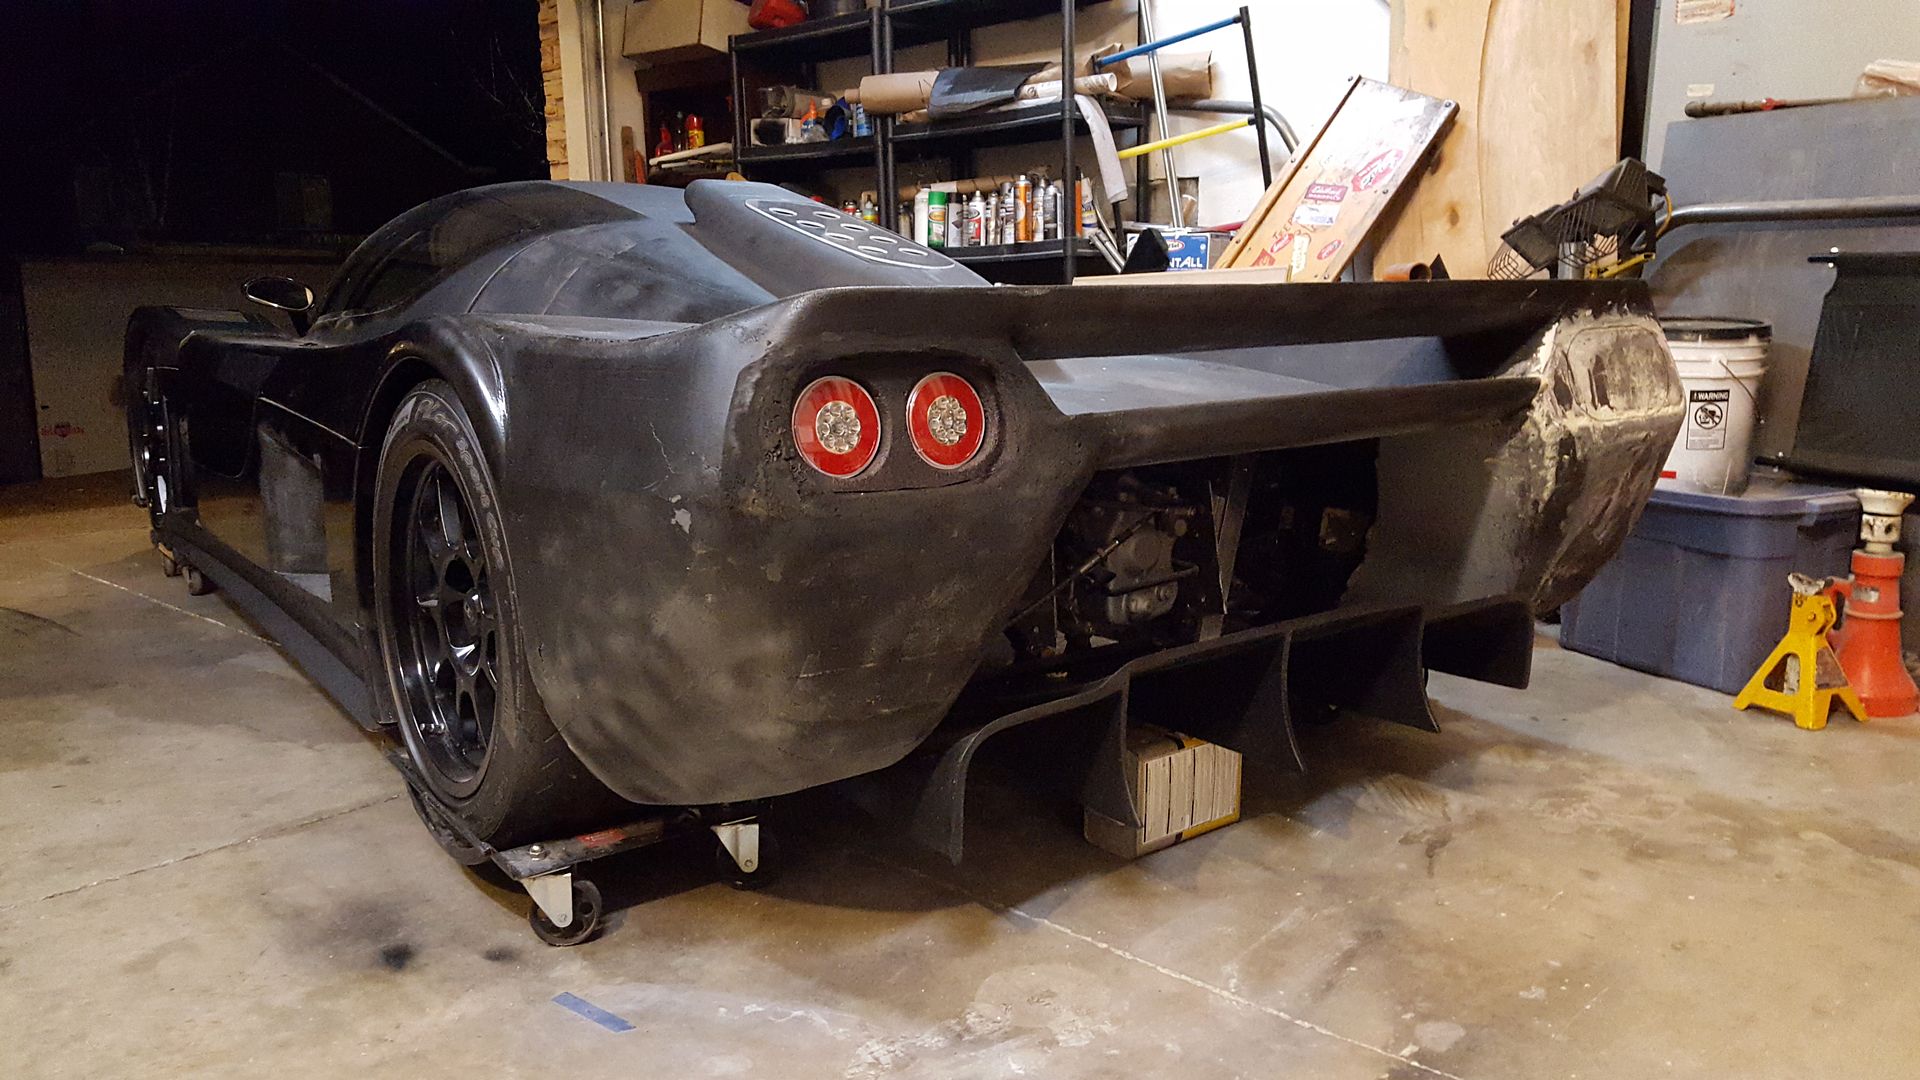
Finally came to the final decision about how the wing and diffuser will mount. This will also dictate how the rear clam hinges. Which, it won't. The rear of the car will be bolted on. Havnt decided 100% where my cut lines will be for the engine cover, but only about 50% of the rear will hinge up.
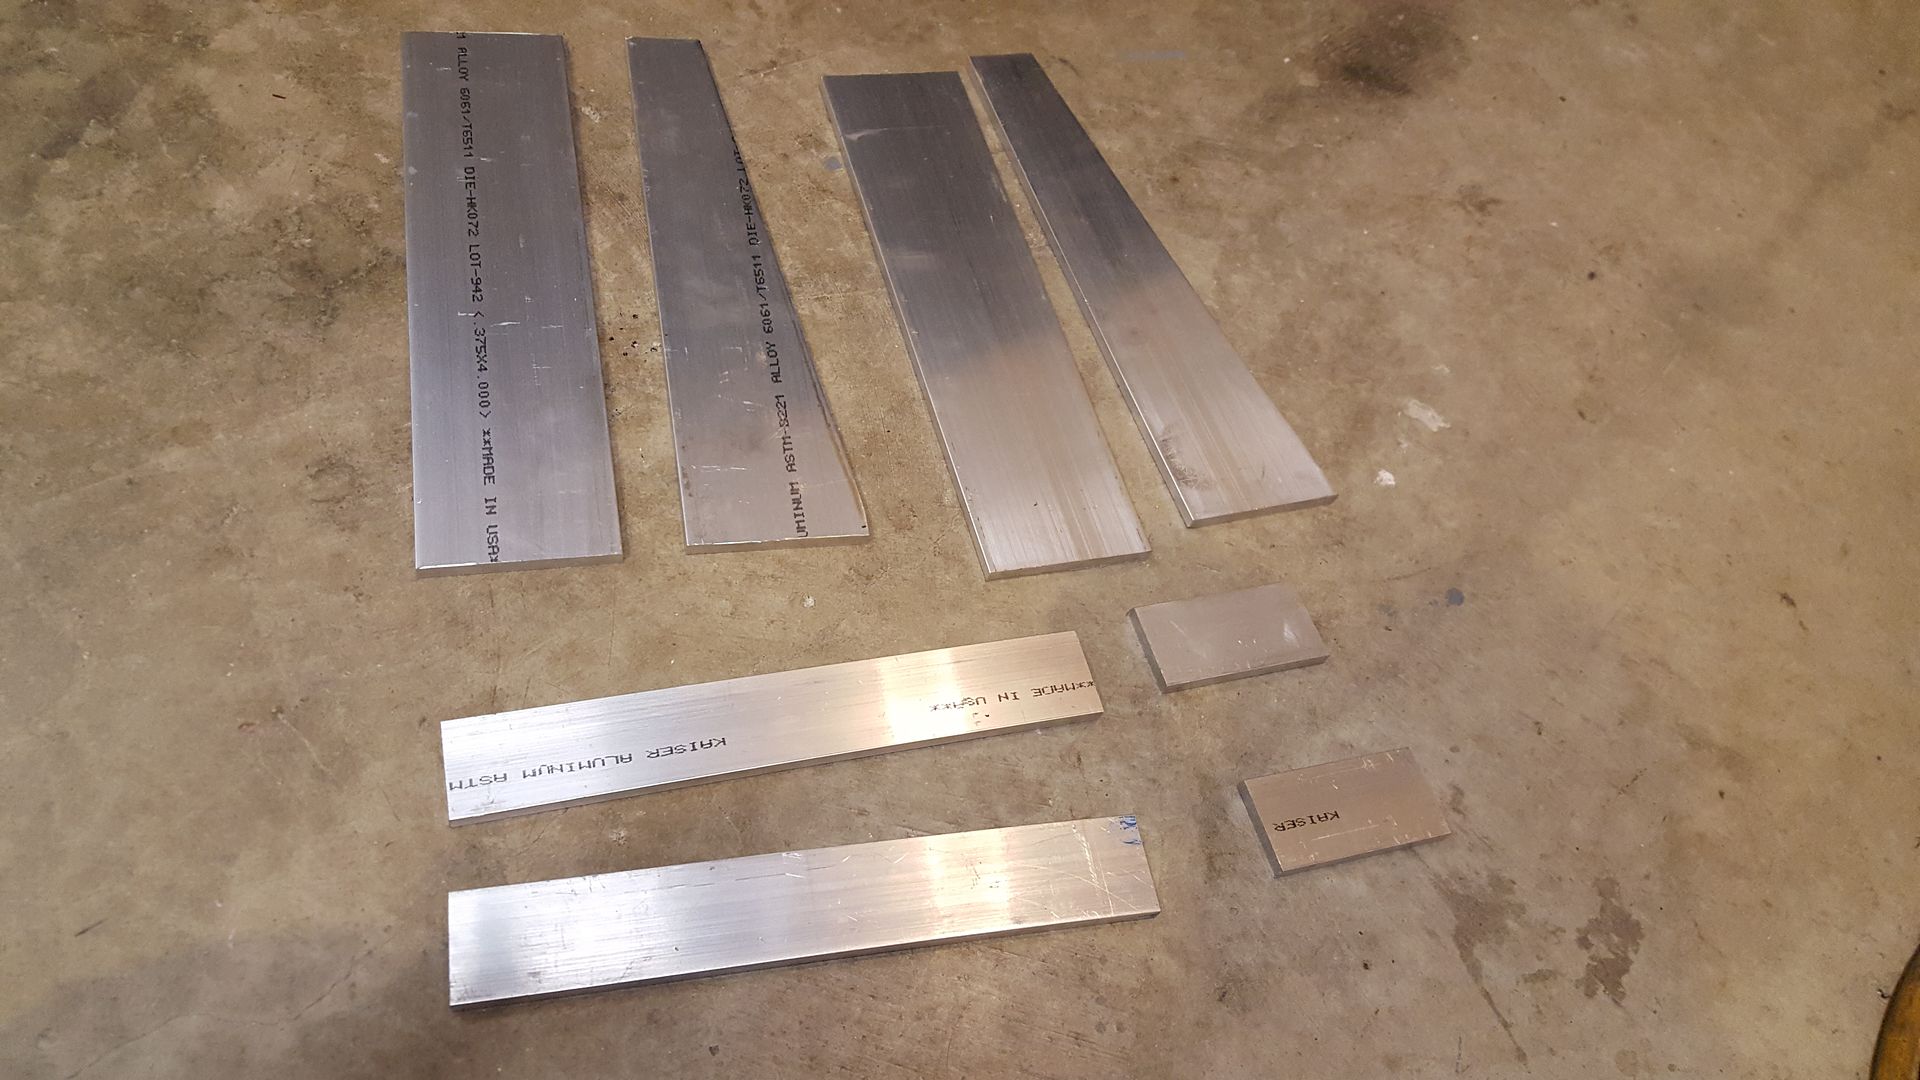
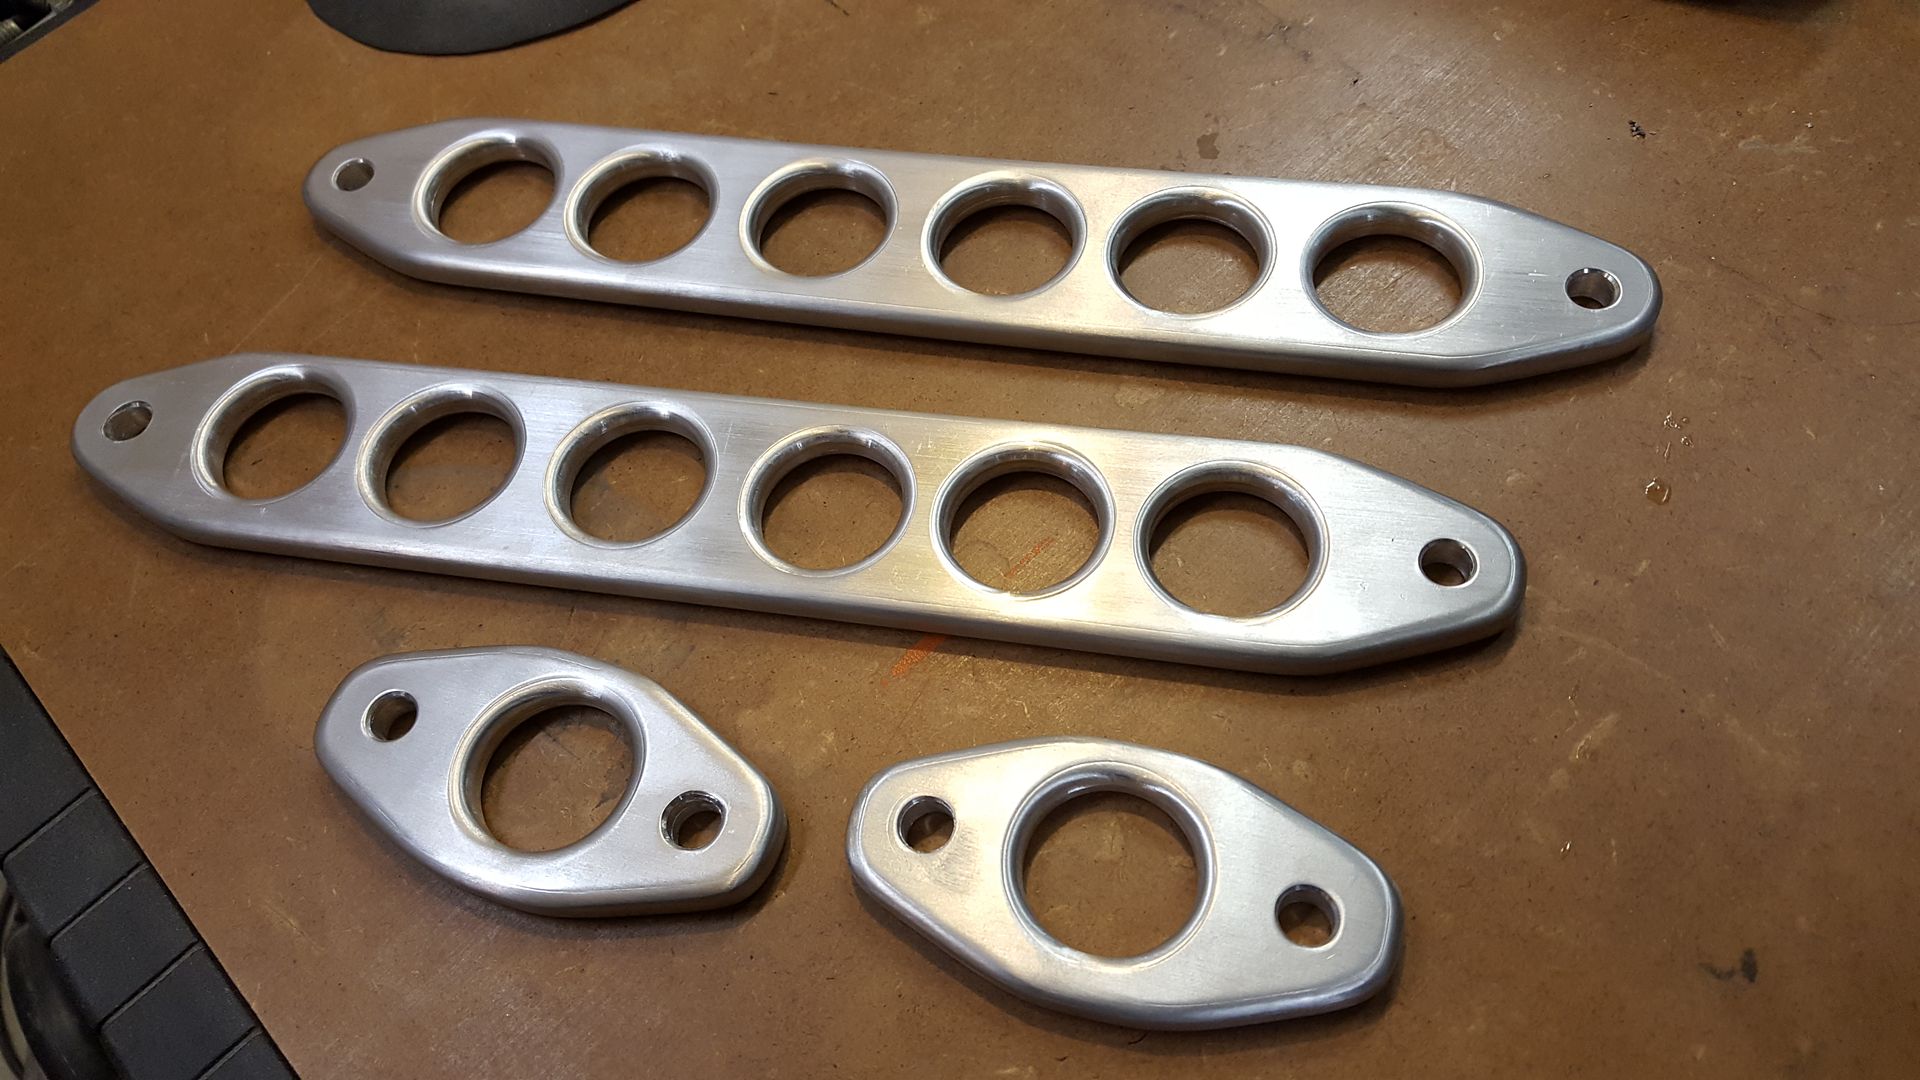
Here is the rear upper wing mounts. Using just hand tools, was able to make these. They started as simple 3/8" thick 6061 2" and 4" flat bar. MANY hours later, they are almost done. The rear upper mount, has a short pivot that will mount to it, then to the wing. This will allow for super easy wing adjustments. Wing will be able to rock back and forth with bolts loosened, so a little movement forward flattens wing, little rearwards, and angle gets greater.
As far as overall weights go, I am going to be about even. Even with adding the rear diffuser. The original wing mount set up was 36#. Mine breaks down like this, diffuser 10#, wing mounts 8#, inner frame to mount diffuser and wing to 9#, So, 27#, and I added the diffuser, so 9# to spare, which will probably equal out in the extra body work.
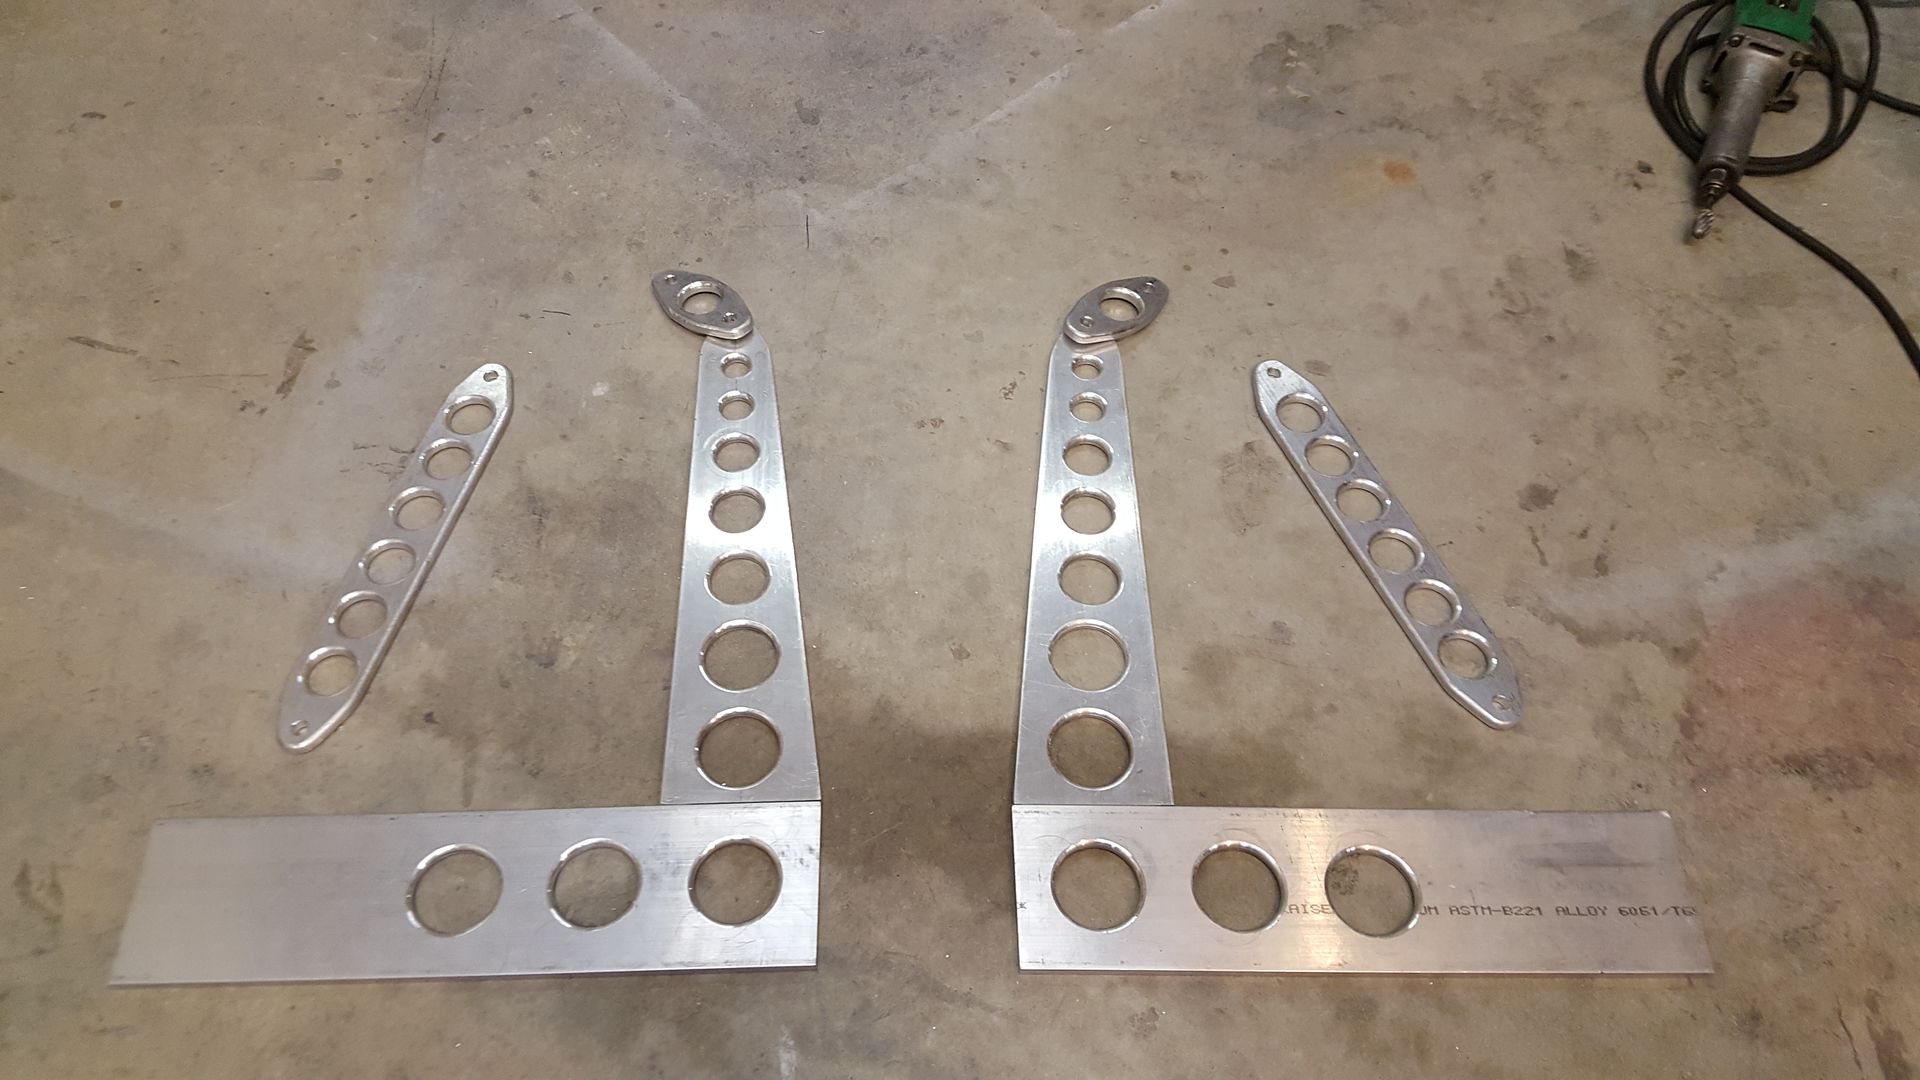


Last edited:
That's nice work for using hand tools. Care to elaborate a bit on the process you used?
Aluminum cuts very easily with carbide tipped blades. So, here is the tools used-
Chop saw with carbide tipped finish type blade (more teeth)
1/2" drill , you will fry a 3/8" drill with the hole saws.
Hole saw set in 1/8" increments
Drill bit set
Carbide cutters for die grinder, or high speed drill. Use for cleaning up inside of holes once hole saw is used.
Step bits to chamfer mounting holes
Measuring and marking tools
Upright belt sander. Bolted like parts together and rounded ends and side finishing so they are perfectly symetrical.
Small router. I used a 1/8" round over bit to round all edges. Routing is very easy.
Metabo burnisher with flap/fleece wheel to leave brushed finish.
A 20 ton brake. Not done yet, but ends of lower rear piece need to be bent over to make mounting flange.
I am about 8 hours into making these pieces, so it certainly isn't fast. But if you figure cad time, cut time, and price, and i already had all of these tools, well, lets just say it gave me something to do. Lol.
A big word of warning. If you are cutting the materials on a chop saw, if you go too fast, or do not have your work piece stable enough, the blade will grab and violent shit will happen very quickly. Hence the need for a fine toothed blade. DO NOT attempt small pieces and hang onto it with your finger tips, like I do. Lol.
For small pieces, always cut off of a larger piece. Don't try to make a small piece smaller. It puts your hands way to close to the blade and if it twists even the slightest amount, the blade will catch and you will be surprised how much stuff can happen in 0.0002 seconds!
Other than that, it is just patience and planning.
A small tip to add to Scott's tricks for cutting aluminum with carbide blades. In our shop, we keep a stick of beeswax close at hand beside any saw that might be used to cut aluminum. Coating the blade first (by simply touching the stick to the rotating blade) greatly reduces the risk of the blade grabbing the aluminum. Try it. I guarantee you will be pleased (and safer) with the results.
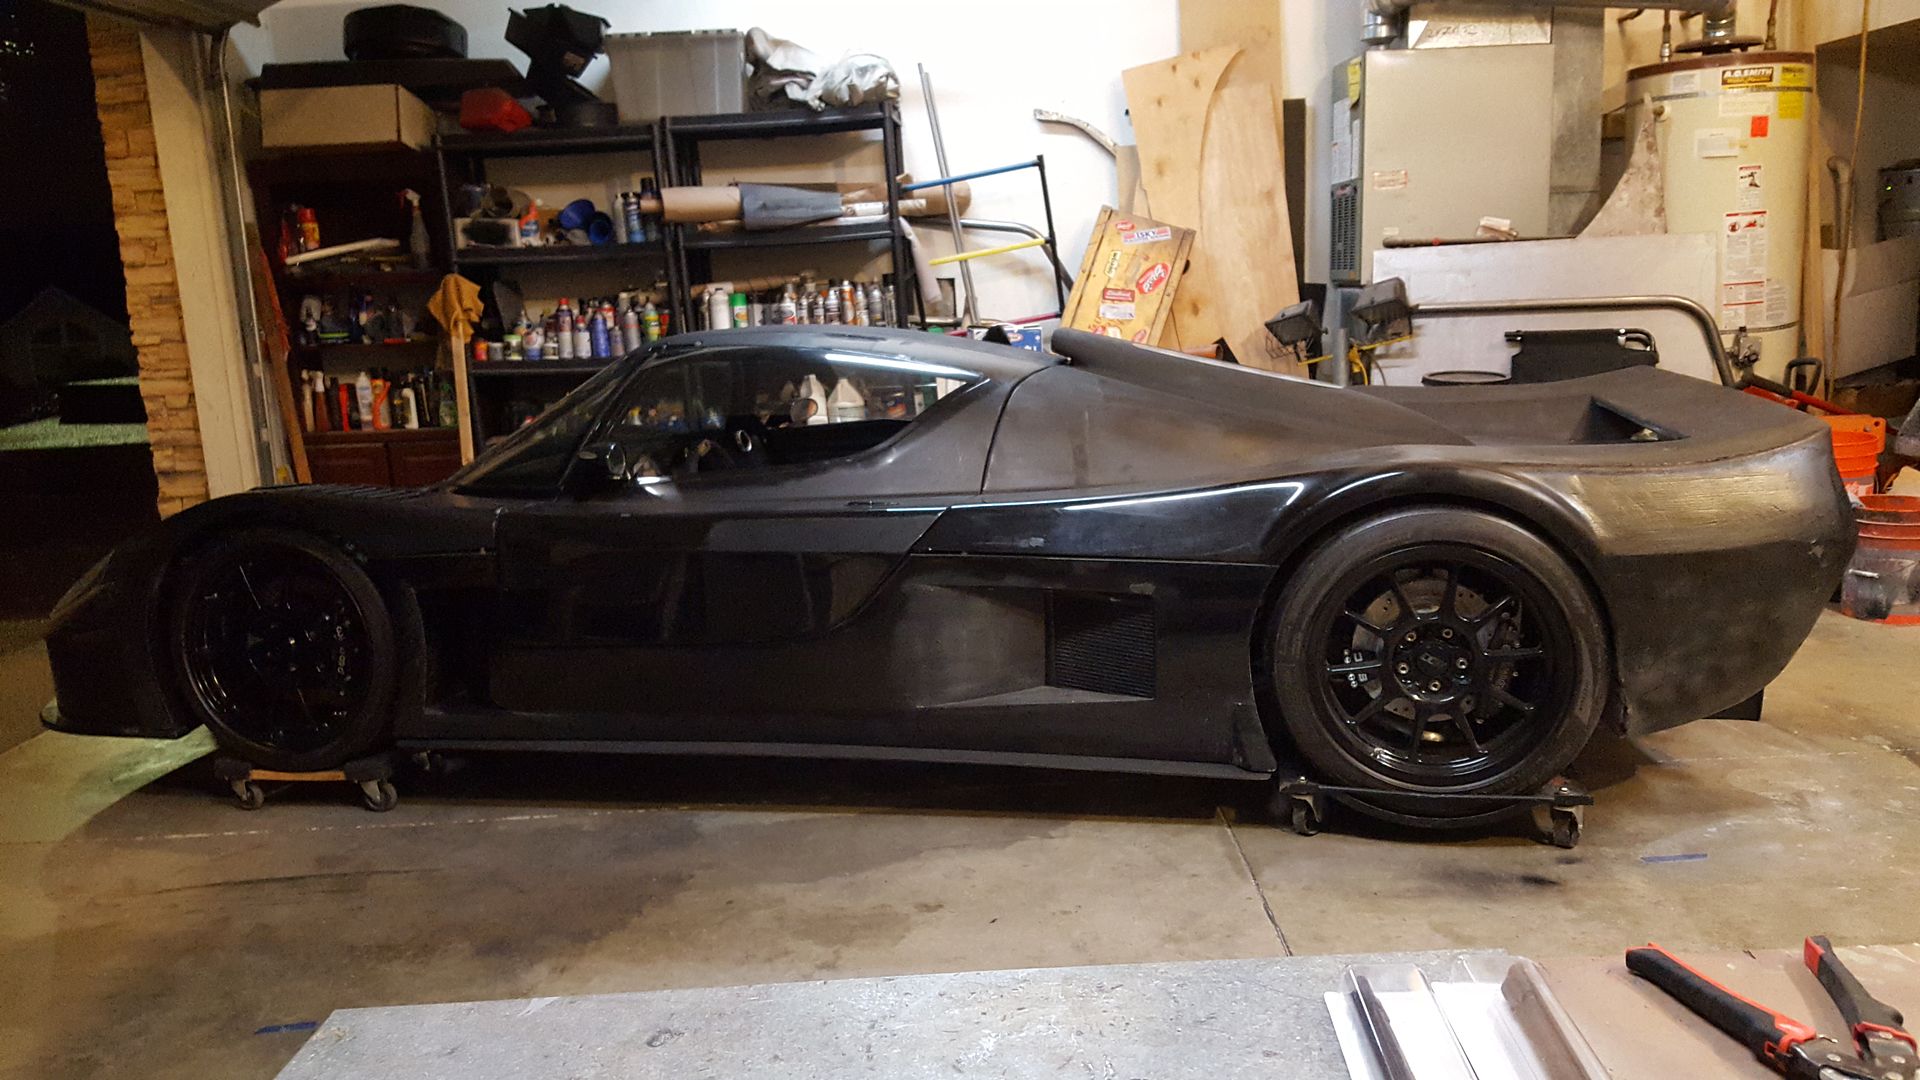
It pains me to say this Scott, and I know you'll take it with good heart - but my eye does not like the (amount of) rear overhang. I have the exact same reaction to the MKIII GT40 and perhaps it's just an aberration of mine. I do however, like your rear end treatment and it will be interesting to see what you decide to put in the centre "void".
I am also amazed with what you achieve with mere "hand tools". To me, that is the joy of making 'things' not using a machine (other than hand tools). For that reason, I do not believe 3D printers will give the same ultimate satisfaction to the home car constructor..
Carry on!
I am also amazed with what you achieve with mere "hand tools". To me, that is the joy of making 'things' not using a machine (other than hand tools). For that reason, I do not believe 3D printers will give the same ultimate satisfaction to the home car constructor..
Carry on!
Hey Keith. Ya, I would love to have my own cnc mill or other machines, but, garage is already filled with this car project and all of the current tools, so out of the cards until I build a large shop, which I am currently saving for. But ya, there is something about being done and knowing the only thing I had to have farmed out was mounting of the tires. And have it be a top notch build.
I am well aware that what I am doing will get conflicting reactions or tastes. Happens in every part of life no matter what. I like that you used the word "abberation". Because it really is an abberation that can swing the tides of like and dislike for no real reason other than potentially something it reminds you of that wasn't liked in the past. We all have it. Lol.
On a touch of defense, everyone here has all seen SLC's in progress, and finished. What I am making, has never yet been seen in a "finished" condition. There is still some tweaks that will happen (albeit, the length and basic shape will not change from here) and the rear wing going on, which make huge visual impacts.
I do appreciate honest feedback though. I have been through this for nearly every car build the last 10-15 years. I always have to be different. Haha. You need to have tough skin creating new things and able to accept criticism.
I use the forums as somewhat of my "design team". I have no sketches, no computer renderings, and no one to really even bounce ideas off of, so trying to build something to compete in looks with some of the top manufacturers in the world with millions in design budgets and teams in cad programs, is needless to say very tough.
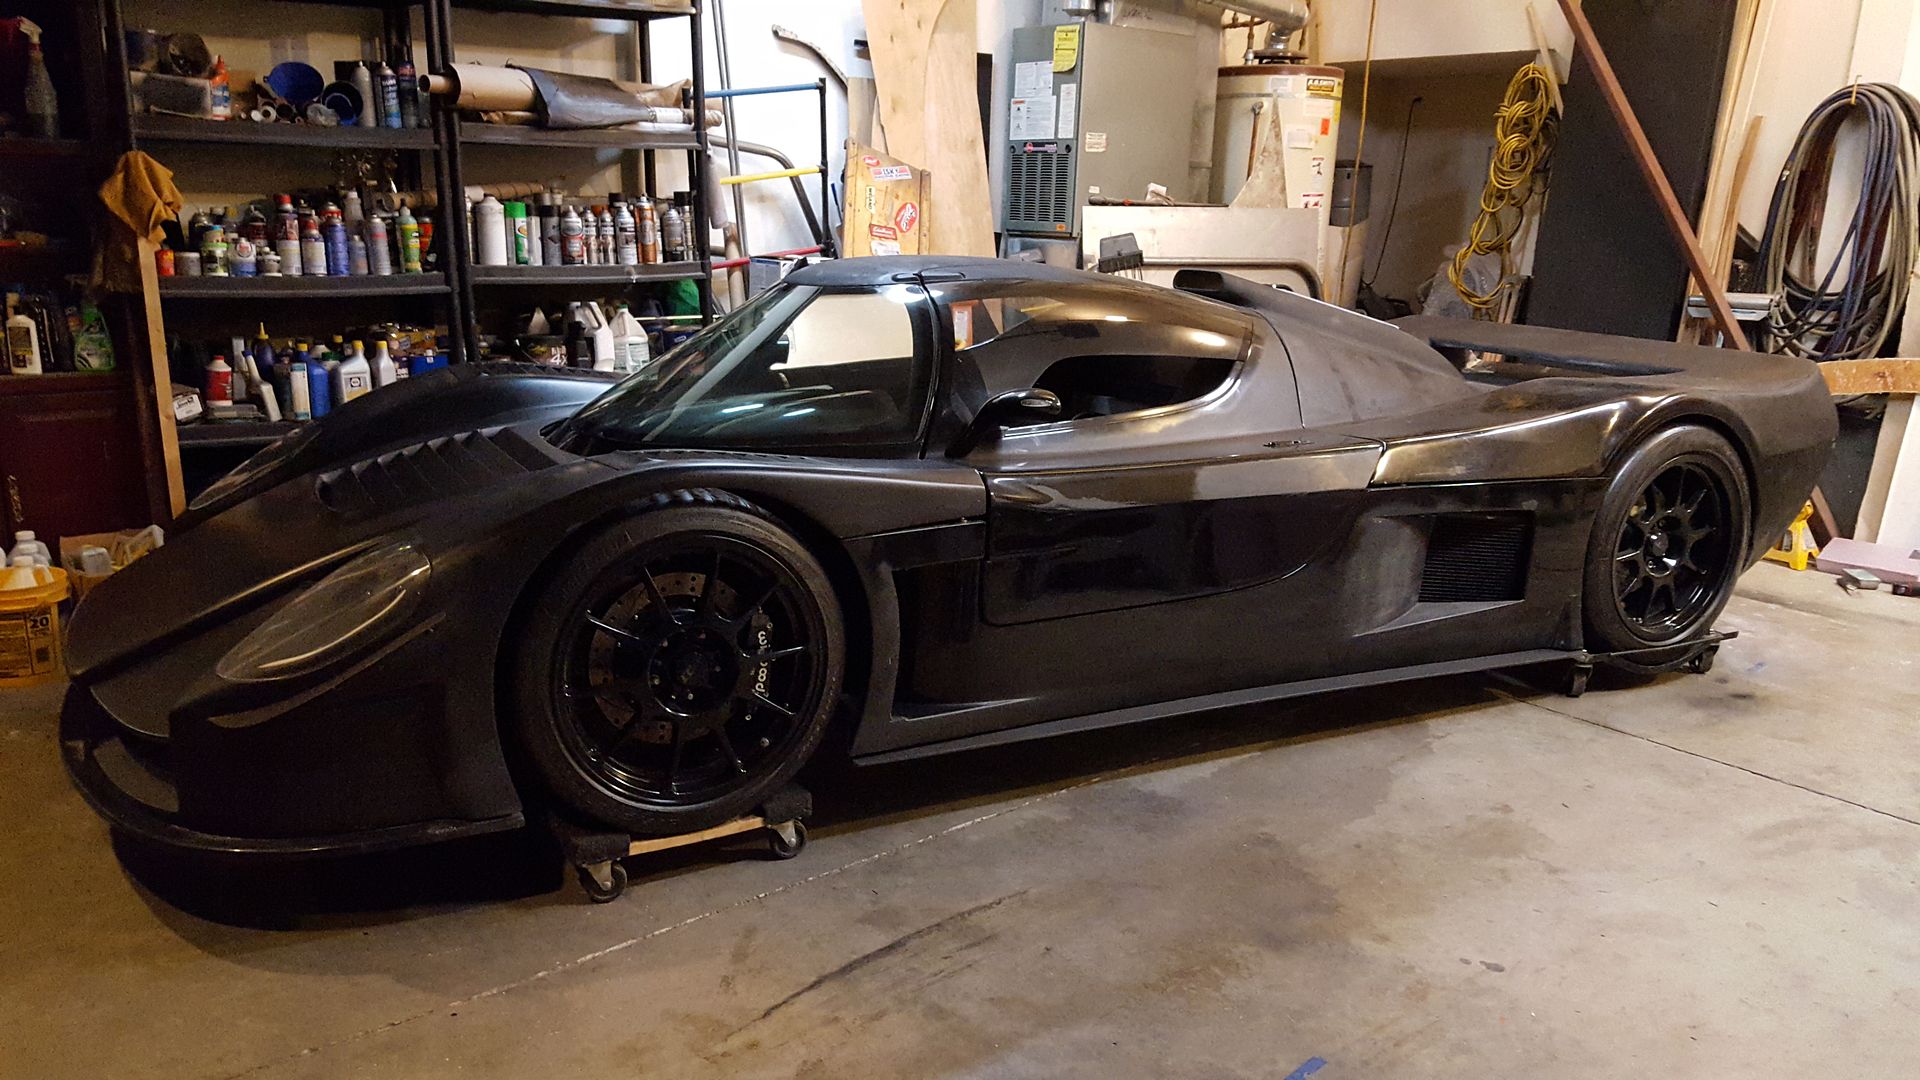
Once the car is done, most who see it will have no idea it started as an SLC. I think in that respect, people will look at it as it's own car, not compared to the original. In the build phase, there is lots of "maybe this should be done, or that moved", but once completed, it really is more of an overall like or dislike, similar to a manufacturer bringing out a new model. As a complete package, I really think it will hit it out of the park when done!
I am well aware that what I am doing will get conflicting reactions or tastes. Happens in every part of life no matter what. I like that you used the word "abberation". Because it really is an abberation that can swing the tides of like and dislike for no real reason other than potentially something it reminds you of that wasn't liked in the past. We all have it. Lol.
On a touch of defense, everyone here has all seen SLC's in progress, and finished. What I am making, has never yet been seen in a "finished" condition. There is still some tweaks that will happen (albeit, the length and basic shape will not change from here) and the rear wing going on, which make huge visual impacts.
I do appreciate honest feedback though. I have been through this for nearly every car build the last 10-15 years. I always have to be different. Haha. You need to have tough skin creating new things and able to accept criticism.
I use the forums as somewhat of my "design team". I have no sketches, no computer renderings, and no one to really even bounce ideas off of, so trying to build something to compete in looks with some of the top manufacturers in the world with millions in design budgets and teams in cad programs, is needless to say very tough.
Once the car is done, most who see it will have no idea it started as an SLC. I think in that respect, people will look at it as it's own car, not compared to the original. In the build phase, there is lots of "maybe this should be done, or that moved", but once completed, it really is more of an overall like or dislike, similar to a manufacturer bringing out a new model. As a complete package, I really think it will hit it out of the park when done!
.....and you may find that in the end, you enjoyed the journey as much or more than the destination....
There's only one person to be pleased here and his name is Scott..
That, Randy, is part of my flaw. As much stress and brain power these builds can eat up, I keep doing it to myself car after car, with yet another car stacked up behind the SLC to build already, even more labor and design intensive. Instead of day dreaming about how it will drive when finished, I find myself day dreaming about the next part to build. So ya, the journey is the fun for me. Once it is done, I am off to the next flashy thing typically.
Scott, great looking aluminum work there.
To add to methods for cutting aluminum using wood working equipment, specifically chop saws. Use a carbide blade with a negative rake. As noted preferably a higher tooth count. But you can get by with a courser blade if you run a negative (5degs.) blade it will have a less likely chance to grab and "power feed" the material. When cutting thicker bar you need to have a course blade to allow the chip an area to go. The low tooth count blade has a larger gullet to fill with a chip before it clears the material and ejects it. Otherwise it will "weld" the chip into the gullet and cause a large lump and unpleasant action.
With care there is no wood working tool that can not be used to cut or shape aluminum. Regardless of tooth count, it is the negative rake that makes for a smooth safe, cut.
Re: Rear louvers
Well, the back end that is pictured above, is no longer. Lol. Came up with a plan that should fit the car better, and get me back into a single wing, not the double. It just looked too cluttered once the upper wing got on.
Found a place for the third brake light. Will post pics when done.
Scott,
Have you thought about making the rear louvers out of Lexan? (Polycarbonate etc...)
Have you also thought about a high mount 3rd break light? Sounds silly I know but thought I would ask.
Well, the back end that is pictured above, is no longer. Lol. Came up with a plan that should fit the car better, and get me back into a single wing, not the double. It just looked too cluttered once the upper wing got on.
Found a place for the third brake light. Will post pics when done.

I should been more specific the ones I was speaking of are aft of the side windows. Appear to be taped in 1/4 masking tape.
I can't believe you changed it again lol. Wait yes I can…I love some of what you did. I would love to fly out there take some measurements and put my spin on it. I suck at photoshop so I only render in real 3D.
I sent you an email also about something else. Speaking of other items you may get a laugh out of some of these something barrowed

Havn't done anything yet. I have been busy working on the SL65 and my TTCayenne took a little crap too, so no time. Back on it in a day or two.
I guarrantee you will have not seen anything like what I am planning!
I guarrantee you will have not seen anything like what I am planning!
Havn't done anything yet. I have been busy working on the SL65 and my TTCayenne took a little crap too, so no time. Back on it in a day or two.
I guarrantee you will have not seen anything like what I am planning!
Do I need to hold your beer?
Similar threads
- Replies
- 5
- Views
- 782