Shane's SLC Build

You might want to check into Sharkhide metal protectant. It’s crystal clear - I’ve never seen it yellow, even in high temperature areas.
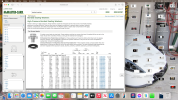

I applied Sharkhide to my SLC's (raw aluminum) frame back in ~2008 because of that stupid thread back in the day where people were wondering if over time the frame would oxidize and crack and fall apart.

From what I can tell it's still on there almost 20 years later (you can tell there's some coating of something on the surface).

No yellowing or anything and the frame looks the same as did back in 2008, albeit dirtier.

I left my 917's aluminum tub uncoated and 10 years later it looks identical - i.e., unless you live in some high humidity area, by the ocean, etc., i'm not sure there's any gain to sealing it with Sharkhide.
 

Randy V

Moderator-Admin
Staff member
Admin
Lifetime Supporter
I used Sharkhide, primarily, on motorcycles. The alloy cases were subject to all manner of road debris, rain, etc. On top of the cases getting very hot, then splashed etc. They never yellowed or showed any signs of the “white death” corrosion that is so common. I’ve used it successfully on a number of other projects too. Every polished component on my old Pro-Street Nova was treated - as an example..
 

Attachments

  • BA6CBD3C-3CD8-461F-84BA-BEFC028D3147-17131-0000131E58D6F0F4.jpeg
    BA6CBD3C-3CD8-461F-84BA-BEFC028D3147-17131-0000131E58D6F0F4.jpeg
    110.4 KB · Views: 171
  • 170158EF-FFA8-45B2-853C-22E04137C834-17131-000013210713F983.jpeg
    170158EF-FFA8-45B2-853C-22E04137C834-17131-000013210713F983.jpeg
    52.5 KB · Views: 145
  • A27121F0-34F7-4A2A-A7FE-E6F2EB2C74AD-17131-0000131E1235269B.jpeg
    A27121F0-34F7-4A2A-A7FE-E6F2EB2C74AD-17131-0000131E1235269B.jpeg
    172.9 KB · Views: 138

Shane

Supporter
I used Sharkhide, primarily, on motorcycles. The alloy cases were subject to all manner of road debris, rain, etc. On top of the cases getting very hot, then splashed etc. They never yellowed or showed any signs of the “white death” corrosion that is so common. I’ve used it successfully on a number of other projects too. Every polished component on my old Pro-Street Nova was treated - as an example..
Love the Nova! That is sweet.
 

Shane

Supporter
Quick question. Should I start a new thread with specific questions or should I post them in my build thread?

I am going to post this here and then move it if I need to.

So many questions about the seat alignment. Here they are.

1. Where do most people mount the seat and at what height. It doesn't seem like the seats will go down much further.
2025-10-26 13.12.57.jpg


2. I am really trying to figure out the pedal placement but I needed everything in to see how it fits. It looks like the seat needs to be as far over as possible? Does this look right?
2025-10-26 13.13.04.png


3. Steering column quick disconnect. How does the inner piece connect to the quick disconnect?
2025-10-26 13.13.13.png


Thanks for all your help!
 

Joel K

Supporter
Shane,

Lots of things to consider as you are finding out.

Howard recommended the following process which I followed:

1)First align the seat to the steering wheel
2)Then align the pedals to the seat.

Here are some of the challenges.
1)The seat needs to clear the center console and shifter
2)If you are planning to track the car you need a recline angle that gives you enough headroom with a helmet.
3)if you move the seat up you can gain some headroom, but then the wheel may be too close.

In general where RCR mounts the steering column, it will be more inboard than the seat sits with the stock brackets. The steering wheel will also not be centered in the binacle.

If you want the seat more inboard Kurt Hoffman made some nice brackets to shift them inboard and I think he posted some dimensional diagrams for them in his build thread.

Cam T and I angled the seat inboard a bit to align the driver with the steering wheel.

Basically it is a set of compromises that you will have to figure out what works for you. If you have the gentleman’s seat, that will be more difficult to center than a standard seat or Tillett seat.
 

Joel K

Supporter
Another thing to note. On my build, my chassis did not have the mounting holes pre-drilled for the steering column so I drilled holes to place it on a slight angle centered through the driver binnacle. Some may not like it sitting slightly at an angle, but I chose that vs. having the wheel offset to my body. If I removed the angle then the steering column would not be centered in the binnacle and didn’t feel like reworking the fiberglass dash to fix that issue.
 
Last edited:

Ken Roberts

Supporter
You should use the search feature on here. I just did and found your answer on how to mount the quick connect. One of the search results pointed to post #67 of my build log.

In general if you are tall and/or going to use a Helmet......mount the seat as low as possible. Lots of builders on this forum describe the installation in detail. Your height and weight and seat back angle and which seats you will be using play a key roll.

I guess I'm the only one to say this......... in my opinion powder coating aluminum suspension components is a bad idea. You never see a OEM car with coated aluminum a-arms or uprights. They do look nice but unfortunately cracks can hide behind the coating.

Did you pressure test the fuel tank before powder coating? A few of us have found pin hole leaks in the welds.
 
Last edited:

Shane

Supporter
Another thing to note. On my build, my chassis did not have the mounting holes pre-drilled for the steering column so I drilled holes to place it on a slight angle centered through the driver binnacle. Some may not like it sitting slightly at an angle, but I chose that vs. having the wheel offset to my body.

@Jkviper, thanks for taking the time to respond. Yup, sounds like a lot of compromises. I'll get on it and figure it out!

@KENS80V, thanks for the advise, I will try and use the search more, but I couldn't find what I was looking for. I became a supporter because all of you guys have done such a great job of documenting your builds. I have spent hours searching for different things.

What I am not understanding is the part that screws onto the column, doesn't have a pin or anything to keep it from unscrewing. I am sure I am just missing something simple. That is why I asked.

I know people don't like the powder coating or the polished bolts. I enjoy building it and I am doing it with my son, this car will never be driven on a track and probably will not be driven a lot. I know for some that is a waste, but for me, I enjoy sitting behind a buffing wheel, paint gun, welder more than driving them. It is just me and what I like. It's also pretty cool to see my son get excited about building cars!!
 

Shane

Supporter
I decided I better pressure test my fuel tank thanks to @KENS80V. I pressurized it to about 5-7psi and sprayed all the welds and connectors with a really soapy water mix. The only place that leaked was the fuel sending unit. I couldn't get it to seal, even after tightening it multiple times. It leaks at the bolt head, not the gasket on the tank. Just thought I would share.
2025-10-28 14.39.47.jpg
 

Ken Roberts

Supporter
You can try these bonded sealing washers for the top of the fuel sender if the surface is flat under the bolt heads.
 

Attachments

  • Screenshot 2025-10-29 at 9.03.11 AM.png
    Screenshot 2025-10-29 at 9.03.11 AM.png
    2 MB · Views: 124

Shane

Supporter
You gotta love McMaster! I'll see what I can do. There are washers on the top, they just don't seal very good. I don't think there should be any fumes but if people are complaining of any, I'd check this first.
 

Shane

Supporter
Here is how I did the steering wheel quick disconnect. I took the custom nut from RCR and welded it to the disconnect shaft. I drilled three holes in the disconnect shaft so I could weld on to the nut. I am a little worried about just using thread locker on the nut to steering wheel shaft. I might tack weld it.
 

Attachments

  • 2025-11-05 17.08.20.jpg
    2025-11-05 17.08.20.jpg
    228.6 KB · Views: 69
  • 20251107_062858.jpg
    20251107_062858.jpg
    276.9 KB · Views: 81

Shane

Supporter
Here is the front suspension put together. A lot of polishing but it is looking good. I wasn't really sure how the stanceparts cups went together, but Bill was quick to help from RCR. I see some that are upside down, but I couldn't find any interference putting them in this way. I would rather not have them upside down where they can collect FOD.
 

Attachments

  • 20251107_133243.jpg
    20251107_133243.jpg
    691.3 KB · Views: 78
  • 20251107_133248.jpg
    20251107_133248.jpg
    429 KB · Views: 87

Shane

Supporter
Okay, I need help with the serpentine belt on the LS3. I have the AC brackets on the right and then they sent me the other brackets on the left. Does anyone have a drawing or picture how these are to be mounted? They LS3 came just as the long block with no accessories, etc.

It looks like I need an alternator bracket.
A tensioner for the AC?

View attachment 148880

I thought I would follow up on this post, #13, and show where they all went. #2 is the throttle bracket. It is used on the adjustable pedal assembly. I didn't use 8 or 9. I have an LS3.

2025-08-11 13.56.28.jpg
 
Back
Top