
- Forums
- GT40 Replica Manufacturers' Corner
- RCR Forum - RCR40/SLC/917/Superlite Aero
- The SLC Clubhouse
You are using an out of date browser. It may not display this or other websites correctly.
You should upgrade or use an alternative browser.
You should upgrade or use an alternative browser.
SLC 24 Howard Jones
- Thread starter Howard Jones
- Start date
Howard Jones
Supporter
2 or 3 pounds. It's about a 1/8" thick and no metal.
Howard
That’s some nice homegrown glass work. Always interested in others glass skills. What technique did you use to create your mold?
That’s some nice homegrown glass work. Always interested in others glass skills. What technique did you use to create your mold?
Howard Jones
Supporter
Well...…. Technique is a bit generous of a term but in this case I was basically making a box with two open ends so I formed a box out of cardboard covered it with duct tape (resin does not stick to duct tape) then covered the box with a couple of courses fiberglass woven cloth and let it harden. After that I pulled all the cardboard and tape out of the box, cleaned it all up and continued to add squares of core matt to give it strength then covered it with 3 or 4 more woven cloth courses. I did not use chopped strand for this because I just didn't but chopped strand could have been used to add thickness instead of more courses of woven cloth. I had bought a big roll of leftover cloth really cheap many years ago so I tend to use it because I already have it.
Now I made the flat center vane on a flat piece of wood covered again with duct tape in the same manner as the box. 2 courses of cloth coved with a core piece and two more courses of matt. Once hard used a template made from, you guessed it cardboard, to shape the rough flat vane. I then held it in place with...………... ya duct tape, and used matt to permanently set in place and let the one side harden. Now I removed the duct tape on the other side and glassed it in place with more woven cloth matt like the other side.
Fillets an be formed at the right angle point to get a nice transition by mixing resin, hardener, milled fiberglass, and microspheres. Mix it up in small quantiles to the consistence of peanut butter. This can be used as an adhesive also.
The real fiberglass guys are cringing about now...………….but you can get good results this way if you need to make one off pieces that are not structural in any real sense.
Get two at least different woven cloth weights. 2 or 3 ounce light weight to form corners and 6 ounce to make the flat bigger pieces. I use polyester resin, it is the least expensive, and the hardener that goes with it. I also buy very cheap acid and chip brushes in large quantiles and tend to throw then away at the end of the working session.
Mix small amounts, like a couple of ounces or less at a time and finish a course or two at a time, then get set and do another course or two with the nest batch. Cut all the cloth in the sizes and pieces you will need before you mix resin. Resin costs more than cloth. And buy cloth that is at the bottom of the scale when it comes to cost per yard.
I am speaking from a one off small projects perspective not a large piece thing like a body/mold. I would not know how to properly do something like that without some real instruction.
Here's a supplier that has all the stuff I mentioned above, Harbor Freight for brushes, and another source for instruction on all things fiberglass.
https://www.fiberglasswarehouse.com/product/14-milled-glass-fibers/
https://www.tapplastics.com/product_info/videos
https://www.harborfreight.com/36-Piece-1-in-Industrial-Grade-Chip-Brushes-61491.html
https://www.harborfreight.com/36-pc...eqlmGZnh1J_Vmb_VUXZEWEuFEYjitOpkaArgJEALw_wcB
See post number #530
Last edited:
I relied on Howard's earlier post pretty heavily to help me fabricate my duct. Howard's technique is actually a little cleaner than mine ") . I specialize in low skill fiberglassing!
. I specialize in low skill fiberglassing!
I used poster board and packing tape to make my molds and laid up on them as Howard did. Separating everything is pretty easy because you can just pull and cut everything away without worrying about draft angles - so you can make as complex a shape as you want.
Posts 28 & 35 on my blog summarize how I made the basic shape and final exit/turn. I hadn't figured out how to make that transition when I made the initial piece so I relied on my final bodywork to help form the last turn out of the body. I added insulation to the interior of my box as well as a healthy amount to the interior of my foot box. I have zero heat intrusion issues. As Howard says, I think having such a duct is a huge step toward managing foot box heat.
https://socalslc.com/2018/03/04/28-full-of-hot-air/
https://socalslc.com/2018/05/04/xx-splitting-h-air-s/
Scroll way down on post 35 to get to the radiator duct part.
. I specialize in low skill fiberglassing!I used poster board and packing tape to make my molds and laid up on them as Howard did. Separating everything is pretty easy because you can just pull and cut everything away without worrying about draft angles - so you can make as complex a shape as you want.
Posts 28 & 35 on my blog summarize how I made the basic shape and final exit/turn. I hadn't figured out how to make that transition when I made the initial piece so I relied on my final bodywork to help form the last turn out of the body. I added insulation to the interior of my box as well as a healthy amount to the interior of my foot box. I have zero heat intrusion issues. As Howard says, I think having such a duct is a huge step toward managing foot box heat.
https://socalslc.com/2018/03/04/28-full-of-hot-air/
https://socalslc.com/2018/05/04/xx-splitting-h-air-s/
Scroll way down on post 35 to get to the radiator duct part.
Howard Jones
Supporter
I went back and looked at my construction process for the radiator duct. I am now pretty sure I used a release agent painted on a poster board that had a political ad on it thus making it a bit non porous. Later on I made a couple of things with just duct tape and found that I could skip the release agents on stuff that I didn't really care how it looked once complete. Interior ducts, etc.
Howard Jones
Supporter
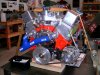
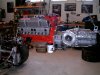
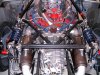
The latest, well most recent, thing going on with my car is a engine inspection. I ad a low oil light come on at COTA last year on the same weekend I broke my rear wheel bearing. All of the re design of the wheel bearings and ball joint stuff is above. That took quite a while and after the first of the year I stared thinking what was that oil pressure thing about.
I had run the engine since but oil pressure was lower than usual. It read about 35 psi at idle and did not really go up much from there at higher revs. So after all the previous work on the suspension I started to begin thinking engine. I asked around and came up with a few engine builder in my area but most of them were doing street car stuff. Lots of LS guys etc. What I needed was a race engine guy who could look over my previous build and let me know what the hell I had missed.
For the life of me I couldn't think what had happened, if anything. I had a real loss of confidence. I have built a few engines myself and had never really have had a problem, Was it just a SBC thing I didn't know about? In any case I came across Samson Racing Engines. Believe it or now they are less than 3 miles from my home here in New Braunfels Tx. He does all kinds of engines and is a certified engine supplier for the current TRANSAM series.
So I stop by a few times and we decide to take it apart and go from there. Really what else can you do. So we work out a price to include a engine dyno run to tune it and I took it out in January waited until he had some open time and dropped it off.
So what happened. Well we believe that several things at once caused two crank main bearings to show a lot of wear. They did not break up as there was no bearing material in the filter or oil. I think this was related to three things. First I forgot to tighten down the distributor lock down nut once and had the dist. moving around enough to ruin the dis. gear. I replaced it, changed the oil/filter and it all seamed ok after that. Then at COTA that weekend I forgot to turn on the electric waterpump and the coolant got pretty hot. Around 250-260F ish. I caught it on the pitlane before I went on track and after I turned on the pump the temp went right back to normal and I ran the session without any perceived problem.
The next day was drama day with the wheel bearing event and that same lap the oil light came on and as I was thinking about that the wheel bearing failed. This all left me with a lot to do to say the least.
So back to the engine . When I drained the oil the last time I only got about 6 quarts out where I had put in 8. Hummmmmmm……….???
So ………………………...I think this all started with the dist. gear leaving steel particles in the engine, then it got hot and had been using oil so it damaged a bearing or two. Later the particles got into the main bearings shell and oil pump gears and the pressure went down. There was no other damage in the engine. All other bearings were normal and the pistons and bores were fine.
The low oil light saved me as I was going to leave the track after the lap. I did but towed in by the wrecker.
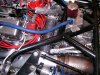
So now I have been putting it all back together for a COTA weekend in two weeks. While I had it all apart I decided to make add cross over (H pipe) tube to the exhaust. I didn't want to change the whole exhaust system so this took a bit of fit and cut thinking but it came out pretty well. It will be interesting to hear how it sounds now. Hopefully a bit quieter and little more cross over sounding.
Oh and the engine made just what I thought it made as far as HP, 451 @ 6000. with more than 300ft/lbs of torque from 2800-6500 with a max torque at 5400. 391 ft/lbs
I had run the engine since but oil pressure was lower than usual. It read about 35 psi at idle and did not really go up much from there at higher revs. So after all the previous work on the suspension I started to begin thinking engine. I asked around and came up with a few engine builder in my area but most of them were doing street car stuff. Lots of LS guys etc. What I needed was a race engine guy who could look over my previous build and let me know what the hell I had missed.
For the life of me I couldn't think what had happened, if anything. I had a real loss of confidence. I have built a few engines myself and had never really have had a problem, Was it just a SBC thing I didn't know about? In any case I came across Samson Racing Engines. Believe it or now they are less than 3 miles from my home here in New Braunfels Tx. He does all kinds of engines and is a certified engine supplier for the current TRANSAM series.
So I stop by a few times and we decide to take it apart and go from there. Really what else can you do. So we work out a price to include a engine dyno run to tune it and I took it out in January waited until he had some open time and dropped it off.
So what happened. Well we believe that several things at once caused two crank main bearings to show a lot of wear. They did not break up as there was no bearing material in the filter or oil. I think this was related to three things. First I forgot to tighten down the distributor lock down nut once and had the dist. moving around enough to ruin the dis. gear. I replaced it, changed the oil/filter and it all seamed ok after that. Then at COTA that weekend I forgot to turn on the electric waterpump and the coolant got pretty hot. Around 250-260F ish. I caught it on the pitlane before I went on track and after I turned on the pump the temp went right back to normal and I ran the session without any perceived problem.
The next day was drama day with the wheel bearing event and that same lap the oil light came on and as I was thinking about that the wheel bearing failed. This all left me with a lot to do to say the least.
So back to the engine . When I drained the oil the last time I only got about 6 quarts out where I had put in 8. Hummmmmmm……….???
So ………………………...I think this all started with the dist. gear leaving steel particles in the engine, then it got hot and had been using oil so it damaged a bearing or two. Later the particles got into the main bearings shell and oil pump gears and the pressure went down. There was no other damage in the engine. All other bearings were normal and the pistons and bores were fine.
The low oil light saved me as I was going to leave the track after the lap. I did but towed in by the wrecker.
So now I have been putting it all back together for a COTA weekend in two weeks. While I had it all apart I decided to make add cross over (H pipe) tube to the exhaust. I didn't want to change the whole exhaust system so this took a bit of fit and cut thinking but it came out pretty well. It will be interesting to hear how it sounds now. Hopefully a bit quieter and little more cross over sounding.
Oh and the engine made just what I thought it made as far as HP, 451 @ 6000. with more than 300ft/lbs of torque from 2800-6500 with a max torque at 5400. 391 ft/lbs
Attachments

Last edited:
Howard Jones
Supporter
Ya, I put a 35 PSI low oil pressure idiot light right up on the top of the dash. It worked, so did the idiot! There's a message there somewhere.
***Remove your oil line fitting from block by the dizzy, get a piece of straight wire about 18" long. Drop it down that gallery and mark it with a sharpie pen level with block, pull it out and measure how far it went in, if its ~ 7.5" your OK, if it goes down around 10" pull the entire short block down & clean all galleries properly and then FIT the PLUG in the block that diverts the oil to go thru filter before returning to block and feed bearings.*** I hope your pressure readings are OK & the plug is there, but your description sounds like an issue Ive seen before.
Howard Jones
Supporter
Thanks for that Jac. I'll do that. The engine was torn completely apart. hot tanked, oil passages brushed, hand cleaned all parts, checked for deck flatness (because it got hot) minor honed, heads checked for flatness, 5 angle valve job done, springs measured, cam and all crank bearings replaced, new rings gaps set to spec, and reassembled to spec.
Howard Jones
Supporter
A little over 7 inches Jac. Thanks. I started the new engine and have very good oil pressure at idle (60psi). On the checkout drive around the block I had 80psi at all over 2Krevs. All good I think.
Thats great Howard, Glad the plug is in place. Must be a HV pump to get 80 psi.A little over 7 inches Jac. Thanks. I started the new engine and have very good oil pressure at idle (60psi). On the checkout drive around the block I had 80psi at all over 2Krevs. All good I think.
Howard Jones
Supporter
Went back to COTA over the weekend of 6-22, 23. It was very hot. Track temps were higher than I have every experienced with air temps in the high 90F and very high humidity. I ran all sessions on Saturday ( 5-30 min + about 20 mins of the last happy hour) I used up all my fuel at that point and was very tired so I just called it a day.
Changes made to ball joints, wheel bearings, etc. all seamed to be fine. Nothing to report other than it all worked. Water temps went to 205F -210F but no higher. This was about as hot a day as I can imagine so in context I think that that's not too hot. Oil temp was steady at 225F and GERBX temp was right at 200F. Both fine.
Tire performance: I think this is the first time I have pushed the Hoosiers into their heat zone. The grip has gone from fuck me this thing is great to.....I didn't think a car could do this. Really! Way beyond anything I have ever experienced. At this point a don't have any idea how fast the car will go around corners but I am sure I will never be able to drive this thing at the limit. For sure 25-26psi cold to 29psi hot is correct for my car. The car felt a bit crisper on turn in than before. More on rails when at high corner loads. Maybe the added camber? Now at -1.5 all corners.
I changed from the BP10 Wilwood pads to the "A" Wilwood pad for the week end. The BP10s are about .4 friction coefficient and the A's are above .7. This was a huge difference and I would say that it has improved brake performance to a point that I am satisfied. Really a very big difference.
I also think I have a good baseline knowledge of COTA's line now so I am no longer trying to figure out where I need to be. But the car! Just put it in position at the turn in point, turn it towards the apex and before the center of the corner just add power and drive it away down the next straight. Speaking of straights...……….. I am in 5th (top gear) a lot on the back straight and long enough on the front straight to take my hand off the shifter before it's time to stop the car for turn 1. I have kind of stopped downshifting and just let the brakes stop the car. Then putting into 3rd and turning the car in for the corner. The brakes work so well now that shifting is just a lot of unnecessary monkey motion.
Now the "needs improvement" I may have hurt the rotors on the front of the car. On Sunday the first two morning sessions went well but I started to pick up a small vibration on the brakes as the heat came up in the rotors. During lunch break I took the four corners apart and couldn't find anything loose or any other apparent problems. What I think has happened is my cooling duct design is cooling the inboard face of the rotor quite a bit more than the outboard side and warping it enough to create a pretty solid vibration. Redesign of the upright cooling duct design is in order. I will need to do a run out on the rotors to see if they are warped but It may be they are damaged.
Now the other thing...……….. Three or four of the driver side outboard CV joint cap screws came loose and the others either shook loose or broke under full power on the front straight at 125mph going from 4th to 5th. Sounds scary. Not so much this time. Since I have a Quaife TBD diff in the car it simply lost drive and rolled to a stop. This happened at the end of the 4th session of the day. This ended the weekend.
TBD's will not transfer torque unless both sides of the diff see at least some resistance (load). When the DS axel came apart it lost all load on that side. This caused the TBD to remove all torque to the other side putting the transaxle into effectively neutral. The attached side simply free wheeled with the tire and the other side (detached) stopped turning and fell down and out of the way. Nothing damaged other than a coupe of broken cap screws. In fact I bolted it back together when I unloaded in the street when I got home and drove it up my driveway into my shop.
I am going to safety wire the CV bolts from now on as well as the other aforementioned retention measures.
So now I need to have a think about that vibration. As I remember the peddle did not pulsate as you would think with a warped rotor. Was it the CV joint loosening up all along? I did look at the whole rear of the car for things being wrong but I may have been blindered by what I believed was a brake issue.
More on this as I take the car apart and really try and figure this one out. It may be I fucked up when I put the car back together and just missed that side as I torqued the CV 's. I really don't think I missed it but...………….well...………..I may have.
Engine was great, no problems at all. Now if I had another 200Hp...…………..ya right, I can barely drive the thing as it is.
"Now if I had another 200Hp...…………..ya right, I can barely drive the thing as it is."
In that case, you need another 300")
Your hero Andretti says - If everything seems under control, you're not going fast enough
Good write up, I got more information than in the phone call....holding out on me are you?
Can't wait for Willow Springs!
In that case, you need another 300
Your hero Andretti says - If everything seems under control, you're not going fast enough
Good write up, I got more information than in the phone call....holding out on me are you?
Can't wait for Willow Springs!
Howard Jones
Supporter
I wonder if he was thinking that upside down flying down the backstretch at Indy at over 200mph a few years ago.
Howard Jones
Supporter
Maybe...……...I tried a new camera used for RC airplanes (Runcam). I haven't had the time to see if it worked yet. I will post any video I have.
Shop around for a TBD that has some preload Howard, the Tru Trac we use in the 9" in the TVR has ~ 70 ft/lb breakaway torque IIRC- ( induced by Belville Washers on each side, that is enough to make it work even on grass, which unfortunately the driver is quite fond of doing all too often.
Similar threads
- Replies
- 14
- Views
- 2K
- Replies
- 5
- Views
- 2K