

- Forums
- GT40 Replica Manufacturers' Corner
- RCR Forum - RCR40/SLC/917/Superlite Aero
- The SLC Clubhouse
You are using an out of date browser. It may not display this or other websites correctly.
You should upgrade or use an alternative browser.
You should upgrade or use an alternative browser.
Jimer's Build
- Thread starter TheJimer
- Start date
Michael Fling
Supporter
Congratulations Jim. Beautiful car... Is your garage built for a motorcoach ?
Last edited:
Congratulations Jim. Beautiful car... Is your garage built for a motorcoach ?
Thanks Micheal! My delivery means that you are now one car closer to taking delivery of your car!
Yes, when we built the house, we had a 45' bus, but now R.Ving was in our past life, so I turned the R.V garage into my shop. After four R.V"s, I'm much happier with a bunch of toy cars!
Jim
gas tank will be removed again and was just but in place for mock up for mounting brackets that need to be fabricated.
- did you get much slag/al shavings out of the gas tank? I notice the sterring rack now comes standard with an angled steel bracket. hmmm. Looks sweet, sounds like you will be ripping thru the build...
- did you get much slag/al shavings out of the gas tank? I notice the sterring rack now comes standard with an angled steel bracket. hmmm. Looks sweet, sounds like you will be ripping thru the build...
gas tank will be removed again and was just but in place for mock up for mounting brackets that need to be fabricated.
- did you get much slag/al shavings out of the gas tank? I notice the sterring rack now comes standard with an angled steel bracket. hmmm. Looks sweet, sounds like you will be ripping thru the build...
Cam, I flushed the tank outside on some landscape rocks, so its hard to tell how much fine shavings came our. However, I did flush out three large drill windings which prompted me to flush the take several more times.
I don't know about the "ripping thru the build" part! I'm jumping around a bit while I wait for parts. Build by day....order by night = 2 full time jobs!
Jim
")
Hi Jacob, I'm glad that my car could play a part in convincing you to go with a SL-C. I like helping other people spend their money!:evil:Looks like you are off to a great start Jim!
I also had the chance to see your car before it left RCR when I got a shop tour back in June. Thanks to its mostly-assembled state at the time, it was very instrumental in thoroughly convincing me that the SLC is the route I wanna go

Congads and good luck!
Jim
Hi all,
Last week was not very productive, kept on running into parts road blocks. This week was much better; at least we were able to start a few projects. We are getting dragged in different directions at the same time; partly because of parts and partly due not knowing what compounding impact the permanent installation of one part will have on a future part. We started by installing items that we know have to go in a certain place. Then we will star “mocking up” before we permanently install something.
Installation/sound deadening:
My plan is to go a little overboard with installation/sound deadening/vibration barriers. Because this only be an occasional track car rather than a dedicated one, I'm not concerned with the additional weight. I applied:
2-coats of D.E.I Boom Mat Spray-on.
1/16” 3M adhesive back rubber noise & vibration barrier.
1/2” DynaPad 3 ply foam/rubber/foam acoustical barrier.
1/16” Thermo Teck Cool-It heat & acoustical barrier.
Eventually carpet pad and carpeting will be placed on top.
The installation was one of those “what came first...the chicken or the egg” quandaries. If you install mounting brackets first, you have the hazel of cutting the insulation material to fit around what ever you just installed! If you install the insulation material first , you have the hazel of de- guncking your drill bit after each hole! I decided to cut out the insulation material and mark its location before installing anything and just try fitting it without permanently securing the material. After we drill the mounting holes, we will go back and secure the insulation and pock holes through the material.
As a side note, every time I try posting pictures on this site, it take's 6-8 attempts.
Attachments
Coolant Lines:
Mocking up the coolant lines, can't go any farther right now. I'm having two 90* elbows welded and waiting for the “big brown truck” to bring my suspension lift kit. From looking at pic's of other builds, it looks like we'll have to route the coolant hose around the lift pump.
Mocking up the coolant lines, can't go any farther right now. I'm having two 90* elbows welded and waiting for the “big brown truck” to bring my suspension lift kit. From looking at pic's of other builds, it looks like we'll have to route the coolant hose around the lift pump.
Attachments
Jimmer,
Try to reduce the matrix size of your image, maybe 640 x 480 or so.....
Doc
Thanks Doc, I'll try that.
Jim
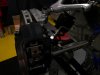
ISIS:
Installed the two ISIS control panels on the street side of the driver footwell.
Brakes:
Replacing the supplied brake line fittings with banjo fittings, just waiting for the big brown truck again.
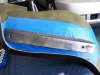
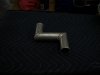
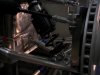
Seat Bracket: (pic #2 & 3)
Mounted 3/16” x 1-1/2” flat stock to each side of the seats to allow for a nice large flat surface to mount the RCR bracket to rather than fighting with the curved contour of the seat. Mike made a jig to to make sure that everything lined up. We drilled and taped a a 3/8” hole so that when the button head bolt comes through the fiberglass seat, the flat stock and finally the RCR bracket, it will act as a stud. We filled the gap between the flat stock and the curved seat with JB Weld Putty. We did this with the upholster in mind (thought that you would appreciated that Mark)!
Seat Riser : (pic.# 4)
Mike welded some 3/8” nuts to the inside of some 1” x 2” tube stock. We are using the tube stock as a 1” riser to raze the seat for this short guy! Bought some black plastic end caps for the tube and will paint the tube flat black. We are going to mound some 3/16” aluminum plate to the underside of the floor pan and lock tight the 3/8” button head bolt up throug the floor, the riser and the RCR bracket. The bolt will now be a permanent stud and will eliminated the need for two people to install/remove the seat (Mark, thinking of you again)
Jim
Installed the two ISIS control panels on the street side of the driver footwell.
Brakes:
Replacing the supplied brake line fittings with banjo fittings, just waiting for the big brown truck again.
Seat Bracket: (pic #2 & 3)
Mounted 3/16” x 1-1/2” flat stock to each side of the seats to allow for a nice large flat surface to mount the RCR bracket to rather than fighting with the curved contour of the seat. Mike made a jig to to make sure that everything lined up. We drilled and taped a a 3/8” hole so that when the button head bolt comes through the fiberglass seat, the flat stock and finally the RCR bracket, it will act as a stud. We filled the gap between the flat stock and the curved seat with JB Weld Putty. We did this with the upholster in mind (thought that you would appreciated that Mark)!
Seat Riser : (pic.# 4)
Mike welded some 3/8” nuts to the inside of some 1” x 2” tube stock. We are using the tube stock as a 1” riser to raze the seat for this short guy! Bought some black plastic end caps for the tube and will paint the tube flat black. We are going to mound some 3/16” aluminum plate to the underside of the floor pan and lock tight the 3/8” button head bolt up throug the floor, the riser and the RCR bracket. The bolt will now be a permanent stud and will eliminated the need for two people to install/remove the seat (Mark, thinking of you again)
Jim
Attachments

Last edited:
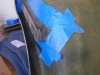
Someone sent me a PM requesting a better pic of the flat stock seat bracket and questioned where we placed the JB Weld putty. Rather then PMing, I figured I'd post on the forum and share with the group. :idea:
Here are two pic's of the bracket ready to be painted with the RCR floor mounting bracket removed.
Hope this helps!
Jim
Here are two pic's of the bracket ready to be painted with the RCR floor mounting bracket removed.
Hope this helps!
Jim
Attachments
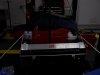
Built progress-week ending 07/19/13:
Mike is on vacation this week and next, so its just George and I. Despite a couple of days off for tests and doctors appointments, we managed to get a fairly good amount accomplished.
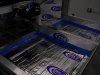
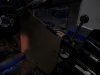
We installed the A/C condenser. Had a “Z” fitting (2 -90* elbows) fabricated; this will allow the transition from the radiator nose piece to the outboard drivers side without kinking the coolant supply hose. (pic #1)
Installed the clutch and two brake reservoir's on the drivers side of the front radiator nose piece. (pic # 2)
Mounted the suspension lift pump on the passenger side of the front radiator nose piece. (pic #3)
I have a question regarding the lift kit hydraulic reservoir and hope that some will be able to help me out. Does the lift pump suspension reservoir need to be mounted above the height of the pump intake port or doesn't it matter?
(continued)
Mike is on vacation this week and next, so its just George and I. Despite a couple of days off for tests and doctors appointments, we managed to get a fairly good amount accomplished.
We installed the A/C condenser. Had a “Z” fitting (2 -90* elbows) fabricated; this will allow the transition from the radiator nose piece to the outboard drivers side without kinking the coolant supply hose. (pic #1)
Installed the clutch and two brake reservoir's on the drivers side of the front radiator nose piece. (pic # 2)
Mounted the suspension lift pump on the passenger side of the front radiator nose piece. (pic #3)
I have a question regarding the lift kit hydraulic reservoir and hope that some will be able to help me out. Does the lift pump suspension reservoir need to be mounted above the height of the pump intake port or doesn't it matter?
(continued)
Attachments
Jim,
the reservoir should be mounted higher than the pump...many builders mount the pump as low as possible , essentially on the floor of the radiator box...making it a non issue to have the reservoir higher.
the reservoir should be mounted higher than the pump...many builders mount the pump as low as possible , essentially on the floor of the radiator box...making it a non issue to have the reservoir higher.
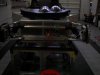
Week ending 07/19/13 continued:
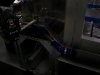
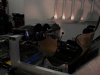
I drilled holes and installed grommets in the drivers side of the front bulkhead for the clutch and two brake line hoses. (pic #1) The front nose piece is just about complete and ready to be installed.
Installed banjo fittings on the brake calipers and installed the front lift kit hydraulic lift cylinders and new springs-(pic 2 & 3)
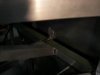
George and I designed and fabricated a nice simplistic shifter mounting bracket that puts the shifter at a comfortable angle that I'm really liking! (pic #4)
The angle of the shifter mounting bracket also allows for a nice foundation to install a sub-panel below the stock dash. (pic #4) I will be installing a 7” - “Dash Commander” display screen in the center of the stock dash. The sub-panel will attach to the center floor counsel. I plan on installing the starter button, suspension lift switch, 4-way hazard lights switch a drink holder in the sub-panel and possibly the Vintage Air controls.
Originally, I purchased a center floor counsel from RCR, but have decided not to use it and build my own. (pic #5) shows partially completed shot of drivers side front section of the floor counsel. If anyone needs one, send me a PM, I'll work out a bargain deal!
Jim
I drilled holes and installed grommets in the drivers side of the front bulkhead for the clutch and two brake line hoses. (pic #1) The front nose piece is just about complete and ready to be installed.
Installed banjo fittings on the brake calipers and installed the front lift kit hydraulic lift cylinders and new springs-(pic 2 & 3)
George and I designed and fabricated a nice simplistic shifter mounting bracket that puts the shifter at a comfortable angle that I'm really liking! (pic #4)
The angle of the shifter mounting bracket also allows for a nice foundation to install a sub-panel below the stock dash. (pic #4) I will be installing a 7” - “Dash Commander” display screen in the center of the stock dash. The sub-panel will attach to the center floor counsel. I plan on installing the starter button, suspension lift switch, 4-way hazard lights switch a drink holder in the sub-panel and possibly the Vintage Air controls.
Originally, I purchased a center floor counsel from RCR, but have decided not to use it and build my own. (pic #5) shows partially completed shot of drivers side front section of the floor counsel. If anyone needs one, send me a PM, I'll work out a bargain deal!
Jim
Attachments
-
 SL-C Build-Wk. ending 07-19-13 006.jpg102.7 KB · Views: 391
 -
 SL-C Build-Week of 07-19-13 cont 001.jpg101.8 KB · Views: 373
 -
 SL-C Build-Week of 07-19-13 cont 002.jpg117.3 KB · Views: 389
 -
 SL-C Build-Week of 07-19-13 cont 004.jpg85.8 KB · Views: 397
 -
 SL-C Build-Week of 07-19-13 cont 005.jpg103.8 KB · Views: 418
Jim,
the reservoir should be mounted higher than the pump...many builders mount the pump as low as possible , essentially on the floor of the radiator box...making it a non issue to have the reservoir higher.
Thanks Fran! That's what I was afraid of..:furious:.but deeply appreciate the info none the less!
Thanks again,
Jim
My next project before I install the front radiator nose piece is to design a radiator fan shroud. I'm wondering if anyone has a drawing of a shroud that they designed and would be willing to share it with me. Or better yet, is there an after market shroud that will work on a SL-C application? I hate to have to re-invent the wheel....again!
Jim
Jim
Michael Fling
Supporter
Fran has commented that a shroud is not needed and as a matter of fact it can be less efficient. Thoughts?
Similar threads
- Replies
- 9
- Views
- 4K
- Replies
- 25
- Views
- 2K