
- Forums
- GT40 Replica Manufacturers' Corner
- RCR Forum - RCR40/SLC/917/Superlite Aero
- The SLC Clubhouse
You are using an out of date browser. It may not display this or other websites correctly.
You should upgrade or use an alternative browser.
You should upgrade or use an alternative browser.
Aaron's SL-C build...
- Thread starter Aaron Hamilton
- Start date
")
Thanks Les.. I spent a whole Saturday aligning my doors.
Several items to note:
1). I set a basic tire and wheel alignment for the chassis.
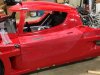
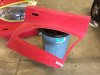
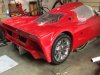
2). I stood my main body up on its end and set it at 74" width at the rear fender well openings by placing tape at that width on the floor. I then marked the bottom side of the lower main body flange to indicate the width of the belly pan of the chassis. This line can be seen easily once the body is on the chassis to confirm that the body is being pulled outward enough at the bottom.
3) Then mount set the body to the chassis and pulled the bottom flanges outward until the 74" width was met both front and back on the body.
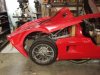
4) I then moved the body forward and rearward to set the wheel arch opening gaps.
5) I then bolted the body to the chassis.
6) Then I test fit the doors to ensure the general fit was good.
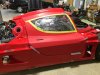
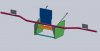
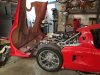
7) I then supported the rear of the main body above the roll cage.
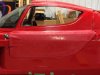
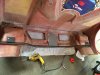
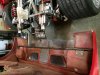
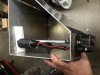
8) I then worked on one door at a time until the fit was correct using 1/8 inch spacers to set the gaps. I'm disappointed that RCR cuts out so much material in the front door jamb. I'm not the only one that has commented about this. There is so much material removed that I can put my whole hand in it after the door is actually fully secured to the J hinge. I'm going to fiberglass that hole back in because it just like he into the cabin.
The doors fit very well if the body is set correctly. I think most of the guys agree..
You also have to push the body out at the A-pillar to make the windshield fit correctly.
Eventually I'm going to weld tabs on the top of the roll bar in those areas. I will attach the fiberglass body at these places to prevent it from moving.
Several items to note:
1). I set a basic tire and wheel alignment for the chassis.
2). I stood my main body up on its end and set it at 74" width at the rear fender well openings by placing tape at that width on the floor. I then marked the bottom side of the lower main body flange to indicate the width of the belly pan of the chassis. This line can be seen easily once the body is on the chassis to confirm that the body is being pulled outward enough at the bottom.
3) Then mount set the body to the chassis and pulled the bottom flanges outward until the 74" width was met both front and back on the body.
4) I then moved the body forward and rearward to set the wheel arch opening gaps.
5) I then bolted the body to the chassis.
6) Then I test fit the doors to ensure the general fit was good.
7) I then supported the rear of the main body above the roll cage.
8) I then worked on one door at a time until the fit was correct using 1/8 inch spacers to set the gaps. I'm disappointed that RCR cuts out so much material in the front door jamb. I'm not the only one that has commented about this. There is so much material removed that I can put my whole hand in it after the door is actually fully secured to the J hinge. I'm going to fiberglass that hole back in because it just like he into the cabin.
The doors fit very well if the body is set correctly. I think most of the guys agree..
You also have to push the body out at the A-pillar to make the windshield fit correctly.
Eventually I'm going to weld tabs on the top of the roll bar in those areas. I will attach the fiberglass body at these places to prevent it from moving.
Last edited:


PeteB
GT40s Supporter
Nice work. I was really surprised how little the clam opens with the stock mounts when I test fitted it the first time a few weeks ago. I'm not up to that much fabrication, so I'm going to just use quick release pins on the hinges so I can easily remove the rear clip when I need to work on the engine.


Similar threads
- Replies
- 2
- Views
- 1K