
- Forums
- GT40 Replica Manufacturers' Corner
- RCR Forum - RCR40/SLC/917/Superlite Aero
- The SLC Clubhouse
You are using an out of date browser. It may not display this or other websites correctly.
You should upgrade or use an alternative browser.
You should upgrade or use an alternative browser.
Aaron's SL-C build...
- Thread starter Aaron Hamilton
- Start date
")
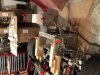
Ive been working on thickening the front portion of doors as well as the door locking mechanism area. Door sub-assembly of the left-hand door is in process. The fiberglass thickness at the J hinge mounting area was only 1/16” thick and the area was flimsy.
Attachments
") as well as upgrades to my place. I’ll be back on her soon enough.
as well as upgrades to my place. I’ll be back on her soon enough.I simply colored over the yellow with a red sharpie marker.. Nothing fancy..
Well I over thought that idea, lol. Thanks, ordered an orange one!
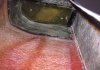
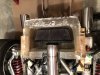
Front brake rotor cooling is now complete. View attachment 99867
Howard had some recent brake issues he thought might be attributed to uneven cooling of his front rotors. I think Ken mentioned something about best practices with regard to directing the cooling airflow (into the vanes between the inboard/outboard rotor faces as opposed to right on the inboard face). If you're planning to track your car you might want to look into fabricating some ducts at the hose exit to avoid the condition Howard experienced.
Joel K
Supporter
Please!!! I’m not keeping the 2x4’s, for the individual(s) that seem to I’m a bit clueless..
Nice job Aaron.
This past weekend I completed the following items:
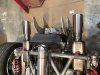
1) Fabricated diagonal wing bracing (prevent lateral sway).
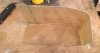
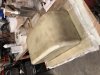
2) Created the buck for my overhead console.
3) Studying the air box fit the rear clamshell.
4) Created the pattern for my wing end plates.
1) Fabricated diagonal wing bracing (prevent lateral sway).
2) Created the buck for my overhead console.
3) Studying the air box fit the rear clamshell.
4) Created the pattern for my wing end plates.
Attachments
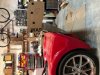
Last night I fitted up the airbox and measured clearance to the rear clamshell. I need to cut down the airbox approximately 2 1/2 inches and then weld up the risers with dzus fasteners to connect it to the spider frame extensions that I've created. I plan to create a fiberglass enclosure that connects the air inlet ducts on the rear clamshell and funnels air into the airbox.
Similar threads
- Replies
- 2
- Views
- 1K