Something I noticed that I though you should be awaer of. Is those side scoops will be hard to mold. Around the opening will be very narrow to try & get gellcoat into as well as the fiberglass itself. You may want to make it a two piece mold. With a joint right around the edge. That way you could spray both sides then bolt together. To then get the fiberglass into it. You'll have to feed it in using a stick or something to fill the mold. Very narrow areas such as those can be a real problem if they are too deep. The other way would be to cut back the mold on the inside of the scoop. So you just have a roll on the upper side. Been there done that LOL

You are using an out of date browser. It may not display this or other websites correctly.
You should upgrade or use an alternative browser.
You should upgrade or use an alternative browser.
CANAMSA - SA stratch build
- Thread starter Fred W B
- Start date
Thanks for the comment Mike. I have made "implants" that go into the recesses, that split off the inside of the mold closing faces. So I can mold the internal return faces as seperate pieces, that will then be bonded into holes cut in the tail. The tail will initially be made with "blank" faces across the openings.
Unfortunatly I do not have the use of my camera at the moment, will post pics when I can.
Cheers
Fred W B
Unfortunatly I do not have the use of my camera at the moment, will post pics when I can.
Cheers
Fred W B
Thanks a lot for the link Ian, I learnt something their straight away, it had not occured to me to put the gell coat on with a roller.
Cheers
Fred W B
Hi Fred,
Just a heads up re using a roller with the gell, I did a section the other day, the gell goes on a treat ( i thought it was the best idea ever!!!) but I was aware that the gel reacted when it came into contact with the resin during the layup, not all of it just in the odd place.
I have since done some research on t`internet and the reaction occured due to too thin a coat of gell, it`s called "alligatoring" of the gell, I have never had any problems before re mixing etc etc only occured when I used a roller.
regards Chris
I've had that problem at times too. But not using a roller, I've always sprayed. It's because of un-cred gell coat. In areas the gell coat may not be fully cured & the solvents in the next coat of laminating resin softens/reacts with the gell coat. This can be because of less air circulation in areas or thickness of the gell coat. I'm one that is too impatient & try to "push" it. Too often starting the next coat too soon. It can be very frustrating if the gell coat is to be the finished surface. Not so much if it will be a painted surface as it can be repaired. But of course is more work. You need to test the gell all over. As I've read in books on the subject. It should be firm/soft to the touch but not sticky. You should leave a finger print but not stick to your finger.
Mike S
Mike S
Hi Guys
Thanks for comments re gel, I've found that I actually prefered the brush after now trying the roller. the roller, at least the one I tried, seemed to leave a texture in the gel. I have not had any problems with the gel as the surface layer since one bad experience where, as Mike says, I learnt that you really have to wait for the gell to go off just enough before moving on.
I've not posted for a while, had some things going on that kept me out of the garage for a while.
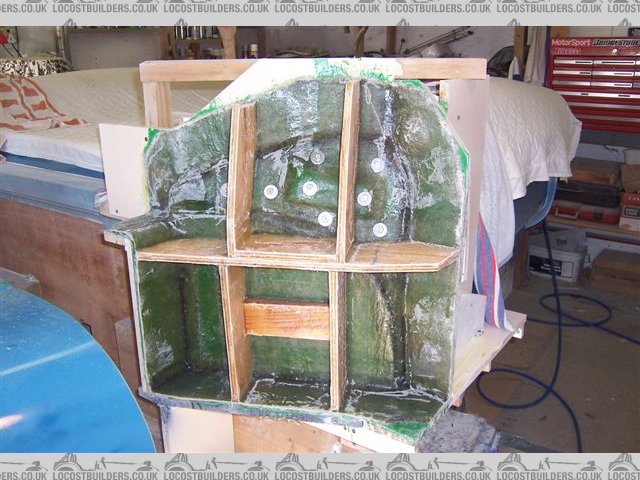
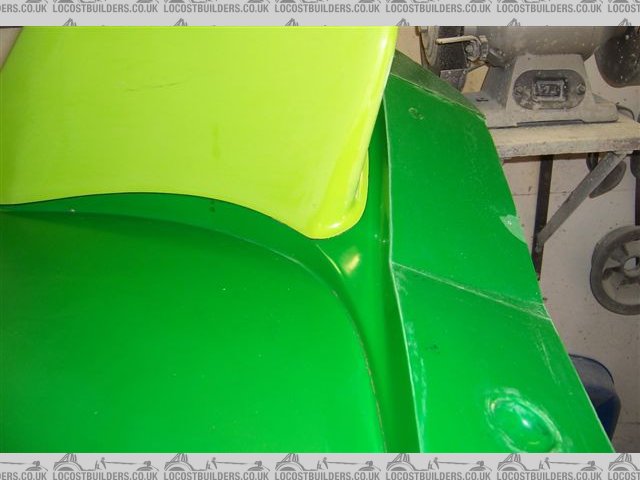
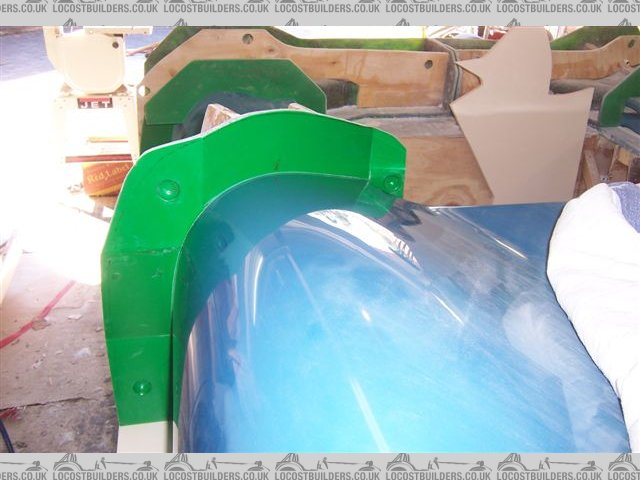
I have now finished the first 2 sections of what will be a 6 piece tail mould, these being the outer face sections of the forward facing areas of the tail, including the inserts that make it possible to form the inner surfaces of the "hip ducts".
After making the insert moulds, these were closed off, and another mould made over them over the full forward facing surfaces. The surface down towards the belt line may be bigger than necessary, I can cut the parts back if needed later. I incorporated a step out block to give a register between the insert and face moulds. The insert section moulds are secured to the face moulds with screws.
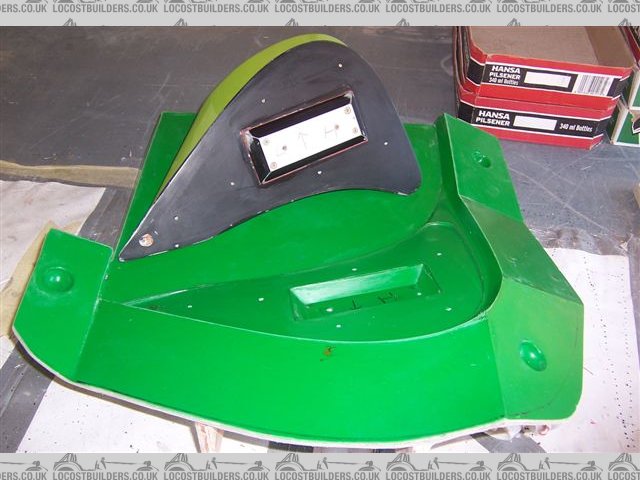
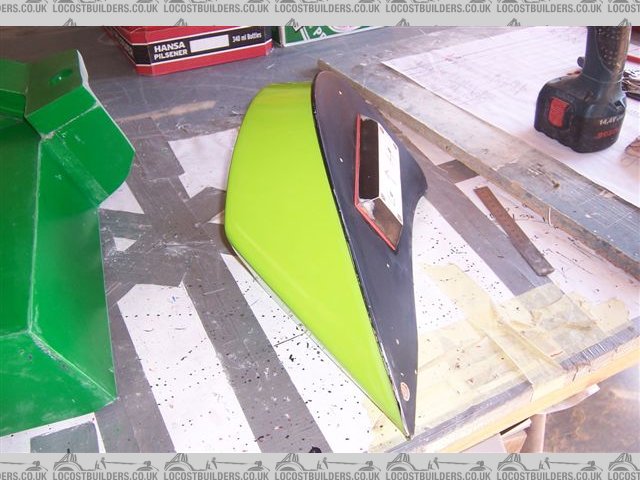
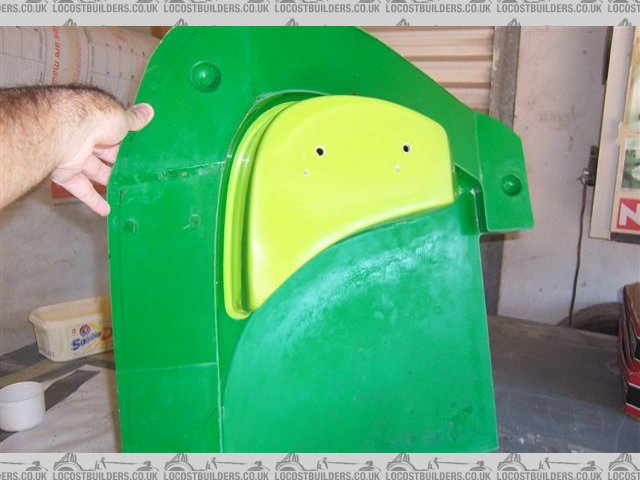
The idea is that the full tail part is first made with the insert section removed from the face mould. The open area of the duct is then cut out, up to the join line. The insert mould is than screwed to the removed face mould and a moulding made separately of the insert. The insert part is then trimmed to the join line, the insert part put back onto the mould and the face mould bolted back into the full part mould, so that it positions the insert part in the correct place. The insert part is then bonded into the tail part.
Hope that makes sense, the pictures may help explain what I am trying to do. The insert and face moulds happen to be made with different colour green tooling gel, which make the join line easy to see
Cheers
Fred W B
Thanks for comments re gel, I've found that I actually prefered the brush after now trying the roller. the roller, at least the one I tried, seemed to leave a texture in the gel. I have not had any problems with the gel as the surface layer since one bad experience where, as Mike says, I learnt that you really have to wait for the gell to go off just enough before moving on.
I've not posted for a while, had some things going on that kept me out of the garage for a while.
I have now finished the first 2 sections of what will be a 6 piece tail mould, these being the outer face sections of the forward facing areas of the tail, including the inserts that make it possible to form the inner surfaces of the "hip ducts".
After making the insert moulds, these were closed off, and another mould made over them over the full forward facing surfaces. The surface down towards the belt line may be bigger than necessary, I can cut the parts back if needed later. I incorporated a step out block to give a register between the insert and face moulds. The insert section moulds are secured to the face moulds with screws.
The idea is that the full tail part is first made with the insert section removed from the face mould. The open area of the duct is then cut out, up to the join line. The insert mould is than screwed to the removed face mould and a moulding made separately of the insert. The insert part is then trimmed to the join line, the insert part put back onto the mould and the face mould bolted back into the full part mould, so that it positions the insert part in the correct place. The insert part is then bonded into the tail part.
Hope that makes sense, the pictures may help explain what I am trying to do. The insert and face moulds happen to be made with different colour green tooling gel, which make the join line easy to see
Cheers
Fred W B
Looking super, hope to see some finished parts out of the molds soon. Your body project is something to be inspired by. First rate all the way, the finished product should be beautiful. In some ways it's too bad though that you've needed to go through such a long & detailed process to get your body. We here in the states are spoiled. We can get things shipped to us just about anywhere at a "fairly reasonable" cost. We don't have a lot of really high import taxes if it has to come from elsewhere in the world. I've had to buy a lot of parts from the UK for my Lotus & Spitfire as well as my Ford crossflow engine. UK shipping is certainly higher than it is here.
Mike S.
Mike S.
Hi Fred,
your ingenuity (is that spelled right?) keeps amazing me, I wondered how one would make this section, this seems the way to go. in fact looking at the flashlines on the GD body they do it more or less the same way as you're now.
on thing will probably be a joy to never forget, you spend years and years on the plug and moulds, when they're actually done, you will have so much experience in the wet lay-up process you'll probably manage to make a whole body in less than a month..... the learning curve is one thing I like most about doing everting yourself.
I'll try and send some pictures and a small movie tonight for further inspiration.
grtz Thomas.
ps: this years first wors-braai on this side of the globe has taken place. still cold but the sun is out!
Thanks for comments guys. Not much more progress to report lately, had some other prorities for the last while.
Thomas, yes I'm thinking that once I've finished the moulds I will really feel like I'm on the downhill slope. You must have your car nearly complete now?
Cheers
Fred W B
Thomas, yes I'm thinking that once I've finished the moulds I will really feel like I'm on the downhill slope. You must have your car nearly complete now?
Cheers
Fred W B
nah not finnished yet,
been working on the french campervan which we'll take to germany next week as a test drive for the trip to le-mans, which i plan on doing in that thing aswell with my younger brother, should be hillarious considering he's a complete nutter at times.
will send some footage sometime soon, busy busy busy gaining greasy fingers and bloody knuckles.
you're most defenatly on the downslope.
grtz Thomas
Thanks Pete. Good luck with your project
Cheera
Fred W B
Cheera
Fred W B
I dont know if this was discussed, but for those wanting to make a buck, you can do it without a cad program, or, import it into a cad program from paper. take a few plastic models, fill them with foam (e.g. DOW's Great Stuff). Cut the model into pieces. Trace the cuts onto paper. At this point you can import them into a cad program, or, do it the old fashioned way and scale the cuts up to the full size.
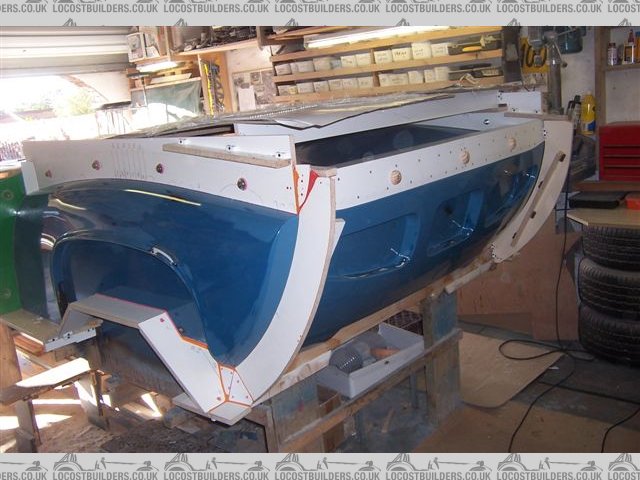
So lately progress has been slow albeit steady.
The entire tail section has been waxed, and all the parting fences made and installed.
The entire tail section has been waxed, and all the parting fences made and installed.
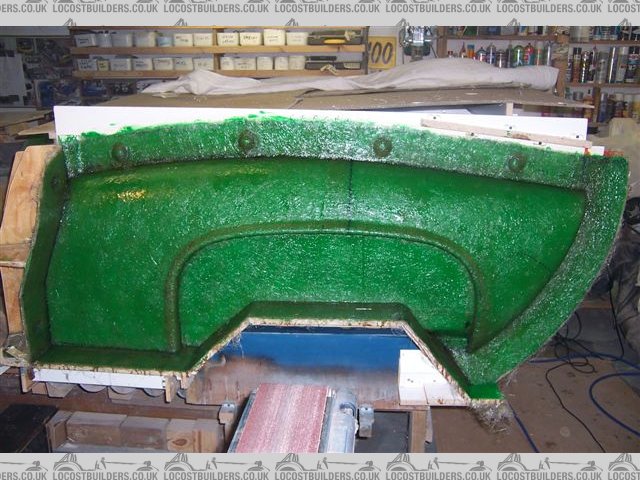
Working now on the next section of the tail mould, all matt templates have been made, matt cut, and today at 10.30 I started with tooling gel application, then once it had gone off applying tissue, then one layer of 300 gram mat on the surface and flanges, + fillets in the corners, then a layer of 600 and 2 layers of 600 on all the flanges.
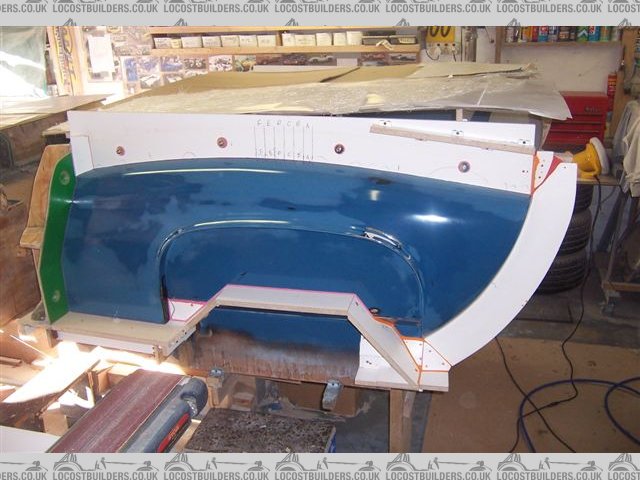
The fiddly pieces around/under the wheel arch return are a pain.
By 5.30 it looked like this.
Needless to say I didn't see any sport on TV today
Cheers
Fred W B
By 5.30 it looked like this.
Needless to say I didn't see any sport on TV today
Cheers
Fred W B
The fiddly pieces around/under the wheel arch return are a pain.
By 5.30 it looked like this.
Needless to say I didn't see any sport on TV today
Cheers
Fred W B
Looking good Fred, I had the same problem with the returns, reckon I got more resin over me and the floor than the part!!!! It`s a shame you can`t tilt it 45* would be easier then! Your mould "interlocks", are you making these or are they bought? (the small half circular interlocks)
regards Chris
Hi Chris
Thanks for your comment.
The smaller locating "bumps" on the side split line were made by casting resin around bolts stood upright in the sections of a plastic tray from a box of chocolates, and then finishing them smooth. This I did by chucking the bolt in a electric drill and then applying a power file to the resin while the part rotated - a "poor mans" lathe.
The larger ones in the rear panel were made in a similar fashion but starting with store bought cupboard door knobs which I cut down and drilled a hole through.
Cheers
Fred W B
Re: t70 spider shortly on rsa tracks
Hi Guys thought you might like to see the car we have just completed.
it was an imported kit from usa, and the guys battled to complete the project, and then we got involved,
we remodelled and heavily modified the suspension, fitted body properly and had many many other mods to do to hopefully get the car competitive
we have now completed the car and it will be racing next week at zwartkops.
https://plus.google.com/photos/107393706816828190179/albums/5763793884302419985
cheers greg