Don's Mk IV Build

Status
Not open for further replies.

D. Nye

Lifetime Supporter
Kirby, I have most weekends open. I'm located in Rock Creek. I may be at the Nifty 50's tonight with the Cobra.

Don
 
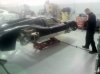
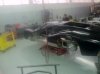
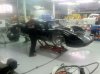
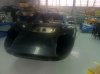
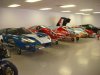
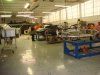
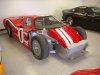
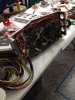
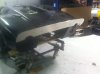
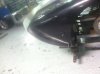
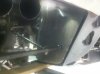
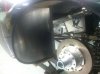
As I study the four “J” cars that raced at Le Mans in 1967 I feel like I’m playing a game of find Waldo. Each car is different which only means different people assembled the car and there are two different teams preparing the cars. The two Shelby cars, J5 and J6 had oil tanks with a clear oil level window while the HM cars oil tank did not. The Shelby cars had a hole through the body for viewing the oil level. The oil tank fill cap was below an access door top right rear finder while the HM cars J7 and J8 had a hole through the body for the fill cap. By the way the fill caps J7 and J8 had during the race are no longer the same. Of all four cars the rear spoiler on J7 was different; I’ll let you find it from the old pictures.


Sorry guys I just find this interesting.

I'm pretty sure another difference is that the HM cars used brake cooling ducts in the front of the nose, whereas Shelby moved them behind the radiator so that the brakes would not cool too much on the Hunaudieres and risk a warped rotor from the extreme changes in temperature.
 

D. Nye

Lifetime Supporter
The old photos of the 1967 Le Mans I have seen show the front air openings closed also on the HM cars. I assume the brake cooling was also from the radiator plenum. I think I read somewhere that the drivers found the lift was higher with the openings open.
 
The old photos of the 1967 Le Mans I have seen show the front air openings closed also on the HM cars. I assume the brake cooling was also from the radiator plenum. I think I read somewhere that the drivers found the lift was higher with the openings open.

It seems you're right looking at race photos, I suppose they must have set up a system similar to Shelby at a later stage than Shelby, as the openings seem to have been covered rather than blocked permanently.
 

D. Nye

Lifetime Supporter
Sorry for the delay of posting anything. Over the summer I went and took a lot of pictures of J7. The junk along the walls was very interesting. Noting the oil coolers and finding identical coolers setting in a corner where I could take a picture of the model number started me on a quest of finding a set. Well be careful what you start looking for because you may find it and have to bring out the big bucks to own it.

Once I had the coolers and could get measurements I than started working on CAD drawings of the support brackets. From information given me about the number of bolts holding the cover plate and old photos I came up with a size, a picture is worth a 100 words, see attached of the original J7 supports.

This is what I came up with, see attached. I may have gone overboard with the aluminum polish. When I fit them to the car I may tone them down a little.
 

Attachments

  • 021.JPG
    021.JPG
    146.3 KB · Views: 752
  • 11-1-2013 003.JPG
    11-1-2013 003.JPG
    205.1 KB · Views: 662
  • 11-1-2013 004.JPG
    11-1-2013 004.JPG
    213.3 KB · Views: 588
  • 11-1-2013 002.JPG
    11-1-2013 002.JPG
    175.9 KB · Views: 593

D. Nye

Lifetime Supporter
Got some pictures of the car today and thought I would share. It's getting there and looking good!
 

Attachments

  • photo2.JPG
    photo2.JPG
    116.5 KB · Views: 827
  • photo3.JPG
    photo3.JPG
    102.6 KB · Views: 646
  • photo4.JPG
    photo4.JPG
    121.7 KB · Views: 654
  • photo5.JPG
    photo5.JPG
    136.4 KB · Views: 749
  • photo6.JPG
    photo6.JPG
    103.3 KB · Views: 679

D. Nye

Lifetime Supporter
I'm planning on being at RCR tomorrow Nov.20th. If anyone wants pictures of a car let me know and I will see what I can do. Going up to take some measurements for some of the bits not provided with the kit. Well be posting better pictures of my car maybe Thursday.
Later,
 

D. Nye

Lifetime Supporter
I took the trip to Detroit to check on the status of the car last Wednesday and took measurements and pictures of the completed car RCR turnkey built a few years back.


My car had the body removed and setting in the welding area for header welding, see attached photos. I also got a look at the wheel centers which look great to me. RCR makes some very nice parts.


I also took lots of pictures of other things in the build process, see attached. The picture of the GT40, P5 and 917 setting next to each other is interesting. Fran can explain why no chassis etc.. Nice art work!

Enjoy and you and your family have a very Happy Thanksgiving!

Don
 

Attachments

  • DSC04817.JPG
    DSC04817.JPG
    145.1 KB · Views: 735
  • DSC04818.JPG
    DSC04818.JPG
    138.9 KB · Views: 627
  • DSC04823.JPG
    DSC04823.JPG
    146 KB · Views: 661
  • DSC04847.JPG
    DSC04847.JPG
    140.5 KB · Views: 712
  • DSC04871.JPG
    DSC04871.JPG
    98.7 KB · Views: 808
  • DSC04846.JPG
    DSC04846.JPG
    152 KB · Views: 695
  • DSC04880.JPG
    DSC04880.JPG
    152.9 KB · Views: 616
  • DSC04696.JPG
    DSC04696.JPG
    132.5 KB · Views: 831

D. Nye

Lifetime Supporter
Fran's gang has been working hard on the headers. It's really cool to see that big FE setting in the car with headers going on.

Enjoy!!!!
 

Attachments

  • headers1.JPG
    headers1.JPG
    490 KB · Views: 648
  • headers2.JPG
    headers2.JPG
    468.4 KB · Views: 483
  • headers3.JPG
    headers3.JPG
    502.5 KB · Views: 502
  • headers4.JPG
    headers4.JPG
    535.1 KB · Views: 452

D. Nye

Lifetime Supporter
The dash switch panel is almost complete after a late night. Plans have me shipping this to RCR for mounting. I'm going to work on the top and weld some of the corners before shipping. I want to paint with black crackle paint similar to the old MG dashes were done. Thinking it's best to wait until all dash sections are complete and paint everything together.
Just have fun!
 

Attachments

  • 093.JPG
    093.JPG
    144.3 KB · Views: 464
  • 094.JPG
    094.JPG
    139.7 KB · Views: 402
  • 096.JPG
    096.JPG
    143 KB · Views: 481
  • 097.JPG
    097.JPG
    137.1 KB · Views: 368
  • 098.JPG
    098.JPG
    155.8 KB · Views: 466
nice work Don! Thanks for posting the pictures, my new mk-4 chassis should be done after the first of the year, so I hope my build Is not too far behind..............m
 

D. Nye

Lifetime Supporter
I thought I would share what’s up with the car. The last month has been busy however I have made some progress with making a wiring harness. After about four tries and the help of Tim Ganskop with part model numbers I was able to make the switch/fuse panel the correct size out of 14 gauge aluminum. With this completed I got the correct starter button, very hard to find, and mounted everything in the panel. It seems they made the switch panel out of acrylic and back lite it similar to airplanes. With cad software I laid out a wiring diagram and proceeded to cut wires to length. Without the car I got the dimensions from the web and used blue painters tape to layout the outline of the car on the garage floor. This let me estimate wire lengths to lights etc.

The originals used 24 pin connectors out of the bottom of the dash, one for the front and one for the rear wiring. If you have ever wired a dash you know you end up with a lot of wires even in what looks like a simple dash layout. I have to admit the hardest part of this process was soldering all the small terminals on those 24 pin connectors, 96 solder connections with small wires. I did get better at this on the last half.

I got pictures of the completed wheels this week and have hopes of a call saying the car is ready to ship this month, we will see.
Don
 

Attachments

  • dash 10.jpg
    dash 10.jpg
    134.4 KB · Views: 496
  • dash 20.jpg
    dash 20.jpg
    121.6 KB · Views: 437
  • dash 30.jpg
    dash 30.jpg
    96.4 KB · Views: 436
  • wiring.jpg
    wiring.jpg
    104.6 KB · Views: 409
  • DSCF0871.jpg
    DSCF0871.jpg
    188.1 KB · Views: 546

D. Nye

Lifetime Supporter
I was emailed yesterday and understand the car is ready to ship. So a trip to RCR is in order to collect the car a bring it to Texas for final assembly. I can't tell you how excited I am to finally get my hands on the car. Fran's team has been busy giving the extra small parts and installing them that makes one of these cars special. Thought I would share some pictures I got last night and one last picture of those SS headers. I'll be sure to post lots of pictures when it is parked in the garage.

Later,
 

Attachments

  • photo 1.JPG
    photo 1.JPG
    438.9 KB · Views: 467
  • photo 2.JPG
    photo 2.JPG
    475 KB · Views: 429
  • photo 3.JPG
    photo 3.JPG
    483.3 KB · Views: 404
  • photo 4.JPG
    photo 4.JPG
    488 KB · Views: 429
  • 3ecdcb6c-f4ea-4738-89c7-a54ee4978cef_zps558eeb22.jpg
    3ecdcb6c-f4ea-4738-89c7-a54ee4978cef_zps558eeb22.jpg
    64 KB · Views: 561
Status
Not open for further replies.
Back
Top