FLyinJ's NY Build Thread

Joel K

Supporter
Been a bit, but things have been moving along at a slow pace.

Got the steering installed, that’s a minor technical feat for someone who never really understood the intricacies of vehicle steering setup. Time will tell if I got it right.

Counting the rotations lock-to-lock, centering the rack, then centering the housing on the body left to right took a lot of measuring and then re-measuring. Pretty sure I’ve got it centered within a couple millimeters, nothing the tie rods adjustments won’t fix. The angle of the tie rods to the upper and lower control arms is a whole ‘nuther issue. I mostly aligned it with the lower control arm, but slotted the mounts so I can move the rack up and down just a little when I get the suspension set up better and check what works best for bump steer.

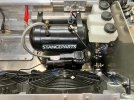
Lol, wouldn’t you know it, I forgot to take the mount off before loosely bolting it on, so now I have to take it apart again to take the mount off off because I can’t fit a wrench behind it. View attachment 153019

Jeff,

There are multiple threads on bump steer. You may need spacers where the steering rack arms connect to the uprights. A common way is to connect it all but remove the shocks. Then run the suspension through its travel and add/remove washers to minimize change in toe. Then fab a spacer the height of the washer stack if you like a single spacer.
 
The front lift kit arrived the other day, I got around to checking it out. It’s from Stanceparts, looks pretty solid. However, it’s got a big air tank that will be fun to try to hide. Anyone switched to the tankless version? Also, no ride height sensors seem to be available for the kit, so it sounds like you just ride with the cup bottomed out as your preferred front suspension height? Wouldn’t mind having all 4 corners have adjustability, but with no way to tell what height you’re running it seems to not have any practical benefit.
Jeff,

I actually cut ~5.5 inches from the middle, rewelded and then mounted it to the front of the foot box.
 

Attachments

  • Stance.jpg
    Stance.jpg
    89 KB · Views: 75

Kyle

GT40s Sponsor
My suggestion is buy a 3d printer and learn fusion. Test in pla. Then send to send cut send for parts
 

Hector

Supporter
Jeff,

I actually cut ~5.5 inches from the middle, rewelded and then mounted it to the front of the foot box.
Regarding the front lift kit , I have the old ramlift pro so I dont know how it compares to the stanceparts one, from my experience I would not want to ride with the lift kit partially up, for one thing fine tuning it to an exact desired height would be very difficult and most of the time does not lift each side perfectly even , it varies each time you do it , also something to consider, turning the front wheels with the lift up can cause rubbing issues depending on your build, I had to do lots of modifications to the body to avoid that issue, especially backing up. Crunching fiberglass noises would not be fun :-) Ask me how I know
 
@Jkviper, I reviewed all the threads I could find. Everyone seemed to have a slightly different take, but yes...I will be removing the shocks and swinging the suspension, but I'd like to do it with the car loaded up and on the ground so I can mark what the "neutral" position will be to start the swing from. Got a little while before that happens.

@Scott W, I don't think I'm that adventurous, lol. I'd be chasing pinholes for days, it'd be ugly.

@SoFlo, Got 3 printers already and a desktop CNC on the way sometime this year. I'm pretty proficient in parts modeling. They will absolutely be put to work prototyping, and send cut send is definitely in the back pocket for bigger jobs.
 
@Jkviper, I reviewed all the threads I could find. Everyone seemed to have a slightly different take, but yes...I will be removing the shocks and swinging the suspension, but I'd like to do it with the car loaded up and on the ground so I can mark what the "neutral" position will be to start the swing from. Got a little while before that happens.
As long as you know your chassis ride height, and your car has been aligned, you can check your bump steer. Get your car aligned before you mount the body too. You'll want to continue your bump steer measurements into rebound too. Don't go to the alignment shop until your brakes are bled, you can't check caster without front brakes, ask me how I figured that out...
 

Frank Clark

Supporter
Like Hector, I have the old lift setup. Had it out once without realizing the lift was not quite all the way down. It was a nightmare to drive at speed. Was OK at 70, but at high speed ridges and humps in the road caused it to dart. YMMV. I would not 'plan' on needing to drive it with the lift up except for getting over bad spots.

I also put no weight on alignment shops. My feeling is if you build the car, you should be the best one to align it. Given everyone's weight/balance, ride heights and use of the car is different, you should expect your alignment to be different as well. Doing the alignment is not rocket science and lots of resources on the net. I have tweaked my setup many times. At this point, I can't even tell you where it's at. But I can tell you what a bit more or less toe and a bit more or less caster does with my car. My total investment in 'alignment' tools is less than the cost of a one good alignment. In reality, you can get by with a few straight edges, tape measure and a $10 dial angle finder. A $200 camber/caster guage makes life much easier, but we got by for years doing it manually.
 
I did my alignment by leveling the chassis in conjunction with setting the desired ride heights. Then used a digital angle meter along with the good old string method. Didn't get too crazy like adding weight to the drivers seat ( what we did on race cars) but it rides and steers great. Used two plastic 1/4 inch sheets at each corner under the tires with a little grease in-between to allow the wheels/ suspension to move freely. Had to be careful because you could push the car around with one hand when it was on the plastic.
 
Back
Top