Frank's KVA Build

Started on the car again after the trouble with my knee

Placed the pulley´s i´ve got to make a shim for the crank pulley because it´s offline
when to work again on the panneling
 

Attachments

  • IMG_2942 (Small).JPG
    IMG_2942 (Small).JPG
    50.2 KB · Views: 455
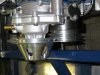
Frank, If you have sufficient clearance between PUMP pulley and the WP housing, rather than make/fit a shim or spacer to the crank pulley, remove the water pump and its back cover plate, and using a press push the WP pulley flange on to the shaft by the reqd amount. ------- NB. When doing this use a short piece of round steel stock in the impellor bore so that you are supporting/pressing directly on the shaft of the WP bearing- not the impellor or housing.----- There is usually enough room between flange & front of bearing to allow this, also be aware that some WP shafts have a reduced dia immediately in front of the flange that acts as a spigot for the WP pulley, if this is the case you may need to make allowance for this by counter boring the pulley slightly also.
 
Last edited:
Back again to work on the car after the holliday's
We went to italy and i also went to miln where i visited paolo it was nice talking to him and to see how passioned he is about the 40 as one madman to another madman.
Anyway I started again on the panneling and the front is almost finished.
 

Attachments

  • Foto0020 (Small).jpg
    Foto0020 (Small).jpg
    20 KB · Views: 399
  • Foto0021 (Small).jpg
    Foto0021 (Small).jpg
    22.1 KB · Views: 386
  • Foto0022 (Small).jpg
    Foto0022 (Small).jpg
    20 KB · Views: 428
  • Foto0023 (Small).jpg
    Foto0023 (Small).jpg
    44 KB · Views: 393
  • Foto0024 (Small).jpg
    Foto0024 (Small).jpg
    26.2 KB · Views: 422
  • Foto0025 (Small).jpg
    Foto0025 (Small).jpg
    45.6 KB · Views: 399
  • Foto0026 (Small).jpg
    Foto0026 (Small).jpg
    38.2 KB · Views: 364
  • Foto0028 (Small).jpg
    Foto0028 (Small).jpg
    43.3 KB · Views: 417
  • IMG_3089 (Small).JPG
    IMG_3089 (Small).JPG
    54.6 KB · Views: 411
  • IMG_3096 (Small).jpg
    IMG_3096 (Small).jpg
    23.5 KB · Views: 433
  • IMG_3098 (Small).jpg
    IMG_3098 (Small).jpg
    26.7 KB · Views: 346
  • IMG_3099 (Small).JPG
    IMG_3099 (Small).JPG
    44.5 KB · Views: 387
Hi Frank you are doing well, I see it is time for me to pay you a visit....
see you soon in the mean time keep the pics comming
 
Finished the frontpaneling, still needs final attaching
started on the panneling of the doorcorners and the base for the fuelcap when i noticed after finishing the right corner that the body was'nt mounted correctly on the chassis so i decided to first putt the suspension on the front and allign the wheels correctly and then the rear wheels
If the wheels are ok then i will allign the body and fix the hingepoints again (but then on the right spot)
After that i'll remake the doorcorner
 

Attachments

  • Foto0033 (Small).jpg
    Foto0033 (Small).jpg
    39.2 KB · Views: 380
  • Foto0052 (Small).jpg
    Foto0052 (Small).jpg
    41.3 KB · Views: 395
  • Foto0053 (Small).jpg
    Foto0053 (Small).jpg
    48.2 KB · Views: 368
  • Foto0054 (Small).jpg
    Foto0054 (Small).jpg
    49.9 KB · Views: 392
  • Foto0063 (Small).jpg
    Foto0063 (Small).jpg
    37.7 KB · Views: 401
  • Foto0064 (Small).jpg
    Foto0064 (Small).jpg
    29.6 KB · Views: 368
  • Foto0068 (Small).jpg
    Foto0068 (Small).jpg
    25.1 KB · Views: 352
  • Foto0065 (Small).jpg
    Foto0065 (Small).jpg
    27.6 KB · Views: 373
  • Foto0066 (Small).jpg
    Foto0066 (Small).jpg
    45.1 KB · Views: 390
  • Foto0067 (Small).jpg
    Foto0067 (Small).jpg
    39.4 KB · Views: 383
  • Foto0069 (Small).jpg
    Foto0069 (Small).jpg
    33.9 KB · Views: 347
  • Foto0070 (Small).jpg
    Foto0070 (Small).jpg
    48.4 KB · Views: 381
  • Foto0071 (Small).jpg
    Foto0071 (Small).jpg
    47.6 KB · Views: 499
  • Foto0072 (Small).jpg
    Foto0072 (Small).jpg
    42.5 KB · Views: 362
  • Foto0074 (Small).jpg
    Foto0074 (Small).jpg
    42.7 KB · Views: 388
  • Foto0075 (Small).jpg
    Foto0075 (Small).jpg
    45 KB · Views: 377
  • Foto0085 (Small).jpg
    Foto0085 (Small).jpg
    55.7 KB · Views: 395
  • Foto0086 (Small).jpg
    Foto0086 (Small).jpg
    55.7 KB · Views: 393
  • Foto0087 (Small).jpg
    Foto0087 (Small).jpg
    57.2 KB · Views: 454
some new pics
they speak for themself
 

Attachments

  • Foto0111 (Small).jpg
    Foto0111 (Small).jpg
    40 KB · Views: 358
  • Foto0112 (Small).jpg
    Foto0112 (Small).jpg
    41.3 KB · Views: 359
  • Foto0114 (Small).jpg
    Foto0114 (Small).jpg
    39.1 KB · Views: 354
  • Foto0119 (Small).jpg
    Foto0119 (Small).jpg
    46.5 KB · Views: 351
  • Foto0120 (Small).jpg
    Foto0120 (Small).jpg
    44 KB · Views: 338
  • Foto0122 (Small).jpg
    Foto0122 (Small).jpg
    37.1 KB · Views: 353
  • Foto0123 (Small).jpg
    Foto0123 (Small).jpg
    52.7 KB · Views: 336
  • Foto0124 (Small).jpg
    Foto0124 (Small).jpg
    44.8 KB · Views: 402
Hi Frank
I admire your fabrication skills, some excellant work. It makes me want a Tig welder even, more so I can weld aluminuim
Keep up the good work

Andy
 
Thanks guys for the kind words
You can see what someone can do with a bit of imaginenation,cardboard,a knife,alluminium sheet ,metalcutter,metalfoulder,and Andy it's not a tig but a mig/mag welder (but I'm still looking for one)
Frank
 
Frank:
I always enjoy looking at your posts..you have done a super job of fitting and measuring your panels.
I was wondering if you are experiencing any problems feeding the alum. wire in your mig gun, and what alloy you are using. I currently only use mig on thicker sections, and depending on the finished application either 4043 or 5356 wire, maybe the specs are different in Europe.
I used to spool-gun all of the alum welds on thicker sections, but now we use a push-pull gun which eliminates all the bird nesting, and the finished product is much cleaner.
Keep up the good work
Phil
 
Hi Phil,
I'm just using 0.8 mm alu wire don't know the specs have to look it up at the spool (I will this week)
And yes i've got problems with the wire feed because i don't have a push pull gun, I've got a machine witch can be used with a push pull but they are asking a lot of money for the gun (750 euro) so what i did was loosening the pushwheel in the machine so it won't fold.
But it's not ideal i know.
What do you pay for a push pull ?

Cheers
Frank
 
Frank:
You can check the push-pull gun at the Miller website, I don't think they are cheap, but cheaper than a spool gun. Maybe you could try changing the liner in your torch to a teflon unit, much cheaper and might work well. Also the 5356 wire is much harder than 4043 and it might feed better.
Good Luck
Phil
 
I attached the doors to the spider so it's easier to measure it
 

Attachments

  • Foto0140 (Small).jpg
    Foto0140 (Small).jpg
    53.3 KB · Views: 410
  • Foto0142 (Small).jpg
    Foto0142 (Small).jpg
    21.8 KB · Views: 362
  • Foto0144 (Small).jpg
    Foto0144 (Small).jpg
    28.8 KB · Views: 412
  • Foto0145 (Small).jpg
    Foto0145 (Small).jpg
    32.8 KB · Views: 396
Finaly can start working on the car again.
Bought myself a present
a ac/dc tig welder so i can weld the alu proper
Eddy came over today from leiden to help me get started with the tig (picture)
and now just a lot of practising before i can weld my panneling
 

Attachments

  • IMG_3105 (Small).JPG
    IMG_3105 (Small).JPG
    37.5 KB · Views: 311
  • IMG_3101 (Small).JPG
    IMG_3101 (Small).JPG
    60.6 KB · Views: 416
not so easy to learn
but with practice it is getting a bit better every time
 

Attachments

  • Foto0170 (Small).jpg
    Foto0170 (Small).jpg
    27.7 KB · Views: 370
  • Foto0176 (Small).jpg
    Foto0176 (Small).jpg
    38.8 KB · Views: 371
  • Foto0177 (Small).jpg
    Foto0177 (Small).jpg
    31.3 KB · Views: 369
  • Foto0179 (Small).jpg
    Foto0179 (Small).jpg
    32.3 KB · Views: 356
  • Foto0180 (Small).jpg
    Foto0180 (Small).jpg
    52.6 KB · Views: 384
Back
Top