Hello Kurtis,
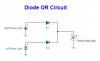
I quick question regarding post #286. The diode that you used for the third/center brake light. Is it needed because the ligh is LED? I'm wiring my tail light circuit now and glad I caught that post. Also do you happen to have a Amazon source. I tried pulling up the part number shown on the diode but no luck on Amazon. Appreciate any help you can offer.
Rob..
")