Roaring Forties 66

The area where the high level brake light mounts is open to the cabin. As I wanted to run a tail / brake combination light, it would reflect back into the cabin constantly at night. Also the narrow section between the rear window and the spider roof line would twist on closing.
I clamped that section at the correct angle and then glassed in a wall to enclose the area.
Bit of glassing to the low lying areas on the door and rear clip.

Clayton
 

Attachments

  • update 31.03.11 001.jpg
    update 31.03.11 001.jpg
    141.7 KB · Views: 370
  • update 05.05.11 003.jpg
    update 05.05.11 003.jpg
    104.9 KB · Views: 331
  • update 31.03.11 007.jpg
    update 31.03.11 007.jpg
    148.8 KB · Views: 340
  • update 05.05.11 008.jpg
    update 05.05.11 008.jpg
    130.1 KB · Views: 370
  • update 31.03.11 013.jpg
    update 31.03.11 013.jpg
    91.7 KB · Views: 379
Back to the front clip.
Made some adjustable pads to hold the rear edge of the clip level with the spider.
Tried to seal the wheel wells a little by glassing some panels above the chassis tubing (aluminium panel to fill in the area below). There will be a rubber seal that clips onto the fibreglass edge.
Side panels added near the latch area to stiffen it up as well as to help seal the door hinge area.

Clayton
 

Attachments

  • update 05.05.11 010.jpg
    update 05.05.11 010.jpg
    67.6 KB · Views: 395
  • update 05.05.11 013.jpg
    update 05.05.11 013.jpg
    107.6 KB · Views: 336
  • update 05.05.11 028.jpg
    update 05.05.11 028.jpg
    147 KB · Views: 363
  • update 05.05.11 030.jpg
    update 05.05.11 030.jpg
    109.7 KB · Views: 388
  • update 05.05.11 014.jpg
    update 05.05.11 014.jpg
    119.2 KB · Views: 449
Last edited:
I wanted extra latches / clips to help secure the rear clip.
Didn't like the race pins or any modern type of latch.
The Falcon XY GT had 1/4 turn clips that came from that era.
Machined up a mould to glass in the receptacles so the clips would sit flush when locked in.

Clayton
 

Attachments

  • update 05.05.11 020.jpg
    update 05.05.11 020.jpg
    149.5 KB · Views: 383
  • update 05.05.11 025.jpg
    update 05.05.11 025.jpg
    146.3 KB · Views: 376
  • update 19.05.11 007.jpg
    update 19.05.11 007.jpg
    95.4 KB · Views: 442
  • update 19.05.11 005.jpg
    update 19.05.11 005.jpg
    87.2 KB · Views: 431
  • update 19.05.11 024.jpg
    update 19.05.11 024.jpg
    121.3 KB · Views: 441
Clayton,
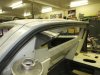
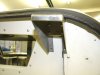
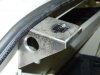
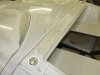
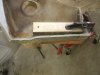
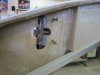
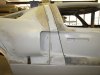
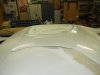
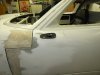
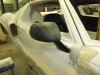
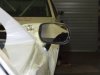
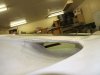
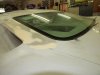
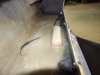
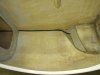
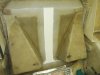
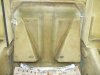
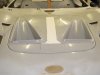
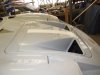
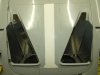
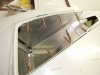
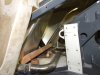
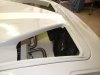
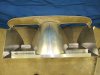
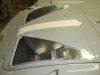
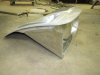
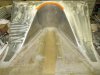
Be aware that it doesn't matter how many or type of securing mechanisms you use. If you forget to latch them it won't change the result(see rookie mistake). the Dzus(?) fasteners are a spring mounted securing mechanism and won't tolerate a lot of stress(how much I don't know), but I use them on areas that are getting a down force from the wind such as the front nostril panel. Then there is no threat of the wind doing any damage. If the rear clip rises up the slightest bit it will be hit with the force of the air moving over it(negative at the rear window) along with the positive force of its face rising above the cabin, and the lifting force will be considerable(again I don't know how much). I use the Aerocatch system which is a pin system but is hidden below the surface. My rational for using them is that 1. if the covers are up in the air, are to alert you that they aren't fastened, and 2. they are lockable to keep prying eyes from taking a peak(it does happen). But as I said in the beginning, if you don't latch them, bad things will happen.
I guess what I am trying to say is that if by chance you latch the Dzus fastener and somehow forget to do the bottom latch, you may be putting yourself at risk when at speed. this from one who knows.
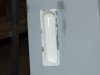
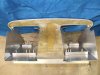
I am not familiar with the latches you are showing so if they can handle the load, then disregard that part of the information.

Bill
 
Thanks Bill
Yep, doesn't matter how many safety systems you have, sometimes the holes in the swiss cheese lines up.......:furious:

The bonnet pins came from a XY Falcon and were designed for that purpose, so I'm pretty happy with their strength.
They are also spring loaded and sit quite high when not latched.

Clayton
 
Made some brackets for the secondary rear clip latches and fitted the ¼ turn clips.

Clayton
 

Attachments

  • update 19.05.11 011.jpg
    update 19.05.11 011.jpg
    132.5 KB · Views: 413
  • update 19.05.11 015.jpg
    update 19.05.11 015.jpg
    98.1 KB · Views: 404
  • update 13.06.11 007.jpg
    update 13.06.11 007.jpg
    135.6 KB · Views: 395
  • update 13.06.11 005.jpg
    update 13.06.11 005.jpg
    95.3 KB · Views: 410
  • update 13.06.11 001.jpg
    update 13.06.11 001.jpg
    91.2 KB · Views: 356
  • Update 18.11.11 008.jpg
    Update 18.11.11 008.jpg
    77.2 KB · Views: 403
With the door seal running down the side of the dash, had to cut some of the side away and re-glass it narrower. Fitted the dash mounts and raised the dash another 6mm (plate under feet). As well as raising the steering column cut out to gain a better steering wheel height.

Clayton
 

Attachments

  • update 13.06.11 017.jpg
    update 13.06.11 017.jpg
    116.8 KB · Views: 392
  • update 13.06.11 024.jpg
    update 13.06.11 024.jpg
    135 KB · Views: 398
  • update 13.06.11 027.jpg
    update 13.06.11 027.jpg
    153.3 KB · Views: 362
  • update 13.06.11 030.jpg
    update 13.06.11 030.jpg
    125.2 KB · Views: 345
Front clip Dzus fastener mounts made.
Headlight mounts made and fitted.
Side cover plates also glassed up.

Clayton
 

Attachments

  • Update 18.11.11 004.jpg
    Update 18.11.11 004.jpg
    83.8 KB · Views: 400
  • 05.12.11 011.jpg
    05.12.11 011.jpg
    77.6 KB · Views: 380
  • 05.12.11 001.jpg
    05.12.11 001.jpg
    130.6 KB · Views: 400
  • 05.12.11 007.jpg
    05.12.11 007.jpg
    112.1 KB · Views: 420
  • 05.12.11 009.jpg
    05.12.11 009.jpg
    118.1 KB · Views: 438
  • 05.12.11 010.jpg
    05.12.11 010.jpg
    121.9 KB · Views: 351
  • Update 18.11.11 002.jpg
    Update 18.11.11 002.jpg
    135 KB · Views: 394
Dash ready to be covered by vacuumed formed vinyl.
Switch panels cut out and aluminium ones made.
Will be using an electric demister which mounts directly under the grill area and feeds into the plenum.
There’s an interior light mounted under the dash as well as the doors.

Clayton
 

Attachments

  • 15.12.11 002.jpg
    15.12.11 002.jpg
    113.9 KB · Views: 341
  • 15.12.11 006.jpg
    15.12.11 006.jpg
    125.6 KB · Views: 339
  • 15.12.11 009.jpg
    15.12.11 009.jpg
    105.7 KB · Views: 310
  • 15.12.11 020.jpg
    15.12.11 020.jpg
    120 KB · Views: 332
More glassing and edge gapping.....

Clayton
 

Attachments

  • 15.12.11 021.jpg
    15.12.11 021.jpg
    97.2 KB · Views: 349
  • 15.12.11 022.jpg
    15.12.11 022.jpg
    106.6 KB · Views: 305
  • 15.12.11 025.jpg
    15.12.11 025.jpg
    79.4 KB · Views: 342
Clayton,
I must say you are using a systematic and well thought out approach to your build and it is looking very nice. I have one suggestion for you. In your post(128) where you added the Dzus fasteners to your front sill. If you plan on ever driving in the rain, you might want to consider adding a lip to the forward edge to control run off to the wheel wells and keep it out of the main cabin area. If you are like me, I don't plan on ever driving in the rain, so no lip for me.

Bill
 
Thanks Bill
Yet again, you're onto it.
It's hard to see from that angle, but if you look at page 5, post 92 & 93.
You'll see the lip that stands around 1/2" and will have pinch weld rubber seal all the way round.
There's also a photo of the lid with sides to cover the seal area.

Clayton
 
Eye brows fitted.
RX7 series 1 electric side mirrors fitted.
Only had to shape the base plate a bit to match the door curve.

Clayton
 

Attachments

  • 16.12.11 002.jpg
    16.12.11 002.jpg
    93.1 KB · Views: 312
  • update 28.12.11 011.jpg
    update 28.12.11 011.jpg
    109.9 KB · Views: 352
  • update 28.12.11 012.jpg
    update 28.12.11 012.jpg
    89.4 KB · Views: 353
  • update 28.12.11 015.jpg
    update 28.12.11 015.jpg
    120 KB · Views: 339
  • update 28.12.11 020.jpg
    update 28.12.11 020.jpg
    90.5 KB · Views: 327
Door pocket covers.
I wanted a radio / stereo without being too obvious.
Speakers will be flush mounted from behind with a black grill to blend with the black vinyl over the cover plates.
Stereo head will be mounted in the back of the pocket and antenna runs inside the front lip of the dash.
Passenger side pocket has iPod cable for the misses....

Clayton
 

Attachments

  • 16.12.11 008.jpg
    16.12.11 008.jpg
    152.1 KB · Views: 341
  • update 28.12.11 003.jpg
    update 28.12.11 003.jpg
    106.8 KB · Views: 355
Glassed in some finger grooves above the door pocket area.
Temp fitted the rear glass and found the L/H side had a large dip in the middle.
Built up the area with glass and it’s now flush with the screen.

Clayton
 

Attachments

  • update 14.01.12 016.jpg
    update 14.01.12 016.jpg
    116.3 KB · Views: 279
  • update 14.01.12 010.jpg
    update 14.01.12 010.jpg
    52.7 KB · Views: 332
  • update 14.01.12 001.jpg
    update 14.01.12 001.jpg
    93.3 KB · Views: 340
  • update 14.01.12 003.jpg
    update 14.01.12 003.jpg
    88.7 KB · Views: 301
Rear clip wheel arch.
Ran the wires for the high mount light which will be glassed in.
Blanked off the void above the air intake duct and glassed them in (to help seal the wheel well to the engine bay and clean up that area).
Extended the forward wheel well panel down below the chassis panel for extra sealing.

Clayton
 

Attachments

  • update 17.01.12 002.jpg
    update 17.01.12 002.jpg
    106.1 KB · Views: 260
  • update 24.01.12 002.jpg
    update 24.01.12 002.jpg
    124 KB · Views: 267
  • update 24.01.12 008.jpg
    update 24.01.12 008.jpg
    120.6 KB · Views: 282
  • update 24.01.12 017.jpg
    update 24.01.12 017.jpg
    128.4 KB · Views: 298
  • update 29.01.12 003.jpg
    update 29.01.12 003.jpg
    106.7 KB · Views: 277
Now for the nostril vent changes.
I wanted the shape of an Mk1, vents spread and a wider section between them (also helps with maintaining more of the stripe).
Cut the vents out and moved them outboard as much as possible, framed it up for glassing in the new centre section.

Clayton
 

Attachments

  • update 22.02.12 002.jpg
    update 22.02.12 002.jpg
    76.6 KB · Views: 301
  • update 22.02.12 005.jpg
    update 22.02.12 005.jpg
    89.8 KB · Views: 276
  • update 22.02.12 026.jpg
    update 22.02.12 026.jpg
    134.9 KB · Views: 307
  • update 22.02.12 028.jpg
    update 22.02.12 028.jpg
    109.7 KB · Views: 315
  • update 22.02.12 032.jpg
    update 22.02.12 032.jpg
    124.9 KB · Views: 291
With all the edges feathered out, laid in some gel coat and finished with glass.

Clayton
 

Attachments

  • update 22.02.12 037.jpg
    update 22.02.12 037.jpg
    116.5 KB · Views: 271
  • update 08.03.12 001.jpg
    update 08.03.12 001.jpg
    147.5 KB · Views: 274
  • update 08.03.12 021.jpg
    update 08.03.12 021.jpg
    155.3 KB · Views: 277
  • update 09.04.12 002.jpg
    update 09.04.12 002.jpg
    83.8 KB · Views: 242
  • update 09.04.12 004.jpg
    update 09.04.12 004.jpg
    118.4 KB · Views: 280
I wanted to deepen the vents to the bottom of the radiator core. Couldn’t use much of the original ducts as the bottoms had a big curve to them. Ended up cutting most of it away.
Started the fun job of making another mould.

Clayton
 

Attachments

  • update 09.04.12 011.jpg
    update 09.04.12 011.jpg
    89.9 KB · Views: 265
  • update 09.04.12 013.jpg
    update 09.04.12 013.jpg
    93.4 KB · Views: 263
  • update 12.04.12 002.jpg
    update 12.04.12 002.jpg
    86.5 KB · Views: 280
  • update 12.04.12 007.jpg
    update 12.04.12 007.jpg
    120.4 KB · Views: 261
  • update 22.04.12 004.jpg
    update 22.04.12 004.jpg
    103.8 KB · Views: 259
Mould finally finished and ready for glass.

Clayton
 

Attachments

  • update 22.04.12 006.jpg
    update 22.04.12 006.jpg
    129.8 KB · Views: 285
  • update 22.04.12 008.jpg
    update 22.04.12 008.jpg
    136.4 KB · Views: 251
  • update 22.04.12 040.jpg
    update 22.04.12 040.jpg
    124.6 KB · Views: 261
  • update 22.04.12 033.jpg
    update 22.04.12 033.jpg
    106.4 KB · Views: 280
  • update 22.04.12 046.jpg
    update 22.04.12 046.jpg
    127.2 KB · Views: 260
  • update 03.05.12 004.jpg
    update 03.05.12 004.jpg
    131.5 KB · Views: 290
Back
Top