Seattle Active Power GT40 - A Father/Son build

While I ended up working a handful of days over the Christmas/New Years holiday, I still managed to get some solid hours in the garage!

Firsts...inlcuding moving under it's own power. The Seattle rain briefly stopped, and while it was 40F & roads were wet, that didn't stop us!
-long engine idle
-confirmed cooling system kicks on fans & maintains temps @210F
-confirmed Alt works
-clutch works (after lots of adjustment!)
-1st, 2nd and reverse gears work
-brakes & steering works
20200104_161109.jpg


Shifter's installed. The main shifter does N-1-2-3-4-5 sequentially, the side one does reverse.
20191229_104516.jpg


Brake union...it kept leaking; once I removed it, I could see it was grooved. Replaced with a new one and the leak stopped!
20191229_205525.jpg


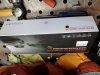
FedEx, UPS, Amazon...to many packages to build a car!
20191230_150126.jpg


first long engine idle run...my ~1,300CFM garage fan did a descent job at removing the exhaust.
20200102_162526.jpg


Rear Inboard suspenion coming along...final pushrod & crank. Mocking up the rear shock towers via CAD (Cardboard Aided Design); plan to make it from 1/4" plate, and cut out some lighting holes...
20200102_184440.jpg


Dash: It's not perfect, but good enough to get the car on the road. During the 1st drive I had the wires fixed w/ wire nuts, and the starter wire was loose...I stalled the engine, and end up having to jump out to re-start...figured it was time to have a real dash that I could start the car from ;)
20200110_185254.jpg


New Dash wired up...and quick test to confirm I didn't mess anything up.
20200111_215101.jpg


close up...
20200111_215107.jpg


Video of engine idling...finally a smooth idle, no backfiring. With the rear off the ground, I got it into 1st, 2nd and reverse. Also confirmed cooling system could maintain 210F
 
Love that my girls always ask to help in the garage...I try to keep a few projects ready for them.
20191226_103502.jpg


I ended up changing the intake manifold as that was giving me idle issues & backfiring...I just needed something simple so that I can get this driving. With the intake off, I decided to open the wire harness and re-route everything...the OEM harness routes evertyhing on the back of the engine, which would normally be next to the firewall; but for a GT40, it's right next to the exhaust. I had double insulated everything...but I was worried that wasn't enough.
20191226_122437.jpg


Even my wife joined in the fun...she was helping me bleed the brakes & Clutch!
20200102_195944.jpg
 
Just 'found' your build thread, some nice previous project choices and it continues on this car as well. Nice to see an Active car out here, look forward to watching the progress from this point. Way cool to have female family involved, great to see them out there with you, that rocks.

As I see so many great self-built cars here on the left coast it gets me wondering - is there an event that peeps like us already congregate? Or should we start one ?!
 
As I see so many great self-built cars here on the left coast it gets me wondering - is there an event that peeps like us already congregate? Or should we start one ?!

I haven't heard of any...but I would join if there was one! I always learn something when a fellow builder stops by, or I get a chance to check out someone else's build.
 

Chris Kouba

Supporter
I've virtually "met" some fantastic people around the world through this forum, and actually shook hands with several who reside here in the NW. Would definitely welcome the opportunity to grow the circle. Some time this summer perhaps?
 
On the sequential gearbox, did you find acceptable gear ratios from Mendeola. I had looked at them in the past but (at the time) felt the ratios available were too short for street use. Interested in what you found and how it applied in regards to your use parameters.
 
On the sequential gearbox, did you find acceptable gear ratios from Mendeola. I had looked at them in the past but (at the time) felt the ratios available were too short for street use. Interested in what you found and how it applied in regards to your use parameters.

We got the ratios we wanted...now whether or not they are "correct" will be seen in the coming months. I will say that Mendeola was great help with all of this...we came in with a pretty good idea of what we wanted, and they helped recommend the final details.

-1st -5th gear ratios: 2.57, 1.71, 1.19, .90, .70H
note: 5th is Helical cut gear for street use (quieter for freeway cruising)
-3.56 final drive
-We also were consicous to choose 5th gear to allow 200MPH with a taller tire...at some point we wanted to make the salt flats.

Gear Ratio to MPH.PNG


For Comparison, a C5 Z06 is:
1st Gear..... 48 mph
2nd Gear.... 69 mph
3rd Gear....100 mph
4th Gear....148 mph
5th Gear....178 mph
6th Gear....Doesn't readline, aero/power limited
 

Neil

Supporter
Peter, if you plan to take your car to Bonneville, get the latest SCTA rule book. You will be classified as "Modified Sports".
 
It's been awhile since my last update...

Working on the Rear Clamshell: the exhaust is very tight, I had previously hacked it apart just enough to make things clear...knowing that I would come back later to clean everything up.
20200301_144949.jpg


Opening up the air vents...
20200303_204037.jpg


Once I cleaned up the areas around the exhaust, I added an Aluminum heat sheild so that it cover the exhaust...with a plexiglass rear window, I was worried it would melt.
20200316_202646.jpg


20200301_144949.jpg
20200303_204037.jpg
20200316_202646.jpg


Getting ready to start cutting...I try to save all my FG cutting/sanding for 1 time, and then use my big exhaust fan to help reduce dust.
20200317_094911.jpg


Underside of the Rear Body: previously I had FG'd in thin wood strips, knowing that I would want to add a heatsheild. I got this thin sheetmetal heatsheild that worked out well.
20200319_100921.jpg


just about done...easy to cut, and used some wood blocks to help form it around all the bends/edges. You can also see the early stages of my new inner fenders; previously this area was open, so the tires would be throwing dirt/water into the engine bay, and I have the ECU right in front of the passenger wheel.
20200319_181348.jpg


My finished rear inner fenders...
20200320_201232.jpg


Working the Al panel that mounts above the exhaust
20200322_181717.jpg


Once it was all fitted, took off the protective masking tape, and my little helper jumped in to do the Clecos!
20200322_182810.jpg


finished
20200322_214516.jpg
 
Peter, have a look at my heat shields, post # 146 I think.
nicely done, I like how you hid the mounting on the underside! I did an extended engine run to have everything heat up (only idle, but w/ no cooling air flow) and was pleased that the fiberglass body was warm, but nothing concerning. On a lotus 7 build, I had a turbo fairly close to my hood, which was thin FG, and it nearly melted it...but that was before adding any insulation.
 
a few more updates...finalizing the exhaust to add inline valves and tips to accommodate the rear body. Overall I'm pleased how this came out...if I would've thought ahead, I should've done this out of SS, as I tried to sand the tips post-welding and nothing was working, so I ended up spraying them silver.

It takes a lot more time trying to keep both sides symetrical...I miss just having 1 muffler on other cars!
20200321_155628.jpg


Exhaust valves in place, and a small curve to get the tips to clear the central exit in the body.
20200321_173608.jpg


a quick silver high heat paint to clean things up.
20200322_085303.jpg


My exhaust valves. These were supposed to be bypass style, but i couldn't find a way to fit any more exhaust tubing/mufflers in the back of this; so I opted to drill a surface area equivalent to 1" Dia for each side. I just went for a road test and it works reasonably well...it's still loud, but it really takes much of the deep tone out. I only plan to use this when I'm leaving my neighborhood, as I live in a quiet suburbia packed with houses.
20200322_095830.jpg


My little helper tightening everything up.
20200322_100910.jpg


Finished product
20200322_143735.jpg


This time w/ the rear body in place. the tips just barely poke through, and when the hood is up, it's descently pointed at the same hole with enough space/insulation, that it won't overheat things.
20200322_144423.jpg
 
Really nice work. An LS GT40 provides cover to work outside the box. Shock pivot and exhaust designs are wonderful. Take care up there in Seattle.
 
Next set of updates....


Installed the Gear Indicator gauge: fairly simple, and works perfectly.
20200326_142733.jpg


Alongwith the gauge, I had to install the position sensor that bolts onto the back of the Mendeola Sequential.
20200326_115616.jpg


Like most of you, rear visibility isn't great...so I wanted a combo Mirror & Camera set-up,...the problem was that most mirrors are designed to mount to your original mirror w/ rubber straps. I found this one on Amazon, and it's perfect. When it's not on, I could easily see behind me (a little dark them a normal mirror), and the wide-angle/screen, makes the camera work well too; I'll likely position the rear camera tilted farther down to aid in parking.
20200328_132639.jpg


Took the top off, and welded some simple tabs to the upper cage.
20200328_145315.jpg


Made a quick mounting tab to screw into the back of the mirror, that I could then weld my mounts to. I had orginally thought I would just attach it to my front windsheild, but wanted to tuck it farther up to improve forward vision.
20200328_132627.jpg


Rear veiw camera on. Both the mirror and camera have the protective plastic still on, and even then it's a clear pictures...the glare from the garage isn't apparent, only when taking a picture of it.
20200328_222707.jpg


Mount for the mirror....I smoothed it out and painted black.
20200328_222929.jpg


Rear Camera tucked close to the spoiler
20200328_223614.jpg
20200328_223620.jpg
 

Attachments

  • 20200328_132639.jpg
    20200328_132639.jpg
    389.3 KB · Views: 451
Peter, please tell us the exact model name of the mirror and camera. I wasn't sure of the brand and extra components you bought.

Bob Woods
Tornado GT40 in Texas

1) Mirror/Camera: "NikoMaku Mirror Dash Cam Front and Rear Backup Camera 12 Inch Screen for Cars GPS 2K Resolution Full Touch Screen Rear View Mirror Camera 170° Wide Angle Dual Lenses Waterproof AS-3 Pro Max " $150
link: https://www.amazon.com/gp/product/B081ZVH35J/ref=ppx_yo_dt_b_asin_title_o04_s01?ie=UTF8&psc=1

2) Power (the mirror only comes w/ a cigarette lighter): "Dash Cam Hardwire Kit, Mini USB Hard Wire Kit Fuse for Dashcam, Plozoe 12V-30V to 5V Car Dash Camera Charger Power Cord, Gift 4 Fuse Tap Cable and Installation Tool(11.5ft) "
link: https://www.amazon.com/gp/product/B07FXJD8W1/ref=ppx_yo_dt_b_asin_title_o04_s01?ie=UTF8&psc=1

I couldn't find too many reviews on it, but overall I'm happy. I'm building this as a 75% race car, so I'm focused on functionality rather than trying to get the latest super-HD monitor; and with that, it's still better than my BMW's reverse camera/display.
 
final update that gets me to today:

between the exhaust, rear inner fenders, heat sheilds, and new latches, I've needed to get the rear clamshell on/off multiple times, and my wife had a hard time getting a firm grip...so I added a few more ceiling anchor points; it takes more time than when I have a freind over, but I can get it off and hoisted up to the ceiling in about 5 minutes (Ialso have straps that go around the rear fenders to make it level).

20200321_130922.jpg


Hoping it's not used...but especially early on, I want to have an easy tow spot in case anything happens. The front doesn't have much structures, as the Radiator supports are fairly thin Aluminum. I Cross braced the foot box area where this tow hook is, so I figure that also helps if I ever got into a really nasty front end hit. I debated making this a quick release type so that it's not always stick through the hood...but with track days, they're in a hurry to help get you off, so I wanted it fixed and always available.
20200322_143721.jpg


The sun peaked out, and so did I. What better way to ensure social distancing than a loud 427! This was my longest drive yet...still only a few miles around my house; next step is lights, then registration...then I can go out farther.
20200329_121358.jpg


it's still easier to winch it back onto the lift...plus I haven't run power to my new mirror.
20200329_121609.jpg


I have a short safety check list, the side mirrow was not on it.
20200329_122542.jpg


I made a under-panel for the radiator mounts so that it's boxed in (helped a lot to stabalize the front end, which would sway side to side). This was my final touch, adding a rubber bulb seal that compresses under the radiator to help promote cooling. There's still a lot of other open areas that I need to tackle...
20200329_130512.jpg


installed and firm against the radiator. So far I have plenty of cooling, when the fans kick on, it keeps temps right at 210F...but Seattle temps are still in the 50/60s.
20200329_143412.jpg
 
been focusing on making the car street legal...so progress on the headlights:
Overall I'm very happy with how these turned out. it's exactly what I had envisioned (yay - I built something I intended)...even though I'm still not entirely convinced I like my vision yet. I didn't like the original style headlights, especially as they're not as useful when compared to modern projectors...but I'm not sure if these match the rest of the car.

Got some neat LED blinkers that are also running lights. White for the running lights
20200408_193616.jpg


and yellow for the blinkers
20200408_193639.jpg


painted the headlight buckets a black w/ texture...wasn't trying to do the final job, just getting the look/feel for now...once I'm ready for paint, this will all come apart and be redone.
20200412_151749.jpg


rivets galor...more than what more others do, but I was struggling to get the edges that fold around the curve to stay down w/ less rivets, so I deceased the spacing.
20200412_193358.jpg


small youtube trick to prevent the end of the drill bit from scoring the plexi.
20200412_202220.jpg


headlights: backing plate that I made (mounts the headlight to the body, and allows for adjustment), LED projectors, and surrounds which hide all the mounting hardware.
20200412_205518.jpg


Back side of the headlights
20200412_205725.jpg


headlights installed, but w/o surrounds
20200412_205800.jpg


surrounds installed
20200412_211647.jpg


final product
20200418_221211.jpg
 
I also made some dust covers for the back of the headlights to protect them from debris/dirt that's going to come off the front wheels.

got to use my new brake to fold some boxs. Used a left over kitchen exhaust hood cover that was left over from several years ago...it's a nice SS w/ plastic protective cover that I had been saving.
20200414_095511.jpg


sprayed a protective covering...this turned out great. primarily looking for something that would blend in, and hide all the debris/dirt/scratches that these will see.
20200414_193028.jpg


installed: the LED Projectors came w/ the rear mount which is intended more normal headlights...but these were a perfect way to mount the coverings.
20200415_092451.jpg
 
taillights up next...


I had some older style taillights that didn't fit too well...so I opted for some cheap LED round lights.
20200403_163730.jpg


I pictures of the lights looked far better...these looked kinda cheap chrome plastic, so I tinted them. The small curve needed some heat to help the tint conform, but overall not too hard.
20200403_193852.jpg


finished the 1...looks far better than this picture due to the glare/reflection.
20200405_162426.jpg


installed:
20200405_164040.jpg
 
Back
Top