Southern GT #70

Davidmgbv8

Supporter
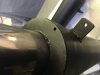
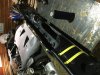
Doing little projects when time permits. welded O2 bung in the muffler. When I made the hole I noticed that there is no packing. Contacted Mick and the muffler end knocks off. out slips perforated inners and you can begin wrapping. Well if the scream test through the muffler is any indication, I am happy I did this before the first start up!
mufflerO2.JPG
muffler pakc stainless.JPG
muffler-pack-jpg.120691
 

Attachments

  • muffler pack.JPG
    muffler pack.JPG
    411.2 KB · Views: 1,346

Davidmgbv8

Supporter
Picked up the exhaust today from the coaters, Polydyne of Houston TX.
Nice even finish, I unwrapped the collectors/mufflers, stuffed the innards, took the tips to the kitchen sink and sanded from 400-1500 grit for a nice tip finish, which I should have done before coating. My son asked why not polish to a mirror shine? I said because the wheel outer lip is brushed so I want a similar finish as to not tart the girl up…. Thank goodness he has been raised around British cars and know what “tarted up” means!
B0743DAF-A4F5-4B12-9F6A-21F7861ECC62.jpeg
069F0702-5D9B-4E9C-AA0F-4C6B8C26CF0E.jpeg
6B9C7C21-8033-437D-B693-400460F3435B.jpeg
 

Davidmgbv8

Supporter
I drilled a water weep hole at the bottom of each muffler flange prior to coating to keep the tin worm incheck
 

Attachments

  • 692AEA99-A2BE-4B72-AE7C-B73C97C7ED33.jpeg
    692AEA99-A2BE-4B72-AE7C-B73C97C7ED33.jpeg
    221.9 KB · Views: 155

Davidmgbv8

Supporter
While the trolleys were drying decided to tackle my warped dash. It cam this way new as when Bill made the moulds it was from a 25-30 yr old GT40 that had seen a fair bit of sun. As a result it was sunk from the right side of the tach to the ammeter. So I cut it from the parting line and with the help of a heat gun door wedge sims, boxes of nails, I am on the way to a straight dash. When finished I will need to find a way to reinforce so the sun does not make it happen again if I ever get a windshield!
EC5C3741-962B-45A2-AD62-B6010070B9F6.jpeg
 

Attachments

  • 5BB9941D-C2E8-4B65-B5B7-86EB80A6B171.jpeg
    5BB9941D-C2E8-4B65-B5B7-86EB80A6B171.jpeg
    402.5 KB · Views: 139

Ian Anderson

Lifetime Supporter
Looks good David, it will save your back a load of grief.
Question though, how will you get it back down after numerous pounds of additional weight have been added?

Ian
 

Davidmgbv8

Supporter
Exactly, hoists that is how we got it on there, bedsides this is mock up, got to build a front end fit and weld, figure if I want to enlarge the center tunnel or run a cap on it for additional plumbing., move steering support, and a few other items
 

Davidmgbv8

Supporter
Frustrating weekend trying to build the front structure to hold the radiator and front end, I am close but I really need a surface table! The front clam does not want to sit symmetrical on the frame, time to cut the tacks apart and try again!
45B58FA5-2DAE-490D-BD9C-B292CEBEC9F0.jpeg
 

Davidmgbv8

Supporter
Well i cut a bunch of tacks and almost starting again because the front end just was not square. Going to try a different approach after I get some work work done.
 

Paul T.

Supporter
Built my front support structure square to the chassis and then had to make it crooked to fit the front clip and have it line up with the spider and doors
 

Davidmgbv8

Supporter
Got my water jet guy to modify the front clip bracket design so I could bend it easier. Today I picked the up, bent the tabs tacked it together, put it on the clip. Next drilled the tubes, put the bobbins in and slid on the front clam. Couple of adjustments and I was centered on the front suspension and the arch centerline. Now to put this away for a couple of months so I can finish a ‘52 TD and send to its owner!
A19A6DC0-AF92-449F-983E-71D9E70547F3.jpeg
FEB3B2D4-7551-42A9-BEA6-242CEBDFDAD1.jpeg
B82D674E-8AD8-4CA1-981C-407F6CE36B57.jpeg
 
Back
Top