Dimi Terleckyj
Lifetime Supporter
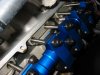
Provided the head gasket and inlet gasket is intact the only way excess oil can enter the cylinder is either up past the rings or down via the valve stems.
In a new engine the piston rings and oil control rings shouldn't be the likely cause unless one was damaged during installation by the engine builder.
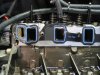
The valve stem seals are usually a metal collar with the rubber seal vulcanised onto the metal collar.
They normally dont split but can be damaged by not seating them squarely when installing.
The other problem with valve stem seals is they dont always remain down over the top of the valve guides and can float up and down on the valve shaft as the valve moves which can appear they are seated but while they are up will allow oil down into the cylinder.
Either way the only way to confirm is to pull the head and remove and replace the seal.
Dimi
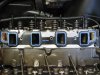
In a new engine the piston rings and oil control rings shouldn't be the likely cause unless one was damaged during installation by the engine builder.
The valve stem seals are usually a metal collar with the rubber seal vulcanised onto the metal collar.
They normally dont split but can be damaged by not seating them squarely when installing.
The other problem with valve stem seals is they dont always remain down over the top of the valve guides and can float up and down on the valve shaft as the valve moves which can appear they are seated but while they are up will allow oil down into the cylinder.
Either way the only way to confirm is to pull the head and remove and replace the seal.
Dimi