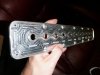
J. Salmon RCR-40 Build

Starter lead

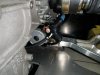
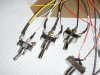
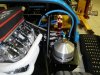
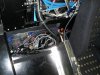
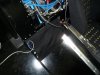
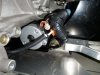
Sorry, but I didn't spend much time trying to source the Ford plug, since it is several hundred bucks. A standard blade connector fits. Then I filled it with silicone (a bit sloppily, actually) and pushed in the loom. Getting it back off may turn out to be interesting, so lets hope it will be some time before I need to.
 

Attachments

  • Starter lead 1.jpg
    Starter lead 1.jpg
    43.2 KB · Views: 533
  • Starter lead 2.jpg
    Starter lead 2.jpg
    46.9 KB · Views: 505
  • Starter lead 3.jpg
    Starter lead 3.jpg
    45.2 KB · Views: 493
Throttle cable adjustment

The Kinsler "swing set" is a nice bit. I spent a long time measuring the throw of the cable before I set the stops on the pedal box in the hopes I would not have to pull the box to adjust it. Thankfully, I seem to have gotten it right.

Each throttle butterfly set is on a rod that has its own stops that are set at Kinsler. There is a central stop on the swingset that acts as a safety and keeps you from over twisting the butterfly rods. So, you set it so the pedal hits its stop, and at that point, the safety on the swingset is just s smidge from it's stop. And when the swingset does hit its stop, there is a smidge of movement on the rods. As you can see, I now have full throttle range, and the pedal box limits travel.
 

Attachments

  • Throttle closed.jpg
    Throttle closed.jpg
    54.4 KB · Views: 527
  • Throttle open.jpg
    Throttle open.jpg
    52.6 KB · Views: 437
Finishing the switch harness

Since I had tested the switches and everything works, I pulled the dash, pulled the harness, tested it again (which was good because I did find a little issue that I fixed) and made sure everything was just so.

I soldered all the ring terminals. I also used a product called "Liquid electrical tape" that I got from the local hardware store. I put it on the screw threads to help keep things from loosening over time.
 

Attachments

  • Finished switch harness.jpg
    Finished switch harness.jpg
    51.3 KB · Views: 466
PCV catch can

Added a PCV catch can from these folks:

PVC Oil Catch Can

Also had an idea for bundling my ECU wires. I put some heat shield underneath everything (both sides of the panels) and had a friend sew me a nice alcantara-like cover that velcros down. Once it's behind the seat, it's nicely contained and looks clean.

As I mentioned, the whole drivetrain choice hinged on the Ricardo being worth the effort. I am happy to say it is. The clutch and gear shifter are like butter.
 

Attachments

  • PCV catch can.jpg
    PCV catch can.jpg
    56.7 KB · Views: 659
  • Shifter1.jpg
    Shifter1.jpg
    47.4 KB · Views: 648
  • Shifter2.jpg
    Shifter2.jpg
    36.6 KB · Views: 553
  • ECU bundle 1.jpg
    ECU bundle 1.jpg
    53.1 KB · Views: 589
  • ECU cover.jpg
    ECU cover.jpg
    39.6 KB · Views: 530
Another try...

Now that it runs and all the wiring is done, I took it back to VIR for the bodywork, carpet, and final suspension setup. Fingers crossed....
 

Attachments

  • Ready for bodywork.jpg
    Ready for bodywork.jpg
    53.7 KB · Views: 869
  • Ready for bodywork2.jpg
    Ready for bodywork2.jpg
    53.9 KB · Views: 2,183
Re: PCV catch can

Also had an idea for bundling my ECU wires. I put some heat shield underneath everything (both sides of the panels) and had a friend sew me a nice alcantara-like cover that velcros down. Once it's behind the seat, it's nicely contained and looks clean.

NIce idea; wonder if it could creat any temperature related issues ?

TOM
 
Re: PCV catch can

NIce idea; wonder if it could creat any temperature related issues ?

TOM
I thought about that Tom, and that's why I put the heat shielding under it. There is no heat shield in the cover, it is just two layers of fabric (it's faux alcantara, which is like a fake of a fake). It's also wide open on each end, so it will have just about as much air flow as it would with the seat in place. But it looks much better, there aren't wires spilling all over the place, and you can still quickly get to anything you need to get to.

I also left the serial to USB plug attached, because I see no better place to store it. So the laptop can be plugged in quickly.
 
Update - Suspension is completed and aligned. The car is being loaded to go to have final body work completed (latches installed, dash finished, etc). Entering the final stretch, I hope.

I think all I need now is the rear glass.
 
Jay,
Have looked back through your postings, and I was wondering how you sourced your air cleaners? Are they your design or are they made specifically for your Kinslers? I am currently working on building a Lexan setup that will work with my TWM setup. Liking to tinker, the build of it has its inherent problems. I like the way you have them set up.

Bill
 
Bill,
the air filters were setup by Kinsler. They took some special ITG filters and machined the plates to mount them using dimensions that Fran provided. They JUST fit. Not much view out the mirror :)
-J.
 
Jonathan, I don't remember exactly. I remember the rears are 335s and they are an OEM Viper size. I can't remember what the fronts are.

Thank you. I hope to get a GT40 as nice as yours on the road in the near future.
 

Randy V

Moderator-Admin
Staff member
Admin
Lifetime Supporter
Nice switch panel! :thumbsup:

I wonder if they want to make more?
 
Back
Top