Look at the front of mine AJ, the bar is mounted higher than your actuator. Not sure if it is an offering from Fran or custom made, but it is an option.

- Forums
- GT40 Replica Manufacturers' Corner
- RCR Forum - RCR40/SLC/917/Superlite Aero
- The SLC Clubhouse
You are using an out of date browser. It may not display this or other websites correctly.
You should upgrade or use an alternative browser.
You should upgrade or use an alternative browser.
A.J.'s SL-C build thread
- Thread starter Pow3r
- Start date
A 3 position momentary rocker should work to operate. Like push up extends, push down retracts, middle is "off". Just don't know what would happen when you hit max piston travel. Try it and find out.")
One of these should do the trick, even has the arrows on it.
[ame=http://www.amazon.com/Wiring-Switch-Relay-Linear-Actuators/dp/B00LON21DQ/ref=pd_sim_86_5?ie=UTF8&refRID=09J2H64NFM7VYR9X7E2K]Amazon.com: Wiring, Switch & Relay Kit for Linear Actuators: Automotive[/ame]
One of these should do the trick, even has the arrows on it.
Amazon.com: Wiring, Switch & Relay Kit for Linear Actuators: Automotive
These work fine. You don't even need a relay if the switch is rated for the LA current. I'm using just a regular DPDT switch without a relay to control the LA on my electric parking brake. Tests have shown that the LA just stalls out at the end of it's travel (or it has internal limit switches, I'm not sure).
But a simple DPDT switch that is rated for the current that the LA consumes is all you need. In fact, that is the approach that the lift kit uses that most SLCs use.
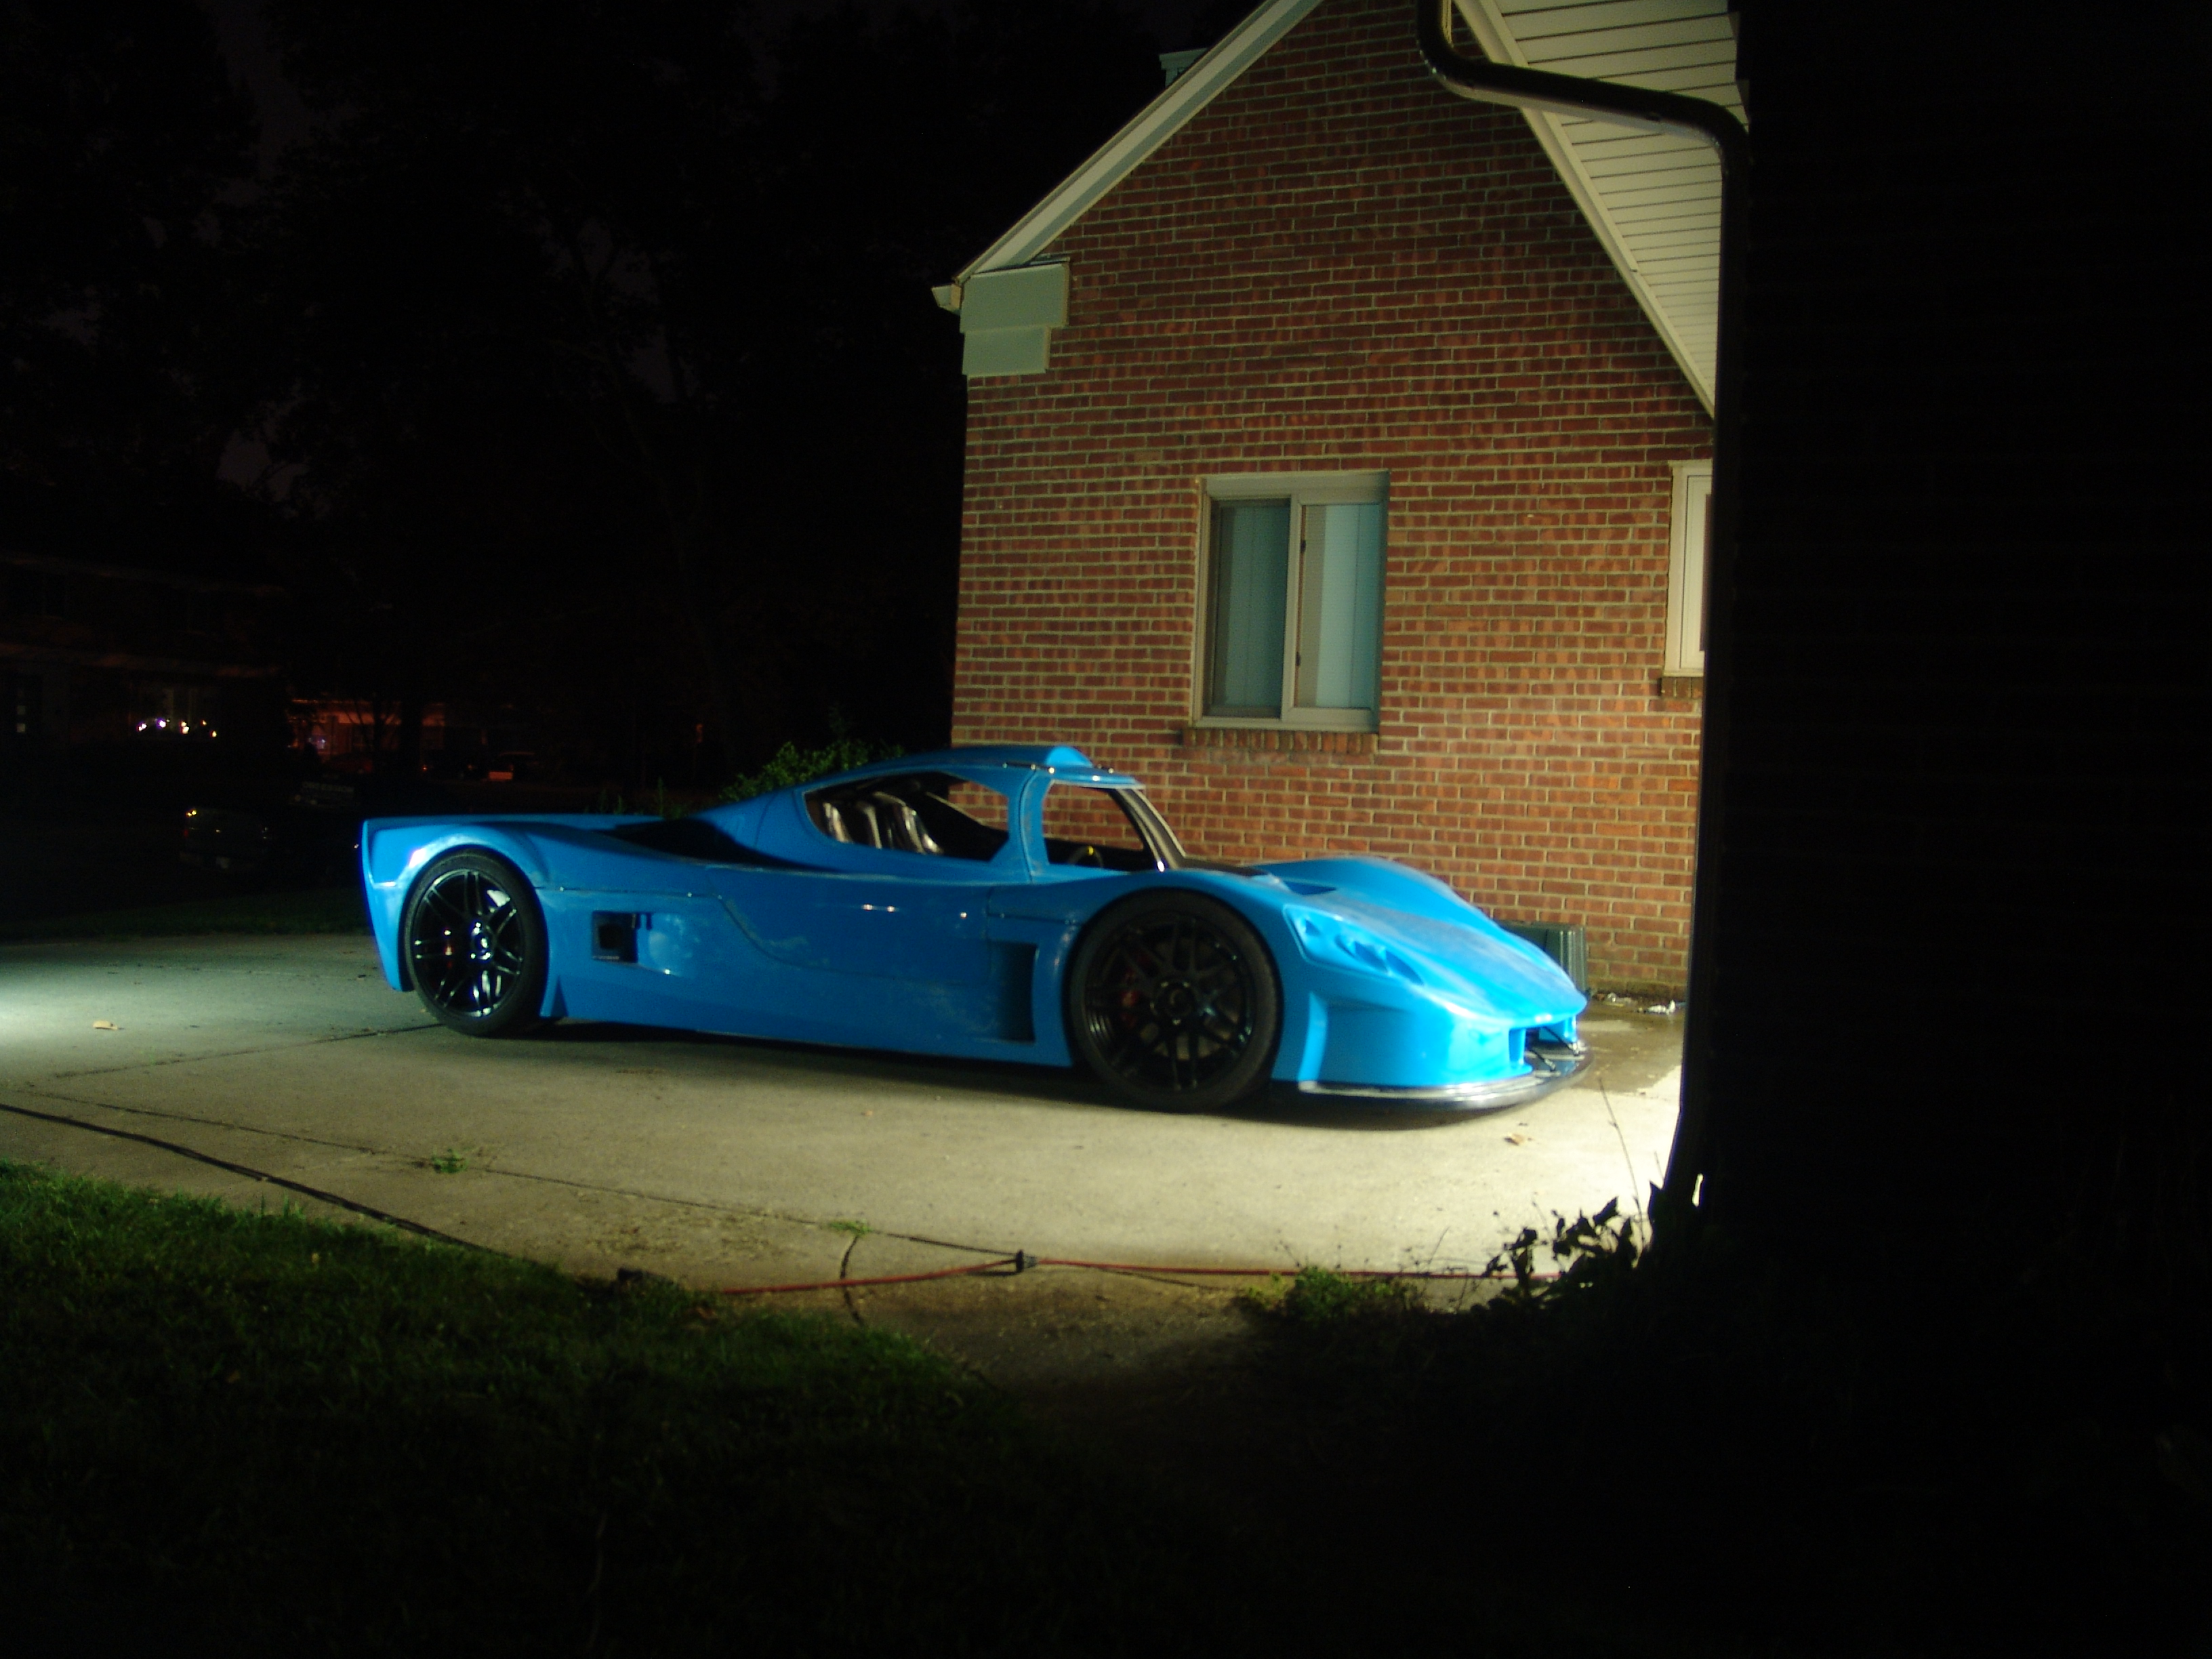
A little camera fun last night
I spent a lot of time getting the door fits just right. I had to relocate of the ball studs on my lower hinge mod because the location was too far aft. The left side door hinge operation was flawlwss, and it turns out location of the ball stud on the left side was much farther forward. I moved the right side forward to match. Problem solved.
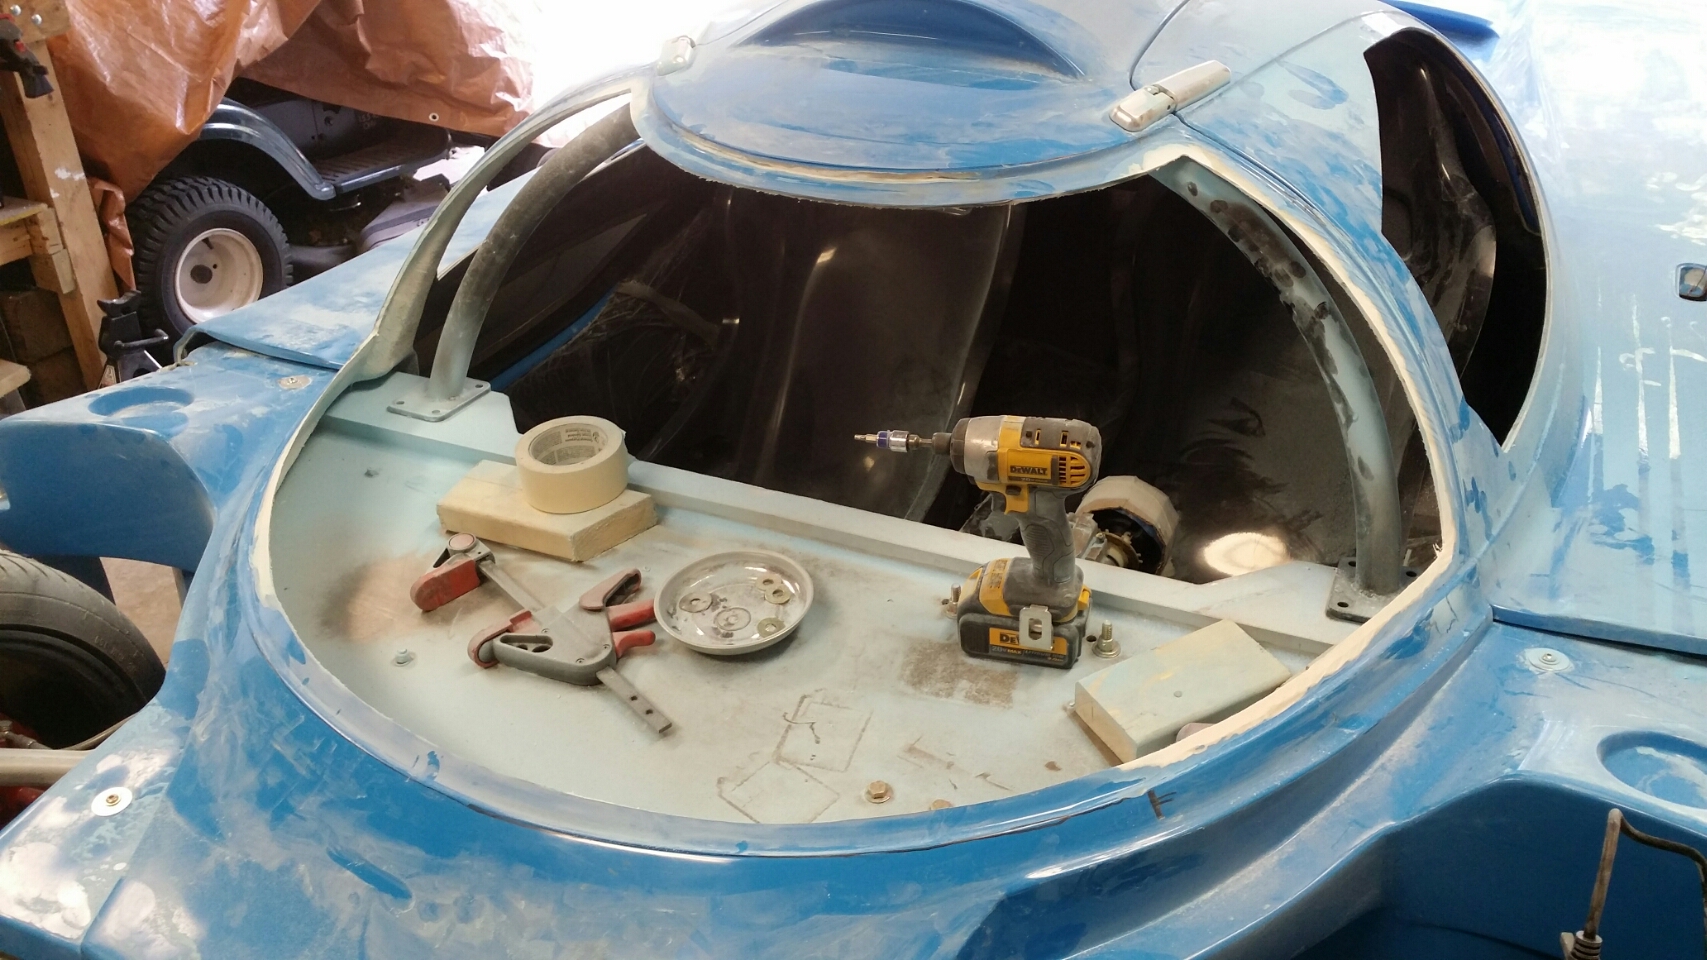
Next I did a test fit of the windshield. Wasn't pretty. Long story short I realized the body was not matching the glass. A portion of it was the windshield flanges were too long. They were intentionally left this way for strength. So it was time to cut them to size. But the windshield was much wider than the car. And I haven't done anything to the body to fit the doors or hood. Pretty much tweaked it for the tire flushness but it's not under stress. Well, to get the body to fit the glass I had to spread the body. I used a pipe clamp then screwed the body into position to hold it.
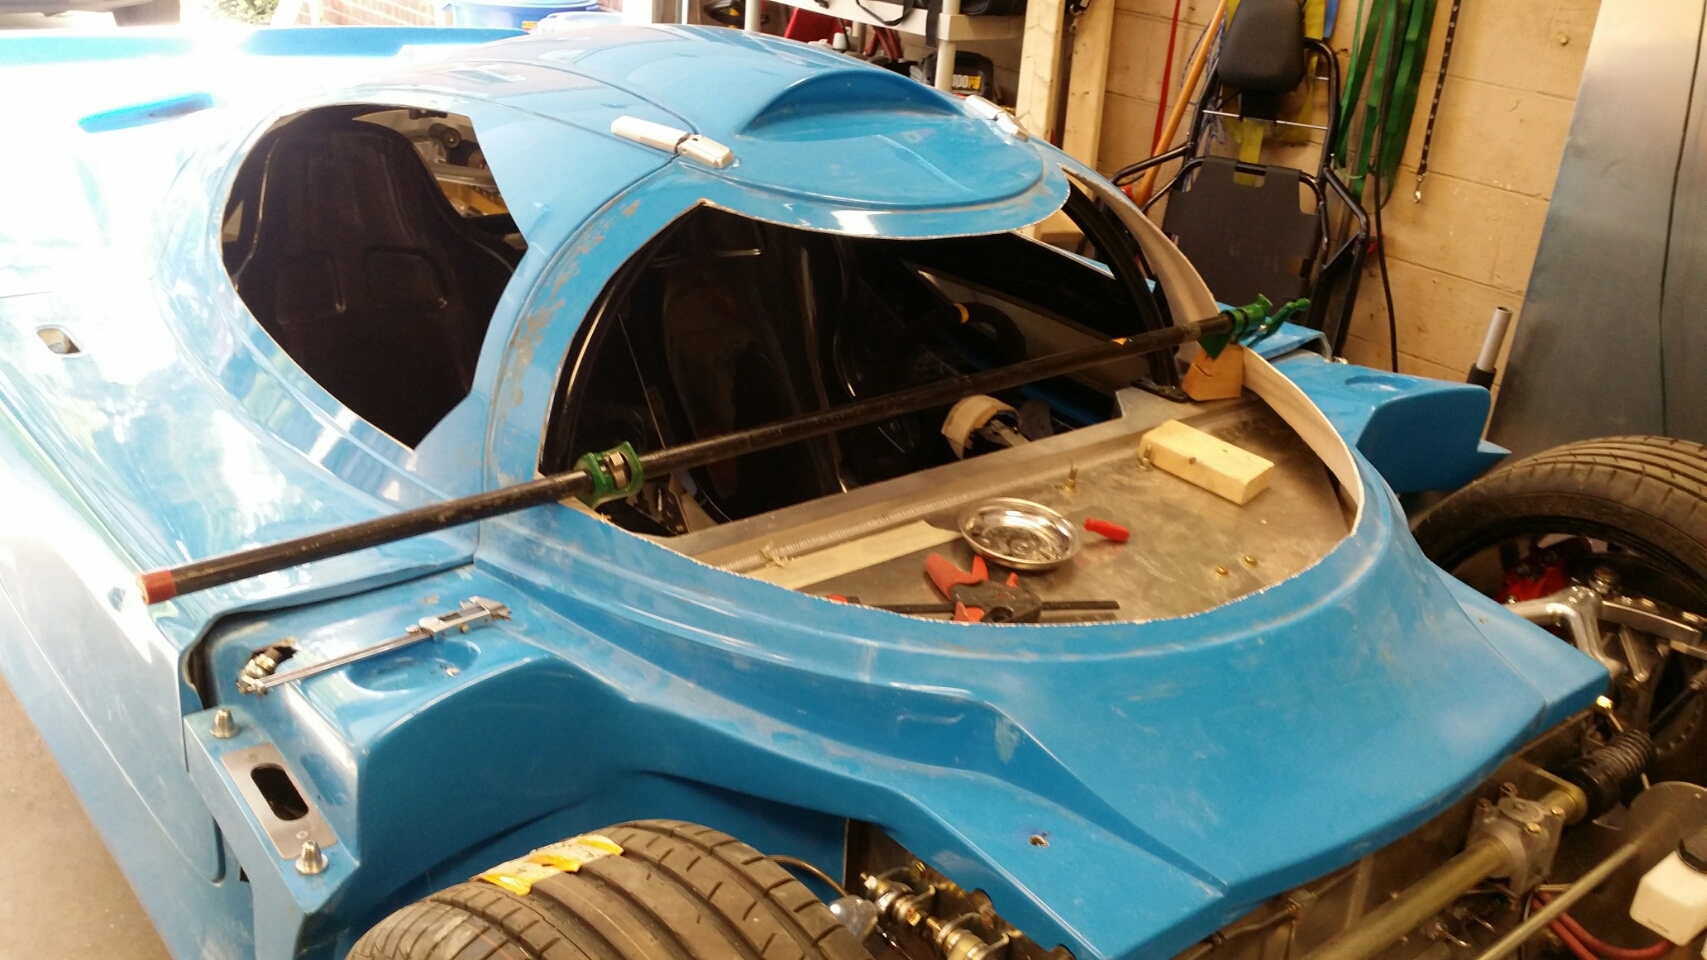
I had to move the existing holes a bit. But this illustrates how much movement I got. Right side had the same movement.
The glass was good to the A post, but now it wouldn't set down properly in the front. So I marked where it was hitting and ground the flanges
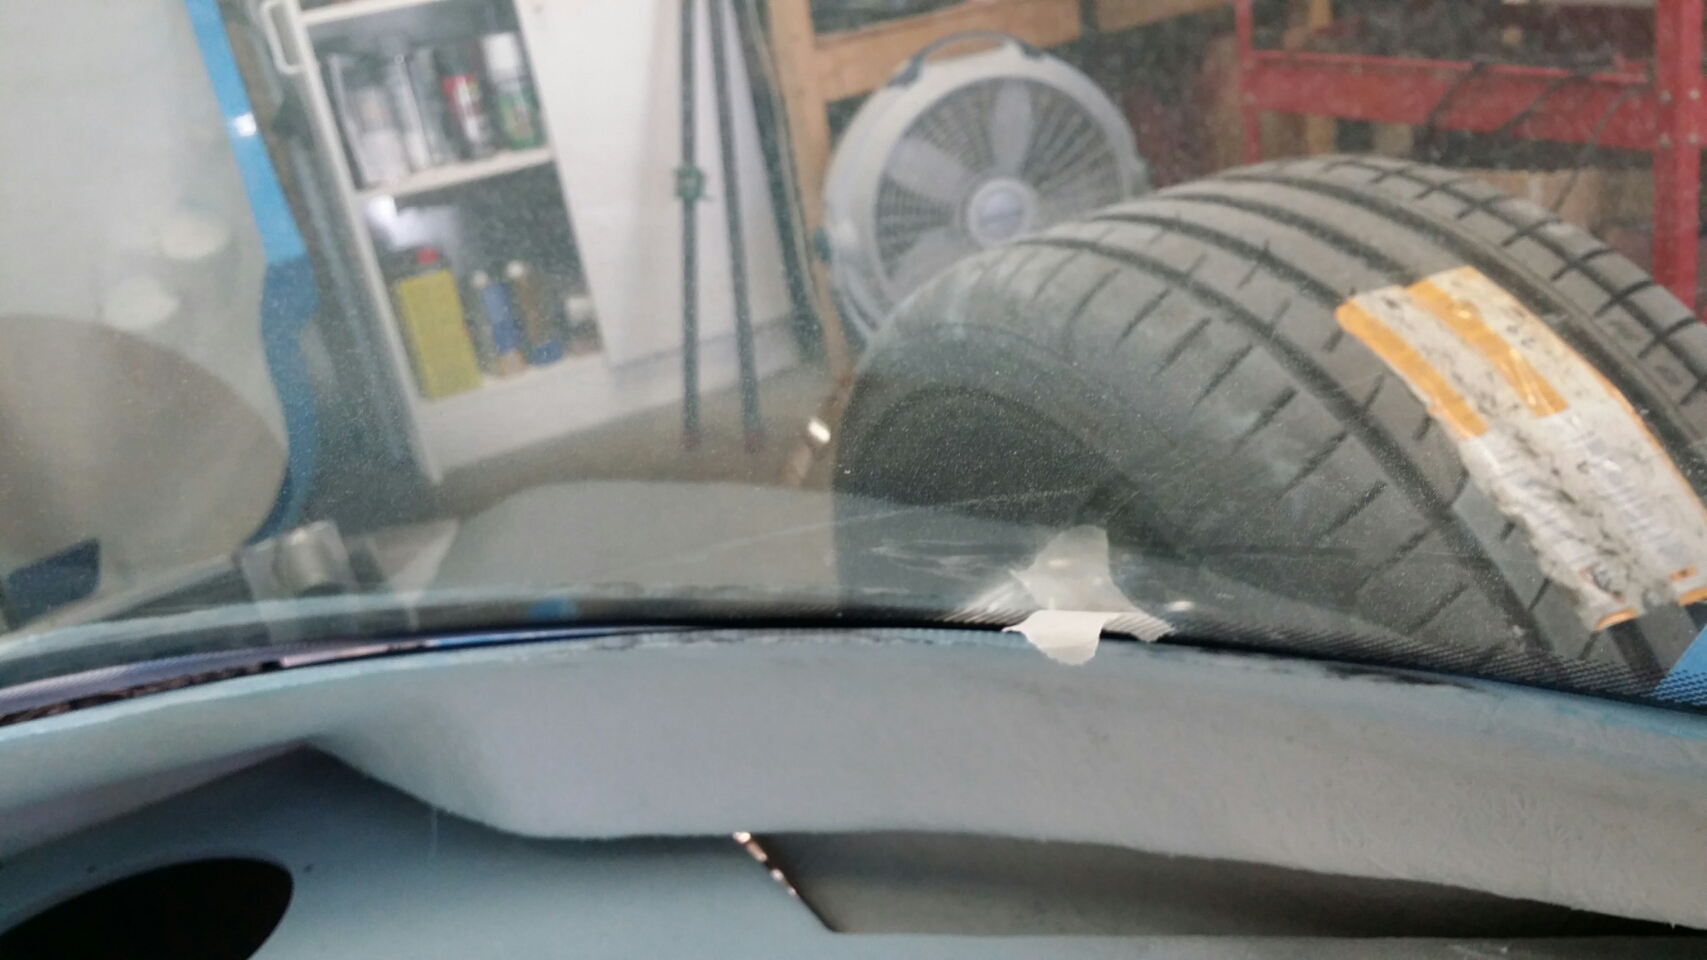
After all that, the glass fits like a glove. It's just sitting loosely in place:
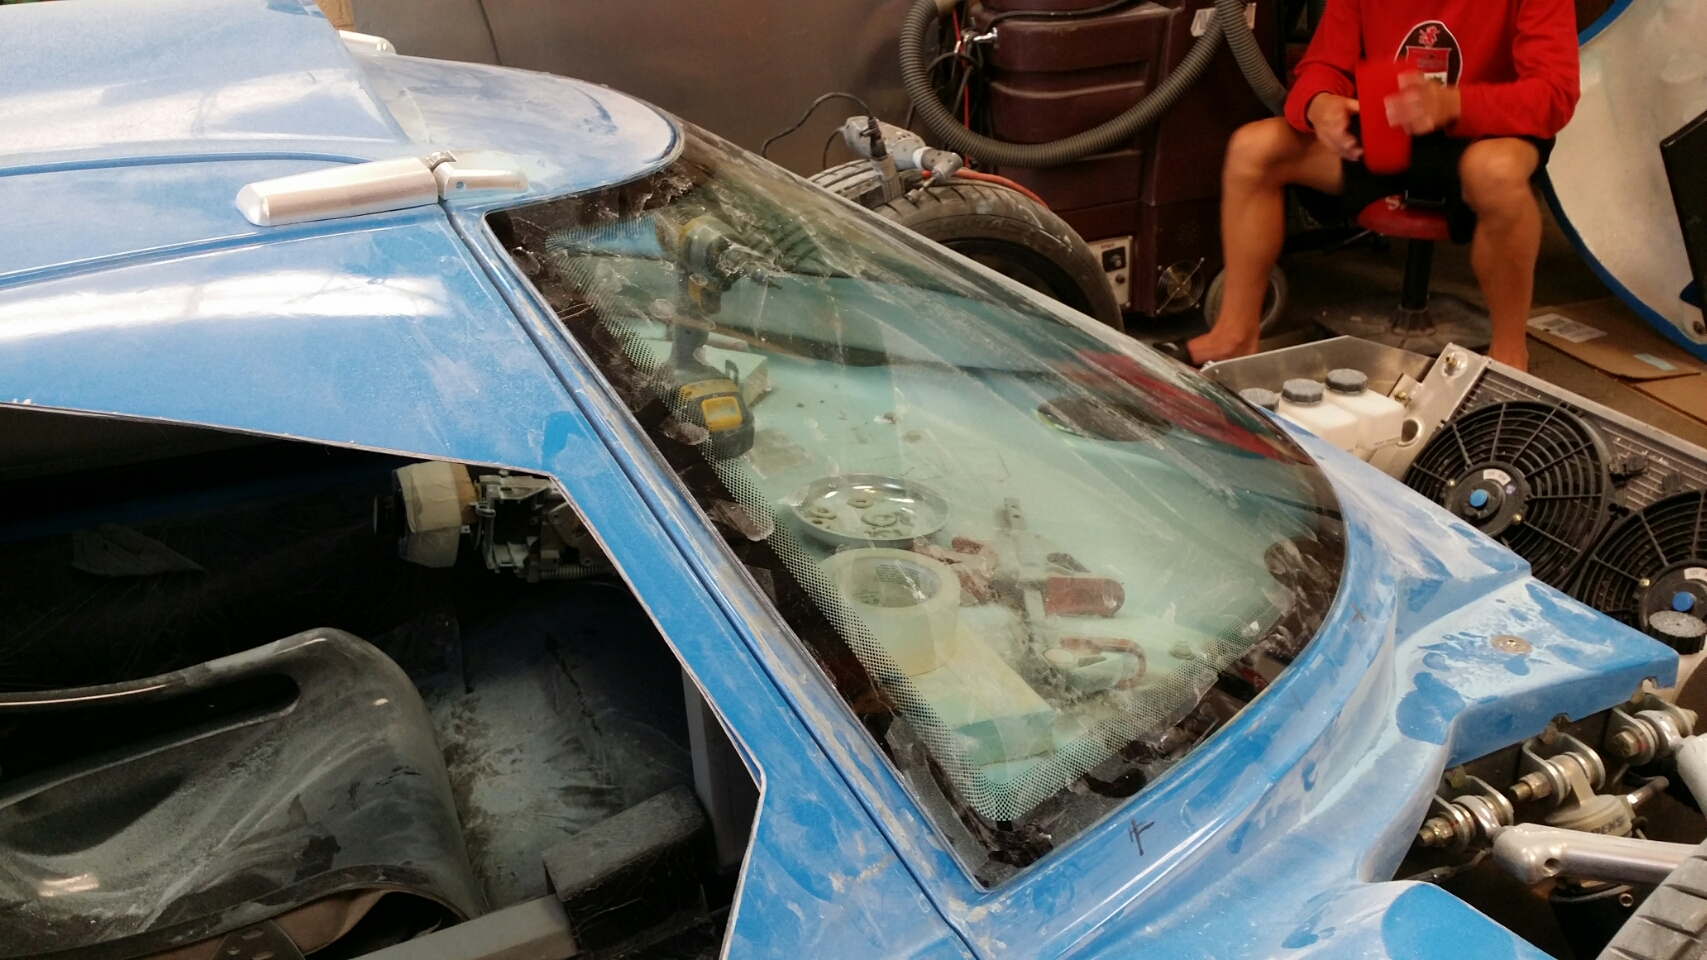
Problem is, as you might imagine, it threw off my hood and door fits. So back to square 1 on those. On the bright side, I'm getting better (faster) at getting the fits the way I want them!
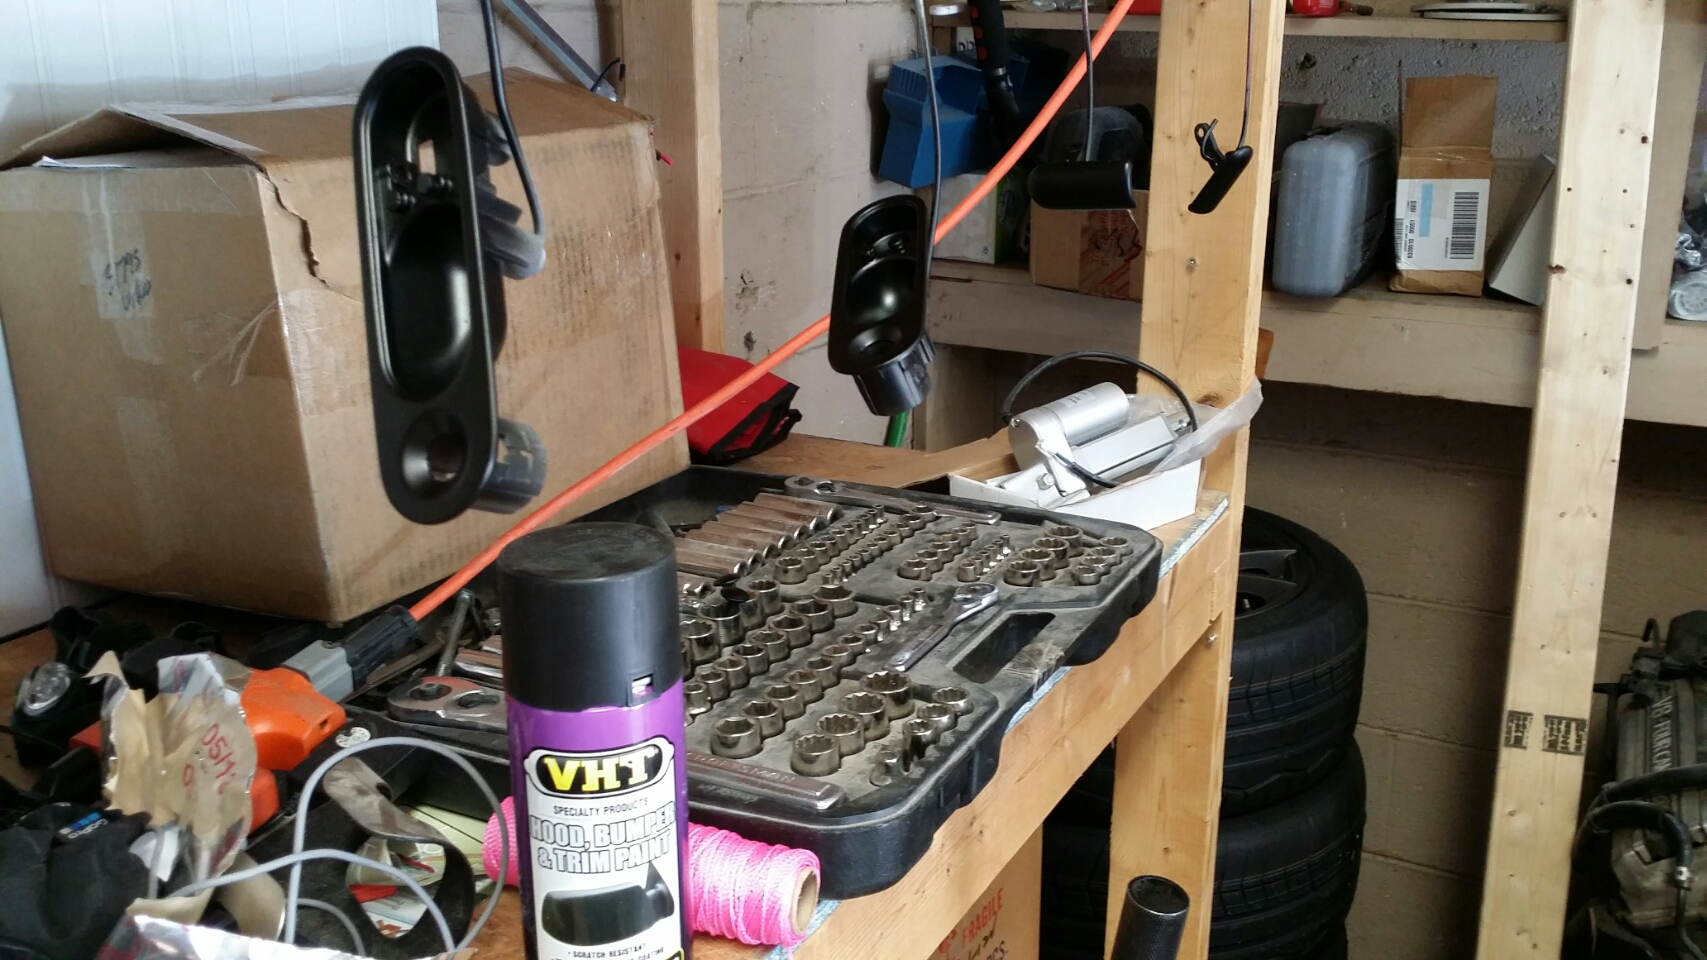
I also did a trial on painting the door handles black (hanging in the pic). I was pleased with how they came out so the upper hinges and fuel door assembly are next. For anyone interested, the purple can is what I used
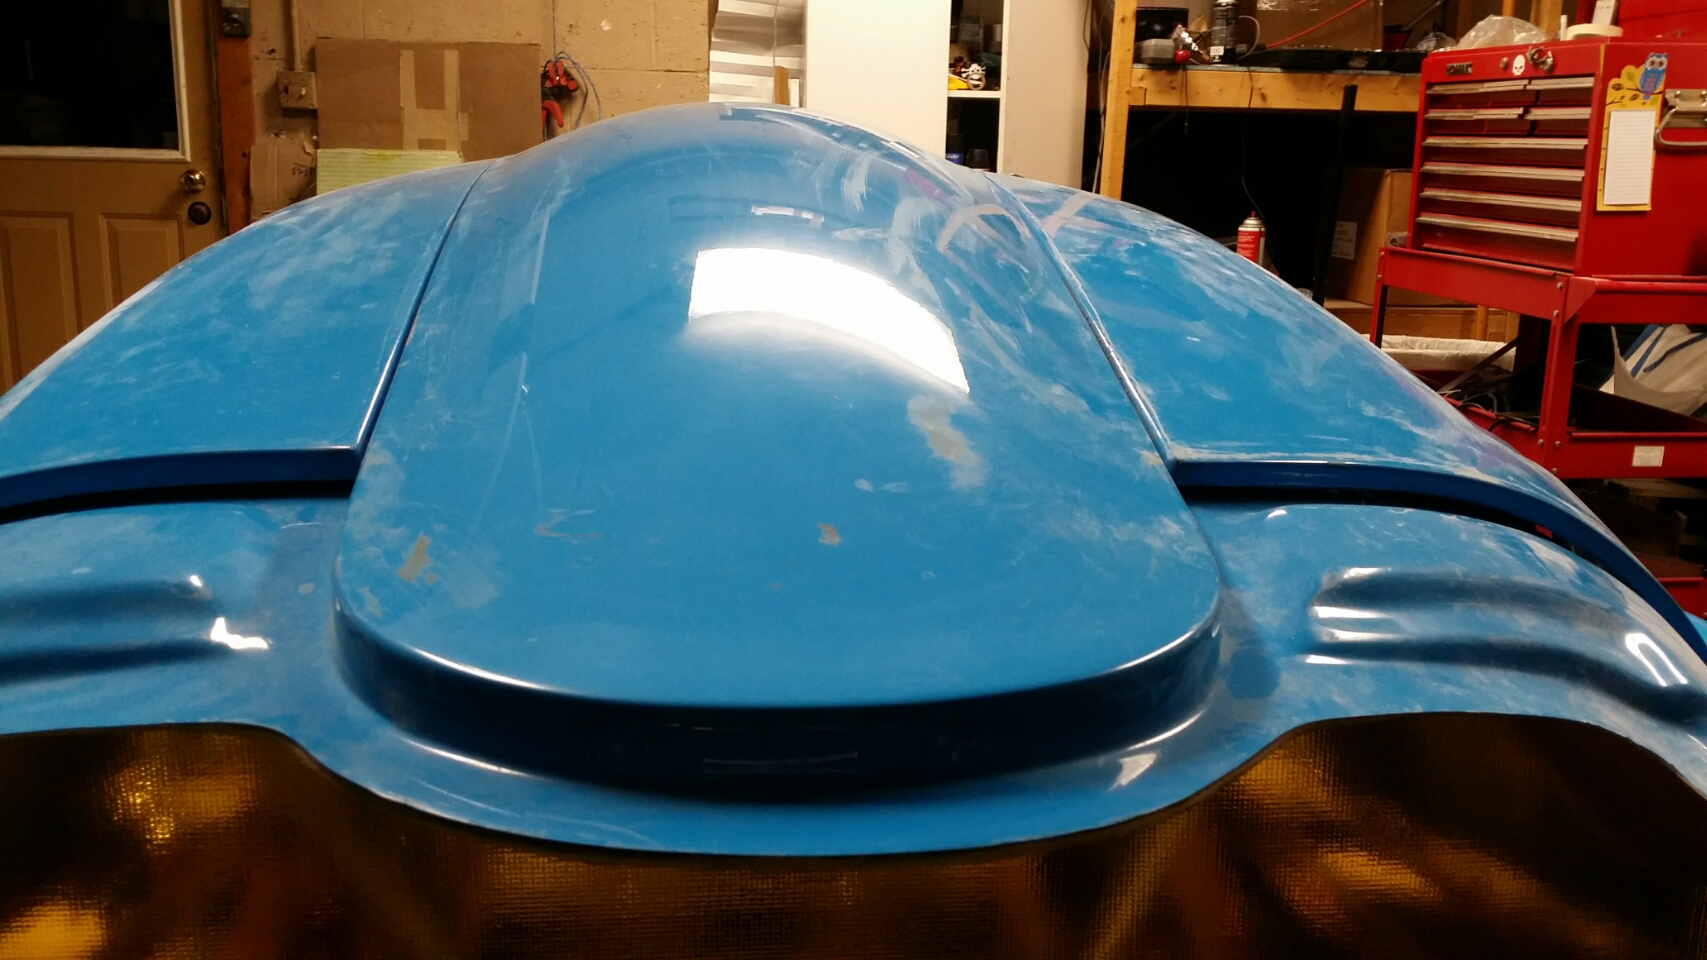
One more issue, I can't get my rear wheels centered in the wheel well any better than this:
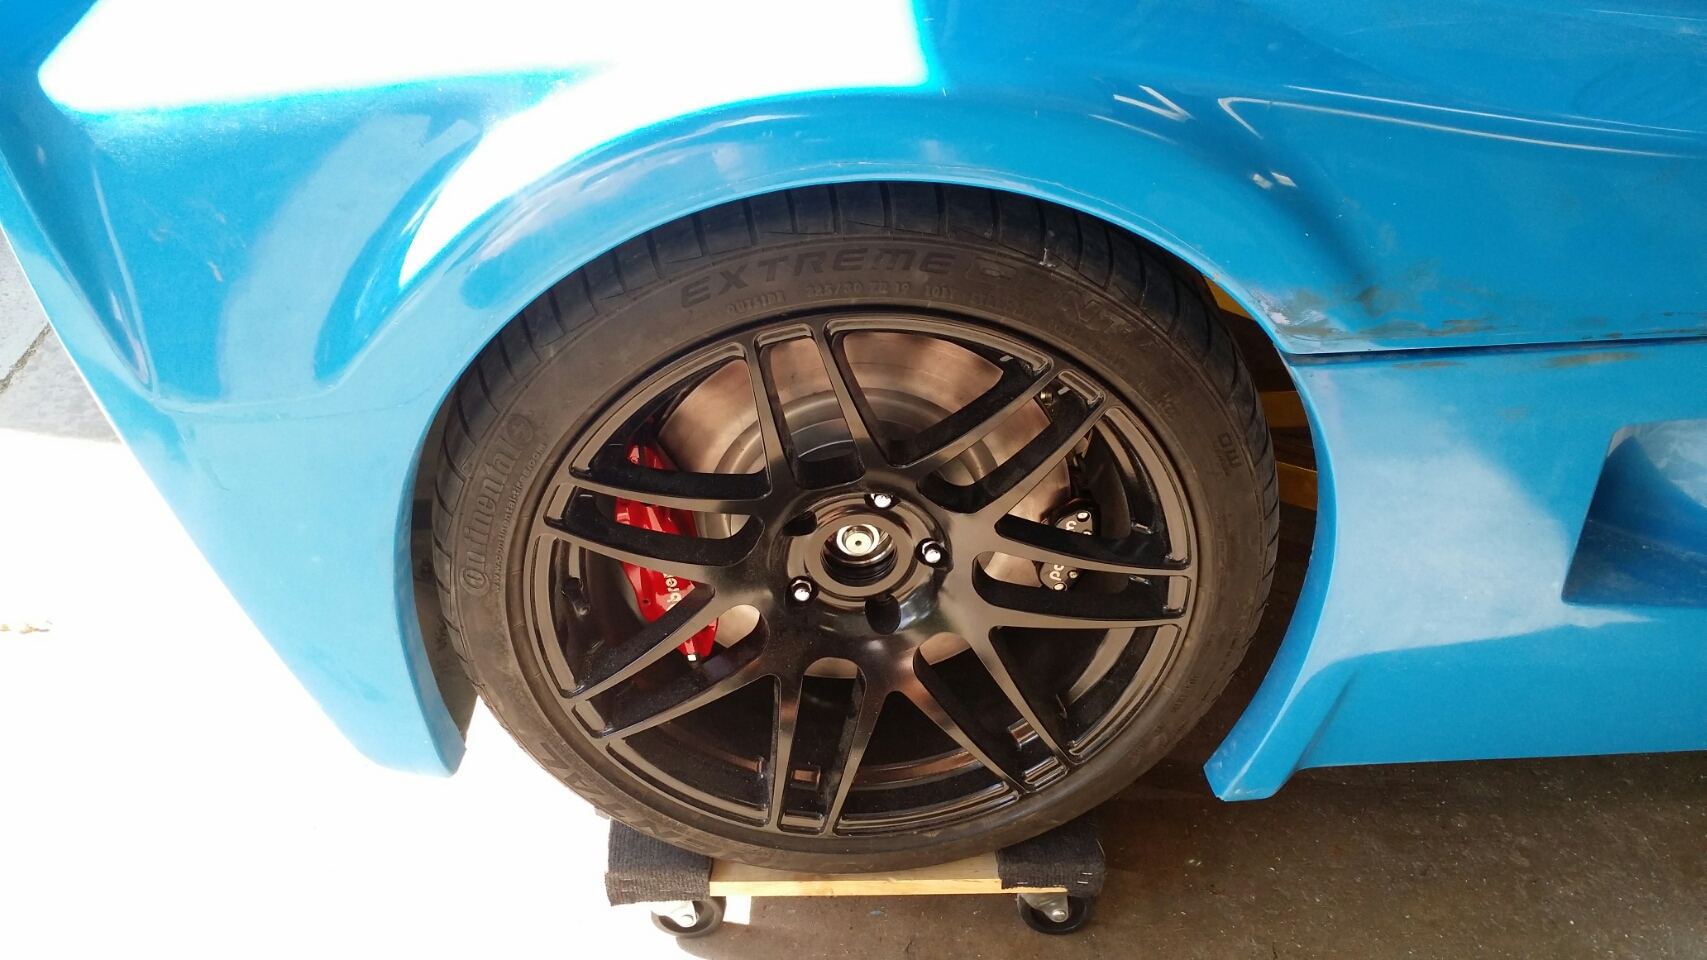
Is this common? The front wheels have a bit wider gap to the hood in the rear of the opening than the front. I'm pleased with the look, but the body is cheated as far back as I dare. I have the rear clam under a lot of tension trying to force the rear hinge aft to open up the gap to the tire, but that winds up pushing the clam up, causing a V margin on the gap to the spider alon the side. I also raised the hinge mount point because the virtual center of the wheel opening was lower than the center of the wheel. But once again, that opens the gap to the spider. By the way, this picture was taken before spreading the A posts for the windshield. That didn't have much of an impact on rear fits. I think this is as good as I'm going to get it, but I figured I'd check to see if I'm missing a trick or something.
A.J.
Next I did a test fit of the windshield. Wasn't pretty. Long story short I realized the body was not matching the glass. A portion of it was the windshield flanges were too long. They were intentionally left this way for strength. So it was time to cut them to size. But the windshield was much wider than the car. And I haven't done anything to the body to fit the doors or hood. Pretty much tweaked it for the tire flushness but it's not under stress. Well, to get the body to fit the glass I had to spread the body. I used a pipe clamp then screwed the body into position to hold it.
I had to move the existing holes a bit. But this illustrates how much movement I got. Right side had the same movement.
The glass was good to the A post, but now it wouldn't set down properly in the front. So I marked where it was hitting and ground the flanges
After all that, the glass fits like a glove. It's just sitting loosely in place:
Problem is, as you might imagine, it threw off my hood and door fits. So back to square 1 on those. On the bright side, I'm getting better (faster) at getting the fits the way I want them!
I also did a trial on painting the door handles black (hanging in the pic). I was pleased with how they came out so the upper hinges and fuel door assembly are next. For anyone interested, the purple can is what I used
One more issue, I can't get my rear wheels centered in the wheel well any better than this:
Is this common? The front wheels have a bit wider gap to the hood in the rear of the opening than the front. I'm pleased with the look, but the body is cheated as far back as I dare. I have the rear clam under a lot of tension trying to force the rear hinge aft to open up the gap to the tire, but that winds up pushing the clam up, causing a V margin on the gap to the spider alon the side. I also raised the hinge mount point because the virtual center of the wheel opening was lower than the center of the wheel. But once again, that opens the gap to the spider. By the way, this picture was taken before spreading the A posts for the windshield. That didn't have much of an impact on rear fits. I think this is as good as I'm going to get it, but I figured I'd check to see if I'm missing a trick or something.
A.J.
AJ,
My windshield doesn't come close either. Help me understand what you did. After expanding the A pillars, you "screwed the body in place" to hold it? Was screwing the body to the lower plate enough to hold it in place?
My windshield doesn't come close either. Help me understand what you did. After expanding the A pillars, you "screwed the body in place" to hold it? Was screwing the body to the lower plate enough to hold it in place?
(Note: the body is screwed down along the rockers with two 1/4-20 screws per side. This was before I started and hasn't changed)
I already had screw holes drilled through the body (#2 & #3 below) and tapped in the chassis underneath. This was to lock down the hinge area on the body since I have the door shocks installed on the hinges. I don't want the shocks distorting the body during hinge operation. So I had reference points (holes in the body to line up with the threaded hole). I also had to shift the body to the right because my body doesn't want to fit over the tires properly. The right tire was sticking out from the hood.
I fit the glass to the body and realized I needed to spread the windshield opening.
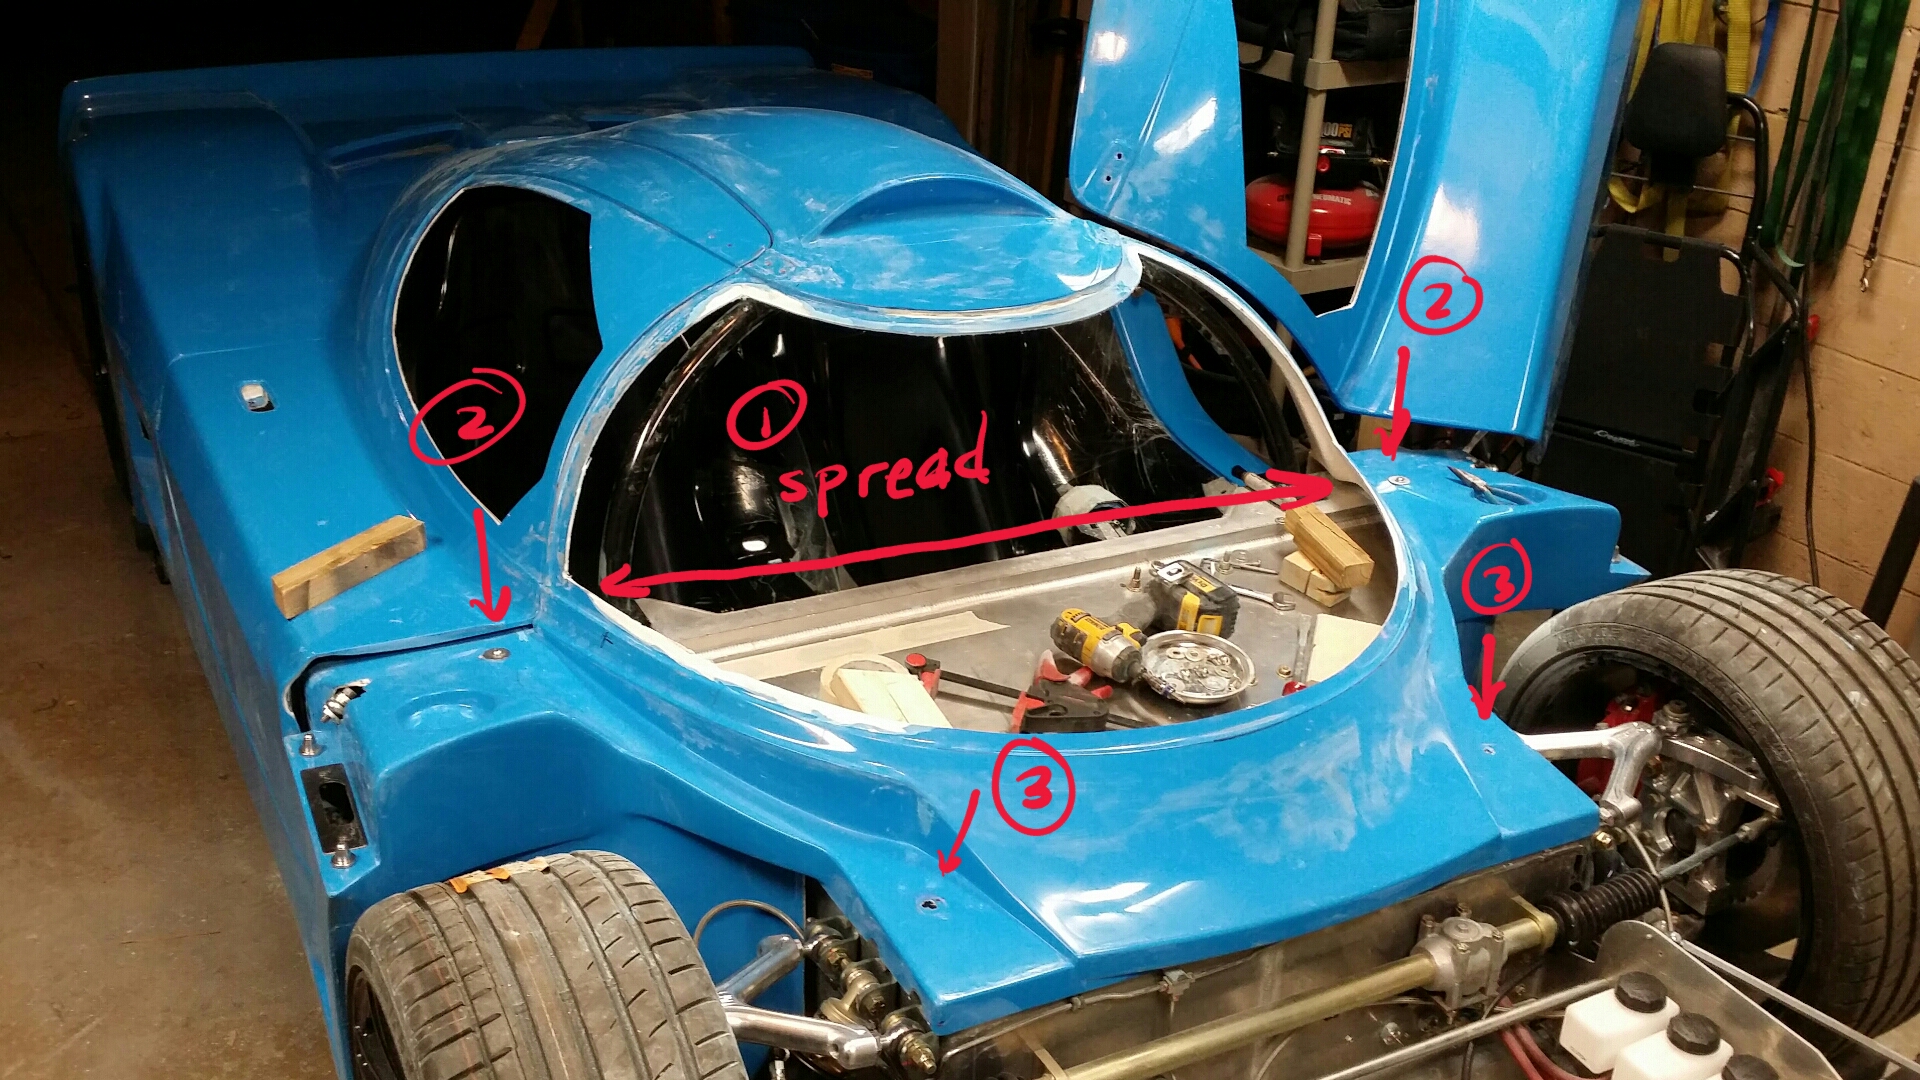
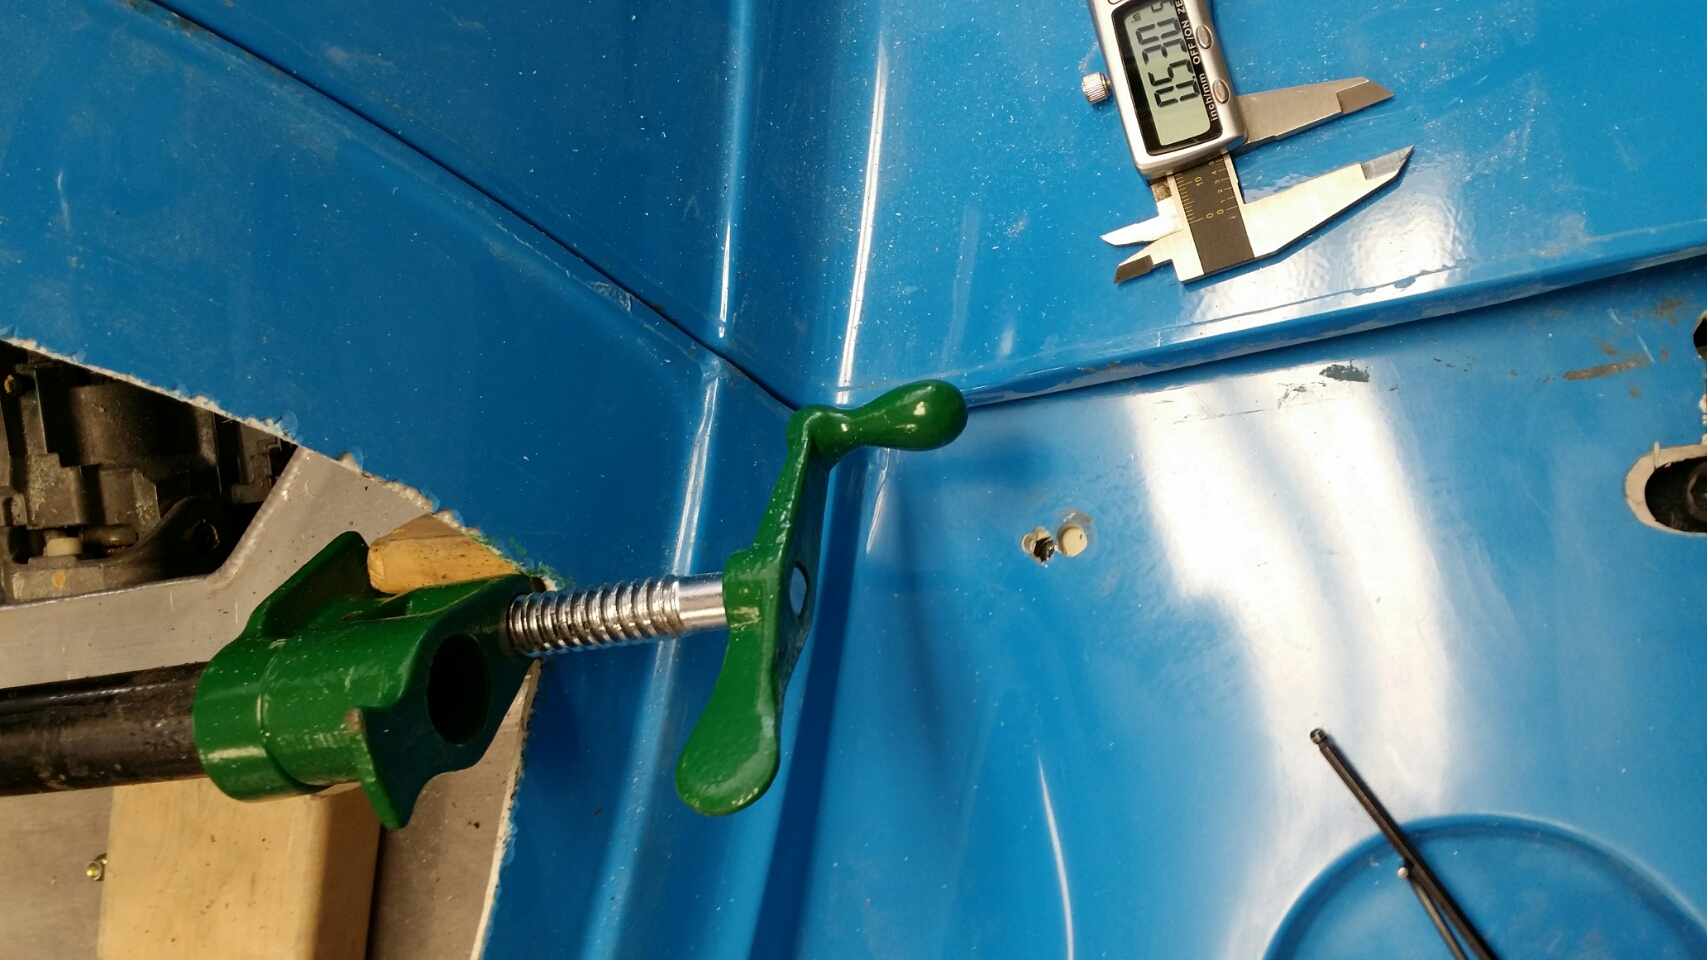
I used the pipe clamps to spread at #1, and I drilled new holes in the body to find the existing threaded hole in the chassis. The body moved about 1/2" outboard on each side. I used 1/4-20 screws to hold the body in place. A screw at #2 was enough. I measured the depth at the hole and used a stack of washers. I wrapped them in masking tape so the stack wouldn't fall over when shoving into position. I also found that by shooting the scews at #3 it pulled down on the body and opened the windshield opening slightly. I thought I was going to have to trim the windshield opening top and bottom quite a lot. I wound up only do in a little at the top.
After work today I wanted to see how much the body sprung back. I had second thoughts about refitting the doors and hood. The panel gaps are now compromised to the point that they will require trimming to make perfect. And i lost the shift to the right. Not a major deal since a good fitting windshield is priceless. But I wanted to see if I could split the difference and salvage the fits. So I removed the screws.
The body didn't spring back much. I was able to get back the right-shift and am in the middle of redoing the fits. The glass is still near perfect.
I hope this makes sense.
A.J.
I already had screw holes drilled through the body (#2 & #3 below) and tapped in the chassis underneath. This was to lock down the hinge area on the body since I have the door shocks installed on the hinges. I don't want the shocks distorting the body during hinge operation. So I had reference points (holes in the body to line up with the threaded hole). I also had to shift the body to the right because my body doesn't want to fit over the tires properly. The right tire was sticking out from the hood.
I fit the glass to the body and realized I needed to spread the windshield opening.
I used the pipe clamps to spread at #1, and I drilled new holes in the body to find the existing threaded hole in the chassis. The body moved about 1/2" outboard on each side. I used 1/4-20 screws to hold the body in place. A screw at #2 was enough. I measured the depth at the hole and used a stack of washers. I wrapped them in masking tape so the stack wouldn't fall over when shoving into position. I also found that by shooting the scews at #3 it pulled down on the body and opened the windshield opening slightly. I thought I was going to have to trim the windshield opening top and bottom quite a lot. I wound up only do in a little at the top.
After work today I wanted to see how much the body sprung back. I had second thoughts about refitting the doors and hood. The panel gaps are now compromised to the point that they will require trimming to make perfect. And i lost the shift to the right. Not a major deal since a good fitting windshield is priceless. But I wanted to see if I could split the difference and salvage the fits. So I removed the screws.
The body didn't spring back much. I was able to get back the right-shift and am in the middle of redoing the fits. The glass is still near perfect.
I hope this makes sense.
A.J.
TY so much for the explanation. Why don't you come to my shop and see if you can do it again? LOL
I would truly love to! If you weren't so far away....
It really wasn't that bad. It's just frustrating that I have spent SO much time on fits. I've redone them so many times. If I were to build another slc, I would fit the windshield first. And do the final string alignment next. Then fit the spider. I did a lot of "I'll get it close so I can move on" which wound up being a complete waste of time. I moved the suspension all around too, thinking I was doing something value added. I could have knocked off 50 hours from my build without these errors. That's how Allan gets a car done in a few hundred hours. He doesn't waste any time. I'm not angry or dissatisfied with the kit in any way. It's wonderful and I look forward to getting home every day so I can work on it. I probably work on the slc 3 or 4 hours most days, and that's on top of at least 60 hours a week in my regular job.
The point is a first time builder wastes a ton of time. And it's ok. Get used to it. Embrace it. Learn from others to try to avoid time-consuming mistakes. On the flip side, I've saved a **TON** of time with Allan's videos. I don't know what I would do without them.
It all evens out and is part of the wonderful journey. I've said it before: this is so far removed from what I envisioned the build would be. It has exceeded my expectations. And my expectations were extremely high after dreaming of this for the better part of a dozen years.
--rant off--
A.J.
Has anyone discussed the door handle orientation with respect to the latch operation? Idisassembled my handles, painted them black and reassembled them. When I put the left handle into the left door pocket that I already cut I out while watching Allan's video, I noticed the handle mechanism rotates towards the outside of the door. The latch needs to be pulled towards the inside of the car. They're opposite directions. It would have been a simple fix to swap the handle to the right side, but I already cut the door pockets (they're not symmetrical side to side).
So a word to the wise, check this out before cutting out the handle pockets. I was able to make the handle work, it's just not as elegant and took a lot of time.
A.J.
So a word to the wise, check this out before cutting out the handle pockets. I was able to make the handle work, it's just not as elegant and took a lot of time.
A.J.
Here's some pictures:
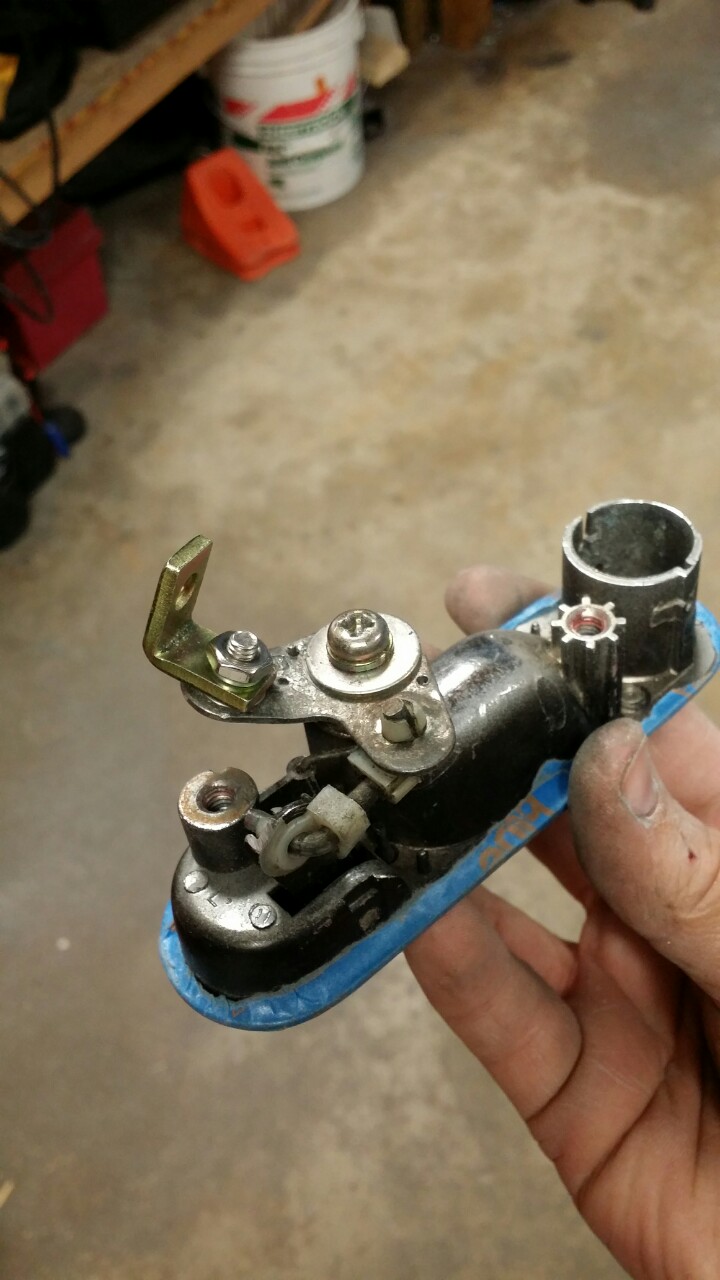
Left side door handle, before painting:
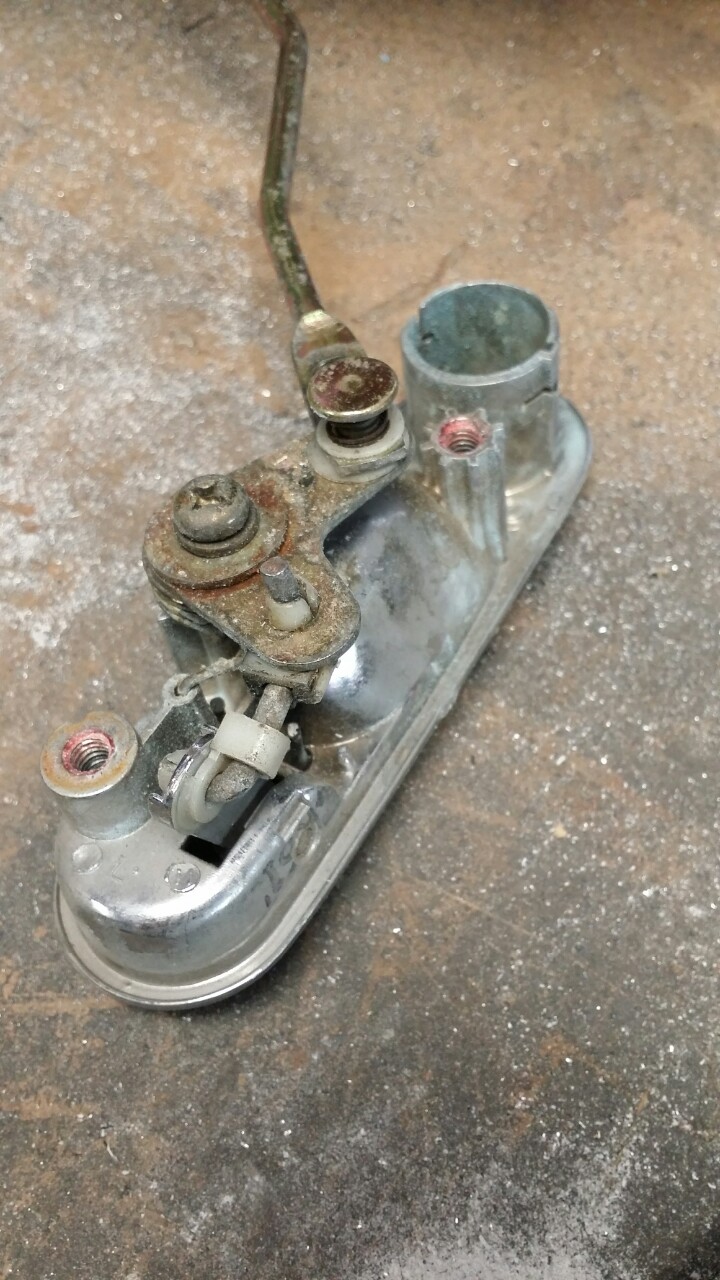
After mods to make it pull in the correct direction. The small L bracket is nice because it makes the hole location adjustable. This is very important to be able to tune the distance the handle moves. It's from the lock mechanism on the latch that gets removed
Left side door handle, before painting:
After mods to make it pull in the correct direction. The small L bracket is nice because it makes the hole location adjustable. This is very important to be able to tune the distance the handle moves. It's from the lock mechanism on the latch that gets removed
I'm a stickler for fits. At least I'm trying to be. It feels like I get bogged down frequently, but it will be worth it in the end. I struggled centering the rear wheels in the opening, as previously mentioned. I wasn't sure what method was kosher for moving the rear wheel forward (both sides). Will verified that swapping washers at the control arm attachment point will do it. Just be sure to move all of them the same amount. Problem was, my lower control arms only have one thick washer on each side of the heim. I didn't think that was going to be enough. I was afraid I was going to have to do the same to the front to move the wheels aft, allowing me to move the body aft....which involves tearing up the entire suspension. Again. Thankfully, amazingly, the one shim appears to have done the trick. Now I just have to redo the alignment, but that's not so bad anymore.
Another source of aggravation is flushness of the door to the roof. There isn't a good way to control it. So I added a little device
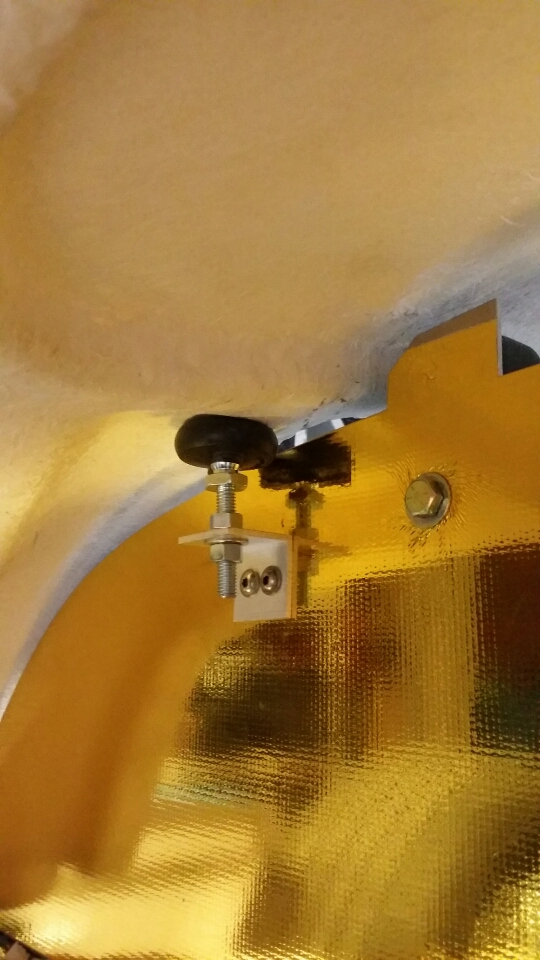
This pushes up on the spider to bring it up to match the back of the door. It's rated for 4000 lbs....my bracket will fail long before the pusher!
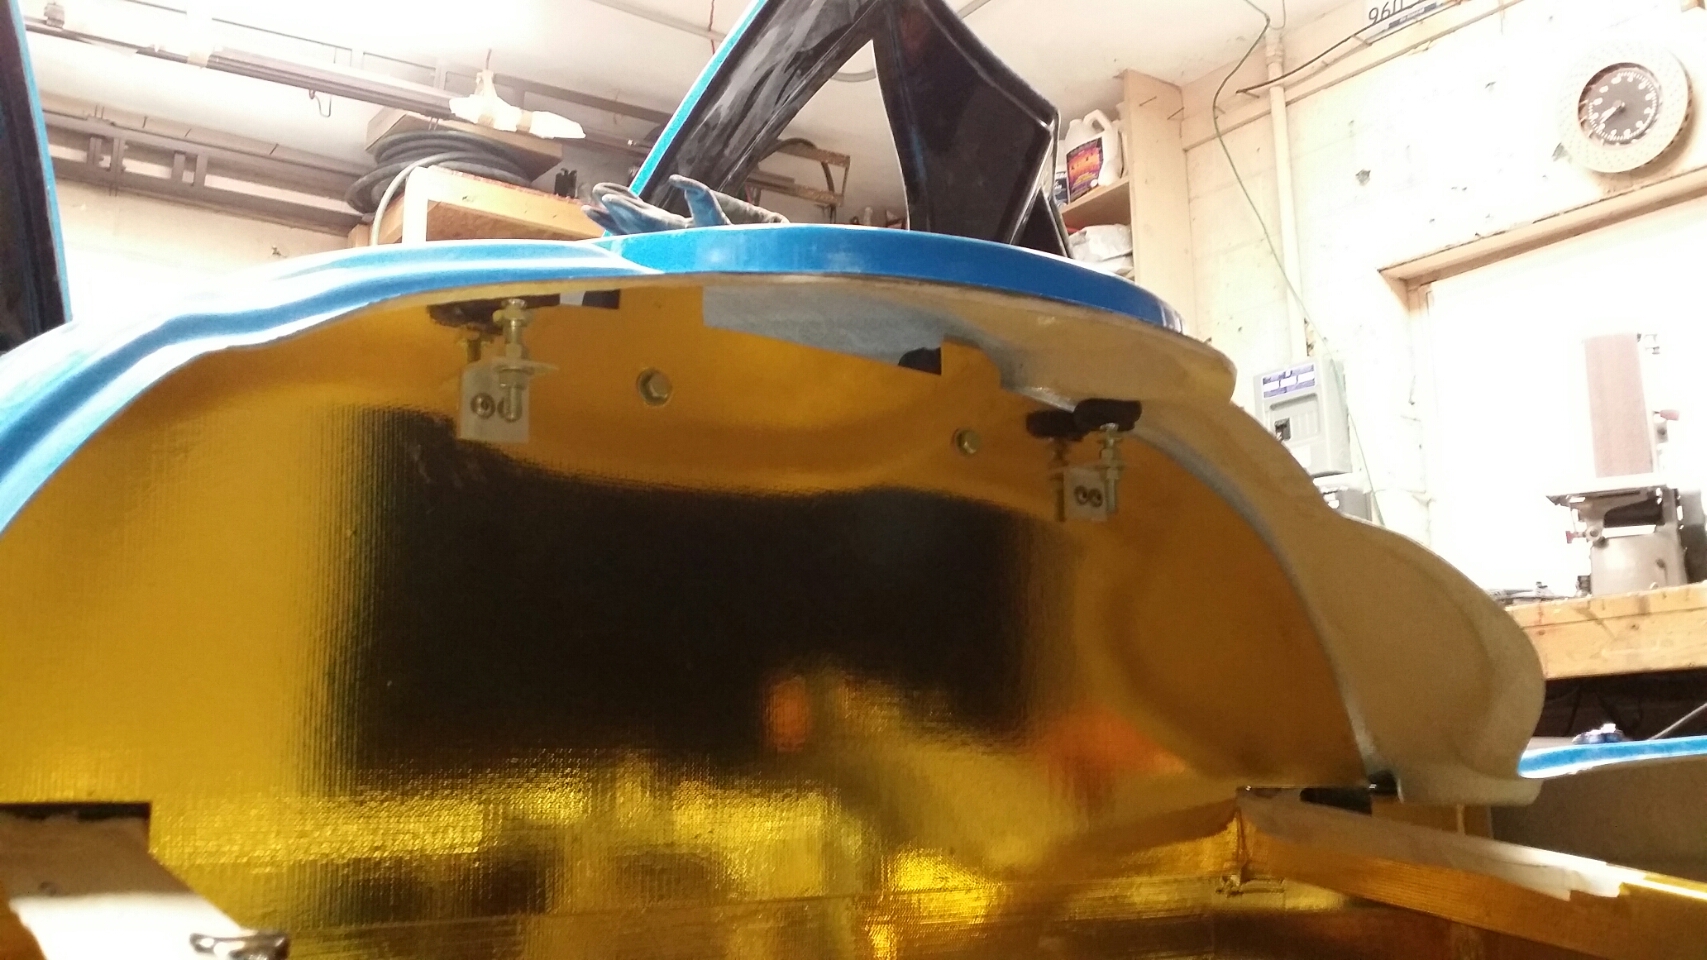
I didn't even tune in the height, and the back of the doors are perfectly flush epper:
A.J.
Another source of aggravation is flushness of the door to the roof. There isn't a good way to control it. So I added a little device
This pushes up on the spider to bring it up to match the back of the door. It's rated for 4000 lbs....my bracket will fail long before the pusher!
I didn't even tune in the height, and the back of the doors are perfectly flush
epper:
A.J.
Good work!
When fitting the body, especially the doors, it's not a bad idea to put in the seals you are going to use, as adding them later can sometimes alter the fit you worked so hard to get perfect long ago...
Same thing for the seals around the spider and the bulkhead panel (the one you've covered with gold foil.)
You'll have to pull them off for paint, but they are relatively cheap if you have to do them over again.
Thanks Will! We're on the same track: the seals came in the same shipment with the pusher, and right now they're strung around the perimeter of the garage to ease all the kinks and creases from being bundled for shipping. I also have some modeling clay on the way from Amazon so I can measure seal gaps to make sure the seal I have is the proper height. I'm also thinking of putting the seal on the door rather than the spider....
You know, now that you mention it the bulkhead seal that I'm going to make can do the same job as this pusher....oh well :stunned:
You know, now that you mention it the bulkhead seal that I'm going to make can do the same job as this pusher....oh well :stunned:
I actually like doing all the final body fitment stuff. You know it makes the huge difference between coming out good from a distance, or something that could pass an oem fitment test.
Your doing some good work AJ.
Your doing some good work AJ.
I'm also thinking of putting the seal on the door rather than the spider....
The wiki has a list of seals in use on some cars. A popular solution is the D bulb for the doors, as well as another flat piece on the spider. Multiple seals is a standard OEM method for better sealing.
Here's the link to the seals section in the wiki.
I already bought the D shaped one that you recommend. Depending on how much room I have I'd like to consider bulb-to-bulb seals. Closing efforts shouldn't be too much of an issue because of the way my door shocks are oriented. The hinge actually gets a little push from the shock as it closes :thumbsup:
Thanks Scott. Knowing your level of attention to detail that means a lot. I really enjoy the fits too....at least once I'm confident I'm headed in the right direction. When I feel like I'm floundering it's the source of a lot of anxiety!
A.J.
Thanks Scott. Knowing your level of attention to detail that means a lot. I really enjoy the fits too....at least once I'm confident I'm headed in the right direction. When I feel like I'm floundering it's the source of a lot of anxiety!
A.J.
Ya, I had a short break down last night. Trying to figure out and buy all the fittings for the hard lines, turbo/wg plumbing, vacuum block to make (the itb's need to have a vacuum block built with a signal from every throttle body just to get a correct signal, then all the outputs needed!) and the factory coolant heater outlet and inlet have been removed on my motor and I need to build. Well, I tried figuring it all at once. Hahaaha. I had a short circuit mentally. Went to bed, lol.
Now, $300 in fittings alone this morning and back out to the garage to get going at it with a clear head again! I am starting to rethink this whole hard line everything approach, but, it will be worth it when done and maintenance free (hopefully).
Now, $300 in fittings alone this morning and back out to the garage to get going at it with a clear head again! I am starting to rethink this whole hard line everything approach, but, it will be worth it when done and maintenance free (hopefully).
Similar threads
- Replies
- 11
- Views
- 2K