
You are using an out of date browser. It may not display this or other websites correctly.
You should upgrade or use an alternative browser.
You should upgrade or use an alternative browser.
CANAMSA - SA stratch build
- Thread starter Fred W B
- Start date
you're getting very close now Fred,
is the colour of the plug a hint of what's going to come?.....
Grtz Thomas
is the colour of the plug a hint of what's going to come?.....
Grtz Thomas
Last edited:
Thanks for kind comments Guys
Calender wise I have been working on the pattern for now just past three years. I always say that if I can get 10 hours in a week I am doing well, but often it will be less, and then thier are periods when I don't get anything at all done for 2 or 3 weeks due to other commitments. Although I have been able to put quite a bit of time in during holidays from my day job, which would pull the average back. So I would guess at 1200 to 1300 hours by now.
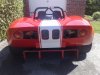
Although the pale blue does look very good on Johan's car (and my wife likes it.......) what I want to do is this:
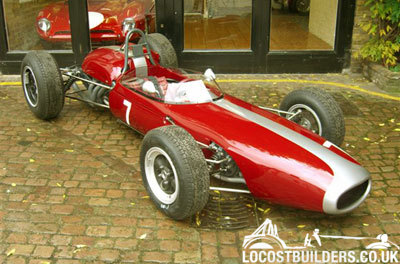
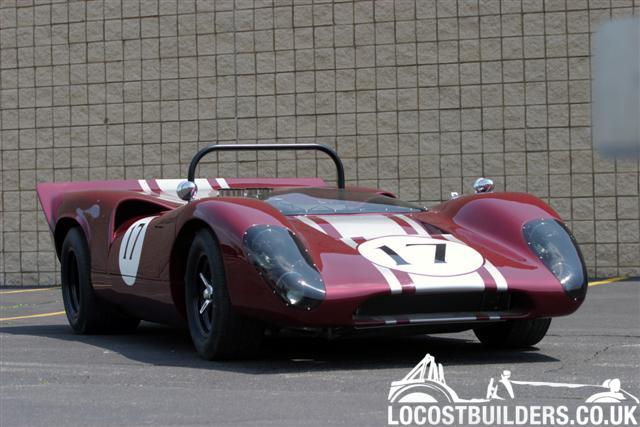
The plan is a deep blood red and silver, just like the single seater below. Sills will be the silver below the beltline as well, running into a gulf GT40 style "moustach" . Stripe will be a broad centre stripe with two smaller stripes each side, like the second picture below, but with wider side stripes, more like the third pic, but here maybe too wide. Also here the red is too maroon for my taste.
Maybe now you are sorry you asked, but I have been thinking about this a lot......

Cheers
Fred W B

If you have to take a guess how much hours have you spend
Calender wise I have been working on the pattern for now just past three years. I always say that if I can get 10 hours in a week I am doing well, but often it will be less, and then thier are periods when I don't get anything at all done for 2 or 3 weeks due to other commitments. Although I have been able to put quite a bit of time in during holidays from my day job, which would pull the average back. So I would guess at 1200 to 1300 hours by now.
is the colour of the plug a hint of what's going to come?.....
Although the pale blue does look very good on Johan's car (and my wife likes it.......) what I want to do is this:
The plan is a deep blood red and silver, just like the single seater below. Sills will be the silver below the beltline as well, running into a gulf GT40 style "moustach" . Stripe will be a broad centre stripe with two smaller stripes each side, like the second picture below, but with wider side stripes, more like the third pic, but here maybe too wide. Also here the red is too maroon for my taste.
Maybe now you are sorry you asked, but I have been thinking about this a lot......
Cheers
Fred W B
Maybe now you are sorry you asked, but I have been thinking about this a lot......
I guess you have to think about something during all those hours of sanding filling sanding filling....The finished plug is an absolute credit to you Fred.
Out of interest, what is the single seater?
Out of interest, what is the single seater?
Hi Russ - not sure, just a pic I saw of a car for sale somewhere, something makes me say maybe a Brabham?
So the next steps were to get the parting lines and fences done for the door perimeters . These were laid out with the aid of dimensions and pictures supplied by the very helpful owner of an original T70
Then 10 repeats with wax on both doors.
Small gaps between the fences and the pattern were filled with kids plasticine
Last edited:
Then on with the first door mould. I put on two coats of tooling gel and laid up 1 x surface tissue, 1 x 300 gram and 5 x 600 gram layers. Double thickness on the flanges.
Took me a while to get the "knack" of laying up. I put on two layers at a time. I let it rest for a good few days or a week between each session. The trick is to get all the bits of mat tailored exactly to fit prior to catalyzing the resin. I also prepared two or three small mixes, to use in one session, rather than mixing all the resin at once and rushing to get the whole thing done before it went off. The surface area of the door is 0.8m2. The flat bits are easy to do, its the fiddly bits on the returns that take time.

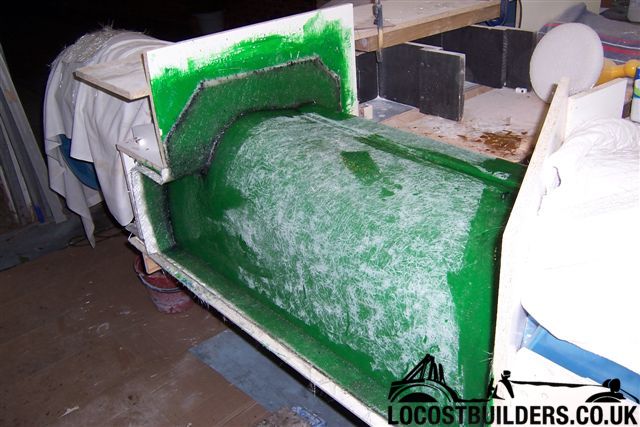
Took me a while to get the "knack" of laying up. I put on two layers at a time. I let it rest for a good few days or a week between each session. The trick is to get all the bits of mat tailored exactly to fit prior to catalyzing the resin. I also prepared two or three small mixes, to use in one session, rather than mixing all the resin at once and rushing to get the whole thing done before it went off. The surface area of the door is 0.8m2. The flat bits are easy to do, its the fiddly bits on the returns that take time.
I then added some plywood bracing. I bonded only the longitudinal pieces to the mould, the transverse pieces were secured together and to the longitudinals with screws to hopefully eliminate "print through" of the transverse ribs.
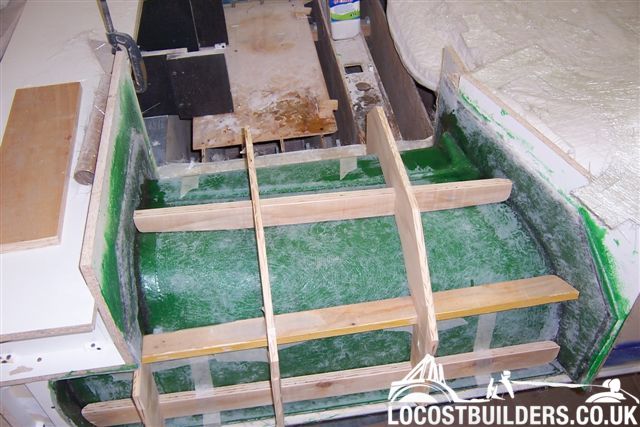
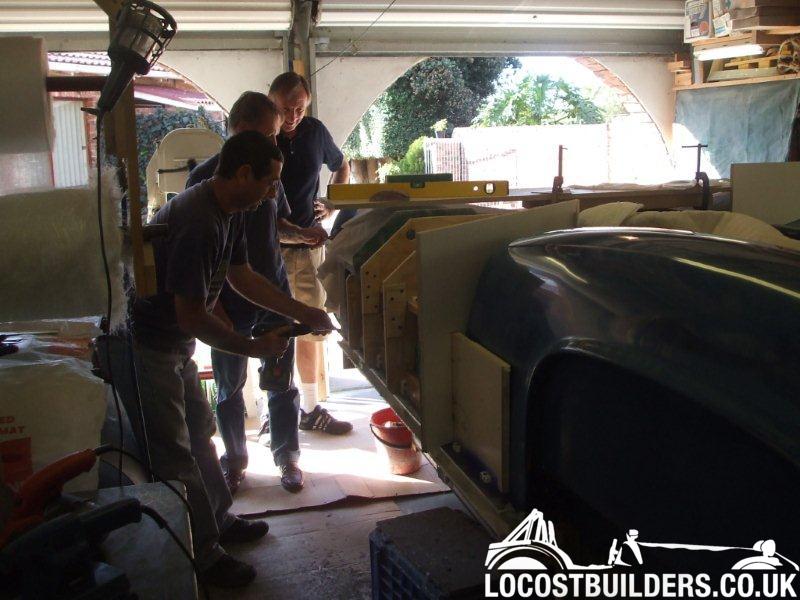
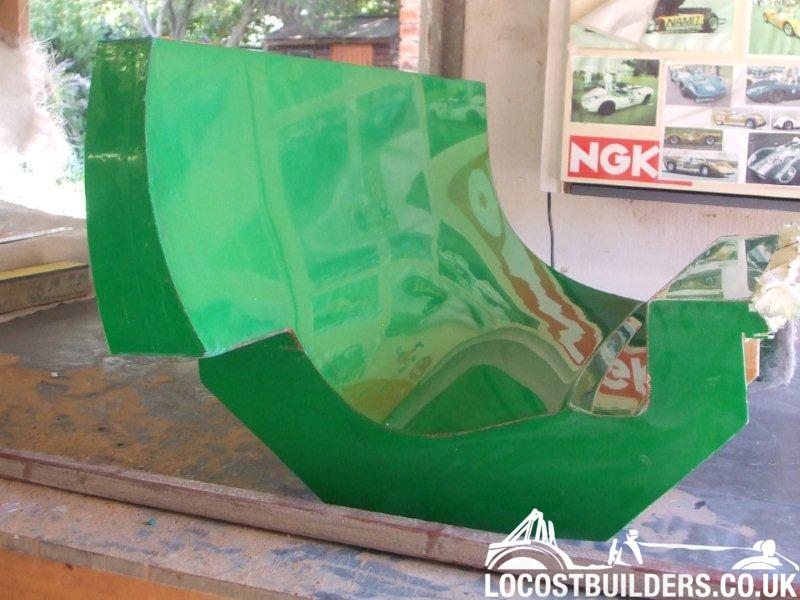
And now this past weekend I released the first door mould. Took some determined pulling with the aid of some friends but it eventually released cleanly, with no damage to the gel coat.The mould surface looks good enough to make parts (that will be painted) straight away with no further finishing. Lines are true and it appears "print through " is not a problem. The rough looking edges in the pic is just where some plasticine is still adhering.
Now to make up the wooden flanges for the door inner returns and the insert box that makes the return where the hinges are and I can then actually make a part!
I have removed this mould now as I want to cut the door sections out of the pattern once the doors are made to permit easier access to the top sections of the front and rear clips as I make those moulds. The forward facing sections of the rear section will have wood inserted to enable me to make the mould section for the return on the rear clip that is "in the door gap".
Cheers
Fred W B
Fred,
That door turned out nice. We used PVA (poly vinyl adheasive) between the tooling gelcoat and the glass. The mould did not turn out quite a shiney as yours but it helped release the part. The PVA is also water soluble. I hope the rest turn out as nice.
Dave
That door turned out nice. We used PVA (poly vinyl adheasive) between the tooling gelcoat and the glass. The mould did not turn out quite a shiney as yours but it helped release the part. The PVA is also water soluble. I hope the rest turn out as nice.
Dave
Nice one Fred, looks fantastic, always so pleasing when the mould comes off, finnish looks excellent! As an aside, this thread gave me the inspiration to do my own body/mould, many thanks!
regards Chris
regards Chris
Thanks for the kind responses guys.
Hi Chris Noo - I'm flattered that you say that, seems you are getting on well.
Thanks Chris M, your car looks excellent, adds to my motivation to get this damn thing finished
Cheers
Fred W B
this thread gave me the inspiration to do my own body/mould
Hi Chris Noo - I'm flattered that you say that, seems you are getting on well.
great choice of colour scheme
Thanks Chris M, your car looks excellent, adds to my motivation to get this damn thing finished
Cheers
Fred W B
Hey Fred,
That´s looking very nice! really apreciate the amount of effort you put into this car. hats off for that!
few questions about it though
How will you mount the body on the chassis btw, do you allready have mounting points on it?
And how will you make the glass/lexan windscreen on yours? do you also have a mould for that? maybe TW mouldings can still make one or know the location of the original moulds.
this is one thing on the GD i like less, its normal black GRP, and there's no option of making it more like the original lola's. I like the black but would have loved to have the choice on it.
a friend who's also going to build a T70 has plans to cut up the GD body and rebuild using lexan.
I just drilled another 400 poprivet holes on my chassis (count 1100+ now) with only half the panneling done.... gonna be nice though.
colour scheme on yours sounds really nice. I made a final decision for mine also..... I hope")
regards Thomas
That´s looking very nice! really apreciate the amount of effort you put into this car. hats off for that!
few questions about it though
How will you mount the body on the chassis btw, do you allready have mounting points on it?
And how will you make the glass/lexan windscreen on yours? do you also have a mould for that? maybe TW mouldings can still make one or know the location of the original moulds.
this is one thing on the GD i like less, its normal black GRP, and there's no option of making it more like the original lola's. I like the black but would have loved to have the choice on it.
a friend who's also going to build a T70 has plans to cut up the GD body and rebuild using lexan.
I just drilled another 400 poprivet holes on my chassis (count 1100+ now) with only half the panneling done.... gonna be nice though.
colour scheme on yours sounds really nice. I made a final decision for mine also..... I hope
regards Thomas
Last edited:
Hey Fred,
That´s looking very nice! really apreciate the amount of effort you put into this car. hats off for that!
few questions about it though
How will you mount the body on the chassis btw, do you allready have mounting points on it?
And how will you make the glass/lexan windscreen on yours? do you also have a mould for that? maybe TW mouldings can still make one or know the location of the original moulds.
this is one thing on the GD i like less, its normal black GRP, and there's no option of making it more like the original lola's. I like the black but would have loved to have the choice on it.
a friend who's also going to build a T70 has plans to cut up the GD body and rebuild using lexan.
I just drilled another 400 poprivet holes on my chassis (count 1100+ now) with only half the panneling done.... gonna be nice though.
colour scheme on yours sounds really nice. I made a final decision for mine also..... I hope
regards Thomas
hi thomas
sorry to hijack freds build thread but one of the UK GD owners has already done just that and made his own clear lexan front screen to replace the black section gd supply. give andy a bell or email for details if you like.
might save your friend a lot of work etc.
Hi Thomas -
Further to above, you will have noticed that the original cars have body work that looks to be much lower between the front wheelarches than the GD/RCR (and mine) , so that makes the screen area very different.
I did look into trying to source an original style screen, but have now decided I don't like the look. I now plan to make a simple "speedboat" style single plane windscreen in grey smoked lexan, like the hardboard mock-up in the pic below.
As for mounting the body, I have not got that entirely figured out yet. The rough plan is to hopefully get the moulds and first body done this year still (2010), but I am starting to think that may be optimistic.
Then say a year (2011) to fit up the body on the proto chassis (some inner panels to sort as well), sort all the mounting brackets etc and make the wishbones.
They say another year (2012) to build up the real chassis and car? - Then comes roadworthy, testing and finally installation of the "real" motor.
Cheers
Fred W B
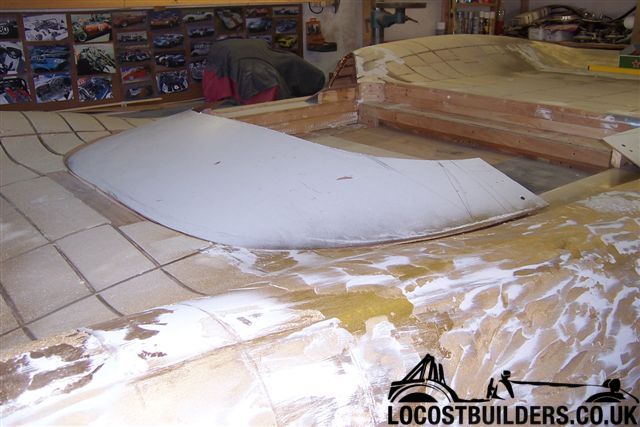
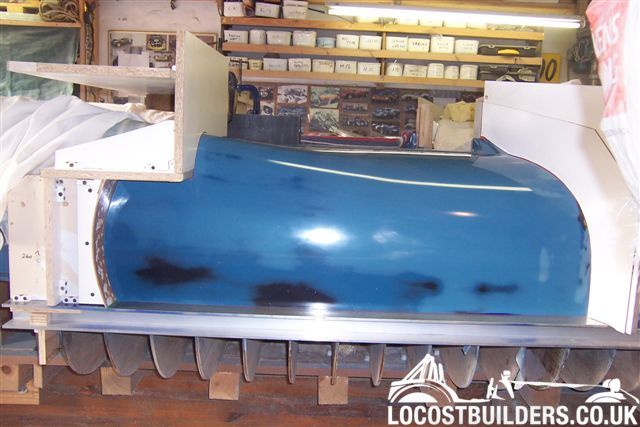
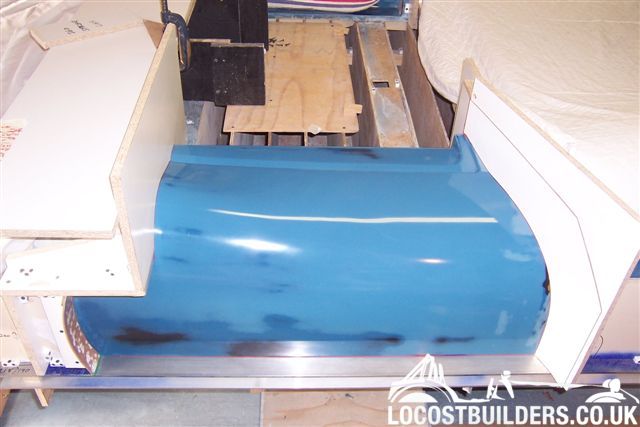
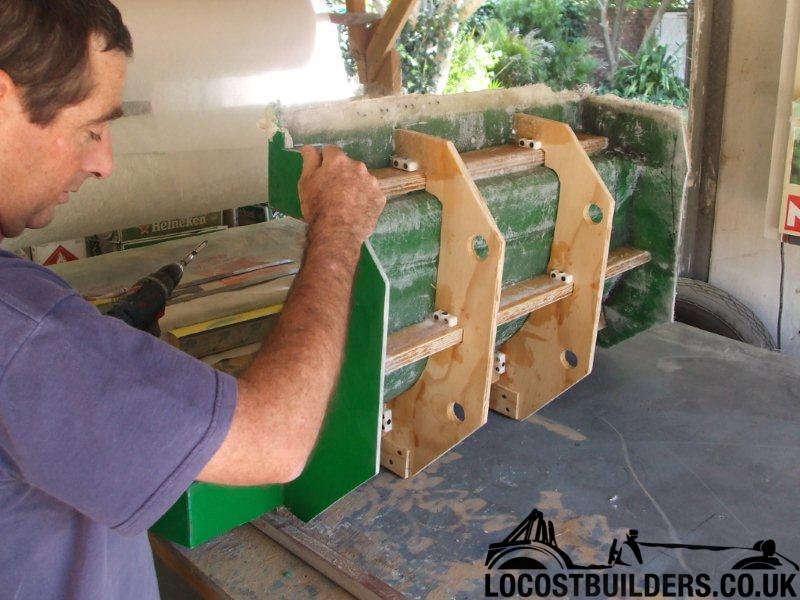
Small update, but not much progress to report, have been otherwise occupied quite a bit over the last few weeks.
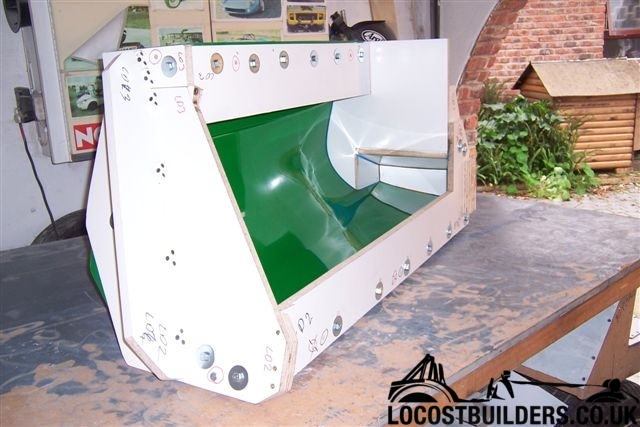
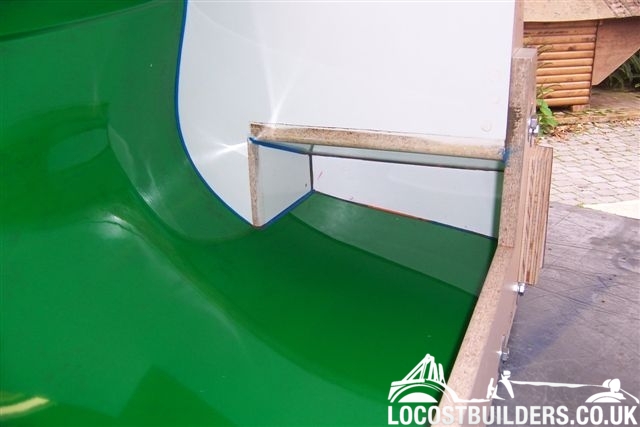
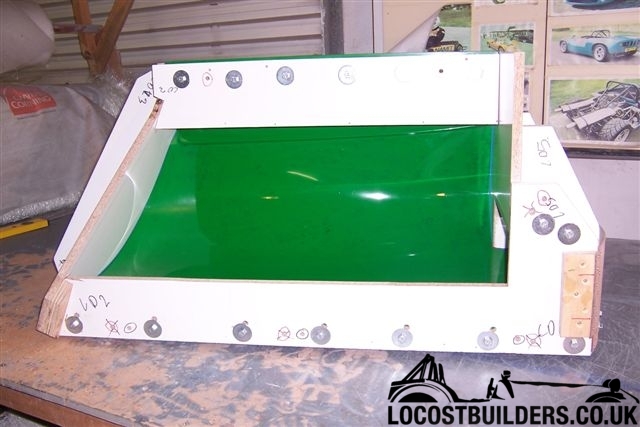
I attach some pictures of the left door mold buttoned up with all the return flanges (including hinge recess) and edges radiused.
I then had a bit of a set back, when I went to make the first part I flat lost my Mojo. I had spent hours getting the return flanges and plastacine radiuses to the edges sorted and matt cut for the first door part. I applied the gell coat and then rushed starting the lay up (something to do with getting to a social function to watch some soccer match). Didn't let the gell coat go off enough, it started to move around under the first layers of matt so no gell coat on some edges was the result.
So scrapped that attempt and pulled it all out once the surface tissue and first matt layer had gone off. Chalk it up to experience, and at least I proved that my edge radius prep worked well. I then found that my clumsy effort had left a slight texture on some areas of the the mold, so I have had to refinish the mould by sanding with 1200, and then bring the finish back with rubbing compound. Now I have to rewax, reradius and make a start on another attempt on the door.
Cheers
Fred W B
edit to add - the photo display resolution seems to makes the blue plastacine line look "unsmooth" in some places in pic 2.
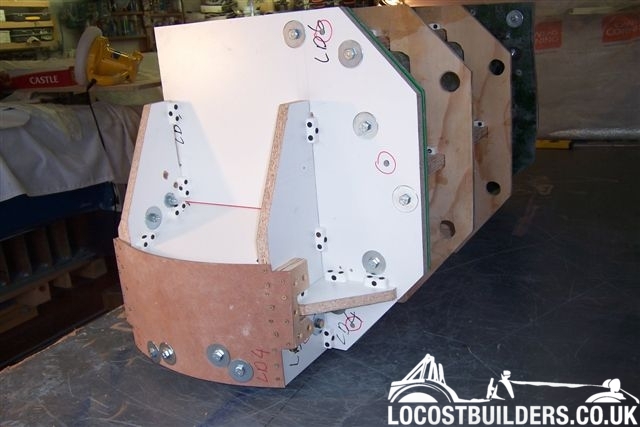
Last edited: