You are using an out of date browser. It may not display this or other websites correctly.
You should upgrade or use an alternative browser.
You should upgrade or use an alternative browser.
CANAMSA - SA stratch build
- Thread starter Fred W B
- Start date
Wow Fred,
You don't let the grass grow under your feet, do you!
That was hardly even a setback!
What a massive project. I am following your build with great interest. Wishing you all the best with it.
Cheers,
You don't let the grass grow under your feet, do you!
That was hardly even a setback!
What a massive project. I am following your build with great interest. Wishing you all the best with it.
Cheers,
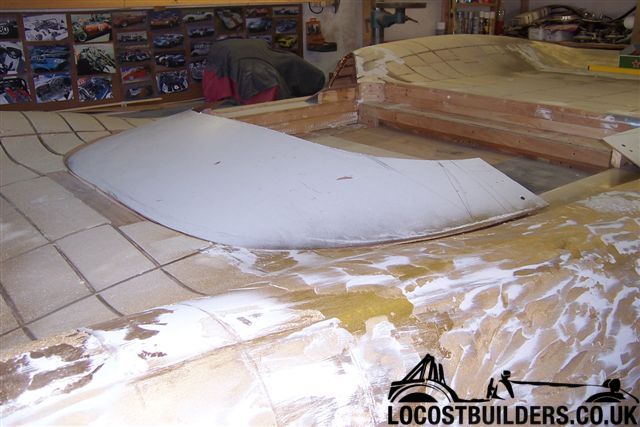
Thanks Russ, but the above photo is before the mod - I am going to remove the pink foam slice from the plug, rejoin and reshape the bottom of the other sections to blend to the shorter tail. The section taken out will be 92 mm, not 150 as I first thought.
Cheers
Fred W B
Cheers
Fred W B
Hi Fred, I guess you have loads of time on your hands to make a t70 from scratch, good look to you, if you need any help, I can put you in touch with the guys who supplied me with my t70 Mk 3 body, they already have a mould ready.
cheers samantha620.
I will try & post some pics if i can
cheers samantha620.
I will try & post some pics if i can
Hi Fred WB,
Are you the same chap who knows Ed Rosler ? He's back in Jersey at the moment,
Tony Sargeant
P.S Love the work your doing.
Are you the same chap who knows Ed Rosler ? He's back in Jersey at the moment,
Tony Sargeant
P.S Love the work your doing.
HI Tony
Thanks for the compliment, but I can't say that I know anyone called Ed Rosler.
Got quite a bit done this afternoon on the tail, I had put in a days leave to do some errands and get the afternoon in the garage. More Photos soon.
Cheers
Fred W B
Thanks for the compliment, but I can't say that I know anyone called Ed Rosler.
Got quite a bit done this afternoon on the tail, I had put in a days leave to do some errands and get the afternoon in the garage.
More Photos soon.Cheers
Fred W B
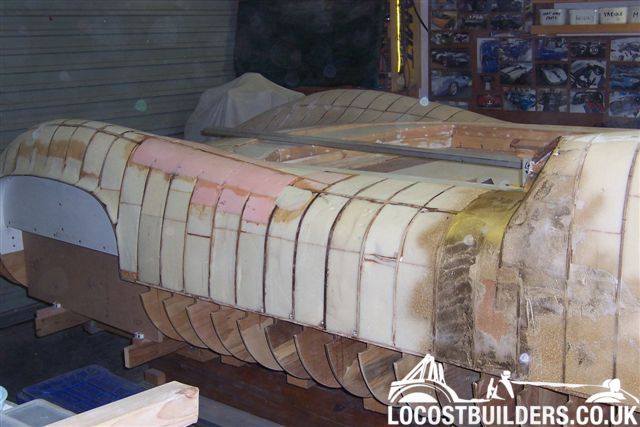
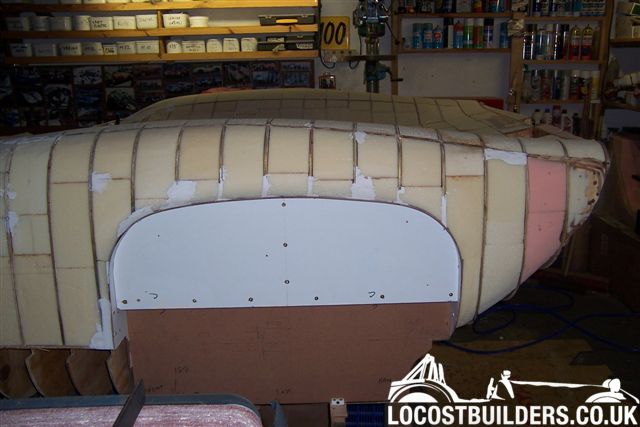
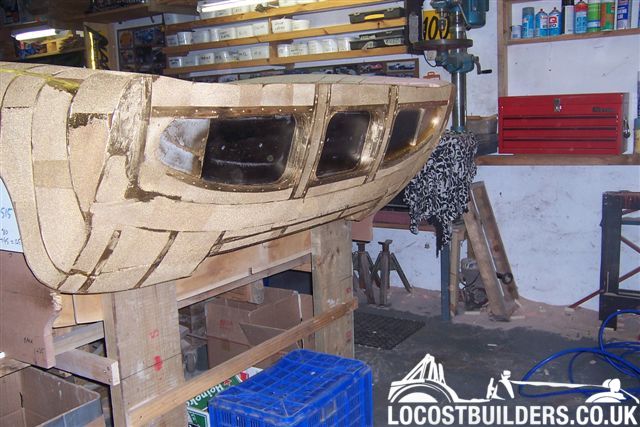
The tail now looks like this
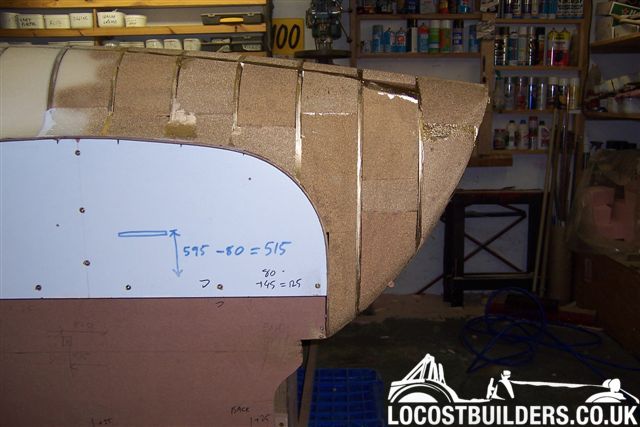
The rear transom panel turned into a real mission

But it's now pretty much done, just a few holes to fill and edges to straighten
Note the foam dust lying like snow on the floor along the wall. I blow it away with an airline, it's easier than sweeping up all the time.
Cheers
Fred W B
Note the foam dust lying like snow on the floor along the wall. I blow it away with an airline, it's easier than sweeping up all the time.
Cheers
Fred W B
Last edited:
Hi P, little white things are plastic blocks that accept screws used in making cheap furniture from chipboard and melamine. You should be able to get something similar in any hardware store.
Cheers
Fred W B
Cheers
Fred W B
D*mn Fred,
you once said on locostbuilders, you were going all the way. after some skeptics told you it was to much work, but you sure make it seem simple.
good going! it's going to be very nice.
Btw How are you completly sure it will fit the chassis under the body, and what are the plans on mountening it to the chassis? might be a good idea to start thinking about that, if you haven't allready offcourse.
Made that mistake once when shortening a buggy... which resulted in a lot of body on body off practice
grtz Thomas
Hi Thomas
Thanks for support. WRT the body fitting the chassis, thats why the chassis so far is only a prototype.
I am determined to get the body mounted and all the bits like radiator etc mounted as well as the suspension sorted out so I can design and make all the required brackets, front and rear subframes etc before making the REAL chassis. I also have had some ideas in the meantime on how to improve and simplify the chassis, so will have an oppertunity to do this then.
I am doing it this way as I really don't want to rework or compromise anything in order to get something to fit once I (finally) build up the car for real. I want to have everyting in an optimium place to avoid having any of those "You know, if I'd just put that chassis rail (or whatever) 30 mm further out/in/along, I could have got this part in easier, and that part would have looked/worked better" moments once I stand back and look at the almost complete car.
I have been measuring as I go along though, amd am reasonably comfortable that the chassis as it is now will fit under the body, it's a big car after all")
Cheers
Fred W B
Thanks for support. WRT the body fitting the chassis, thats why the chassis so far is only a prototype
. I am determined to get the body mounted and all the bits like radiator etc mounted as well as the suspension sorted out so I can design and make all the required brackets, front and rear subframes etc before making the REAL chassis. I also have had some ideas in the meantime on how to improve and simplify the chassis, so will have an oppertunity to do this then.
I am doing it this way as I really don't want to rework or compromise anything in order to get something to fit once I (finally) build up the car for real. I want to have everyting in an optimium place to avoid having any of those "You know, if I'd just put that chassis rail (or whatever) 30 mm further out/in/along, I could have got this part in easier, and that part would have looked/worked better" moments once I stand back and look at the almost complete car.
I have been measuring as I go along though, amd am reasonably comfortable that the chassis as it is now will fit under the body, it's a big car after all
Cheers
Fred W B
Last edited:
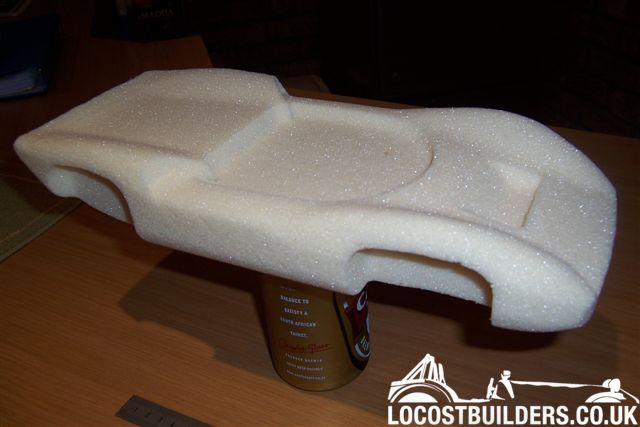
While I'm on, let me show this pic of the results of a test run on the CNC controlled 3D router my friend Andrew (guy who drew the body) made himself. This was cut from a block of foam, with a toolpath derived from the model we drew way back. The surface is actually smoother than it looks in the pic, the flash picks up the texture in the foam.
I think its pretty damn impressive for a home made machine.
With any luck will post some pics of progress with the nose of the car in a week or two.
Cheers
Fred W B
I think its pretty damn impressive for a home made machine.
With any luck will post some pics of progress with the nose of the car in a week or two.
Cheers
Fred W B
That's what DPcars did on the actual bodyplug. he hired a company who opperate a HUGE portal type 3d mill to make boat hull plugs, could be quite expensive though.
Nice to make an RC of that small thing!
on the bodymounts,
I noticed the other day on a GD cobra that GD uses some thin (5mm) steel plates with a bolt cast on, that have a piece of rubber inside that again is vulcanised to another steel shim that has an m6 thread tapped inside about 5mm deep.
they bolt the plate into the chassis and bolt the body to that, the body doens't recieve the vibrations from the engine, but are apperantly quite strong, because the jack-up points on a GD cobra are the body itself not the chassis, never heard about problems with that. don't know what these thing are called though. they're not like the normal rubber bobins and very strong almost no play between both sides
Grtz Thomas
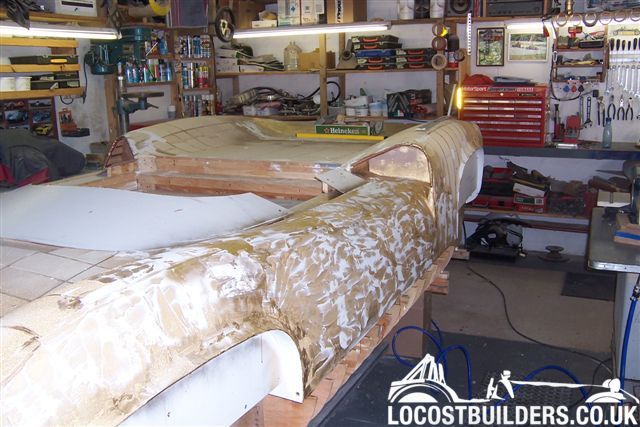
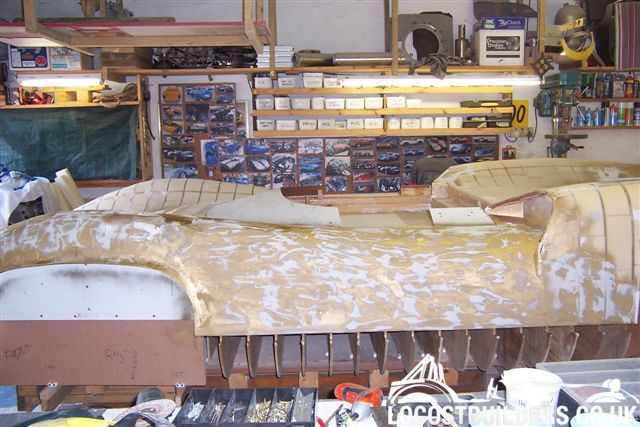
Some more progress to report. I am now happy the rear panel is ready for skinning. All the openings have 1 degree slope returns and the corners are all radiused.
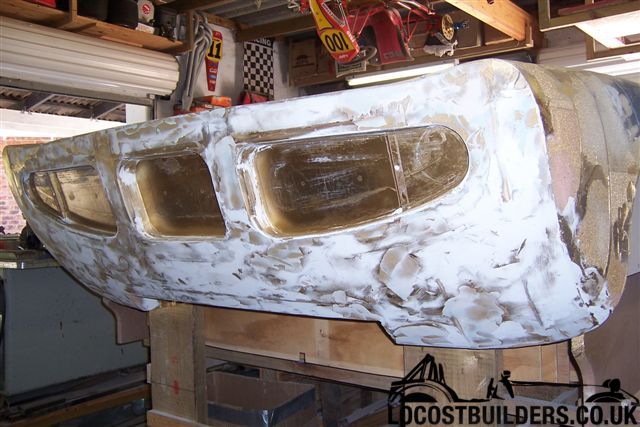
Moving to the mid section, I have mocked up a windscreen template in hardboard in order to establish the angle of the windscreen recess.
Having reworked the LHS, I am now much happier with the blend into the top of the front wheel arch and the profile of the top of the door. Still have to finish off and do the RHS.