
You are using an out of date browser. It may not display this or other websites correctly.
You should upgrade or use an alternative browser.
You should upgrade or use an alternative browser.
Classic HorsePower Scratch GT40
- Thread starter Wolfman
- Start date
Paul Hendrickx
Supporter
ok i need to buya pair of magnifying glasses and read better.... sorry
Devin
Supporter
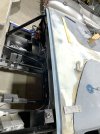
Too nice a day not to pull it out into the daylight and work the gaps and panels outside. Also shows the drastic difference in the size of the typical vehicles I’ll be running with here in this part of Texas. No kidding over 50% of vehicles here are commercial trucks, full sized pickups and SUVs.

Devin
Supporter
Joe, let me know if you need any other pic or dimensions. Unfortunately my setup is what worked with my custom body parts but I did compare as many other builds dimensions I could find on this forum and other sites to get +/-.5 inches of those I found. Also a bit of parallax with my pics so the top and bottom of the pics of the measurements vary a little. Looks like the spacers make it the right height. I ended up welding a new piece at the right height to have a solid base for the bottom of the windshield support to sit.


Last edited:
Devin
Supporter
Added front clam supports and fasteners as this area of the body as it was flexing way too much, even without any downforce or vibrations yet. Made the brackets first, after finding a good mounting location and experimentation to keep it light and eliminate fiberglass flex. Final mounting of the dzus fastener will of course occur after paint.


Last edited:
Thanks for the info! It looks like my AP chassis is nearly 1" below where the top of yours is at the base of the A-pillar, and your lower windshield frame on the spider is thicker than mine. Which may mead that my steering wheel is also 1" below yours. Which means that my dash will need to be raised to meet the bottom of the lower windshield area (If I split the lower windshield area to push the base down to the current chassis). That's a lot to ponder!Joe, let me know if you need any other pic or dimensions. Unfortunately my setup is what worked with my custom body parts but I did compare as many other builds dimensions I could find on this forum and other sites to get +/-.5 inches of those I found. Also a bit of parallax with my pics so the top and bottom of the pics of the measurements vary a little. Looks like the spacers make it the right height. I ended up welding a new piece at the right height to have a solid base for the bottom of the windshield support to sit.
View attachment 149715
View attachment 149716
Devin
Supporter
Cut the pockets for the rear Hartwell latches and fabricated 1 of 2 rear hood pin mounts. Took extra time for a prototype to get a second one perfected. A bit annoying but mark it up as the learning process of building bespoke & custom projects. I use to get more frustrated but guess I’m getting more mello in my “experienced” age LOL.


Devin
Supporter
Somewhat…the center 6” section is where my inner steel structure runs from front to back and supports the roof and bolts directly to the firewall. The top corners of the spider also are in contact with the firewall and add support but aren’t bolted down at those points. The inner spider roof adds a lot of rigidity to the roof as well as the expanding foam I used to fill the center voids between the inner and outer roof.Does the top of your firewall help support the rear roof of the spider and help it maintain its shape?
Devin
Supporter
Finally back at it with some nice Texas fall weather this weekend. I took time to heat up (with a heat gun) the front top of the rear clam to bend it down more to the level of the roof. Happy with the realignment and it will only take a little filler to shape it up.
Focus turned back to my doors and my second most dreaded fabrication challenge…formation and finish of the interior upper door skin. I started with finding and taping a suitable thickness of foam with painters tape to take up the room need for the final weatherstrip. Secondly, I protected surrounding door jams and surfaces with more tape and cardboard which also acted as a shield to corral the expanding foam into its cavity of the outer door skin. Once sprayed, the foam did an ok job of initial placement and was even able to make it stick upside down on the inner upper door skin. Not ideal but made it work until my second round with the door off of the car and turned upside down. A little clean up work and sprayed a second session to fill some of the large voids and laid heavy plastic to aid in an attempt at controlling the form.

Focus turned back to my doors and my second most dreaded fabrication challenge…formation and finish of the interior upper door skin. I started with finding and taping a suitable thickness of foam with painters tape to take up the room need for the final weatherstrip. Secondly, I protected surrounding door jams and surfaces with more tape and cardboard which also acted as a shield to corral the expanding foam into its cavity of the outer door skin. Once sprayed, the foam did an ok job of initial placement and was even able to make it stick upside down on the inner upper door skin. Not ideal but made it work until my second round with the door off of the car and turned upside down. A little clean up work and sprayed a second session to fill some of the large voids and laid heavy plastic to aid in an attempt at controlling the form.
Last edited:
Devin
Supporter
Worked with the heat gun to get a better “dome” shape for the door top. Applied a strength layer of cloth to cure in the proper shape (drying in place) before the final multiple layers of CSM to be applied next. Amazing how just the first application of fiberglass and epoxy resin have turned the floppy outer skin into a more rigid like structure. Also added a piece of thicker aluminum into the structure for possible future door top guide.

What did the height of the cross bar that the steering column bolts to ended up being (from the floor to the top of the bar)? I need to add an inch somewhere, just wondering how you came to the correct height for the lower windshield area.Could you get me a measurement off your chassis? Something seems off with how things go together where the spider-clam-door meet. When everything is nearly flush, the corner of the spider is way above the top of the chassis.View attachment 149688View attachment 149689View attachment 149690
Devin
Supporter
Joe, I hope these couple of pictures answers your questions. They were all taken from the floor which is the lowest point of the chassis.What did the height of the cross bar that the steering column bolts to ended up being (from the floor to the top of the bar)? I need to add an inch somewhere, just wondering how you came to the correct height for the lower windshield area.
Devin
Supporter
After about 5 different sessions of fiberglass and epoxy resin & clean-up and shaping, I believe I’m calling the right inside door fabrication complete. The next phase is to smooth the imperfections with kitty hair filler and sanding in prep for a couple of gel coat applications. The left door foam has been applied so shaping and fitment will be next before starting it’s fiberglass fabrication.

Devin
Supporter
Been slow going with other anti-GT projects and weather delays but final have the drivers (LHD) door rough finished with fiberglass inner structure. The two pics show the extreme rough state of initial foam application to the final application of the fiberglass mat on the rear window frame and upper roof reinforcement.


Similar threads
- Replies
- 5
- Views
- 4K
- Replies
- 9
- Views
- 13K