You are using an out of date browser. It may not display this or other websites correctly.
You should upgrade or use an alternative browser.
You should upgrade or use an alternative browser.
Darrin's MMR BOSS based GT40
- Thread starter darrinps
- Start date
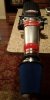
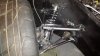
Built this from scratch to mate with my rack ends (14mm x 2 pitch). Got a decent quality Heim joint, stainless steel threaded rod in 14mm x 2, a couple 12mm hardened bolts, self lubricating bearings (for the inside of the Heim joint to mate to the 12mm bolts...the inside of the Heim joint was 14 and the insdie of the control arm bushing is 12mm), then the hard part...building a threaded tube to mate the two. Got some thick wall 1" from Stock Car Steel in NC, then bored it out to size (using four bits...a little at a time....couldn't keep the tube from turning otherwise). After that I tapped it to 14x2 and ended up with this. A couple hours of research for the parts, a couple hours of work cutting/boring/threading, and probably four times the cost of a simple tie rod end IF I could have found one to work (kit comes with an aluminum extender but I wanted it to be steel).
Attachments
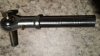
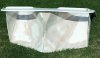
Need to do some final bondo and sanding but the shape is set and I think it will work much better than stock. Could have brought the outside edge a bit closer but didn't want it riding on the pipes.
Attachments
Darrin,
Can't tell from the pics, but with the divided nostril panel, most don't reach down to the bottom like the single nostril panels do. You need to find a way to seal the edges of the insert as best as you can to get the heat up and out from the radiators. When I damaged my rear clip I was driving without the nostril panel in the car and there is a section of the forward firewall that I had removed, as I was needing to get to the steering shaft to install the power unit.
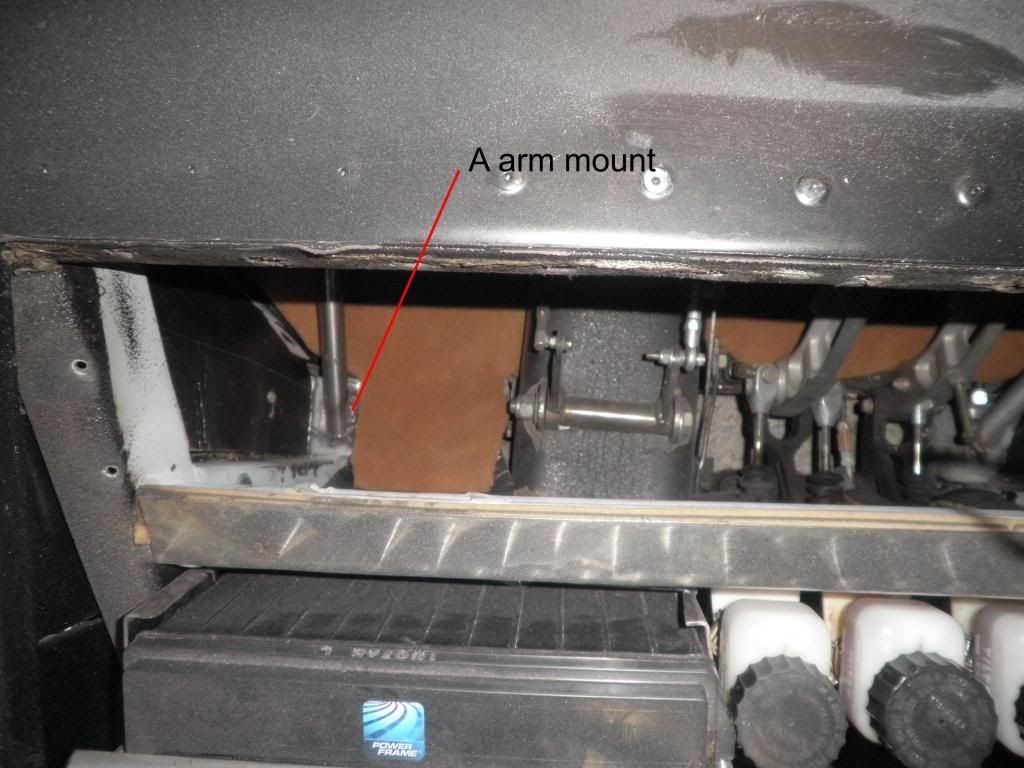
With the nostril panel removed there was a big blast of heat from the radiator. With the panel in place and the same piece not installed I could not feel any heat from the radiators at all. Here is how I did it.
My frame work is standard 1 1/2" square tubing. There is an additional bar(15" forward of the firewall) that is raised from the base frame 8"(standard on a DRB). The radiators on a DRB slope forward at a steep rake. It is used to mount my electric water pump. On this section of square tubing I installed sheets(3/16" thick) of hard(but flexible) rubber that but up against the nostril panel. The sheets are 9 1/2" tall and are mounted to the base frame and the additional tubing. Found the sheets at Ace Hardware.
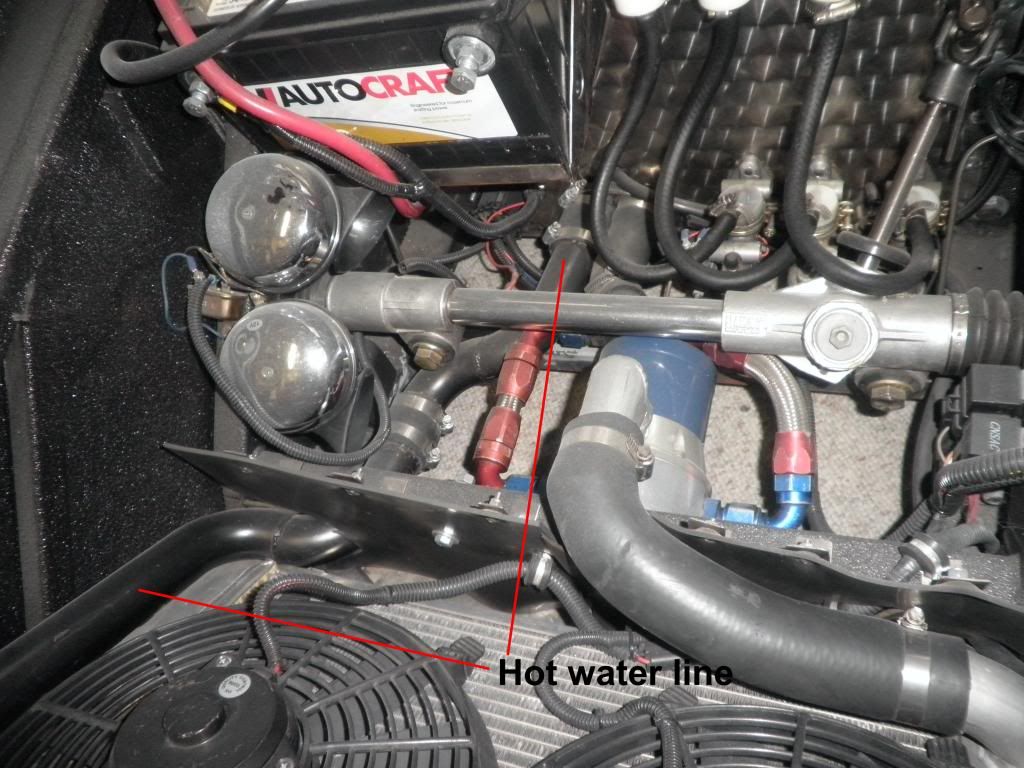
This keeps the majority of the heat away from the front firewall.
Can't tell from the pics, but with the divided nostril panel, most don't reach down to the bottom like the single nostril panels do. You need to find a way to seal the edges of the insert as best as you can to get the heat up and out from the radiators. When I damaged my rear clip I was driving without the nostril panel in the car and there is a section of the forward firewall that I had removed, as I was needing to get to the steering shaft to install the power unit.
With the nostril panel removed there was a big blast of heat from the radiator. With the panel in place and the same piece not installed I could not feel any heat from the radiators at all. Here is how I did it.
My frame work is standard 1 1/2" square tubing. There is an additional bar(15" forward of the firewall) that is raised from the base frame 8"(standard on a DRB). The radiators on a DRB slope forward at a steep rake. It is used to mount my electric water pump. On this section of square tubing I installed sheets(3/16" thick) of hard(but flexible) rubber that but up against the nostril panel. The sheets are 9 1/2" tall and are mounted to the base frame and the additional tubing. Found the sheets at Ace Hardware.
This keeps the majority of the heat away from the front firewall.
Thanks Bill. I was thinking about something like what you mentioned. Some sort of upward sloping flap that sits on the frame below the two nostrils so when the section is inserted, the nostrils make contact and, more or less, seal it a bit.
Even without this though, the difference between what it was and what it is has to be tremendous. Before I modified the thing, I had less than one third of the fans surface area covered by the holes. Now it's 100% although I could do more to create a tunnel like using the flaps you mention.
Even without this though, the difference between what it was and what it is has to be tremendous. Before I modified the thing, I had less than one third of the fans surface area covered by the holes. Now it's 100% although I could do more to create a tunnel like using the flaps you mention.
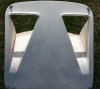
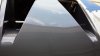
Picked the nostril section up from the paint shop today. Think I am going to stick with this color now I see it up close. They did a pretty good job but said they might need to shoot it again once I deliver the rest of the body just to make sure it matches up correctly. That is a way off though. Lot of fiberglass work to do. Hopefully by September.
Notice the reflection in the second picture. Clear coat on the Ford Tungsten metallic really picks things up.
Notice the reflection in the second picture. Clear coat on the Ford Tungsten metallic really picks things up.
Attachments
Darrin,
Are you doing the whole car in that colour or are you going to break it up with a stripe or something.
It looks a nice finish !
Nick.
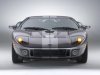
The whole car will have the color but I might put set of light racing stripes down the center kind of like this.
Attachments
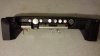
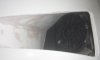
Been a while since I updated this. Need to take a couple photos after I get the condenser in but until then, here is the right dash panel (waiting on the dash to be covered now).
Anyone know the best way to get the thing marked? Just for the light and fuel switches as I figure the others are pretty obvious on this panel. Have a couple others that will need it done on the left (turn signal and lights).
Anyone know the best way to get the thing marked? Just for the light and fuel switches as I figure the others are pretty obvious on this panel. Have a couple others that will need it done on the left (turn signal and lights).
Attachments
Front grille aluminum hex mesh. Over 70% unrestricted area. AC condenser installed (black) and fits exactly over the open area of the radiator.
Looking nice. Are you going to funnel the air into the rad or block off the end for some brake coolers like the originals?
Looking nice. Are you going to funnel the air into the rad or block off the end for some brake coolers like the originals?
Being in TX, I plan to push as much into the radiator as I can.
")
With brake technology these days, and without plans for this to be a dedicated race car, I think the Wilwoods will be up to the task. Still, I might think about working some sort of ducting outside of the tunnel in front of the radiator. I'll swing back around to that later.
Keith Stafford
Supporter
Hey Darrin, just been through your build,.... you are looking good! K
Thanks Keith. I've been away from it for a while but now that the cool weather is here I'll start up again and make a big push to TRY to get this at least to the point where I can fire it up and put it into gear by late March.
Bob (Tornado owner), Pete (built his own Cobra and will be building a GT40), and a friend of his I believe named Doug stopped by my messy garage today to look at the car through all the dust and debris.
Pete asked me what engine was going to be in it (his Cobra runs a nice 4.6L Ford modular with Paxton supercharger) and I told him what it is to be. For those that want to hear one here it is inside of a Cobra. Sure doesn't have the lope and grunt of a 427 side oiler, but it's not too bad on the ears.
https://www.youtube.com/watch?v=OLyo9wUsUGE
Here is the build process for those interested in this engine.
https://www.youtube.com/watch?v=sCOocyTmakM
https://www.youtube.com/watch?v=sCOocyTmakM
Bob (Tornado owner), Pete (built his own Cobra and will be building a GT40), and a friend of his I believe named Doug stopped by my messy garage today to look at the car through all the dust and debris.
Let us know the next time you are going to do that. I'd like to tag along too.
Dash came back. Bob has contact information in his build log for the guy who did it. Al Knoch Interiors I believe is the name. Did a pretty good job.
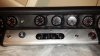
The gauges are from Speedhut which I really like...GPS speedometer included. You can customize them in many ways. Mine say GT40 at the top of the tach and speedometer. They all glow blue at night. The switches are LED tipped and I got those from somewhere in England.
The dash isn't perfect, but it's pretty darn good and I'm happy with it for sure. Mine has some cutouts for the roll cage so that's the holes you might see at the top. I have to polish and either paint or clear coat the demister grill (thinking a thin paint to keep all glare down might be best) then it will be ready to go on once I get the AC in place.