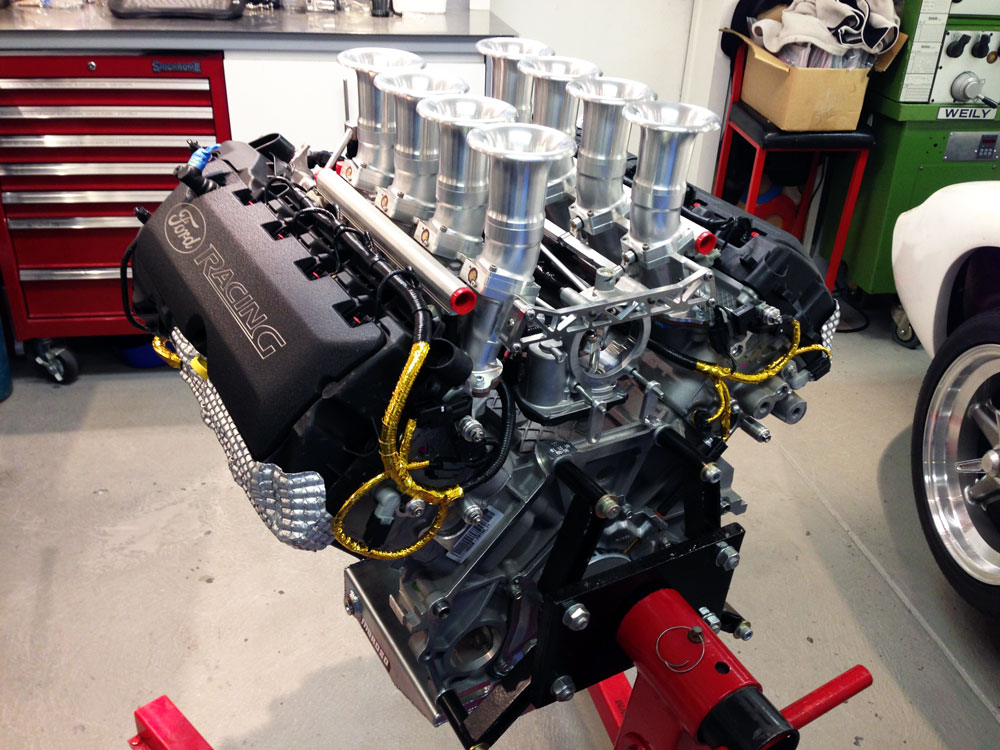
Dean's GT-R build thread

Hi Dean. Are you going to run drive by wire on this as well? I must say that the InnoV8 stack I have uses the OE throttle blade to drive the ITB's and it works great. Easy to setup and adjust throttle curves etc.

You will enjoy the tuning with the variable cams. The Haltech allowed some neat stuff in this area and I'm sure the AEM system will too.

I really look forward to seeing how yours turns out, its great to see all the options out there for Coyotes with ITB's. I plan to run another dyno tune now the the engine has been run in (well thrashed to be honest) and will post some numbers.
 
I wish you lived down the street! I would have a lot of questions for you. I was going to use a throttle cable but would be very interested it hearing/see more about this unit you have to actuate the bell crank. Is that something sold separately or that you took off of the original intake?
 
Hello Dean. Where do you expect to put the redline on this free-breathing monster? Related question, is your Coyote stock bottom end or Aluminator NA?
Thanks again,
Mike
 
I will likely set the redline at 8000. But keep in mind the number is only needed when you have a straight section of track and you can either shift or just run it up the band for maybe 2 or 3 seconds until you get to the curve. I never want to have to lift before the braking zone. The bottom end is just the stock coyote. For track day stuff I just don't think you need more than that.
 

Michael Fling

Supporter
Dean,

Just wanted to touch base to say your new ride is killer! Sexy car with a killer look. It amazes me how well you do things and how easy you make it seem. You and Allan should have your own TV show!
 
My plan for handling debris in the engine bay and the air flow through the engine is simple. Suck it in, chew it up, burn it out!

Filters are for sissy's!:flameon:
 
So it's time for the engine install. I had a friend over and some of my boy's friends stopped by. The thought was that we would just sit it in to see what it looked like. Well, its in and it isn't coming back out in the near future!

I went with solid mounts.


Here's the deal, The transaxle is solid mounted to the frame and the engine is bolted to that axle. If you use a urethane mount, then you are really putting a lot of pressure or force on the transaxle mount. By using a solid mount I believe I have transferred some of that load to the motor mounts. I think this the best way to mount your engine unless you change the transaxle mounts.


I needed to slot some of the holes on the motor mounts. They didn't line up on the first attempt. These are modular motor mounts from a 2004 mustang GT. I wanted to mount the RCR cross bar to the engine before I did the install.

I can't believe how easy it was to set this engine in the car!:thumbsup: If you have every squeezed a 427 sideoiler into a cobra, you will appreciate what I'm saying!


First point to attach is the transaxle mounts but don't torque them down yet.


Next, make sure you drill and bolt your crossbar to the frame before you tighten the transaxle bolts. You might need to shift it left or right. You also want to make sure there is no pressure put on areas where there should be no pressure.


I used a C -Clamp to fully compress the lower sleeve into the RCR cross member then I drilled the 3/8's holes and bolted it in place. I know it sounds easy but it can be frustrating. I had to use 3 different drills to get just the right approach. I believe that the size of the hole through the frame is not crucial so you can over drill it if you need to. The force is carried by the engine mounting system and the way I clamps 360 degrees around the aluminum tube.
 
Hi Dean, wow there is a lot of room in that engine bay, that is awesome. Fitting the Coyote and the Ricardo trans in my RCR40 was not recommended and I now know why :).

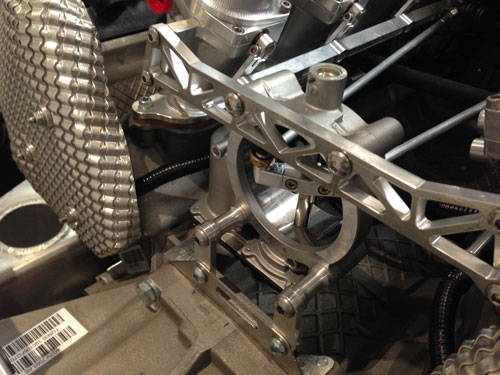
Regarding your question on the drive by wire setup on my 8-stack it came with the throttle bodies and can be seen below.

GT40-Wiring2.jpg


GT40-Block-Plate7.jpg


It really works well and is great fun to tune with the ECU.
 
Dean, your moving so fast you'll be done before I start on mine. At least your providing a near builders manual of detail and guidance. Thanks for keeping us in the loop.
 
It's probably time for an update from the last weekend. Sometimes you can work and work and it looks like it did the day before. Well, I'm sort of in that spot right now. Some things have worked some have needed to be re-thought. I guess that goes with the territory so as I have said many times, if anyone see's a better way to do something please speak up.

I wanted to make a few comments on the intake. The seals do not come with the Borla unit. No problem, just take them from the original intake. Wrong. The Borla intake is not built to accept the 2015 and newer coyote seals. It's not a big deal but I wanted to share the information. Here are the pictures of what I'm talking about.


This is the 2015 intake seal. And this is the old style.


You will need to order these seals.


I've been bolting things in around the engine like the support bars. I snapped on the valve covers with the idea that I would remove them and paint them another color but the blue is growing on me. The pictures also show a semi-complete fuel system. Here are a few pictures.


Dean,
Looking very nice! I believe that the 15-16 Coyote crate comes with 1 exhaust manifold. Where did you source the opposite hand?
Mike
 
I didn't use the stock exhaust at all and, as a matter of fact, I don't think I'm going to use the BBK shorty's you see in the picture either. It's still up in the air but I'm really leaning toward a bundle of snakes approach of some kind. I'm just not willing to pay what most want for them and I'm not sure I have the time or skill to do it myself. So there's really no answer at this point.
 
I wish you lived down the street! I would have a lot of questions for you. I was going to use a throttle cable but would be very interested it hearing/see more about this unit you have to actuate the bell crank. Is that something sold separately or that you took off of the original intake?


Dean,
I bought the same intake, but from Jim Inglese, as I understand it he partners with Borla, its identical to yours. I am also in the same boat, between throttle cable and DBW. The one Jason has, as you can see uses a DBW throttle body to actuate the linkage. I took a spare DBW throttle body I had lying around and milled it flat, with a little fab work i think we could create the mount at the back of the intake and produce similar results. I think it would take the elimination of a couple springs in the throttle bodies and the right linkage built, maybe a couple bosses welded to the rear, but very minor work in comparison to the other projects these cars take.
I plan on posting some pictures once I get back on that part of the project.
Dennis
 
Well it has been awhile. I have been dealing with some family issues that have taken me mentally away from the build. You know how sometimes you just don't "feel" it. That's how I've been for the last three weeks. Anyway, I'm back at it. I'm at the point in the engine install that you spend time just making connections like finishing up the cooling and fuel lines. I ran the PCV lines and mounted the engine management computer. I have been working through my exhaust option too. These things don't really need pictures but I can share a few shots and things I have found along the way. If someone has a question or wants to see something specific, let me know.

I'll post some shots tomorrow of some of the things I've done.
 
Just to get the ball rolling again, here are some shots from the body shop. I have about half of the car there and the other half in my garage. The plan is to do this half then take the rest down when this is finished. I'm not doing the body work but I have been there "helping out". I can say this about the fiberglass work, there is less than a tablespoon of bondo in all the parts combined so far. That is where I knocked a corner off in the process of moving it to the paint booth!

The colors are the same as the Ford Heritage cars and they are so beautiful!

You can't feel the stripe after it was buffed. This guy does very good work!


Back
Top