
You are using an out of date browser. It may not display this or other websites correctly.
You should upgrade or use an alternative browser.
You should upgrade or use an alternative browser.
DRB #5
- Thread starter wbmusarra
- Start date
Waiting gor the front uprights and associated parts to come in. Seems to take forever. Supposed to have been sent in March, then May 3rd or 4th. Still not here,who knows when they will arrive.
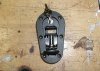
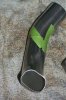
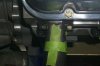
Have been making some progress in other areas. Sent the dash out to be covered. should be back this week. then I get to play with the wiring AGAIN. Recieved the rear clip hold downs. they are really nice. Locking mechanism that CAN"T be missed to give you a parachute experience. The main flap is spring loaded and will remain up until closed. The closing mechanism is a two hand operation, and there is a key to keep prying eyes from openimg the rear hatch. Will have to alter the fiberglass, but my car originlly had the hold downs, so the under panel is already drilled out. Redrilling the outer body will be fairly easy. The aligning will be a bit tricky but not that difficult.
Bill
Attachments
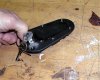
Thoes side indicator repeaters, were later made with a clear cover if you dont want the orange/amber ones. should still clip in and out of the same hole. the early er version from the VS and VR commodore are square in nature and should also fit. A friend of mine replaced his for the later model ones, oval witrh clear cover in his VS HSV Sennator
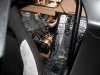
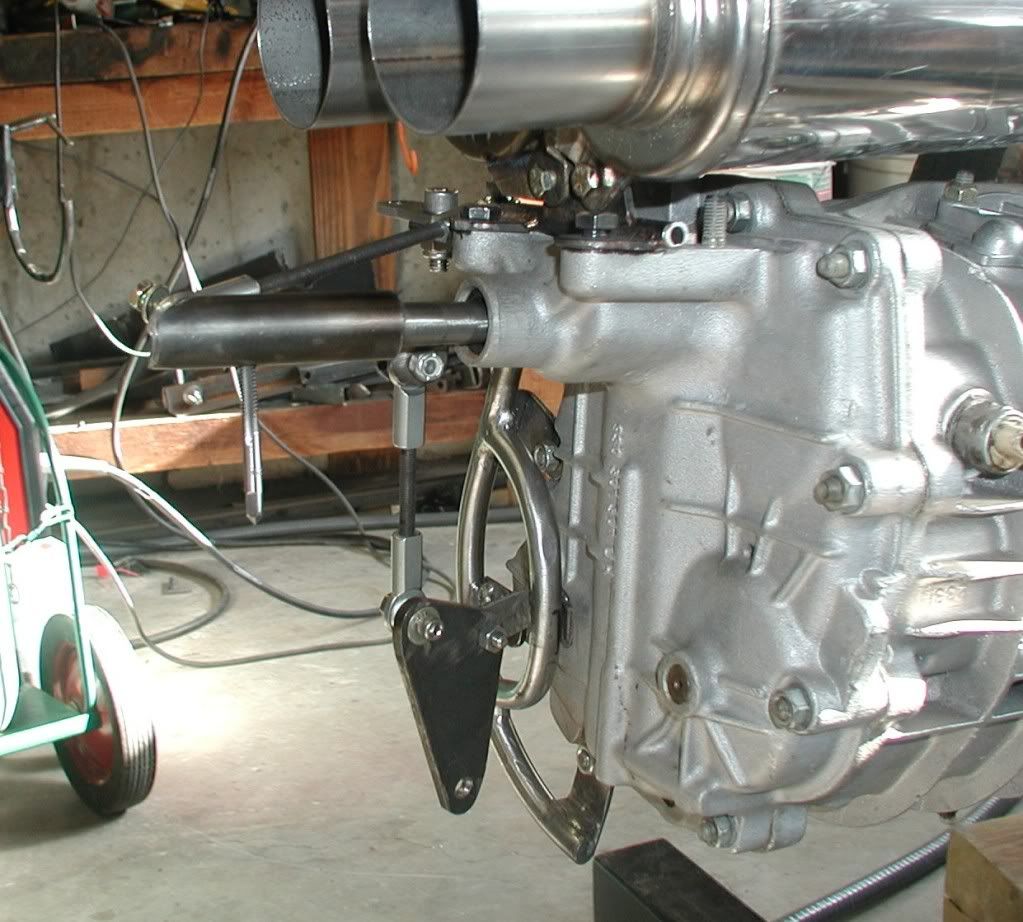
While waiting for the brakes to be sorted out, I have made some good inroads with DRB#5. The dash was sent to Jeff Henderson who does most of the upholstery work for Year One. Jeff does exceptional work, and doesn't stop til he is satisfied. With this at home finally, the electrics can be hooked up and tested before the car gets sent to the engine shop for finalizing and a lot of touchup welding. The headers will be fabed at that time also. Supposed to go to the shop in about a week to a week and a half.
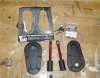
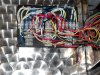
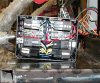
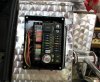
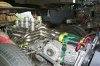
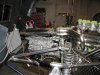
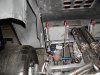
I stole an idea of Bill D. I believe it is. I wasn't pleased with the way the electric relays were working out. So I got two project boxes from Radio Shack. One is the full size, the other is the smaller. My fuse panel was a tad large for the big box, so some trimming was done. The base plate was removed and placed in behind the back of the box for support. The smaller box holds the extra panels for the relays and the relays themselves. It was a tight fit, but they went in nicely. Everything is labeled so I can find it. Now to hook it all up and put the power source to it to test the circuits. The boxes will be mounted on either side of the engine bay. I will use the aluminum panels that came with the boxes to form mounting brackets and hide the few holes in the panels. Did a test fit of the boxes and the dash just to see how they will look. Really neatens up the look. It is sloooowly beginning to look like it should.
Bill
Attachments
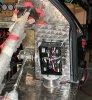
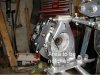
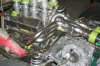
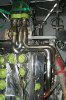
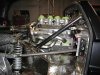
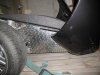
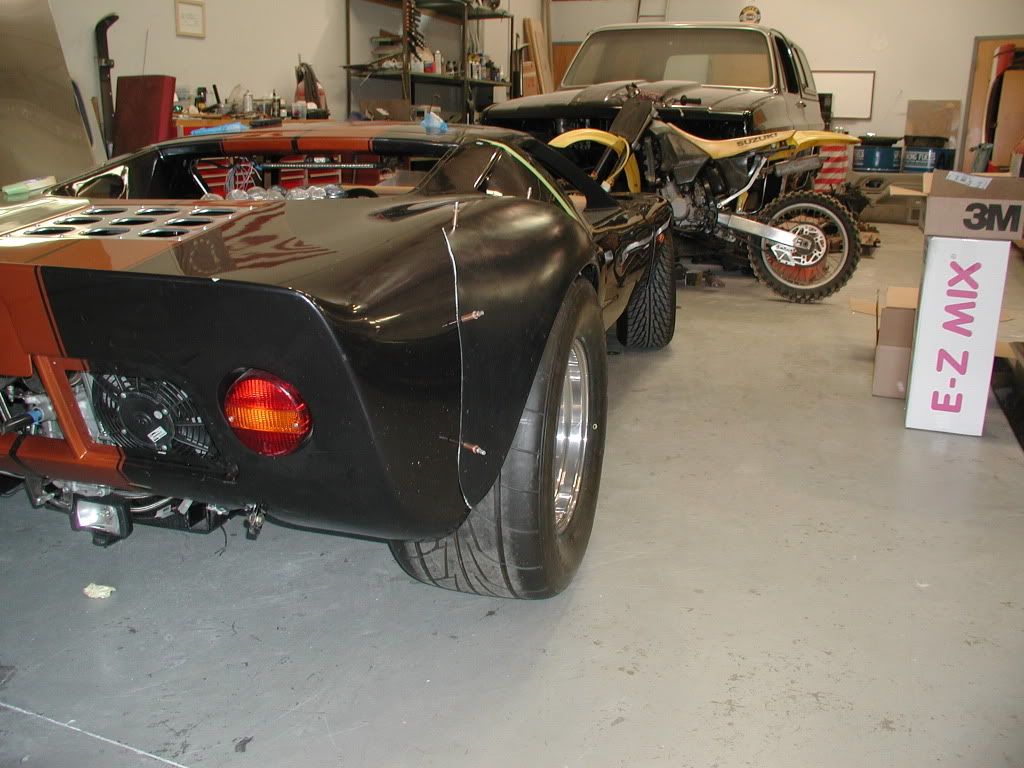
Well, It’s time for another update with a little “splainin” to go along with it all. Way back about 9 months ago I started looking for some aftermarket brakes for the early C4 corvette suspension. Never having ventured much into this area of car workings other than to change the pads on all my cars in the past, I had no idea what was available out there. All my searches led to nothing. About the time I discovered a local Corvette race team, I stumbled onto one Chevy dealership that raced corvettes that offered a Wilwood setup. I was not familiar with what was needed to do setups like AP and the like. Since I was getting my seats from the local race shop, and they were going to set up my suspension, I asked them if they could acquire the brakes as well. He informed me that he could fab up whatever I needed. About that time I received a message from Fran Hall that he had all that I needed for the brakes. Well since the local shop was only a 2 man operation, and Fran’s standing with me is very high, as he had offered some equipment out of the blue once before for me to try out and see if I could make it work (steering rack). I also was impressed with the caliber of work his shop was turning out at the time. So I opted for him to do the brakes as he could furnish many other suspension pieces that I was in need of, not to mention other GT 40 equipment that I was in search of(axel stubs, CVs etc.). So off went a front and rear upright for him to work his magic. Over 6 months time Fran tried several approaches to solve the upright issues that the C-4s presented. Some of my equipment was rather worn and several pieces were replaced.
When all was done, Fran was ready to ship the parts, new pieces and several other parts, which I had requested. With his commitments (unbeknownst by me) to prepare 4 cars for Carlisle, some delays occurred and then there were some mix-ups with the individuals in shipping, and after many weeks, only part of the parts came in. There were then several miscommunications between us. I later learned Fran’s server was down and he didn’t know I had tried several times to contact him.
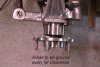
Well, that’s all been straightened out and is water under the bridge. All is back on track, and Fran has sent almost all of the remaining parts (some he didn’t know I wanted, and some shipped to who knows where). I did get the brackets and spacers, and bolts and taps needed to get the brake parts together. Now outside of some minor alignment issues the calipers are in place.
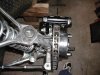
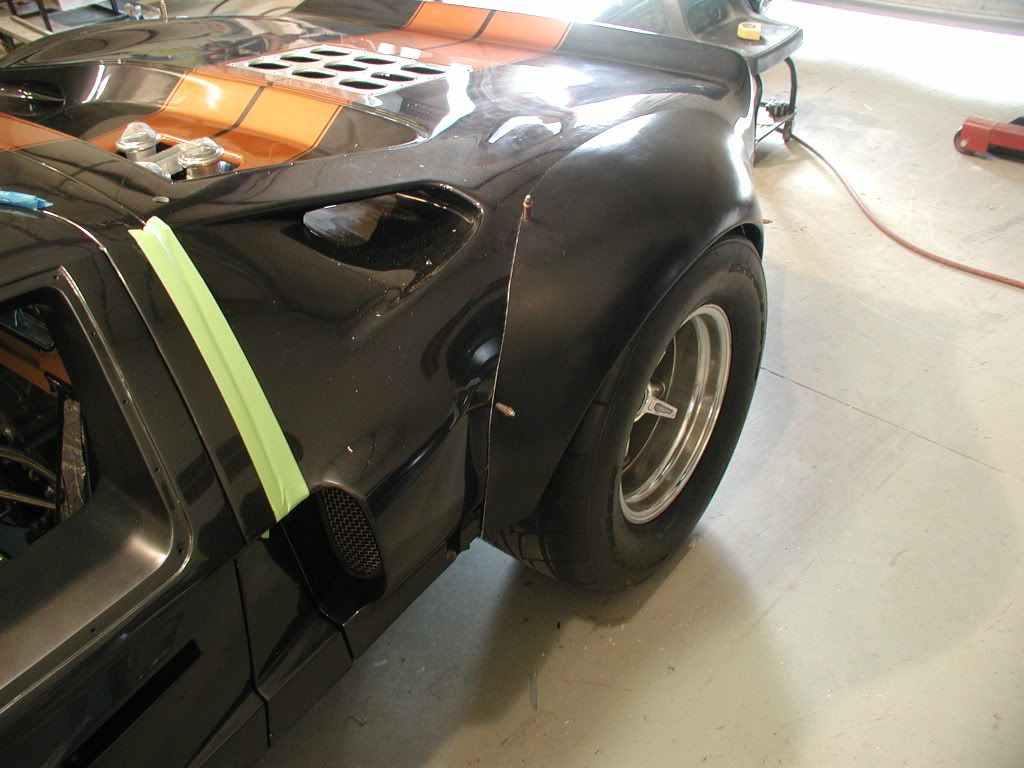
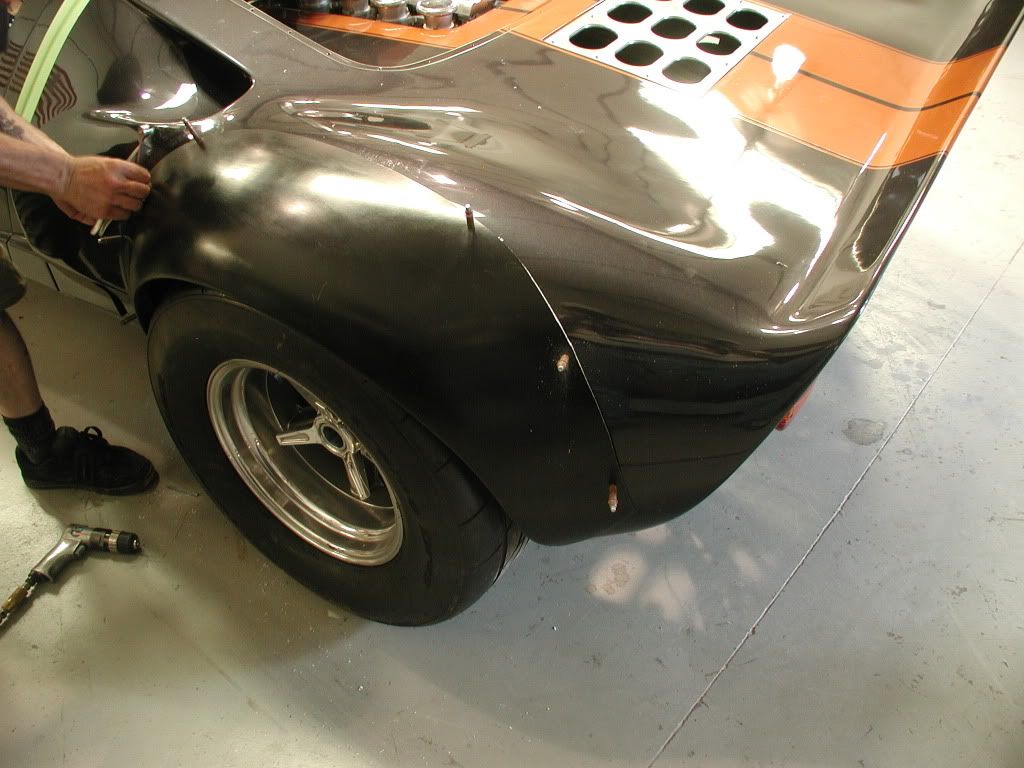
I discovered while installing the pieces that the bells, due to the replacement of the parking brake with Fran’s spacer, are now reversed. The deep bell on the stock setup is on the rear, and the front is shallow. With Fran’s setup the deep is on the front and the narrow is on the rear. Really threw me a curve when I first started to install them. There is a parking brake option, which I will probably add later on.
There are a few areas that need notching. The fronts need the steering arm and the mounting for the old dust shields to be slightly notched. The rears have a section of the upright that needs slight reliving.
I think Fran has a business plan that is really quite unbelievable, in that he has things that he can adapt to other brands, or supply to the other brands. He isn’t afraid to step out there and give a lending hand. It could lead to other business/sales/ market share. In my case, the steering unit he offered was just out of the blue. May have been to adapt to other brands or scratch builders, as that is just about what mine was, or is. The brakes are basically from his own design of front end, which was modeled after the corvette. We even tried to adapt his upright to my unit, but it just wouldn’t work engineering wise. The brakes he has supplied will give him a product that will work for those units like the DRBs, which don’t have many options if they still supply the older units. Could be wrong on this, as they may have upgraded by now to the C-5. Several of the C-4 aftermarket parts, like the wheel bearing and hub assembly have been dropped. Fortunately some of the C-5 stuff is adaptable.
I do remember the thread on the test that Peter Delaney had to go through for rego. They showed the lasting ability of the stock brakes. Before that time I had read on several Corvette forums how the stock setups would not last on the track, and suffered badly from fade. I was always impressed with the suspension on the Corvettes and always thought I could get something aftermarket to work with it. I will admit that I was after a little bling as well. When I couldn’t find anything I thought I was going to be stuck with the stock setups. After having the parts in hand, I can see how the other stuff that wasn’t widely circulated (Aps etc.) would work. It is geometry and aligning.
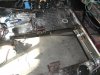
Since getting the parts, I have discovered one rear bearing to have too much play and will be replaced. The trans is out for the spray bar fitment along with the slave cylinder placement, pilot bearing, etc. I believe it will be a 993 setup. Could be wrong on that. The Porsche shop foreman at Jim Ellis is doing this one for me. One of those areas I have no experience in, much less what is required.
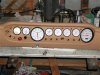
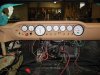
I have also discovered that I may have to alter my gauge arrangement in that I opted for manual gauges for the water, oil temp and trans temp. They all may be too short without them being a little unsightly leaving the dash, so I may have to go to electrics instead. That may work to my advantage, as I have to have several functions that have to be linked. There is the low oil pressure (7psi) linked to the fail-safe inertia switch for the fuel pumps, oil temp and pressure warning lights along with the gauges. There also has to be another oil pressure valve (20 psi) for the accusump.
The really good news is that the car is now able to come down off its stand after 3 years and get to the shops that are going to do the finish work, that being the welding that I could not do, or get to, and final engine assembly and fire up (which I feel should be done by the experts). I have put too much money into the setup to screw things up. This has to be done around the shops other commitments so it may be a week or two.
The LineX shop is ready to do the undercoating and probably will see the car first if the weather will break long enough to get it over there. With that done, all the finish work including carpets, interior bulkhead and door upholstery, can be done. Lots of little things like regrinding the mounts for the shocks, as they are too tall for the QA-1 shocks. This means they will have to be re ceramic coated. I also found that with adding the stainless to the bulkheads, the trailing arms are now too long and will have to be cut and new appropriate end adjustments added.
What this all means is that things will move much more quickly (finally), and the end of the tunnel can’t be that much further ahead.
Bill
When all was done, Fran was ready to ship the parts, new pieces and several other parts, which I had requested. With his commitments (unbeknownst by me) to prepare 4 cars for Carlisle, some delays occurred and then there were some mix-ups with the individuals in shipping, and after many weeks, only part of the parts came in. There were then several miscommunications between us. I later learned Fran’s server was down and he didn’t know I had tried several times to contact him.
Well, that’s all been straightened out and is water under the bridge. All is back on track, and Fran has sent almost all of the remaining parts (some he didn’t know I wanted, and some shipped to who knows where). I did get the brackets and spacers, and bolts and taps needed to get the brake parts together. Now outside of some minor alignment issues the calipers are in place.
I discovered while installing the pieces that the bells, due to the replacement of the parking brake with Fran’s spacer, are now reversed. The deep bell on the stock setup is on the rear, and the front is shallow. With Fran’s setup the deep is on the front and the narrow is on the rear. Really threw me a curve when I first started to install them. There is a parking brake option, which I will probably add later on.
There are a few areas that need notching. The fronts need the steering arm and the mounting for the old dust shields to be slightly notched. The rears have a section of the upright that needs slight reliving.
I think Fran has a business plan that is really quite unbelievable, in that he has things that he can adapt to other brands, or supply to the other brands. He isn’t afraid to step out there and give a lending hand. It could lead to other business/sales/ market share. In my case, the steering unit he offered was just out of the blue. May have been to adapt to other brands or scratch builders, as that is just about what mine was, or is. The brakes are basically from his own design of front end, which was modeled after the corvette. We even tried to adapt his upright to my unit, but it just wouldn’t work engineering wise. The brakes he has supplied will give him a product that will work for those units like the DRBs, which don’t have many options if they still supply the older units. Could be wrong on this, as they may have upgraded by now to the C-5. Several of the C-4 aftermarket parts, like the wheel bearing and hub assembly have been dropped. Fortunately some of the C-5 stuff is adaptable.
I do remember the thread on the test that Peter Delaney had to go through for rego. They showed the lasting ability of the stock brakes. Before that time I had read on several Corvette forums how the stock setups would not last on the track, and suffered badly from fade. I was always impressed with the suspension on the Corvettes and always thought I could get something aftermarket to work with it. I will admit that I was after a little bling as well. When I couldn’t find anything I thought I was going to be stuck with the stock setups. After having the parts in hand, I can see how the other stuff that wasn’t widely circulated (Aps etc.) would work. It is geometry and aligning.
Since getting the parts, I have discovered one rear bearing to have too much play and will be replaced. The trans is out for the spray bar fitment along with the slave cylinder placement, pilot bearing, etc. I believe it will be a 993 setup. Could be wrong on that. The Porsche shop foreman at Jim Ellis is doing this one for me. One of those areas I have no experience in, much less what is required.
I have also discovered that I may have to alter my gauge arrangement in that I opted for manual gauges for the water, oil temp and trans temp. They all may be too short without them being a little unsightly leaving the dash, so I may have to go to electrics instead. That may work to my advantage, as I have to have several functions that have to be linked. There is the low oil pressure (7psi) linked to the fail-safe inertia switch for the fuel pumps, oil temp and pressure warning lights along with the gauges. There also has to be another oil pressure valve (20 psi) for the accusump.
The really good news is that the car is now able to come down off its stand after 3 years and get to the shops that are going to do the finish work, that being the welding that I could not do, or get to, and final engine assembly and fire up (which I feel should be done by the experts). I have put too much money into the setup to screw things up. This has to be done around the shops other commitments so it may be a week or two.
The LineX shop is ready to do the undercoating and probably will see the car first if the weather will break long enough to get it over there. With that done, all the finish work including carpets, interior bulkhead and door upholstery, can be done. Lots of little things like regrinding the mounts for the shocks, as they are too tall for the QA-1 shocks. This means they will have to be re ceramic coated. I also found that with adding the stainless to the bulkheads, the trailing arms are now too long and will have to be cut and new appropriate end adjustments added.
What this all means is that things will move much more quickly (finally), and the end of the tunnel can’t be that much further ahead.
Bill
Attachments
-
 Web P1010004.jpg63.8 KB · Views: 1,081
 -
 Web P1010005.jpg57.6 KB · Views: 1,075
 -
 Web P1010021.jpg44.9 KB · Views: 1,080
 -
 Web P1010025.jpg92.9 KB · Views: 1,086
 -
 Web P1010029.jpg115.5 KB · Views: 1,058
 -
 Web Web P1010014.jpg92.6 KB · Views: 1,171
 -
 Web P1010032.jpg117.5 KB · Views: 1,036
 -
 Web Web P1010011.jpg91.7 KB · Views: 1,197
 -
 Web P1010036.jpg72.3 KB · Views: 1,081
 -
 Web P1010030.jpg65.5 KB · Views: 1,022
It is hard to believe that it has been so long since an update. I have come to the realization that those who can do all the work themselves, are able to get things done on their own schedule, more than those of us that have to get a few shops involved to finish the project. You work on their time and not on yours. As a result, a job that would have taken a day or two, can be stretched out to fill three weeks because of delays, holdups, and other projects getting in the way.
It will be a while before I post more on the car as I go in for some minor surgery on my knee which has torn a cartilage for the second time. Nothing major, just time to fix it. Kneeled down on the carpeted floor for 5 minutes and tried to stand up, and couldn’t. Then the pain hit.
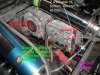
I have made some of progress even though things look like there are miles to go. I had the underside of the car coated with Linex. Had it extended into the front clip area as well since the stainless facing that side was a little worse for wair. Preping the car for the undercoater means taking not only the engine and trans out, but a lot of the wiring as well.All bolts and washers have to have aluminum tape coverings. All holes have to be plugged unless you want to hunt for them afterwards. Otherwise they are covered for good.
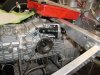
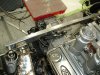
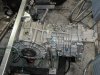
This gave me the opportunity to take the trans to my good friend and shop foreman at the local Porsche dealer. He added the 996 slave cylinder and actuator for the clutch. Moving the motor forward makes the front of the trans a lot closer to the cross bar. It is so close to the trans that the mount had to be fabricated and the cross bar notched. He also added the spay units to the trans for the ring gear, 2nd, 3rd, and 4th gears. Now all I have to do is complete the hosing to the pump, cooler, and return lines. All that is sitting in a box to be done.
The trans oil drain lines come off a T where the oil fill hole was. The T will allow a temp sending unit to be mounted there as well. That work being finished, Atlanta Chassis Dyno did some finish welding and the final torqueing of the engine. They did some extra things for me like a new set of engine mounts as well. The old ones were soild mounted to the frame and had to be altered to clear the oil pan. The new one at least has one bush to try and not rattle the teeth.
The race shop next door(Sheppard Race Cars) redid the trailing arms in a much better fashion. The new arms allow for adjustment on the car. Now all we need is the new rear clevis set from DRB and that will be done. The old clevis were less than satisfactory. The rod/bush angle on more than one did not lineup very well and quite frankly had a bind on bounce. Not a good thing.
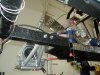
They also have started on the exhaust work, and should be finished soon. For those of you talented enough to Tig a set up, my hat is off to you. I can tig O K, but not good enough to do a set of pipes up right. Would have had many stalgtites!! Sheppard will back purge the pipes and do it up right. They do many dual turbo drag cars that need every ounce of power. When finished the car will come back to the house to finish up on some detail stuff, and then back to Atlanta Chassis Dyno for the ignition, FI harness and fireup. Hopefully then home for the final interior work to be finished. During the slack time I have added insulation(Dynamat) and foam to the door interiors, Dynamat and Dynapad to the firewall, front clip divider, and rear portion of the wheel wells. Depending on the upholsterers requirements, will add there as well. Here are some of the pics of the work so far.
Bill
It will be a while before I post more on the car as I go in for some minor surgery on my knee which has torn a cartilage for the second time. Nothing major, just time to fix it. Kneeled down on the carpeted floor for 5 minutes and tried to stand up, and couldn’t. Then the pain hit.
I have made some of progress even though things look like there are miles to go. I had the underside of the car coated with Linex. Had it extended into the front clip area as well since the stainless facing that side was a little worse for wair. Preping the car for the undercoater means taking not only the engine and trans out, but a lot of the wiring as well.All bolts and washers have to have aluminum tape coverings. All holes have to be plugged unless you want to hunt for them afterwards. Otherwise they are covered for good.
This gave me the opportunity to take the trans to my good friend and shop foreman at the local Porsche dealer. He added the 996 slave cylinder and actuator for the clutch. Moving the motor forward makes the front of the trans a lot closer to the cross bar. It is so close to the trans that the mount had to be fabricated and the cross bar notched. He also added the spay units to the trans for the ring gear, 2nd, 3rd, and 4th gears. Now all I have to do is complete the hosing to the pump, cooler, and return lines. All that is sitting in a box to be done.
The trans oil drain lines come off a T where the oil fill hole was. The T will allow a temp sending unit to be mounted there as well. That work being finished, Atlanta Chassis Dyno did some finish welding and the final torqueing of the engine. They did some extra things for me like a new set of engine mounts as well. The old ones were soild mounted to the frame and had to be altered to clear the oil pan. The new one at least has one bush to try and not rattle the teeth.
The race shop next door(Sheppard Race Cars) redid the trailing arms in a much better fashion. The new arms allow for adjustment on the car. Now all we need is the new rear clevis set from DRB and that will be done. The old clevis were less than satisfactory. The rod/bush angle on more than one did not lineup very well and quite frankly had a bind on bounce. Not a good thing.
They also have started on the exhaust work, and should be finished soon. For those of you talented enough to Tig a set up, my hat is off to you. I can tig O K, but not good enough to do a set of pipes up right. Would have had many stalgtites!! Sheppard will back purge the pipes and do it up right. They do many dual turbo drag cars that need every ounce of power. When finished the car will come back to the house to finish up on some detail stuff, and then back to Atlanta Chassis Dyno for the ignition, FI harness and fireup. Hopefully then home for the final interior work to be finished. During the slack time I have added insulation(Dynamat) and foam to the door interiors, Dynamat and Dynapad to the firewall, front clip divider, and rear portion of the wheel wells. Depending on the upholsterers requirements, will add there as well. Here are some of the pics of the work so far.
Bill
Attachments
-
 Web P1010069.jpg98.3 KB · Views: 964
 -
 Web P1010096.jpg104.8 KB · Views: 1,613
 -
 Web P1010097.jpg110.5 KB · Views: 960
 -
 Web P1010103.jpg104.7 KB · Views: 1,591
 -
 Web P1010104.jpg97.7 KB · Views: 976
 -
 Web P1010088.jpg96.9 KB · Views: 937
 -
 Web P1010100.jpg82.8 KB · Views: 946
 -
 Web P1010101.jpg87.8 KB · Views: 949
I had hoped to have the motor fired up by now, but the engine builder and the exhaust shops have held me up a bit. The exhaust is half done at this time and I am hoping to get the car back to the house on Friday or Monday depending on their progress.
Bill
Bill
Attachments

Pat Buckley
GT40s Supporter
Thanks for the pictures - your car looks geat.
How is the knee doing?
How is the knee doing?
Have been a little slow on the build progress. Had the car in two shops to do some welding and redo the trailing arms/clevis and have the exhaust done. I thought it was going to be done on my schedule(HA!). That took more than 2 months. While in the shops I tore a meniscus in my left knee, actually retore it is more like it, and decided to go ahead and get it fixed. Well I found out that you don't heal like you did 15 years ago. Much slower.
I am out and about now without any hindrance.
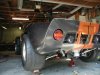
I decided to pick the car up on Thursday. There were rumors of snow, but I figured if it did, I could make the 30 mile trip and be home before the first flakes. Well we got caught in a blinding snow storm(for Atlanta), but managed to get the car home safely. Even with a cover on the car while at the shop, it was filthy. So I have started the tear down and final rebuild. The trailing arms look great and are quite beefer than the original pieces. The clevis were pitiful and were replace with GT40 Australia pieces. Had to alter two of them. Seems that they changed the bolt diameter on two or them from 5/8 to I believe 1/2. At first we thought it was a mistake and would order new ones. Then we saw the angle was a little different and knew it was correct. So we drilled and tapped it to suit. Now the rear suspension can be changed without having to disconnect, change the rod ends, reconnect and measure.
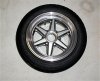
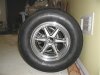
The exhaust was 304 stainless. These guys are truely experts when it comes to exhaust work. It took between 20 and 30 bends to complete the build. Considering they were doing it from only a pic or two, the results are fantastic. I thought the exhaust was going to cost a bunch. Wound up that all the work, trailing arms and exhaust came in at less than I thought the exhaust alone was going to be. I consider that a deal. My alternative was to ship the car up to Fran, have his guys do it, and ship it back. With Frans pricing and the shipping fees, it was back up to the high figure. So alls well that ends well. I finally got my wheels as well. Now all I have to do is decide on the tires I want. Since my wife is starting to clamp down on the budget a little, I will post phone the gulf flares and wide wheels for now. So I will catalogue the disassembly and rebuild after the ignition is added and fired up. The guys forgot to add the retainer clips on the collector/pipes so that will be added later.
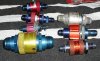
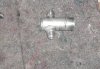
Lynn Miner has a post on Jiffy Tite AN quick connects(reference article that can't be posted on). They are expensive to say the least. I am adding Aeroquip quick connects to my oil, fuel, trans cooler, and water lines for easily removing the engine/trans without making a mess. The sizes run from AN-3 to AN-20 and are self sealing. I find them on ebay from time to time and won't buy them unless the price is around $20. The larger ones will cost a little more. I got lucky and there was an Aeroquip executive who passed away and had many parts, tools, machines and equipment that was being disposed of. Got a lot of them there. There are many sources of these quick connects. One I have is from Eastern Aeromotive(Ibelieve). They come in a free setup or a hard mount to a firewall/bulkhead as it passes through. I have included some of them.
Bill
I am out and about now without any hindrance.
I decided to pick the car up on Thursday. There were rumors of snow, but I figured if it did, I could make the 30 mile trip and be home before the first flakes. Well we got caught in a blinding snow storm(for Atlanta), but managed to get the car home safely. Even with a cover on the car while at the shop, it was filthy. So I have started the tear down and final rebuild. The trailing arms look great and are quite beefer than the original pieces. The clevis were pitiful and were replace with GT40 Australia pieces. Had to alter two of them. Seems that they changed the bolt diameter on two or them from 5/8 to I believe 1/2. At first we thought it was a mistake and would order new ones. Then we saw the angle was a little different and knew it was correct. So we drilled and tapped it to suit. Now the rear suspension can be changed without having to disconnect, change the rod ends, reconnect and measure.
The exhaust was 304 stainless. These guys are truely experts when it comes to exhaust work. It took between 20 and 30 bends to complete the build. Considering they were doing it from only a pic or two, the results are fantastic. I thought the exhaust was going to cost a bunch. Wound up that all the work, trailing arms and exhaust came in at less than I thought the exhaust alone was going to be. I consider that a deal. My alternative was to ship the car up to Fran, have his guys do it, and ship it back. With Frans pricing and the shipping fees, it was back up to the high figure. So alls well that ends well. I finally got my wheels as well. Now all I have to do is decide on the tires I want. Since my wife is starting to clamp down on the budget a little, I will post phone the gulf flares and wide wheels for now. So I will catalogue the disassembly and rebuild after the ignition is added and fired up. The guys forgot to add the retainer clips on the collector/pipes so that will be added later.
Lynn Miner has a post on Jiffy Tite AN quick connects(reference article that can't be posted on). They are expensive to say the least. I am adding Aeroquip quick connects to my oil, fuel, trans cooler, and water lines for easily removing the engine/trans without making a mess. The sizes run from AN-3 to AN-20 and are self sealing. I find them on ebay from time to time and won't buy them unless the price is around $20. The larger ones will cost a little more. I got lucky and there was an Aeroquip executive who passed away and had many parts, tools, machines and equipment that was being disposed of. Got a lot of them there. There are many sources of these quick connects. One I have is from Eastern Aeromotive(Ibelieve). They come in a free setup or a hard mount to a firewall/bulkhead as it passes through. I have included some of them.
Bill
Attachments
-
 P1010141 (Medium).jpg67.3 KB · Views: 777
 -
 P1010142 (Medium).jpg69.1 KB · Views: 742
 -
 P1010143 (Medium).jpg63.3 KB · Views: 749
 -
 P1010144 (Medium).jpg71.6 KB · Views: 847
 -
 P1010145 (Medium).jpg65.1 KB · Views: 775
 -
 P1010146 (Medium).jpg67.4 KB · Views: 733
 -
 P1010147 (Medium).jpg66.2 KB · Views: 787
 -
 P1010149 (Medium).jpg45.8 KB · Views: 812
 -
 P1010150 (Medium).jpg70.5 KB · Views: 755
Peter Delaney
GT40s Supporter
Hi Bill, things are looking sweet - not to long now before you hear some serious noise !!
The exhaust system looks so neat - I wish that we could get away with no CATS here in Oz !!
Quick question - how are you going to do retainers on the collectors ? Like yours, mine are quite close together, so I was only able to add the retainer tags on the sides of the outer 2 pipes on each side (no way to get at the inner/lower pipes, & tags on the inner/top ones would have fouled the sway-bar). Even without tags on the inner pipes, it all stays together just fine.
Kind Regards,
Peter D.
Peter,
That is my feelings as well. I am not planning a sway bar at this time. If I do add one it will be the cockpit adjustable type. Just got to convince the wife that I "need" it.
Bill
That is my feelings as well. I am not planning a sway bar at this time. If I do add one it will be the cockpit adjustable type. Just got to convince the wife that I "need" it.
Bill
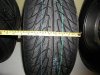
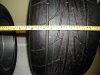
It seems like I have been waiting forever for someone to comeup with some tires for the 15" guys. Thanks to Egiltom and some of the others, some good choices have been ferreted out. I would like to get some of the historic tires like Bill D., but my body would not take the steamrollers he has. So I have been limited in choices(read, wife wants it finished and the budget is getting smaller every day). I want something that will handle the power, but I want something I can drive on the street/track, and not worry about getting ticketed. So I have opted for the Nittos. The 15" rear is their Drag Radial. The guys at Nitto, and one of the forum members have convinced me it is the tire to get and will hold up to road courses. Its only draw back is it is only 6/32 of tread(9 is normal for a street tire). It is 13" across with the 10" BRMs. This is Nittos 555R tire. For those of you with 17" tires, Nitto makes the 55RII which is a true road course tire, and is advertised as such, but you can only get the 275 40zr 17.
For the fronts you have to make some compromises as well. The 555R has a 275 50 15 or a 60 15. Personnaly I think the 275s are too wide. They have another style NTO1. It is for dry competition. Their choices for the front are 205 50zr 15 and 55zr(this tire is actually listed at a smaller diameter,22.85" than the 50). Their other choice is a 225 45zr 15 which has the same diameter as the 50 aspect tire.
To get the true225 50 15, you have to go to high performance street tires. The Neo Gen at 205 50 15 and the NT450 which I chose because it has the 225 50 15 tire. It has the full 9/32 tread and is warranted for 40K miles. It has the largest diameter tire for the 205s or 225 15s at 23.85" and is 9" wide o the 8" rims.You need as much as you can get considering the 325s on the rear are 27".
The car is at the upholstery shop and should be home tomorrow so all the hardware can be installed for the final time. I have settled on Heacock Classic for insurance. They quoted 565 for my car. I feel it is in the ball park for what I have been told. as soon as they issue the policy, I can visit the tag office again. Wheels and mirrors have to go to the painters soon. Will have the spokes painted to match the stripes.
Bill
Attachments
Progress has been slow. It seems to take forever when you have someone else doing the work. The car has been to the upholstery shop and the headliner installed. It is one of those things that is hardly noticed, but makes a big difference in the total look of the car. Jeff has done a remarkable job. The door panels are finished and ready to be installed. They are quite nice. Delayed install due to two cars that are on deadlines. One is for the show "Overhauling" and the other is another fantastic one for Year One. So the car is out getting some more vertical welding done along with tabs added to the exhaust. The guys at the shop said it could go with the tabs or without, since the mufflers are secured to the trans, nothing is going to move. I personnaly think it looks better with them on. Then is shoved next door for the ignition fuel and water lines. I can't weld aluminum, and don't want to take a chance on leaks etc. So will leave it to the experts. Hopefully by this time next week, it will be fired up. No pics to add as everything basicly looks the same. finally got the correct lug nuts for the BRM's and the wheels look fantastic. May have to spring for the flares with the 325's out back. Will have to go back to the painters for some advice and finish work. They had some runs on the underside of the rear clip over the injectors. Didn't notice it for almost 6 months after it was done. Need to do some repairs as well. Have learned that you save the paint til it is at the final stage. Just as well, as I have some additions to be done anyway. The wheels will get the spokes done in the copper of the stripes. Speaking of which, the studs on all the axels will have to be changed to shorter ones, or they will have to be treated to a grinder or saw. The allen wrench runs out before they are tight enough. Have any others encountered that problem? Any tricks for removing them and reinstalling? Could get the length close enough with calipers, just afraid there might be a balance issue.
Bill
Bill
Bill,
the studs should be trimmed to allow full engagement of the Allen wrench...
If you contact Bob Lacey he will give you the heads up I am sure.....
the studs should be trimmed to allow full engagement of the Allen wrench...
If you contact Bob Lacey he will give you the heads up I am sure.....
Didn’t realize so much time had slipped by since the last posting. Since the “slowdown” has slowed me down, and working by myself, the progress is less than I would have hoped. Most of the progress is in areas that are hardly noticed, but still need to be taken care of. So I will get to it without a lot of chatter.
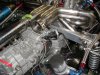
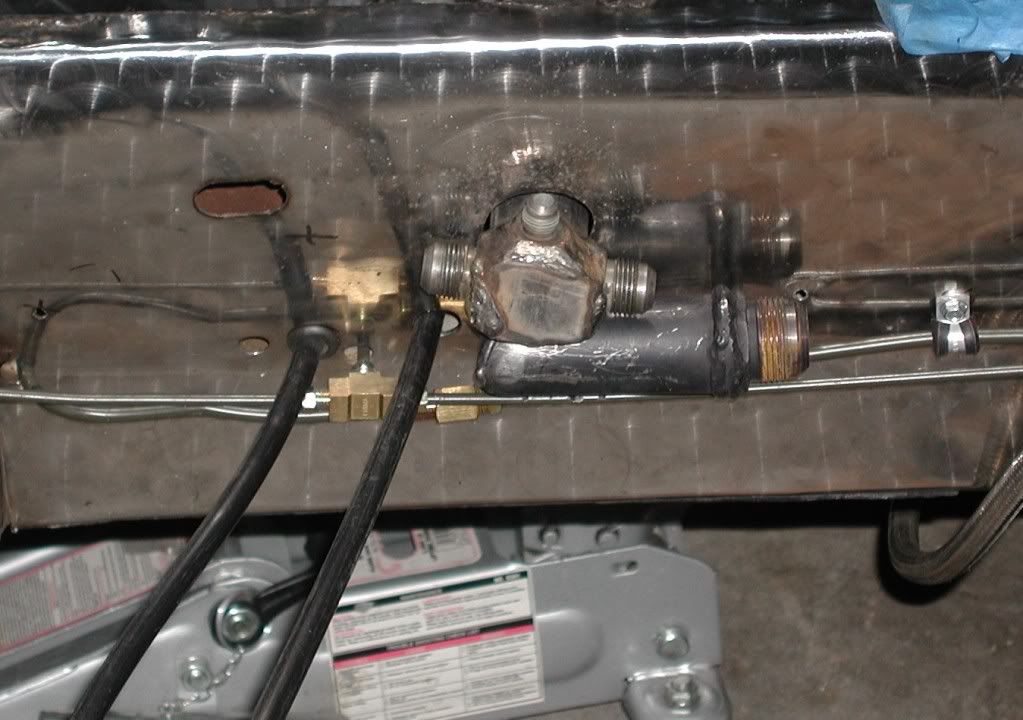
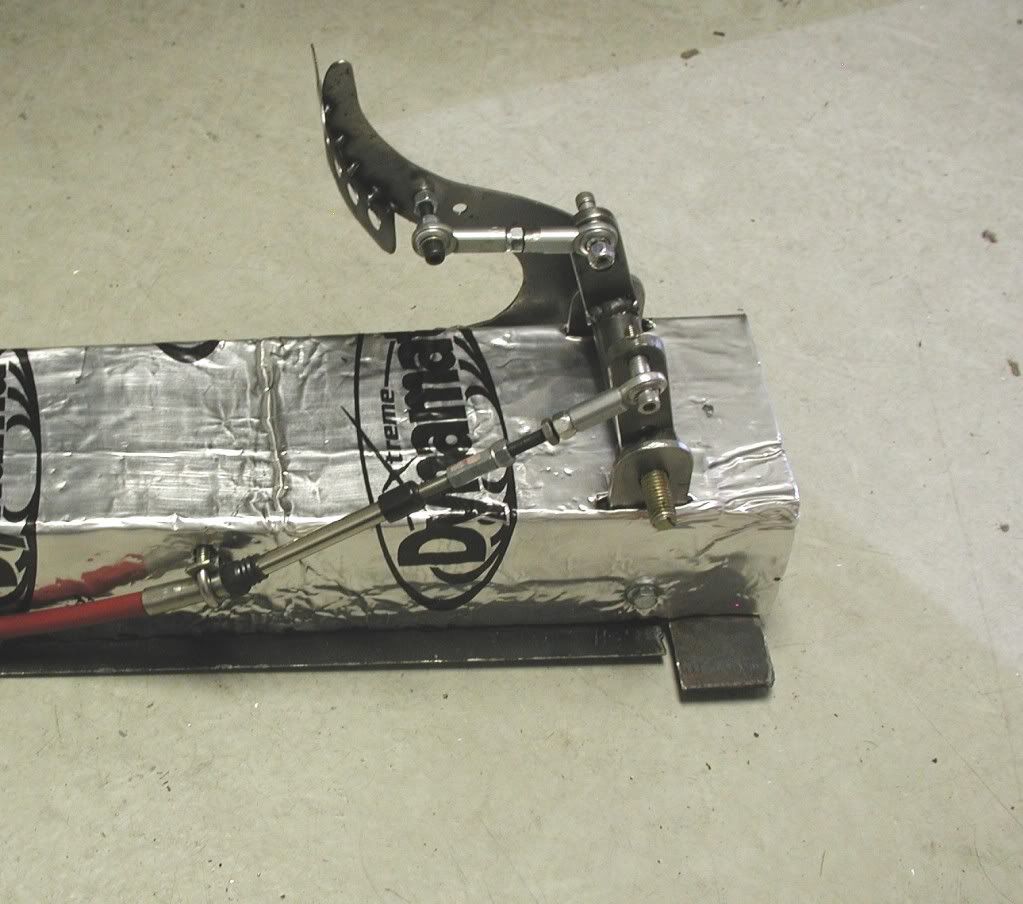
When I brought the car home the last time the shop had run the water lines. They made the mistake of making some of the connections inside the cabin. For me that is not acceptable. I had to return the borrowed TIG welder(about 2 years) and now I hope to get a MIG welder for my own. The lines will be rerun. The muffler shop that has helped me from time to time will put a few bends so that the standard one on top of the other will convert them to side by side. The decision to put them flat came after the holes were cut for the over under design, which is a good thing considering the spacing between the seats.
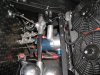
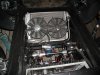
-The Moroso water pump was moved to the front and converted to a true pump and the Ford 351 piece was done away with. This requires a T connection to the return line at the pump and at the engine end. The controller will be a Spal controller that runs the pump at a slow rate and then speeds it up as the temp rises. Warm up times will be delayed, but I feel it is a good tradeoff in saving the radiator from thermal shock. The fans will be thermostatically and A/C controlled. Front brake lines in place
-Gas shocks were added to the front and rear clips
-A/C compressor finally mounted on engine. Will get ceramic coating.
-Rear tray where water pump originally mounted removed and replaced(had too many holes). Still needs retention screws in base.
-Toyota shifter obtained from junk yard($20) and mounted on newly designed console. Came from an 89 Tercel. The 89 Corolla is the same. There may be other years that will work. These units use cables for the neutral gate and gear selector. I had originally wanted a rod shift, but there were to many problems to overcome. This unit is slick.
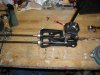
-I chose a bell crank arrangement at the trans rod selector for the neutral gate rather than loop the cable around for a direct shot, like the Brandwood units for two reasons. The use of coolers limits the room at the rear rather severely. Secondly, I don’t have a lathe or mill to construct a direct action shifter. The Toyota, Corvette, and just about any shifter out there that is adapted have a center pivot action which is opposite from what you need. So a z link has to be incorporated to select the gears. Since I have to have a mounting bar for the link, I added another piece for the neutral gate bell crank. Others have used a horizontal bell crank adapter. The coolers canceled that idea out, so after fiddling a little and some help from Russ Noble, I came up with a vertical arrangement. Two support bars will be added to support the neutral gate action and the Z link for the gear selection. All the tables are cut out. I am just waiting on getting a Mig welder to put them together.
-I am hoping to use the Morse cable(6 ft. double bulkhead connection) that I have for the neutral gate selector. A 7 ft. cable would be ideal. I can brace the extension, but not sure it will stand up to the wear and tear. Thoughts anyone? It is a ¼ x 28 rod. I will definitely have to replace the gear selector with a 7 ft. TCI is the only company that makes the double bulkhead for the 7 ft ¼ x 28. They just charge more for that length than any other. Go figure?
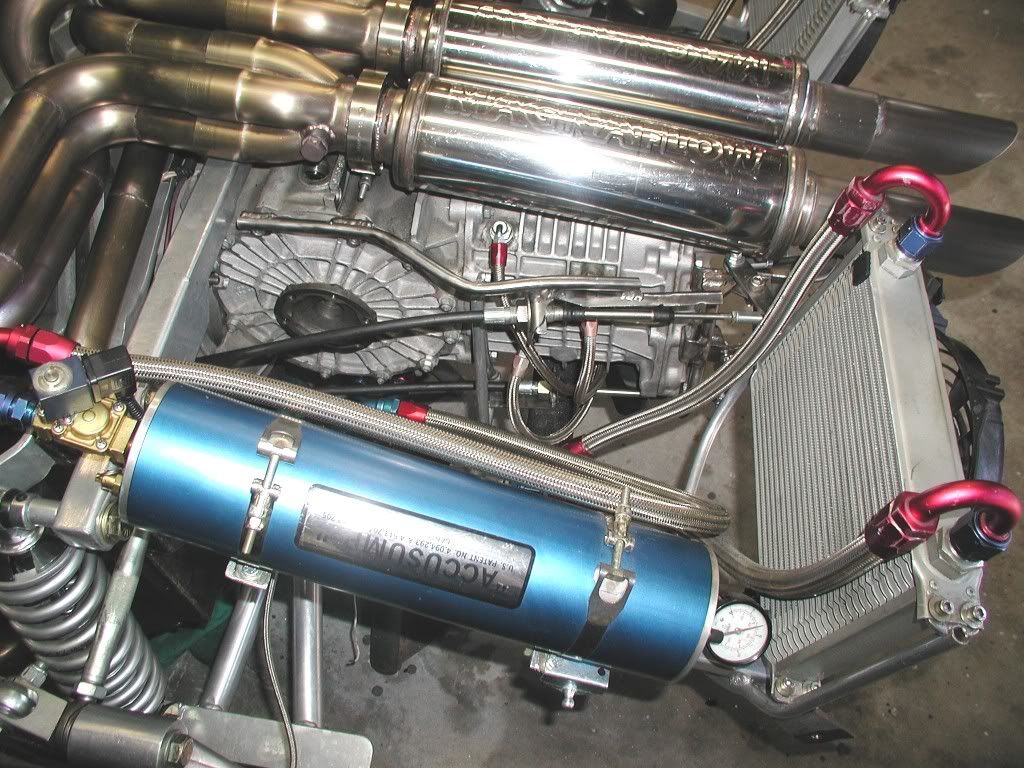
-The trans cooler is hooked up and the spray bar manifold in place. Only spraying 2nd, 3rd, 4th, and the R&P. don’t feel 1st is necessary. The valve cover breather line runs to the rear. Just have to run the burp bottle for the water reservoir. Still debating where it should be mounted. Things are beginning to fill up the available space
-Clutch slave is from a 966
-Swirl pot placed, Corvette coils in place waiting for the Ignition module.
-Rear brake line template in place. Just have to pick up the good lines. Clutch line in place.
-After getting the Nitto rears mounted, I found out that the tires are a bit too tall and wide for the rear clip. That will be addressed later on. Some paint work to be done on the wheels, mirrors and rear clip top. Backup light mounted. Speaking of which, the rear hold downs are taped in place. I think they need to be closer to the top and may be relocated. A little cleanup work in that area needed. Hope to have the water linesand shifter in by next week.
Bill
When I brought the car home the last time the shop had run the water lines. They made the mistake of making some of the connections inside the cabin. For me that is not acceptable. I had to return the borrowed TIG welder(about 2 years) and now I hope to get a MIG welder for my own. The lines will be rerun. The muffler shop that has helped me from time to time will put a few bends so that the standard one on top of the other will convert them to side by side. The decision to put them flat came after the holes were cut for the over under design, which is a good thing considering the spacing between the seats.
-The Moroso water pump was moved to the front and converted to a true pump and the Ford 351 piece was done away with. This requires a T connection to the return line at the pump and at the engine end. The controller will be a Spal controller that runs the pump at a slow rate and then speeds it up as the temp rises. Warm up times will be delayed, but I feel it is a good tradeoff in saving the radiator from thermal shock. The fans will be thermostatically and A/C controlled. Front brake lines in place
-Gas shocks were added to the front and rear clips
-A/C compressor finally mounted on engine. Will get ceramic coating.
-Rear tray where water pump originally mounted removed and replaced(had too many holes). Still needs retention screws in base.
-Toyota shifter obtained from junk yard($20) and mounted on newly designed console. Came from an 89 Tercel. The 89 Corolla is the same. There may be other years that will work. These units use cables for the neutral gate and gear selector. I had originally wanted a rod shift, but there were to many problems to overcome. This unit is slick.
-I chose a bell crank arrangement at the trans rod selector for the neutral gate rather than loop the cable around for a direct shot, like the Brandwood units for two reasons. The use of coolers limits the room at the rear rather severely. Secondly, I don’t have a lathe or mill to construct a direct action shifter. The Toyota, Corvette, and just about any shifter out there that is adapted have a center pivot action which is opposite from what you need. So a z link has to be incorporated to select the gears. Since I have to have a mounting bar for the link, I added another piece for the neutral gate bell crank. Others have used a horizontal bell crank adapter. The coolers canceled that idea out, so after fiddling a little and some help from Russ Noble, I came up with a vertical arrangement. Two support bars will be added to support the neutral gate action and the Z link for the gear selection. All the tables are cut out. I am just waiting on getting a Mig welder to put them together.
-I am hoping to use the Morse cable(6 ft. double bulkhead connection) that I have for the neutral gate selector. A 7 ft. cable would be ideal. I can brace the extension, but not sure it will stand up to the wear and tear. Thoughts anyone? It is a ¼ x 28 rod. I will definitely have to replace the gear selector with a 7 ft. TCI is the only company that makes the double bulkhead for the 7 ft ¼ x 28. They just charge more for that length than any other. Go figure?
-The trans cooler is hooked up and the spray bar manifold in place. Only spraying 2nd, 3rd, 4th, and the R&P. don’t feel 1st is necessary. The valve cover breather line runs to the rear. Just have to run the burp bottle for the water reservoir. Still debating where it should be mounted. Things are beginning to fill up the available space
-Clutch slave is from a 966
-Swirl pot placed, Corvette coils in place waiting for the Ignition module.
-Rear brake line template in place. Just have to pick up the good lines. Clutch line in place.
-After getting the Nitto rears mounted, I found out that the tires are a bit too tall and wide for the rear clip. That will be addressed later on. Some paint work to be done on the wheels, mirrors and rear clip top. Backup light mounted. Speaking of which, the rear hold downs are taped in place. I think they need to be closer to the top and may be relocated. A little cleanup work in that area needed. Hope to have the water linesand shifter in by next week.
Bill
Attachments
-
 Picture 192.jpg72 KB · Views: 557
 -
 Picture 103.jpg62.4 KB · Views: 539
 -
 P1010064.jpg61.7 KB · Views: 498
 -
 Picture 101.jpg53.2 KB · Views: 493
 -
 Picture 098.jpg61.1 KB · Views: 542
 -
 P1010057.jpg56.6 KB · Views: 496
 -
 Picture 167.jpg40.3 KB · Views: 487
 -
 Picture 151.jpg53.5 KB · Views: 595
 -
 Picture 096.jpg50.3 KB · Views: 519
 -
 Picture 186.jpg73.5 KB · Views: 589
 -
 Picture 065.jpg51 KB · Views: 602
 -
 Picture 188.jpg69 KB · Views: 571
 -
 Picture 100.jpg63.3 KB · Views: 558
 -
 P1010049.jpg52.2 KB · Views: 540
 -
 P1010062.jpg56.7 KB · Views: 531
Finally got the water lines corrected. The original layout just wouldn't work. I don't like the idea of the possibility of leaks in the cabin. They were redone by another friend, only to find a dozen pin holes from the welding. I finally got a pretty good Mig welder and I love it. Learning curve is easy. Just a little practice on scrap of varying thickness and it is done. Redid the water lines this time myself for the third time. This time only one leak which was patched very easily. I squared off the pipe and the welding went much easier. Less filler needed= less leaks. I added an AN-6 line to the engine bay end. It will have a braided line hooked to it and capped off. This will serve as the drain line for the radiator/engine if the need arises or the engine needs pulling(please!!). The intake water line is a 16 line that will run to the filler tank and then to the tube to the radiator. A vent line will run to a burp can at the rear. That line is yet to be laid.
The thing I am the most excited about is that I have finalized the shifter setup. I need some advice on this one. I incorporated the Toyota shifter as planned. The cables are 6 foot with extensions to reach the shifter. Do any of you think this is a weak link that should be fixed with a longer cable(7') to bolt directly to the shifter. I am worried about flex.
This was the easy end. You can tell I have altered the original tunnel(several times), but it will all be hidden when covered. This was needed when the cooling tubes were laid flat as opposed to the over under arrangement.
The fun part of this was the transmission end. Here I did several iterations before settling on the final product. The rear coolers limited the arrangement that could be used. Every time I thought I had it there would be interference. With Russ Noble's help I wound up with the neutral gate going under the trans. The fore and aft selector came over the top. I had thought a vertical Z link would work, but there was too much bind with the angles required. I finally hit on the horizontal and it works perfectly. It moves the link more in line with the selector shaft. It isn't quite finished yet as I haven't been able to drill through the selector rod. Man is that tuff stuff. Will eventually get there. I didn't shorten the selector shaft, but I can if the need arises. There is about 3\4" that is available, and if I shorten the selector attachment, even more can be taken off. I don't relish the idea of taking the tail stock off, as I know didly about the Porsche trans. May remove the trans and let my local mechanic do that if needed. The pieces that were required were easily made up. The mounting bracket was done to match up with the trans supports. The bell crank for the Neutral selector was fabricated on the design sent to me "years" ago by Lynn Larson. I can supply the measurements for anyone interested.
This setup does not foul the body work. I have a few more tabs that have to be welded on for the brake and clutch lines and then a few electrical test and off the the electronics shop for the ignition. Rear clip alterations should start by the end of the month.Trying my best to get it done for Road America!!
Bill
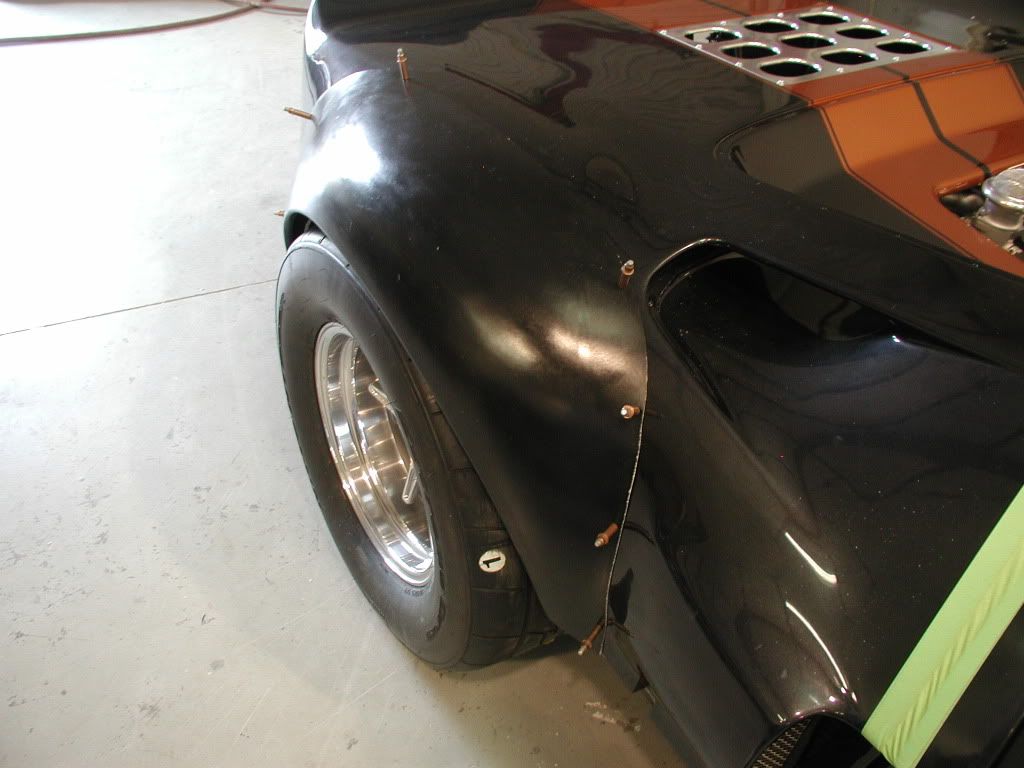
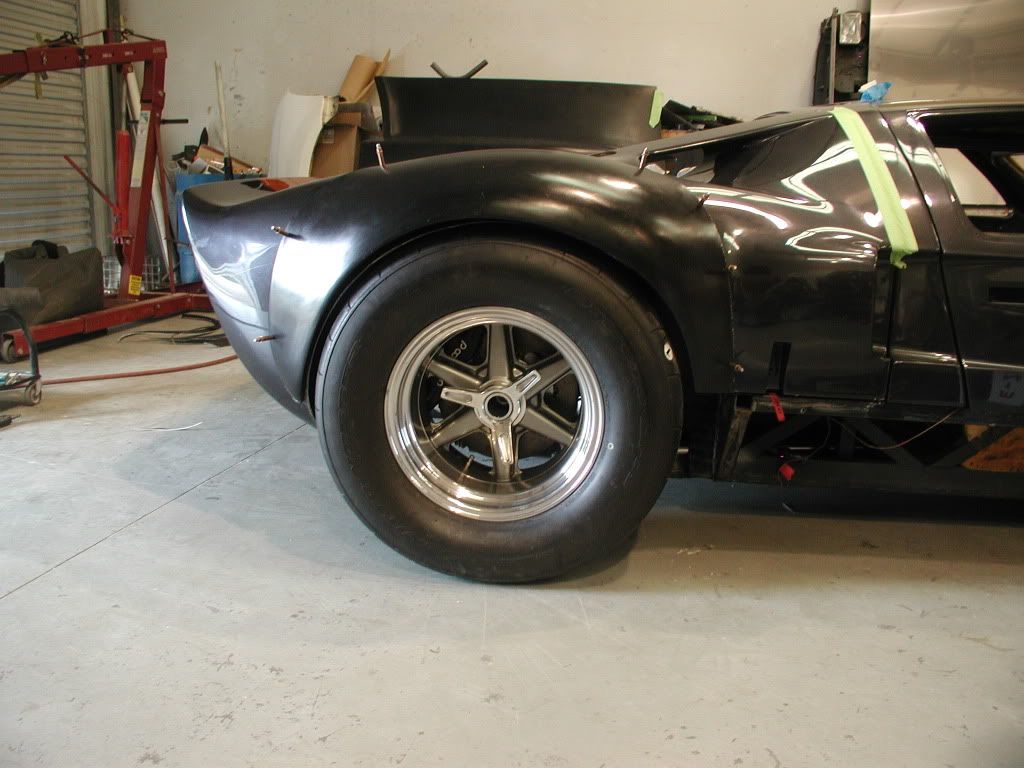
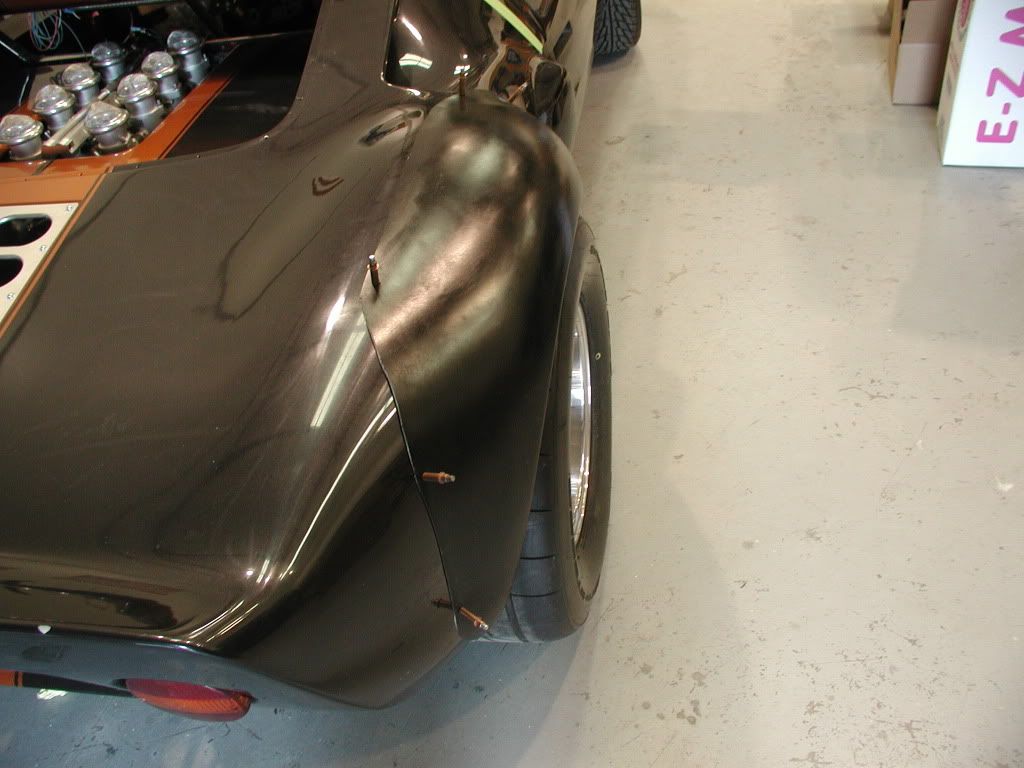
A quick update. The original painter has closed up shop and I don't have a way to contact him. To the rescue is Adrian's Customs. Adrian runs a one man shop and is well versed in fiberglass, carbon fiber, paint not to mention interior work. With the Nittos a bit too tall and wide, the decision to add flares was made. Thanks to Bill Hough, a set was made up. While waiting for the shop to clear out some back work and start the ignition work, Adrian started the flare work. It is interesting that even though these cars were taken from originals, the side vs side are so variable. A lot of triming of the flares has to be done and one side is different in the amount of fiber that is removed from the new flare in fitting. Here are some of the preliminary pics. Adrian has no less than several hundred photos of the work. Aluminum and stainless tabs are glassed in to various areas to to strengthen them. He has shown me some tricks to strengthen the B pillars Lord knows they need it. If you press down on the roof line nest to the windshield the edge of course goes down. What else happens is the cdenter of the roof goes up in reflection. We plan to add steel tabs glassed into the roof at the B pillar and attach them to the cage. It is how they add fiberglass panels to a racecar in place of the steel. will have plenty of pics when we get around to this addition.
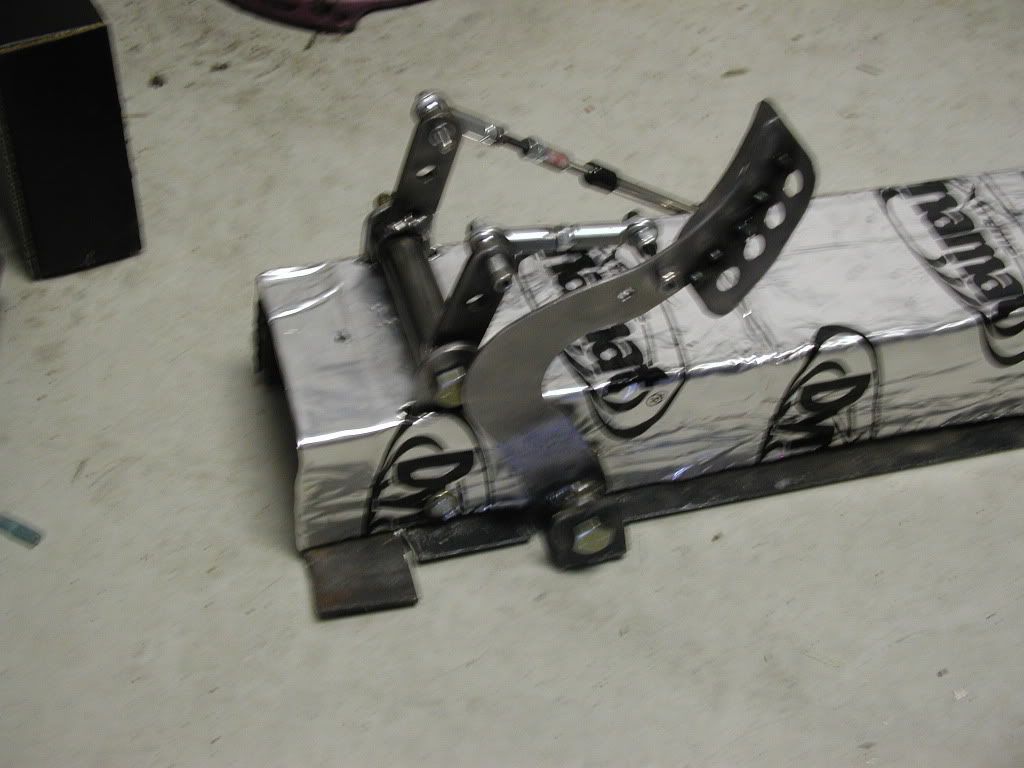
I had time to work on the console because there is no gas pedal. Got busy and fabricated a system that is adjustable for any play that might develop in the system. The outside got a coat of Dynamat and will get a layer of Dynapad before the upholstery gets added. There will be some additional insulation to be added, but it may have to wait til after Road America, It depends on how much time I have after the engine gets fired up.
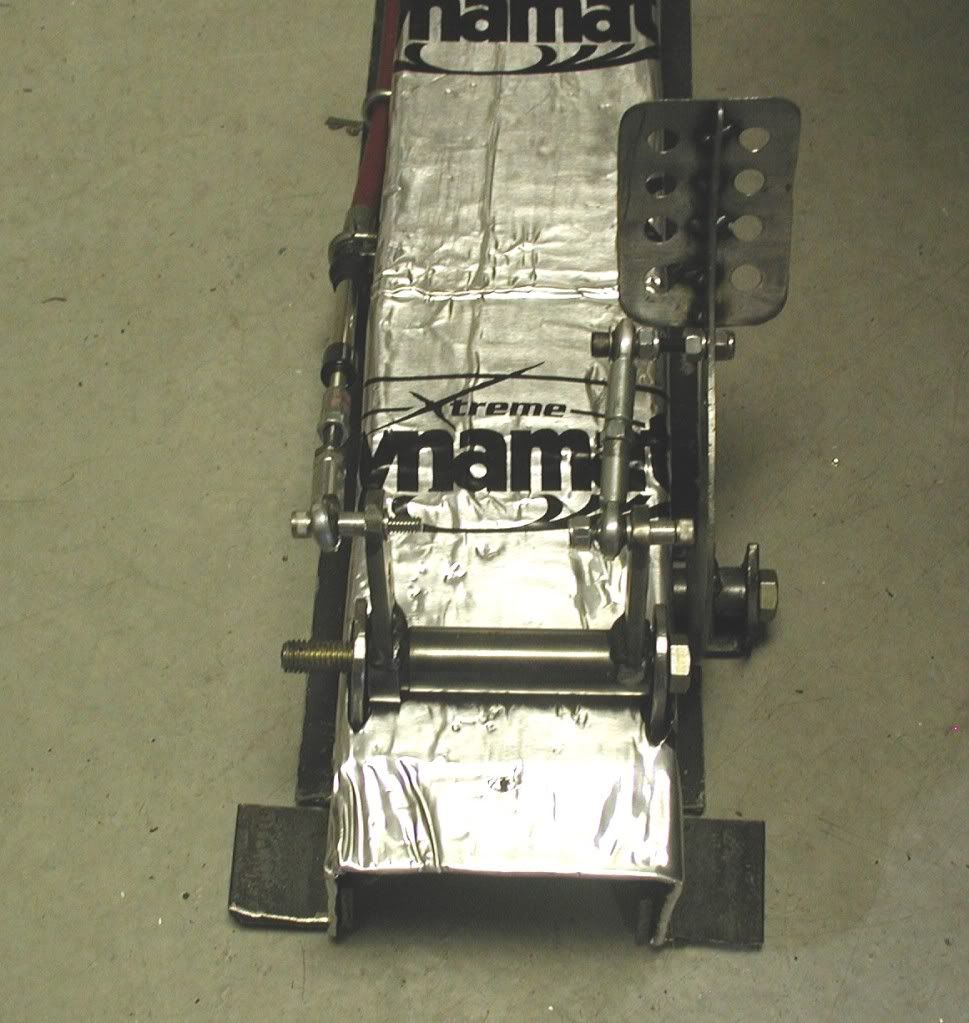
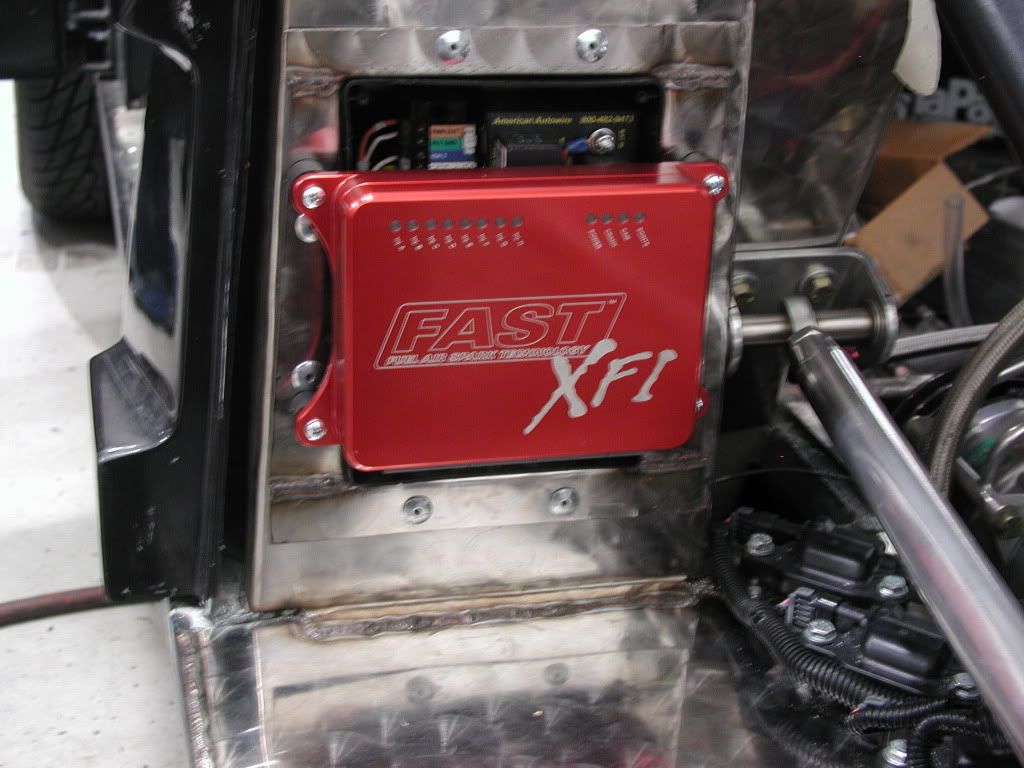
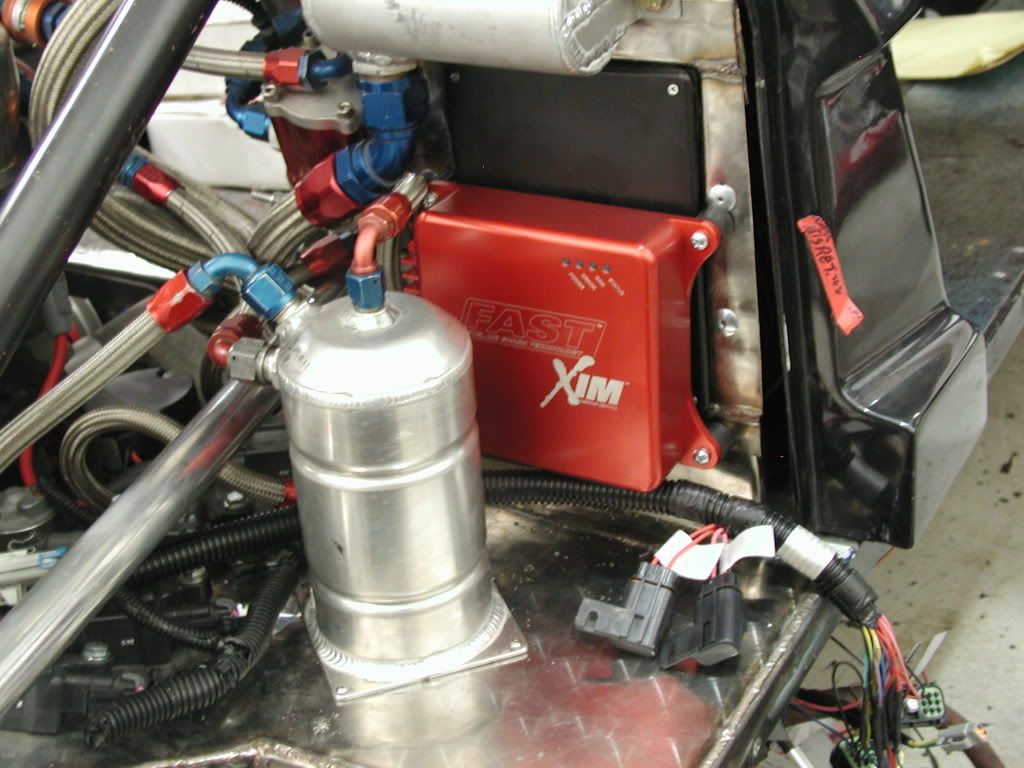
Speaking of ignition. The modules are mounted and the hacked up "new" distributor for the cam sync and oil pump should have been installed Friday. Still to go are the monting of the tanks and fuel level sender, and the rest of the accellerator line and the rest of the sensors for the system. I am using the FAST XFI and SFM since I am going distributorless.
Bill
I had time to work on the console because there is no gas pedal. Got busy and fabricated a system that is adjustable for any play that might develop in the system. The outside got a coat of Dynamat and will get a layer of Dynapad before the upholstery gets added. There will be some additional insulation to be added, but it may have to wait til after Road America, It depends on how much time I have after the engine gets fired up.
Speaking of ignition. The modules are mounted and the hacked up "new" distributor for the cam sync and oil pump should have been installed Friday. Still to go are the monting of the tanks and fuel level sender, and the rest of the accellerator line and the rest of the sensors for the system. I am using the FAST XFI and SFM since I am going distributorless.
Bill
It isn't quite finished yet as I haven't been able to drill through the selector rod. Man is that tuff stuff. Will eventually get there. I didn't shorten the selector shaft, but I can if the need arises. There is about 3\4" that is available, and if I shorten the selector attachment, even more can be taken off.
Hi Bill,
I didn't see this post until this evening...
I had to shorten the shaft on my G50/03 as well.. Drilling it is a b!tch to be sure...
GT-FORTY.COM
If you look at the last couple of pictures I show you what I ended up doing..
Bottom line is that the shaft is case-hardened.. You'll need to grind a bit on the top and bottom and use the best drill bits you can find. I also needed to tap the hole which really took nerves of steel, a lot of lubricant (for both the tap and m'self) and time....................
Time for an update. First some bad news. While the car was at the painters, we discovered that the previous owner had used an epoxy primer, which is good, except he didn't allow for proper curing/drying when he put the finish coat on. This makes the paint I put on soft and will eventually crackle and bubble in the sun. So the flares will remain in primer til later on, much later on. May have a change of colors when it is done.


The good news is that the car is almost ready to go on its maiden voyage. Lots of little things have been done. The shifter has been finalized and heat shielded from the exhaust with a new bracket.

The neutral gate shifter has been secured.
All appears to work well. Will have to see when on its feet. The battery is installed in its place on the front firewall.

The interior is near finished. The door panels are done and allow for a speaker to be mounted. They have been removed so the opening mechanism can be installed(to do list)

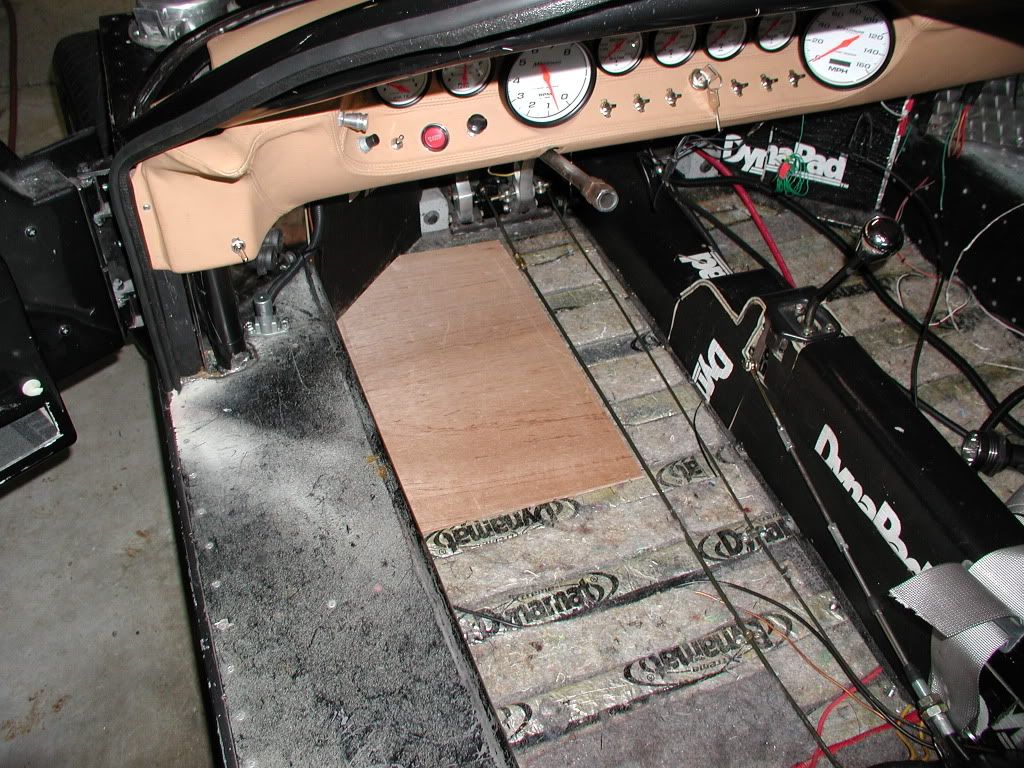
I am adding some thin plywood to the floor to conceal the wiring and hydraulic lines and give some flatness to the carpeting. With just the regular insulation it didn't look right.
We finally got the engine running and sorted out some of the issues associated with it. The butterfly problem has been solved and it runs pretty good. Occasionally the number one cylinder on the right side doesn't want to fire, but comes back when heated up. The car will go back to the dyno shop for the final tune and a run on the dyno. I have gone through about a tank of gas with it running on the jack stands and the trans in gear to give it a little load.
I have tried to get a video of the car running but have had problems in that department as well. So I went to my trust old 3.3 Mega Pixel Olympus digital camera and used the movie mode. This camera is so old that the maximum size SD card is 128 mega bytes. That will record about 90 seconds. It has a hard time keeping up with the sound and is a little jerky. Maybe Santa can help out with that?? So here it is. You can enlarge the picture for better viewing, but it gets a little grainy. The response of the engine is just unbelievably quick:
P1010001-1.flv video by Billmusarra - Photobucket
Bill
The good news is that the car is almost ready to go on its maiden voyage. Lots of little things have been done. The shifter has been finalized and heat shielded from the exhaust with a new bracket.
The neutral gate shifter has been secured.
All appears to work well. Will have to see when on its feet. The battery is installed in its place on the front firewall.
The interior is near finished. The door panels are done and allow for a speaker to be mounted. They have been removed so the opening mechanism can be installed(to do list)
I am adding some thin plywood to the floor to conceal the wiring and hydraulic lines and give some flatness to the carpeting. With just the regular insulation it didn't look right.
We finally got the engine running and sorted out some of the issues associated with it. The butterfly problem has been solved and it runs pretty good. Occasionally the number one cylinder on the right side doesn't want to fire, but comes back when heated up. The car will go back to the dyno shop for the final tune and a run on the dyno. I have gone through about a tank of gas with it running on the jack stands and the trans in gear to give it a little load.
I have tried to get a video of the car running but have had problems in that department as well. So I went to my trust old 3.3 Mega Pixel Olympus digital camera and used the movie mode. This camera is so old that the maximum size SD card is 128 mega bytes. That will record about 90 seconds. It has a hard time keeping up with the sound and is a little jerky. Maybe Santa can help out with that?? So here it is. You can enlarge the picture for better viewing, but it gets a little grainy. The response of the engine is just unbelievably quick:
P1010001-1.flv video by Billmusarra - Photobucket
Bill