
You are using an out of date browser. It may not display this or other websites correctly.
You should upgrade or use an alternative browser.
You should upgrade or use an alternative browser.
DRB #5
- Thread starter wbmusarra
- Start date
Randy,
We haven't put the car back on the computer since before the butterfly/alternator problems, and yes it is rich. No doubt. When checking the throwout bearing placement I noticed the O2 sensor was loose. Probably trying to compensate for the leak. Once I get all the bugs out like the newly leaking fuel line and the oil pan that won't quite snug up on one side(impossible to reach without pulling the engine), and drive it a bit, it will return to the shop and get a final tune and chassis dyno. Can't wait to see the numbers. I plan to get the software and the proper connections to the laptop so I can control things better. The guy doing the interior(Jeff Henderson) is the same guy doing all of Year Ones cars that you see in the car mags. He has an eye for detail and originality(see the headliner).He lives right down the street and is a great guy.
Bill
Well its back to work on the car. I have neglected the car for a while due to work loads at the hospital. We have had some serious staffing issues and there just hasn't been time. Here is where I stand at present. After discussing the issues of the car with the installer, we are taking a different approach to the problem. I removed each wire from the fuse boxes and did continuity test and then grounding test on every one of the grounds. All numbers turned out identical and without fault. The alternator was removed and sent to the shop for test to make sure the overheating had not damaged the unit. It turned out fine, so was reinstalled, but not hooked up. Then a battery charger was connected and the car cranked and allowed to run for a good 45 minutes. During the time the number one cylinder began working and appeared to run fine. The rich exhaust smoke disappeared. More test will be done later. I also downloaded the software for both the XIM and XFI units. A serial to usb cable from Radio Shack was obtained and will be hooked up during a run and all will be checked out in short order. The leaking oil issue will remain until the engine is pulled.
During the interim, I have worked on a few of the little items about the car that I have put off for one reason or another. The flooring has been addressed on the passenger side and the carpet laid on the drivers side. The wood pieces are to level out the washboard layout of the floor pan and to make ready for the passenger "brake" bar. Where the main battery feed runs the wood was grooved to keep it on the floor. Screws were used to secure the wood to the floor and keep it from shifting. The wood pieces extend only to the seat runners, as I didn't want the seats any taller than they are, and the level of the wood extends to just underneath the front lip of the seats. Gaps were left on the edges for tucking the carpet and the side covers.
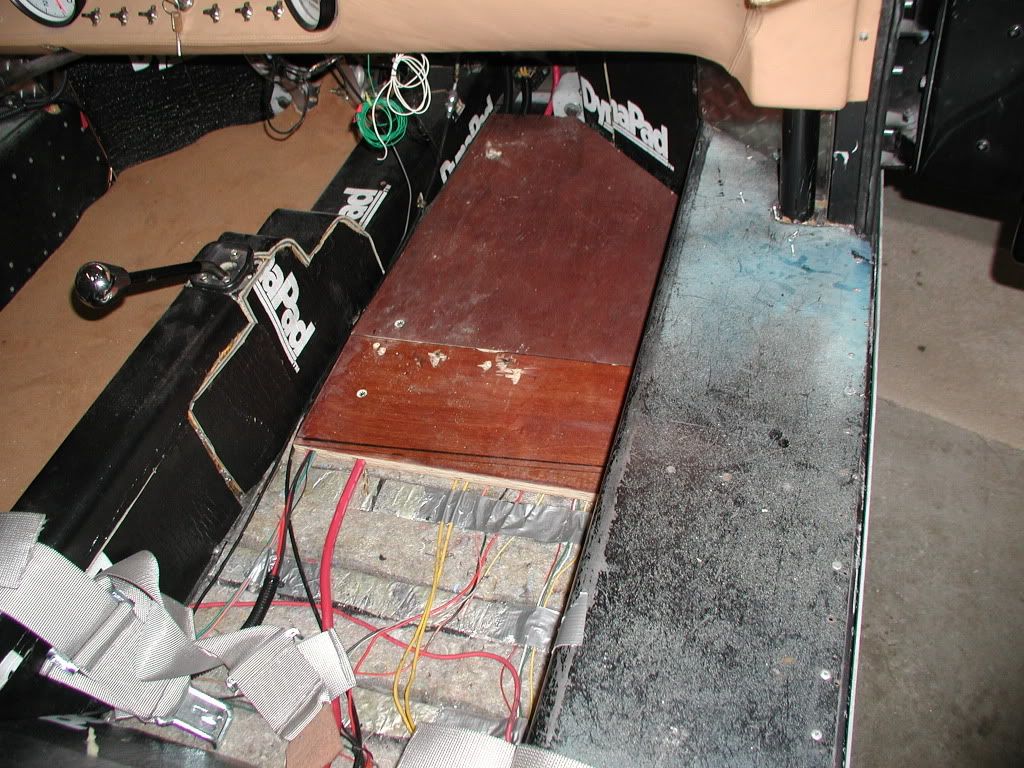
The wiring will be secured so as to not get pinched by the seat tracks.
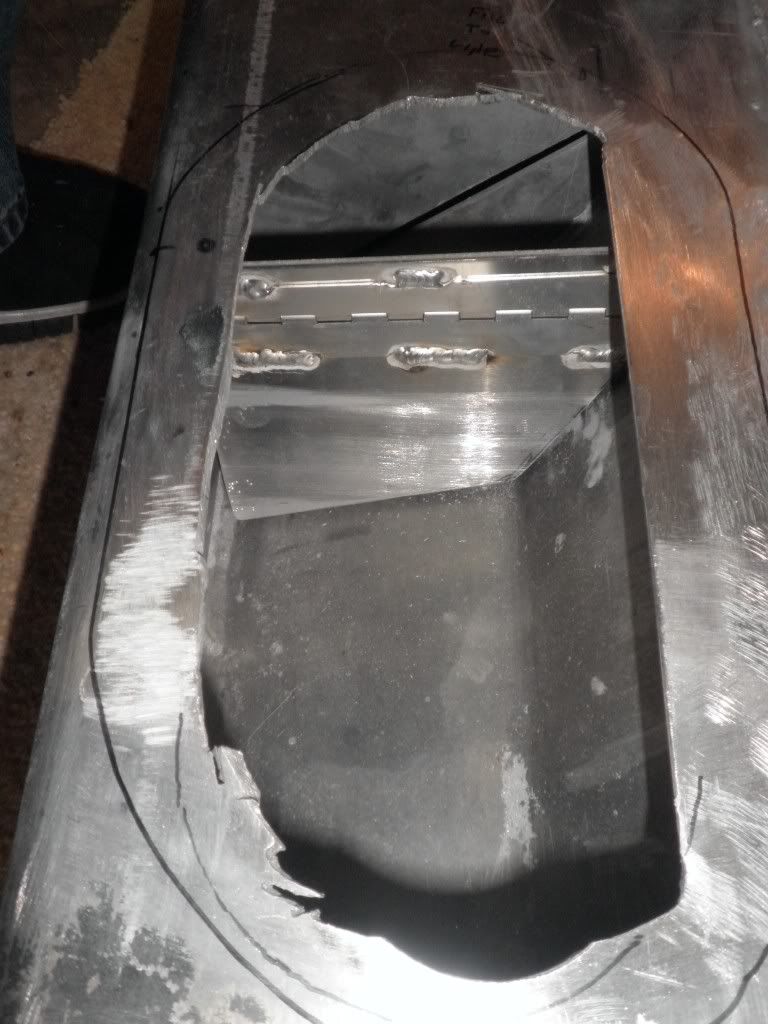
The next project was the Aerocatch latches. The stainless pieces were finished and attached and the holes placed in the rear hatch.When I recieved the car the previous owner had placed holes for a tie down pin setup with cotter pins. It was filled with painting so they were reopened to get a gist of where the new pin system would go. Here are some of the pics during this phase.


The process was a little more difficult than I thought for reasons I had not anticipated. Placing the latches horizontal put them into the vertical aspects of the underside of the hatch. The 4 mm screws and nylocs had to abandoned and longer ones were obtained. After dirlling the holes for the screws, I discovered the screws would thread into the fiberglass and hold quite well without the nylocs. It would even pull the casing down snug over the slight curve of the body at those points. I may countersink the edges later on. Had I REALLY looked at the placement, It would have been better to place the catches along the side of the rear window instead of on top. Would still have had to go with the longer screws, as I believe they were made for sheet metal rather than fiberglass.
Bill
During the interim, I have worked on a few of the little items about the car that I have put off for one reason or another. The flooring has been addressed on the passenger side and the carpet laid on the drivers side. The wood pieces are to level out the washboard layout of the floor pan and to make ready for the passenger "brake" bar. Where the main battery feed runs the wood was grooved to keep it on the floor. Screws were used to secure the wood to the floor and keep it from shifting. The wood pieces extend only to the seat runners, as I didn't want the seats any taller than they are, and the level of the wood extends to just underneath the front lip of the seats. Gaps were left on the edges for tucking the carpet and the side covers.
The wiring will be secured so as to not get pinched by the seat tracks.
The next project was the Aerocatch latches. The stainless pieces were finished and attached and the holes placed in the rear hatch.When I recieved the car the previous owner had placed holes for a tie down pin setup with cotter pins. It was filled with painting so they were reopened to get a gist of where the new pin system would go. Here are some of the pics during this phase.
The process was a little more difficult than I thought for reasons I had not anticipated. Placing the latches horizontal put them into the vertical aspects of the underside of the hatch. The 4 mm screws and nylocs had to abandoned and longer ones were obtained. After dirlling the holes for the screws, I discovered the screws would thread into the fiberglass and hold quite well without the nylocs. It would even pull the casing down snug over the slight curve of the body at those points. I may countersink the edges later on. Had I REALLY looked at the placement, It would have been better to place the catches along the side of the rear window instead of on top. Would still have had to go with the longer screws, as I believe they were made for sheet metal rather than fiberglass.
Bill
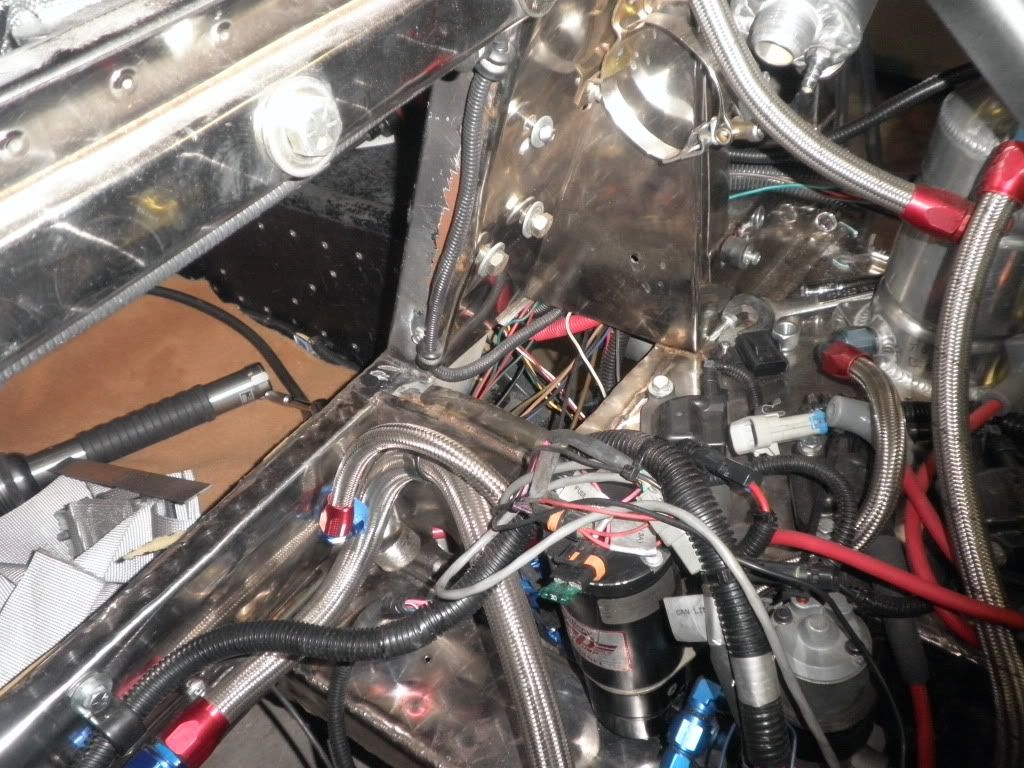
I finally took the bull by the horns and pulled the wiring harness out of the car. Since they had routed it to the rear of the engine, it was not possible to pull the engine without it. The instructions on installing the harness say quite specifically not to run any of the cables near the coils. The installer put them right on top. So I had another reason to redo them correctly. I paid particular attention to the connectors. All were labeled and I undertook the shortening of the harness. There are several shielded pairs of wires and interlinks between the XFI and XIM boxes that allow the two units to communicate. All of the "Block Grds" have been extended and will go on the block this time away from the aluminum trans adapter. The grounding strap will be looked at and probably hooked up so that it goes to the battery. The process took a while and was delayed with my wife needing two sections of hardwood flooring to be refinished. that took almost two weeks and about killed my hands and knees, even with padding. The harness is ready to be reinstalled so that it goes in front of the engine and simplifies the hook up of all the components.
The engine bay was a mess from the work to get the engine running. Seems they left an oil line open and dumped a quart or two into the side pods of the car. All of the stainless has been polished, and awaits the cleaned up engine. Still have to install the passenger brake bar and a few other pieces. The oil leak is next on the agenda this weekend, along with a few other items that need tidying up.
Bill
I am still addressing some of the projects that need doing. I have altered the wood flooring on the passenger side to allow for the A/C lines to be run through the cabin. While working on that area, I put the old trailing arms to good use. I welded them together and formed the passenger brake err foot rest. I didn't want to leave the chassis mounting holes open and I didn't like the idea of welding them shut. The bolt heads and poly bushings were left over and are there just for show.

The shoulder harness mountings were installed. The oil leak was discovered and found to be a wedge of the pan removed for some reason in manufacture. The wedge cut into the gasket mating surface beyond the external grove in the gasket surface. A bead of silicone gasket material was placed around the edges and a little was added to the rear main seal gasket as a drip or two was spotted. All was buttoned up and awaiting installation in the car.

I learned the hard way to not paint the car til the end of the build. No matter how hard you try there will be knicks and scratches. The engine bay section of the roll cage took its share. So they were sanded and repainted.

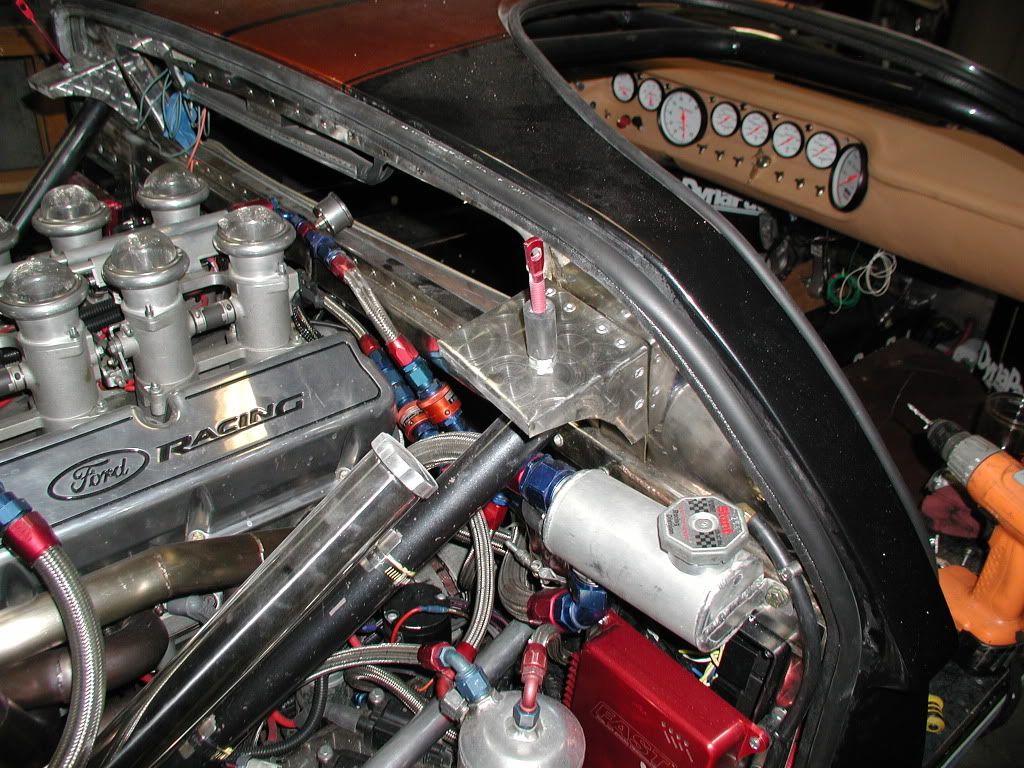
The MAP sensor was relocated to the front of the engine bay for easier access.
The shortened wiring harness will be installed tomorrow and the interior lights will be completed. The stop light switch and clutch safety switch are yet to be installed, and I still have to find places for some of the warning light sensors. After all this it will be about time to put the engine back in its place and see if the ground fault has been corrected.
Bill
The shoulder harness mountings were installed. The oil leak was discovered and found to be a wedge of the pan removed for some reason in manufacture. The wedge cut into the gasket mating surface beyond the external grove in the gasket surface. A bead of silicone gasket material was placed around the edges and a little was added to the rear main seal gasket as a drip or two was spotted. All was buttoned up and awaiting installation in the car.
I learned the hard way to not paint the car til the end of the build. No matter how hard you try there will be knicks and scratches. The engine bay section of the roll cage took its share. So they were sanded and repainted.
The MAP sensor was relocated to the front of the engine bay for easier access.
The shortened wiring harness will be installed tomorrow and the interior lights will be completed. The stop light switch and clutch safety switch are yet to be installed, and I still have to find places for some of the warning light sensors. After all this it will be about time to put the engine back in its place and see if the ground fault has been corrected.
Bill
Well I figured it was time for an update. Progress has been painfully slow. Getting ready for my recertification boards. Since the last post all the wiring of the switches and "safety systems" have been done. I wanted warning lites for all the functions in the car(water, oil temp, pressure, and trans), so a low pressure cutoff was added to the remote oil filter.

It is set for about 7 psi, so if the oil pan doesn't do its job and keep the oil around the pickup, or the accusummp doesn't keep the pressure up, and I don't see the oil presssure lite on, the fuel pumps will shut off. A bypass switch has been installed to aid in starting the engine. Both hands and feet will be busy on any startup. The clutch has to be disengaged for the starter to turn over.
On the oil filter mount there was an extra 1/2" mount, so an oil temp lite sensor was wired in. It is a double lead sensor so the oil fan relay ground was added to it. When the lite comes on the fan is activated. Temp sensors were added to the transmission pump as well, and will turn the fan on when the temp is met.

The pump will remain a switch trigger only because the switch was already installed.
There are three water temp sensors now. The first is manual for the gauge. A spacer was added so the second and third sensors could be mounted.

The second is for the radiator fan and the third is for the Spal pump controller. This is being added so the pump will start slowly and increase speed as the temp rises. It will also run the fan and pump after shut down to eliminate heat soak.
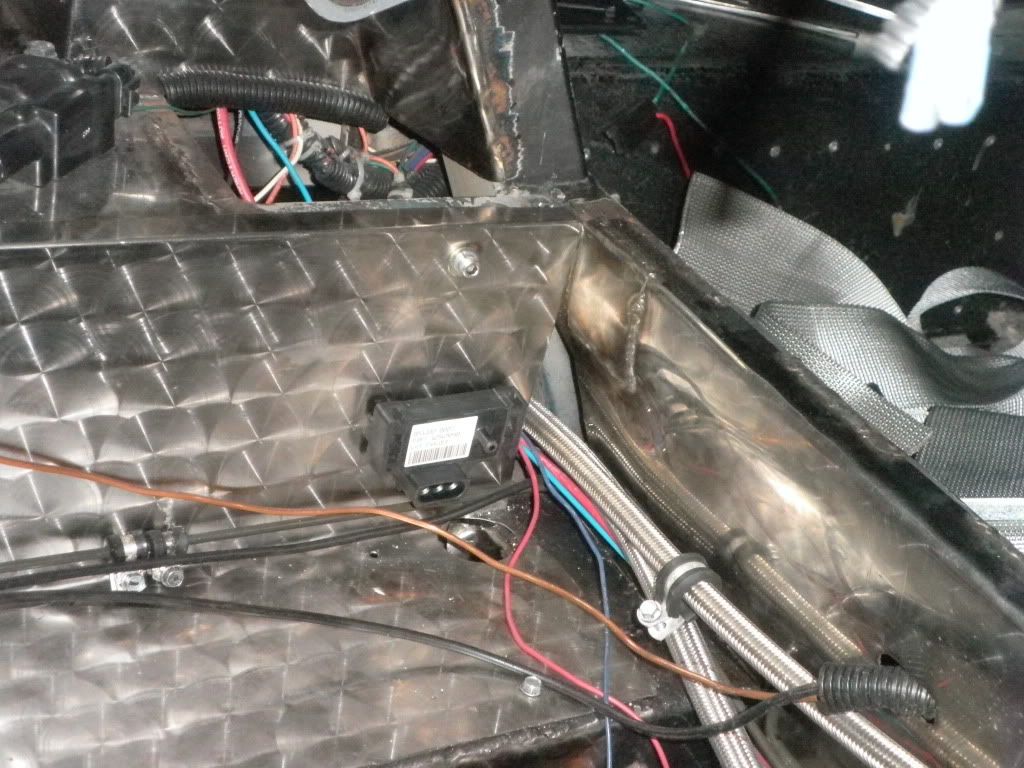
Wiring or rather rewiring of all the dash switches required rerunning of all the wires to the switches except the Accusump. All of the wiring connectors have been replaced with weather pack connectors. the standard connectors were a PIA to seperate or connect.

Other tidbits added are a spoiler to the rear with wheel well vents and the rear screens have been added as well.

The last retaining bolt on the spoiler is to be added as I couldn't get a feel for its placement til the vent was completed. Double large rubber washers were placed between the spoiler and the body.
That's the good news. Now for the bad. When we first cranked the engine we noticed the no:1 cylinder on the right side of the engine didn't fire well and there was some backfiring out the exhaust from unspent fuel. We checked the coil, swapped it out for another more powerful unit, checked compression and even the plug. All was O K except the spark from the plug was weak. We finally found a speck of metal deep in the plug that was causing it to foul. Upon cleaning it the engine ran fine. After getting the car home from the shop I started running into the alternator overheating problem which we think has been fixed. So the engine probably has about 45 minutes of total run time on it. While running the engine I noticed the same cylinder would take its time to start firing(see the crappy video in post #80). While the engine was out I took it over to the shop where it was installed and the head was pulled as the metal in the plug worried us a bit. What we found was the intake valve was hitting the piston just above the valve relief and was gouging the piston. The good news is the valves have been checked and there is no damage to them. The engine will be torn down and the pistons will be fly cut for the larger valves. Each cylinder had tiny bits of metal at the low point in the cylinder. The no:1 just happened to get it into the plug. That cylinder(piston) was as clean as the day the pistons were put in, which means there was a lot of fuel and little firing going on. The cylinders look O K and show no damage but will be rehoned.
In hind sight, we figured that every one in the build process had made a mistake. The short block builder knew that aftermarket heads would be used, just didn't allow for the larger valves as he didn't have the heads when he built the assembly. They were ordered later on. He used stock pistons(reliefs). I made the mistake of setting the heads on the engine to see what it looked like semi assembled. The engine builder torqued the heads already on the engine and didn't check for interference with the valves.
Lesson learned? Always do a check with clay to see what kind of clearance your valves have. We were lucky that it didn't cost us an entire engine. So it will be a couple of more weeks til all is buttoned up and reassembled. Then we will have a refiring of the engine.
Bill
It is set for about 7 psi, so if the oil pan doesn't do its job and keep the oil around the pickup, or the accusummp doesn't keep the pressure up, and I don't see the oil presssure lite on, the fuel pumps will shut off. A bypass switch has been installed to aid in starting the engine. Both hands and feet will be busy on any startup. The clutch has to be disengaged for the starter to turn over.
On the oil filter mount there was an extra 1/2" mount, so an oil temp lite sensor was wired in. It is a double lead sensor so the oil fan relay ground was added to it. When the lite comes on the fan is activated. Temp sensors were added to the transmission pump as well, and will turn the fan on when the temp is met.
The pump will remain a switch trigger only because the switch was already installed.
There are three water temp sensors now. The first is manual for the gauge. A spacer was added so the second and third sensors could be mounted.
The second is for the radiator fan and the third is for the Spal pump controller. This is being added so the pump will start slowly and increase speed as the temp rises. It will also run the fan and pump after shut down to eliminate heat soak.
Wiring or rather rewiring of all the dash switches required rerunning of all the wires to the switches except the Accusump. All of the wiring connectors have been replaced with weather pack connectors. the standard connectors were a PIA to seperate or connect.
Other tidbits added are a spoiler to the rear with wheel well vents and the rear screens have been added as well.
The last retaining bolt on the spoiler is to be added as I couldn't get a feel for its placement til the vent was completed. Double large rubber washers were placed between the spoiler and the body.
That's the good news. Now for the bad. When we first cranked the engine we noticed the no:1 cylinder on the right side of the engine didn't fire well and there was some backfiring out the exhaust from unspent fuel. We checked the coil, swapped it out for another more powerful unit, checked compression and even the plug. All was O K except the spark from the plug was weak. We finally found a speck of metal deep in the plug that was causing it to foul. Upon cleaning it the engine ran fine. After getting the car home from the shop I started running into the alternator overheating problem which we think has been fixed. So the engine probably has about 45 minutes of total run time on it. While running the engine I noticed the same cylinder would take its time to start firing(see the crappy video in post #80). While the engine was out I took it over to the shop where it was installed and the head was pulled as the metal in the plug worried us a bit. What we found was the intake valve was hitting the piston just above the valve relief and was gouging the piston. The good news is the valves have been checked and there is no damage to them. The engine will be torn down and the pistons will be fly cut for the larger valves. Each cylinder had tiny bits of metal at the low point in the cylinder. The no:1 just happened to get it into the plug. That cylinder(piston) was as clean as the day the pistons were put in, which means there was a lot of fuel and little firing going on. The cylinders look O K and show no damage but will be rehoned.
In hind sight, we figured that every one in the build process had made a mistake. The short block builder knew that aftermarket heads would be used, just didn't allow for the larger valves as he didn't have the heads when he built the assembly. They were ordered later on. He used stock pistons(reliefs). I made the mistake of setting the heads on the engine to see what it looked like semi assembled. The engine builder torqued the heads already on the engine and didn't check for interference with the valves.
Lesson learned? Always do a check with clay to see what kind of clearance your valves have. We were lucky that it didn't cost us an entire engine. So it will be a couple of more weeks til all is buttoned up and reassembled. Then we will have a refiring of the engine.
Bill
Amazing Bill!
What an adventure!! And when you are desperately trying to move quickly forward. But it seems you have grabbed all the gremlins now, and will have a good reliable engine finally.
Thanks for posting Bill.
I like reading your build thread. Its also good to read both the positive and negatives you have encountered, there are good learnings in this thread.
The car is a gem.
Cheers, Gus.
I like reading your build thread. Its also good to read both the positive and negatives you have encountered, there are good learnings in this thread.
The car is a gem.
Cheers, Gus.
Thanks guys for the comments. Some may not realize it, but getting some feedback on a build is the type of encouragement that keeps us going when it truly is a slow-go. Having a life and building this car is a challenge sometimes. It seems that there is a conspiracy to keep me out of the garage. I am working a lot of "on calls" the next month or two to pay for this side track. Added to my readings for the re certification(held every six years), It doesn't leave a lot of time. So when it is done, I can slow down and speed up the build.:huh:
Bill
Bill
Well boards are finished and I passed, so Now to get back to the car. It seems every time I get some time on my hands, it is filled with projects that have a greater need. As a result not a lot is happening with the car. things I have accomplished are to get a set of 5" fans ala Chuck for ventilating the rear clip. I have two openings in the front of the compartment that are perfect for them.

One is installed and the other is about to go in. In the bottom of these areas is a lot of wiring that as a winter project will be replaced as a lot of it was added after the wiring was complete(is it ever). As a result the wiring is exposed to the sucking of the fans. I took some of the rigid screen that was used for all the bodyvents and secured them to the underside of the fans for protection. The fans were Spal units that were on sale. The sales people at Spal didn't even know they had them. They were some left over special order items. They pull 500 cfm unrestricted and average over 300 with a normal resistance to flow. They have a different way of attaching with a plug on one end that I just made a hole for in the side wall. The other end has two screw holes for securing them. That turned out to be a blessing as I don't think I could have gotten to the back screws.


I had the tanks sent out to have the vent bungs added to the front and rear of the tanks. They will be linked to the front of the tanks and to a foll over valve and then linked to the breathers next to the fill caps. I cut an access cover in the main tank(only one set of pumps) so I can get to everything that is important. all is a little messy but will be tidyed up later. I also had them add bungs to the bottom of both tanks to setup a crossover line to link the two tanks. The return line from the swirl tank will be T'd to return to both tanks. This allows me to retain the full carrying capacity of both tanks, but use only one set of pumps. I originally had the return only to the independent tank and a crossover to the main, but it didn't work. the flow from the independent tank was too slow and the return was overflowing the tank. Not good.
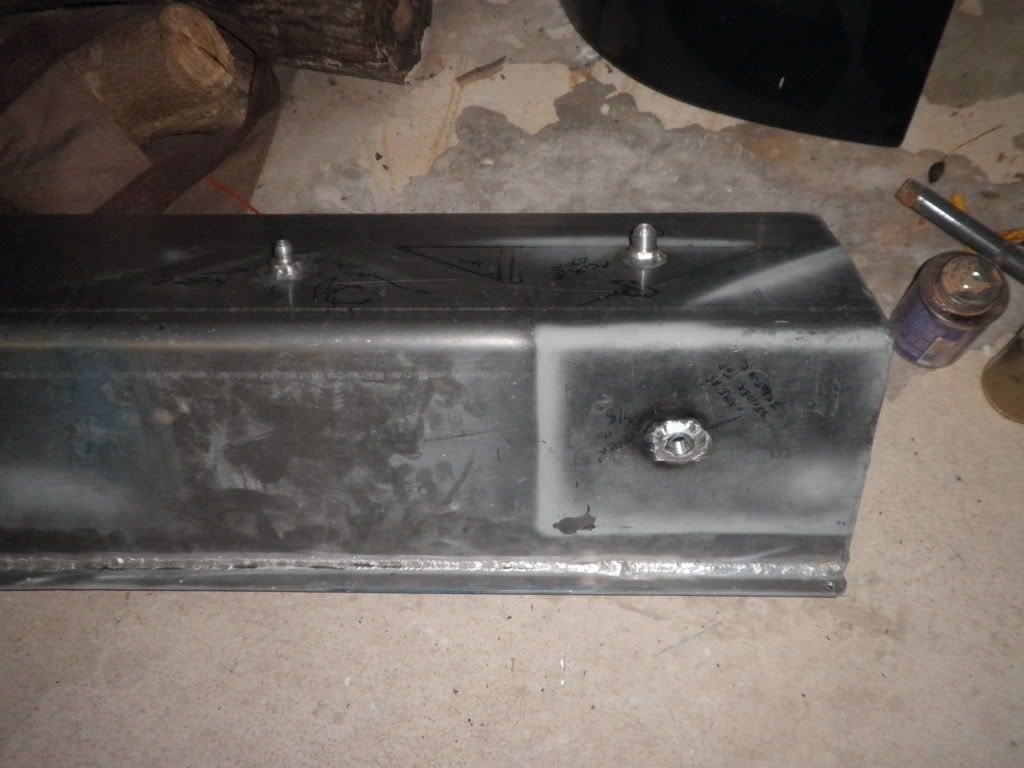
While they were there, I had them make a flapper valve to hold gas around the pickup so it doesn't suck any air. It needs a few touchups which I can handle. Just haven't learned to weld aluminum yet, and I don't want to experiment on the tanks. A bit too important.

More later. got to get to work.
Bill
One is installed and the other is about to go in. In the bottom of these areas is a lot of wiring that as a winter project will be replaced as a lot of it was added after the wiring was complete(is it ever). As a result the wiring is exposed to the sucking of the fans. I took some of the rigid screen that was used for all the bodyvents and secured them to the underside of the fans for protection. The fans were Spal units that were on sale. The sales people at Spal didn't even know they had them. They were some left over special order items. They pull 500 cfm unrestricted and average over 300 with a normal resistance to flow. They have a different way of attaching with a plug on one end that I just made a hole for in the side wall. The other end has two screw holes for securing them. That turned out to be a blessing as I don't think I could have gotten to the back screws.
I had the tanks sent out to have the vent bungs added to the front and rear of the tanks. They will be linked to the front of the tanks and to a foll over valve and then linked to the breathers next to the fill caps. I cut an access cover in the main tank(only one set of pumps) so I can get to everything that is important. all is a little messy but will be tidyed up later. I also had them add bungs to the bottom of both tanks to setup a crossover line to link the two tanks. The return line from the swirl tank will be T'd to return to both tanks. This allows me to retain the full carrying capacity of both tanks, but use only one set of pumps. I originally had the return only to the independent tank and a crossover to the main, but it didn't work. the flow from the independent tank was too slow and the return was overflowing the tank. Not good.
While they were there, I had them make a flapper valve to hold gas around the pickup so it doesn't suck any air. It needs a few touchups which I can handle. Just haven't learned to weld aluminum yet, and I don't want to experiment on the tanks. A bit too important.
More later. got to get to work.
Bill
Bill, I'm sure it is frustrating to be side-tracked from your build regularly, but you are making serious progress and doing thorough work, so it will be excellent when finished. Keep it up, not far to go.
Another poor planning episode came to actually help me out. I added a bracket to my trans mount supporting the cable to the neutral gate shifter AFTER I ceramic coated it requiring it to be redone. I have several other pieces that were bare metal that I wanted done at the same time. The guy I used over a year ago, that lived 18 miles away, had gone out of business. My new painter recommended a company that wound up being 3 miles from my house. They have been in the business many years and was told they do excellent work. So I took the parts over there. I got them back the other day. Man is there a difference.Here is the new one.

Here is a suspension part done by the other guy.
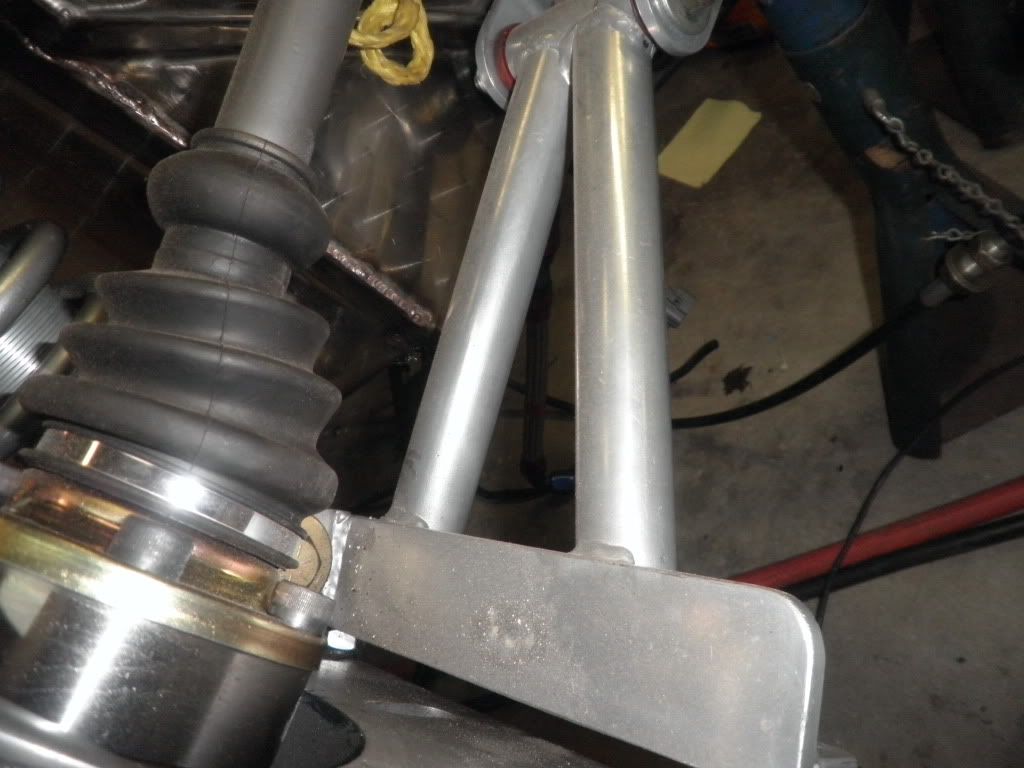
Big difference! They told me that I should use Mother's Aluminum polish on the other parts and it should improve the looks of it. I will try it and see. If not , back it(and several other pieces) go. So be aware, there are different qualities in shops that do the same work. These guys do it in a big vat with some strong chemicals involved. When they come out of the oven they are a flat gray looking color. I liked the ceramic coating better than Powder coating. the build up on the surface is minimal compared to the powder. Makes it great for those pieces that have fairly tight tolerances, like rod end brackets etc.
Bill
Here is a suspension part done by the other guy.
Big difference! They told me that I should use Mother's Aluminum polish on the other parts and it should improve the looks of it. I will try it and see. If not , back it(and several other pieces) go. So be aware, there are different qualities in shops that do the same work. These guys do it in a big vat with some strong chemicals involved. When they come out of the oven they are a flat gray looking color. I liked the ceramic coating better than Powder coating. the build up on the surface is minimal compared to the powder. Makes it great for those pieces that have fairly tight tolerances, like rod end brackets etc.
Bill
After getting the roll over valve from Demon Tweeks I started on the vent system. I used 3/8x1/4 right angle barbs for the tanks. I used the same size for the crossover line. Some fuel line of similar size was obtained and run underneath the car. Here it is with the return line to the independent tank.

With the washboard bottom it allowed me to protect the fuel line by securing it to the indentation. Which reminds me i have to add some 1/4" steel inserts for the sixth point in the harness system for strength. The washboard bottom is easily pulled through(a little thicker than sheet metal), so don't want that belt to give.
The top vent line had to be thought out a bunch as there just isn't much room for it. Since an additional wiring loom had to be added on one side, it fills the little void there is along the top edge of the tank next to the frame. No room for anything else. I decided to place routing holes in the cross members to accommodate the vent line.

I put two vents, one in the front and one in the rear and linked them together to offset any pressure differences. If you look at the previous post with the flapper valve you will see the system that keeps the fuel from sloshing front to rear. There are several of them in the tank and it really takes a long time for the fuel to reach the other end and it breaks up the wave action that would occur on acceleration and hard braking. I decided to go the Lowe's method of running the vent lines and attachments. This is stuff that will never be seen, so why pay $150-70 for the venting hoses and AN hardware when the home improvement stuff will do the job for 1/3 the cost. So here is one side completed.

The vent exits the body just behind the full fillers. It took a lot longer than anticipated because the vent tubing is 1/2" and the vent line is 3/8". I solved that dilemma by using 3/8x1" long nylon washers that would support the tubing, and slide the 1/2" over the 3/8" tube and secure it with tubing clamps.

Now to build the other side. It will be identical except for the rollover valve. It is a tiny 3/8" cylinder with a steel ball that allows flow in and out til upside down. I purchased it some time ago, and hadn't misplaced it(its an age thing), so I'll use it.
Bill
With the washboard bottom it allowed me to protect the fuel line by securing it to the indentation. Which reminds me i have to add some 1/4" steel inserts for the sixth point in the harness system for strength. The washboard bottom is easily pulled through(a little thicker than sheet metal), so don't want that belt to give.
The top vent line had to be thought out a bunch as there just isn't much room for it. Since an additional wiring loom had to be added on one side, it fills the little void there is along the top edge of the tank next to the frame. No room for anything else. I decided to place routing holes in the cross members to accommodate the vent line.
I put two vents, one in the front and one in the rear and linked them together to offset any pressure differences. If you look at the previous post with the flapper valve you will see the system that keeps the fuel from sloshing front to rear. There are several of them in the tank and it really takes a long time for the fuel to reach the other end and it breaks up the wave action that would occur on acceleration and hard braking. I decided to go the Lowe's method of running the vent lines and attachments. This is stuff that will never be seen, so why pay $150-70 for the venting hoses and AN hardware when the home improvement stuff will do the job for 1/3 the cost. So here is one side completed.
The vent exits the body just behind the full fillers. It took a lot longer than anticipated because the vent tubing is 1/2" and the vent line is 3/8". I solved that dilemma by using 3/8x1" long nylon washers that would support the tubing, and slide the 1/2" over the 3/8" tube and secure it with tubing clamps.
Now to build the other side. It will be identical except for the rollover valve. It is a tiny 3/8" cylinder with a steel ball that allows flow in and out til upside down. I purchased it some time ago, and hadn't misplaced it(its an age thing), so I'll use it.
Bill

I trust your GT40 appreciates that you have been re-certified for medical work, so are definitely competent to keep operating on the car. And it will be finished well before the next re-certification, won't it?
Since I have one of the slowest builds here, I wonder how fast a team of guys could rebuild a GT40. Sort of like the F-1 or Indy cars. Well here are a group of guys that have their stuff together. Under 4 minutes:
http://www.hardocp.com/news/2010/09/10/must_see_video_day
Maybe we should get a group together and give it a try??:drunk:
Bill
http://www.hardocp.com/news/2010/09/10/must_see_video_day
Maybe we should get a group together and give it a try??:drunk:
Bill
Bill, it sounds good, and I can imagine how much you are looking forward to completeion. But I don't think a four minute build is going to achieve the level of quality you need to be happy with it.
However, if you DO get a team together for a week, say, give us a warning shout and I'll see if I can wangle my Frequent Flyer points to get over there and lend a hand.
However, if you DO get a team together for a week, say, give us a warning shout and I'll see if I can wangle my Frequent Flyer points to get over there and lend a hand.