
You are using an out of date browser. It may not display this or other websites correctly.
You should upgrade or use an alternative browser.
You should upgrade or use an alternative browser.
Fat Larry's GTR Build
- Thread starter [email protected]
- Start date
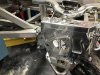
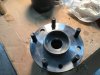
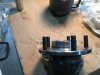
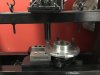
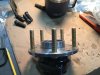
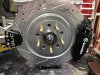
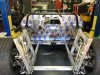
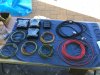
So today i took a cue from Kurtiss and replaced my rear studs and finished replacement of the dust seals on one of my calipers and then it’s on to the heat shield on the fire wall
Attachments
-
 3F4A771A-4212-4B52-8365-F8D90A1F5E98.jpeg463.1 KB · Views: 655
 -
 5A277F24-19B0-4F5B-A1AE-79A549231F4F.jpeg323.3 KB · Views: 514
 -
 A8967418-8905-477F-A811-260CBB3A5221.jpeg352.3 KB · Views: 485
 -
 2B9AA0EB-C576-40D5-9D4C-2349A27F3F3B.jpeg322.7 KB · Views: 512
 -
 4B3EED18-201C-4D4D-9602-028D4CA7F9DE.jpeg412.5 KB · Views: 516
 -
 A8F707ED-4C31-4ECA-ADB4-608A0B5A42A1.jpeg404 KB · Views: 589
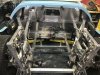
One thing I discovered rather quickly is once you take all of the pieces off the car your new 24 x 24 garage fills up fast i am use to this since most of the cars I have built in the past 40 something yrs were done in either a single car garage or a cramped two car garage
I am going to leave it for now
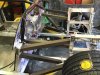
Ok so spent the day finally finishing the heat shield and put the sound deaden on the other sound of the fire wall now it’s on to running’s the ducts for the defrost and vents plus finish up powder coating more parts while I wait for all the electrical systems to show up
Attachments
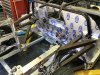
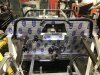
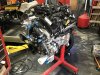
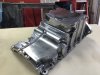
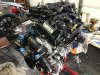
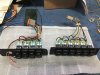
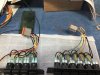
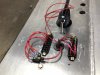
Ok so finally after about 2 months my Infinity Box System showed up today so on to wiring the car, I spent some time today detailing the engine and just waiting for my new Raptor Turbos to come in once mounted off to California she goes to have the Engine Management System installed and then Dyno to make sure everything is working properly before I reinstall for the last time. I also spent some time working on the center console which I will finish up with an aluminum bezel and leather or cloth boot
Attachments
-
 C09243D2-E8AE-4BDD-9597-59E0314FEBA0.jpeg532.3 KB · Views: 463
 -
 8661CC0F-06FF-4B46-83DB-5C3BE26AE181.jpeg505.5 KB · Views: 462
 -
 4673A21D-8073-43D9-9A1E-64F387274CFC.jpeg471.5 KB · Views: 481
 -
 151EA972-662C-4C91-91B6-AF5D178E7834.jpeg401.8 KB · Views: 467
 -
 549A83EB-E286-47FD-A42E-0AD5EB7BE9F1.jpeg359.4 KB · Views: 489


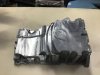
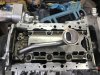
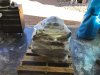
So I got a new oil pan and pickup tube from RMB Motorworks so I wanted to install before I send the motor to Calf and then back onto the wiring I tried to give the pan a little polish job the first pic is before polishing
Attachments
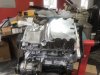
Ok motor all set and ready to go to California for it’s new ECU wiring harness
Attachments

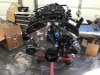
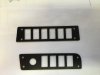
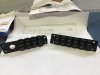
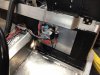
Ok motor made it to Calf now just need to wait for the Dino time, started on the switch panels powder coated them and started to wire
Attachments


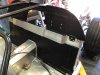
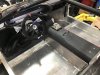
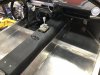
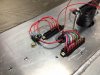
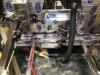
Wiring so much fun there is only so much room for the fat man to get under the dash I thought at one time today I would not be able to get back out and my wife would fine me three days later.
Attachments

To all my fellow GTR builders Happy Thanksgiving to all be safe and don’t eat to much you won’t fit under the dash
Merry Christmas to all my fellow builders and families I hope Santa brings you all you wished for and most importantly a healthy and peaceful celebration enjoy
So yesterday I was able to hook up the Infinity in touch system really neat system and super easy to install I recommend to all my fellow GTR builders
Similar threads
- Replies
- 12
- Views
- 885
- Replies
- 38
- Views
- 10K
- Replies
- 1
- Views
- 753