Chris Kouba
Supporter
Continues to be one of the most interesting projects on the forum
I couldn't agree more. I think this is the most epic project/thread on this forum.

Continues to be one of the most interesting projects on the forum

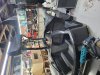
") , then wet lay carbon/epoxy composite over this, taking care to add extra layers where any bolted fixings will be. Then sand it all back, paint on a thin layer of resin and fine sand then polish. This was also a chance to smarten up the door frame a bit.
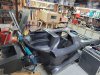
, then wet lay carbon/epoxy composite over this, taking care to add extra layers where any bolted fixings will be. Then sand it all back, paint on a thin layer of resin and fine sand then polish. This was also a chance to smarten up the door frame a bit.That sounds like more or less the same space i will have in my future project, meaning that all the mentioned options will fit, even though some of them will rub your back more or less because of the tight fit.Thanks for the words of support guys
i have been reading Alexanders VW W12 thread with fascination .. and recently watched someone on youtube restore an M120 V12 which got me dreaming. I'm wary of being caught out by any changes in UK IVA rules (given this is going to be a slow build) so trying to be patient
I have >1050mm between rear axle and rear bulkhead so i think (hope) there's a decent length to play with, even more if i scavenge from the space reserved for the fuel system. Available width varies somewhat.