Howard B's RCR 40

Jack, Chris and Larry,

Thanks for your kind words. I did enjoy painting it myself, but I wouldn't do it for a living, I would probably starve!

I tried hard to follow the look of the '69 Gulf car with just a few tweaks. The pictures on the web look darker in color than in reality.

I would like to find the rear aviation light they mounted on the car for the race. It was mounted on the right haunch. It's was visible on a youtube video up until a couple of months ago. It is still visible on the '68 video. Any ideas as to where this can be bought?

I still have to mount the roundel lights (which I have).

I have the numbers and sticker kit from Raceline. They look great, they'll look better on the car.

I must say it's more exciting now to go into my garage!
 
Some notes on the undertaking of the paint job.

Paint booth construction:
-1x6 pine
-hard board panels
-aluminum framed storm windows for the ceiling (from the neighbors recycle bin)
-drywall screws
-four flood lamps (mounted above the ceiling)
-nice home HVAC filters
-hooks and screws to hang stuff from the ceiling
-shop vac

Paint equipment: turbine paint sprayer, disposable paint suits, really nice disposable dust and paint respirators, disposable rubber gloves. safety goggles/glasses.

The painting: Since I am rookie painter, I sprayed non metallic paints, this allowed me to paint individual panels one at a time. This also allowed me to keep the paint booth relatively small (11feet X 8.5feet), I still had room left in my garage to do other work.

It was a long job, of which I had no idea how long it would take me. :huh:

Would I paint another car, yup, I must be sick!

Here is a picture of the rear clip in the booth and one door.
 

Attachments

  • Clear coat 014.jpg
    Clear coat 014.jpg
    78.7 KB · Views: 474
  • Door in Booth.jpg
    Door in Booth.jpg
    126.1 KB · Views: 443
Details, details, details...

Getting down to my final punch list of 50 things or more left to do. (maybe I am kidding myself!)
A couple of days ago I installed the vent windows and the aircraft vents.

I also mounted a pair of heat shields to combat screwing up the paint and body. I used the Click Bond studs and Fiberfrax, (ala Chuck and Ryan)along with some aluminum to act as a shield behind the fuel lines on the EFI from the exhaust. I also attached the cables for the hood pins on the rear clip.

Three things off the list. :thumbsup:

A couple of picks:
 

Attachments

  • Details vent and latches 1.jpg
    Details vent and latches 1.jpg
    160.9 KB · Views: 516
  • Details vent and latches 2.jpg
    Details vent and latches 2.jpg
    154.2 KB · Views: 545
  • Details vent and latches 3.jpg
    Details vent and latches 3.jpg
    224 KB · Views: 526
More little details:

While working in Michigan in the last couple of months I stopped by the Ford Museum for the third time. I was expecting to see the '67 MKIV in it's usual place. However I had a pleasant surprise the 67 MKIV was on a road trip and had been replaced by the 1075 Gulf car on loan. This gave me a great opportunity to take some detail pictures (just a few 140, :thumbsup:).

Even though the paint job is not the paint job of the '69 Le Mans race there were features I could look at close up. One was the small splash guards on the wheel wells of the front tires. With that information I made my own guards and will be mounting them soon.

I was also able to mount the roundel marker lights. See pics.
 

Attachments

  • GT40 1075 Car 118 b.jpg
    GT40 1075 Car 118 b.jpg
    255.8 KB · Views: 436
  • PB192005.jpg
    PB192005.jpg
    83.3 KB · Views: 417
  • PB192000.jpg
    PB192000.jpg
    76.8 KB · Views: 418
  • Roundel Lite 003.jpg
    Roundel Lite 003.jpg
    251.5 KB · Views: 394
  • PB192001.jpg
    PB192001.jpg
    73.6 KB · Views: 368
Thanks Will. I am probably over working this car if it looks better than the original.

I spent the afternoon yesterday shaping the louvers in the demister grill Fran had so kindly given to me when I visited his RCR shop while in working in the Detroit area. Thanks Fran, it worked out just fine.

I did need to size the grill to fit the opening in the dash first. I then sanded and cleaned it for paint. I next took my needle nose pliers and coaxed the louvers into shape. I used a flat paddle sheet metal pliers to straighten all of the louvers and align them. I cleaned the grill again, hung it in the paint booth, mixed a couple ounces of primer and shot the primer.
After allowing the paint to cure, I shot it with mat black.

It was a pretty easy job, that just took some time and patience, oh yeah, just like everything else. :laugh:

Now where are my black screws?
 

Attachments

  • Demister Grill.jpg
    Demister Grill.jpg
    239 KB · Views: 510
Time to check in after all, I last posted here in November. I need to get my build closer to the front so I can find it easier! :shocked:

I finally have this puppy coming to completion, hallelujah!

Some of you will like it, some of you won't, just another Gulf car to some, the best color combo for others.

Personally , I smile every time I am near it! :thumbsup:
 

Attachments

  • P6152320.jpg
    P6152320.jpg
    117.5 KB · Views: 455
  • P6152322.jpg
    P6152322.jpg
    135.5 KB · Views: 461
The reason my girl friend left me...
She saw this and asked if this was why I was building the car...:laugh:

Damn, she figured that out pretty quick!
 

Attachments

  • Girling.jpg
    Girling.jpg
    81.1 KB · Views: 394
Don't care what others might say, I think it looks great. Your statement of how long it takes, is right on. I have been working or the repair and paint since last fall. Took almost 3 months to find the Linden Green. I don't like all the sanding,,, until I get started, then it is hard to stop.

Bill
 
Lee and Paul,

Thanks for the encouragement!
I have more pics to post and I have had a couple of short drives in for sorting.

I built a pair of ramps to get it out of the steep drive way I own. It's a drag if you don't us them.
 

Attachments

  • Side shot.jpg
    Side shot.jpg
    92.7 KB · Views: 430
  • Front shot.jpg
    Front shot.jpg
    135.7 KB · Views: 396
Howard, fantastic looking car mate. Really, a job very well done. With all the details of 1075 I must ask.....you doing the wheels marigold? You may have already answered this question elsewhere on your build so forgive me if asking again.
 

Dave Hood

Lifetime Supporter
Beautiful car, Howard.

Depending on how steep your driveway is, there's a product called RamLift Pro that may help you. I've got it installed on my car, and it gives me an extra three inches or so of clearance. Here's a brief video.

[ame=http://www.youtube.com/watch?v=fi0cLF49uKE]GT40 RAMLIFTpro.com Hydraulic Lift System - YouTube[/ame]
 
Bill,

Yup, I agree with you!

Jimmy,
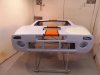
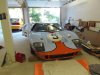
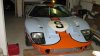
I have the paint for the wheels and plan on painting them, after the sixth year of the two year project, I just want to drive it some at this point!

and Dave,
Yup, I know all about the lifts, I just have fallen short in the budget. Thanks for the lift demo.

I am pleased to have made it this far, after having seen others not make it. I only have kind thoughts for those who have tried and let it go. Frequently, I have seen them as much smarter men than me! (Or, as Forrest Gump said "I am not a smart man.")

All,
I thought I would have gotten comments on the Girling joke. You guys are so "car guys"! :laugh: You just missed it I guess. :laugh:
 
I have the ram lift also. My ride height is really low (4 inches) and I have no issues with driveways. It reduces the length of the front spring you can run, but then the suspension design doesn't allow for a lot of travel anyway.

Your details are just awesome! Nice work!
 
Hi Jay,

We haven't spoken together on the Forum for some time, fellow Virginian.
Thanks for the compliment.

I have enjoyed seeing your posts of your car out in the hills of SW Virginia.

It has been those kind of little things that have kept me chipping to the finish line while doing all the other details of daily living.

Cheers,
Howard
 
Back
Top