
You are using an out of date browser. It may not display this or other websites correctly.
You should upgrade or use an alternative browser.
You should upgrade or use an alternative browser.
Mike's drb #41 build
- Thread starter MIKE SIRR
- Start date
Despite a lack of recent updates, progress has been made. Weather has been unusually cold for us, but I do have a good heat source for the paint boot.
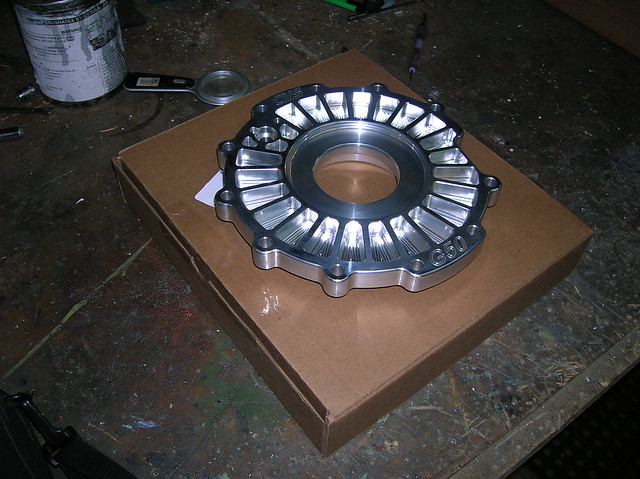
First up, the California Motorsports billet side cover arrived for the G50. Hoping to swap it out sometime this week.
 DSCN9032 by Mike Sirr, on Flickr
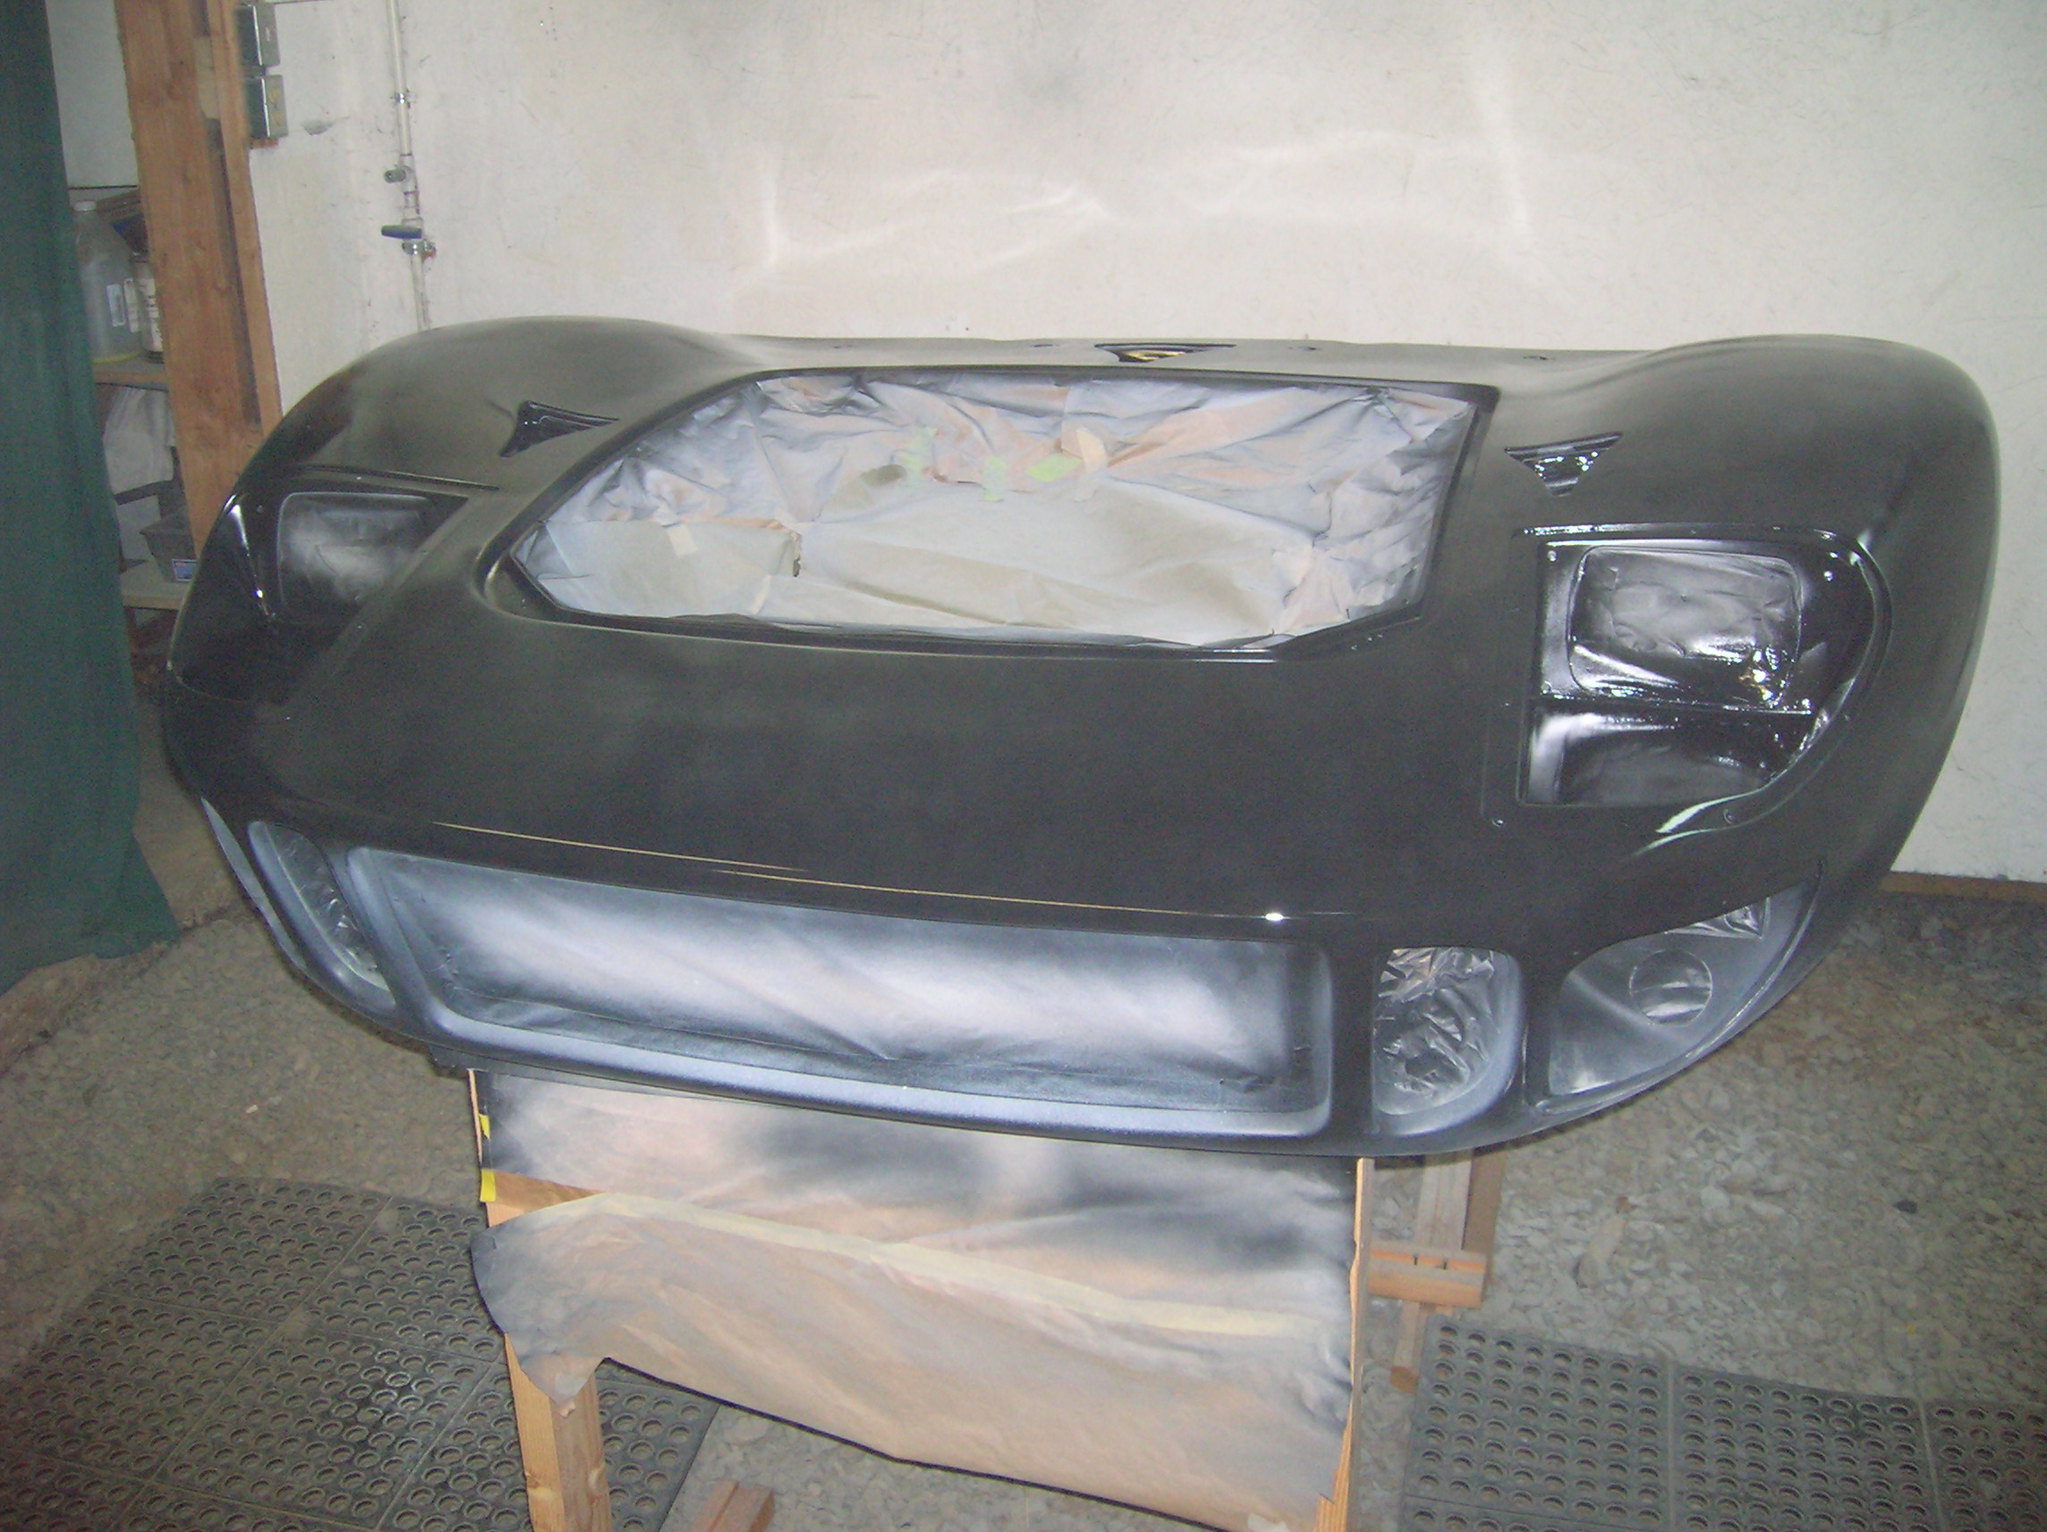
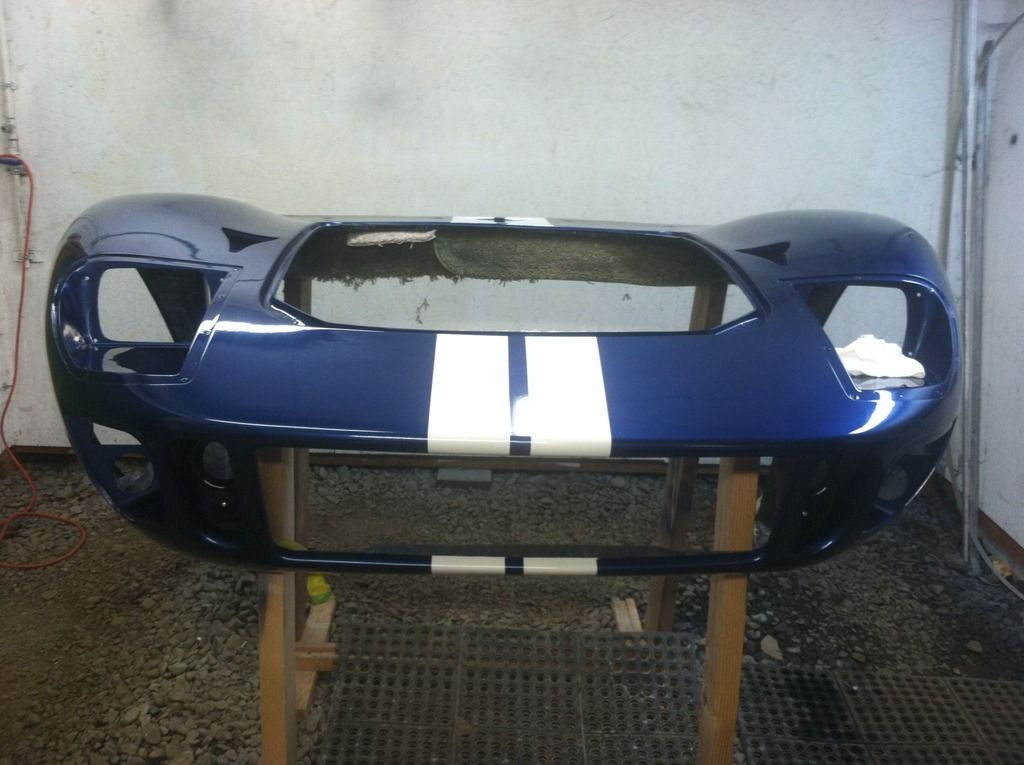
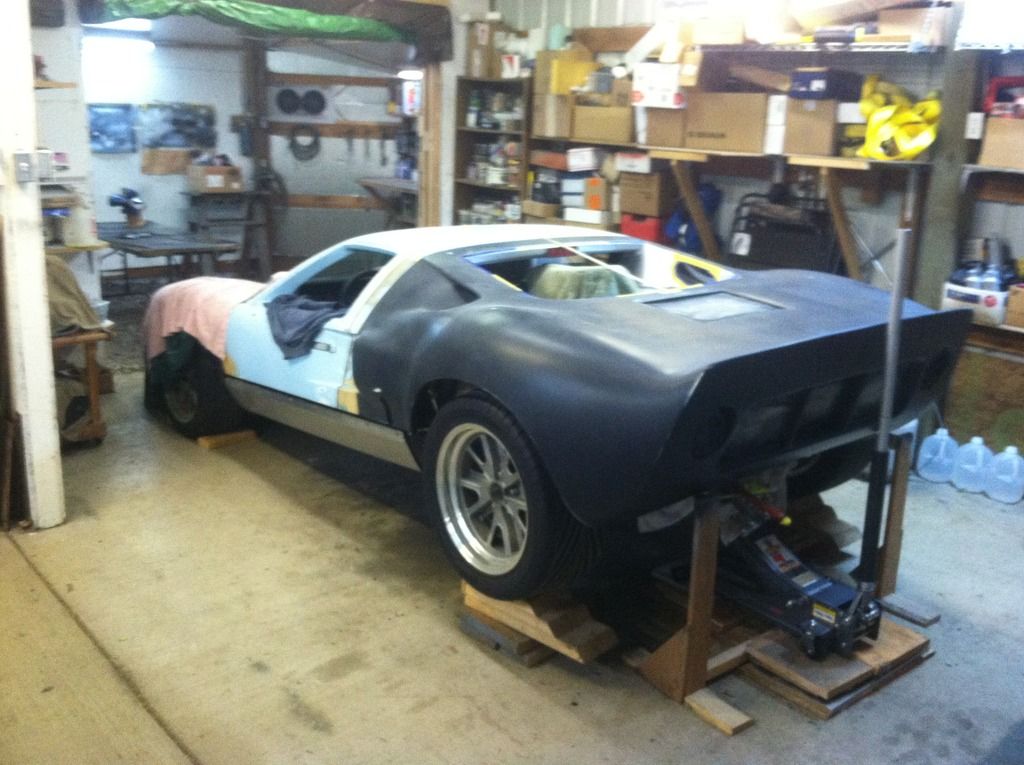
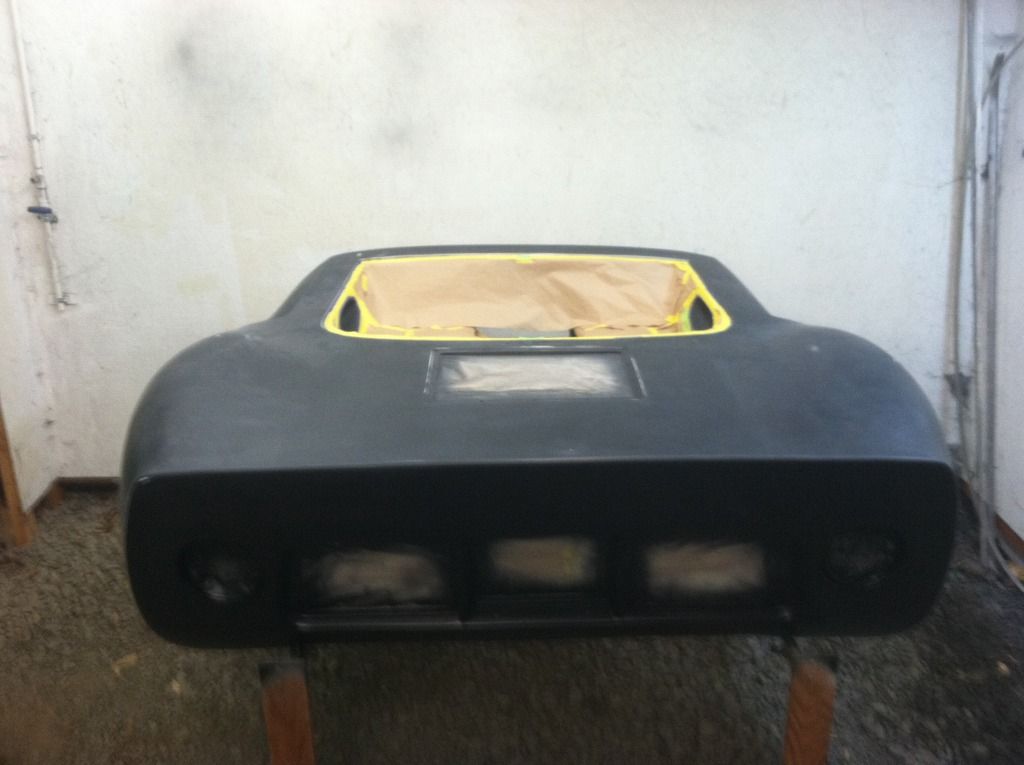
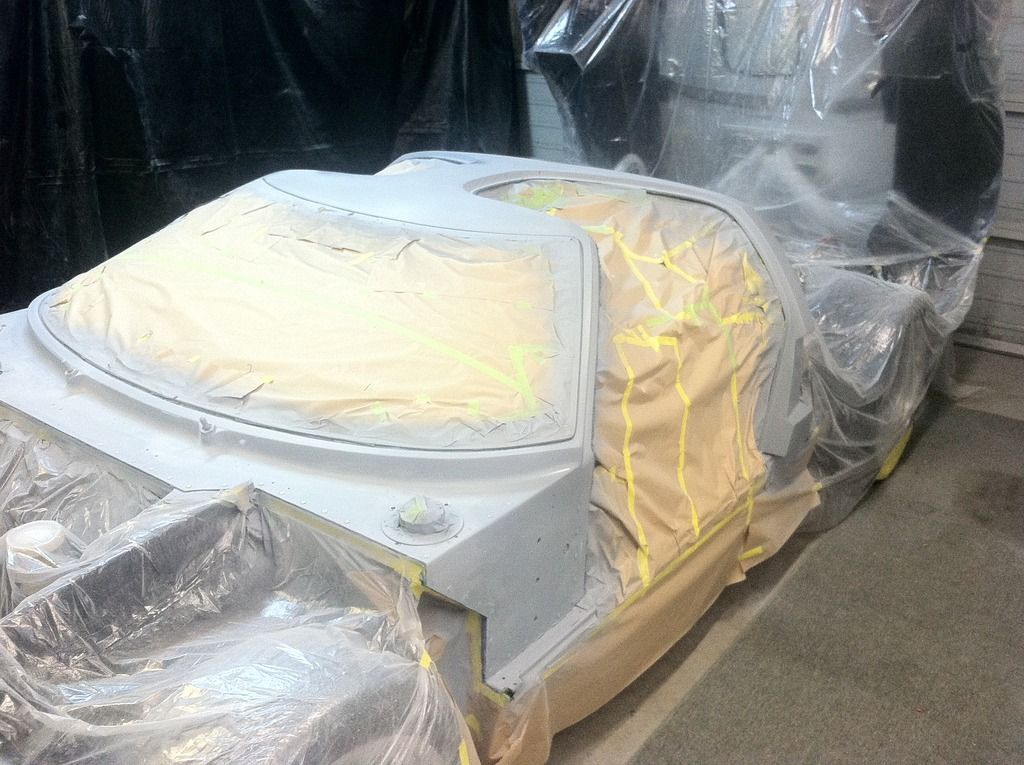
Painting prep has progressed ... focusing on the front clam first. Past couple weeks I have been spraying and block sanding to get ready for blue base.
 DSCN8977 by Mike Sirr, on Flickr
 DSCN8981 by Mike Sirr, on Flickr
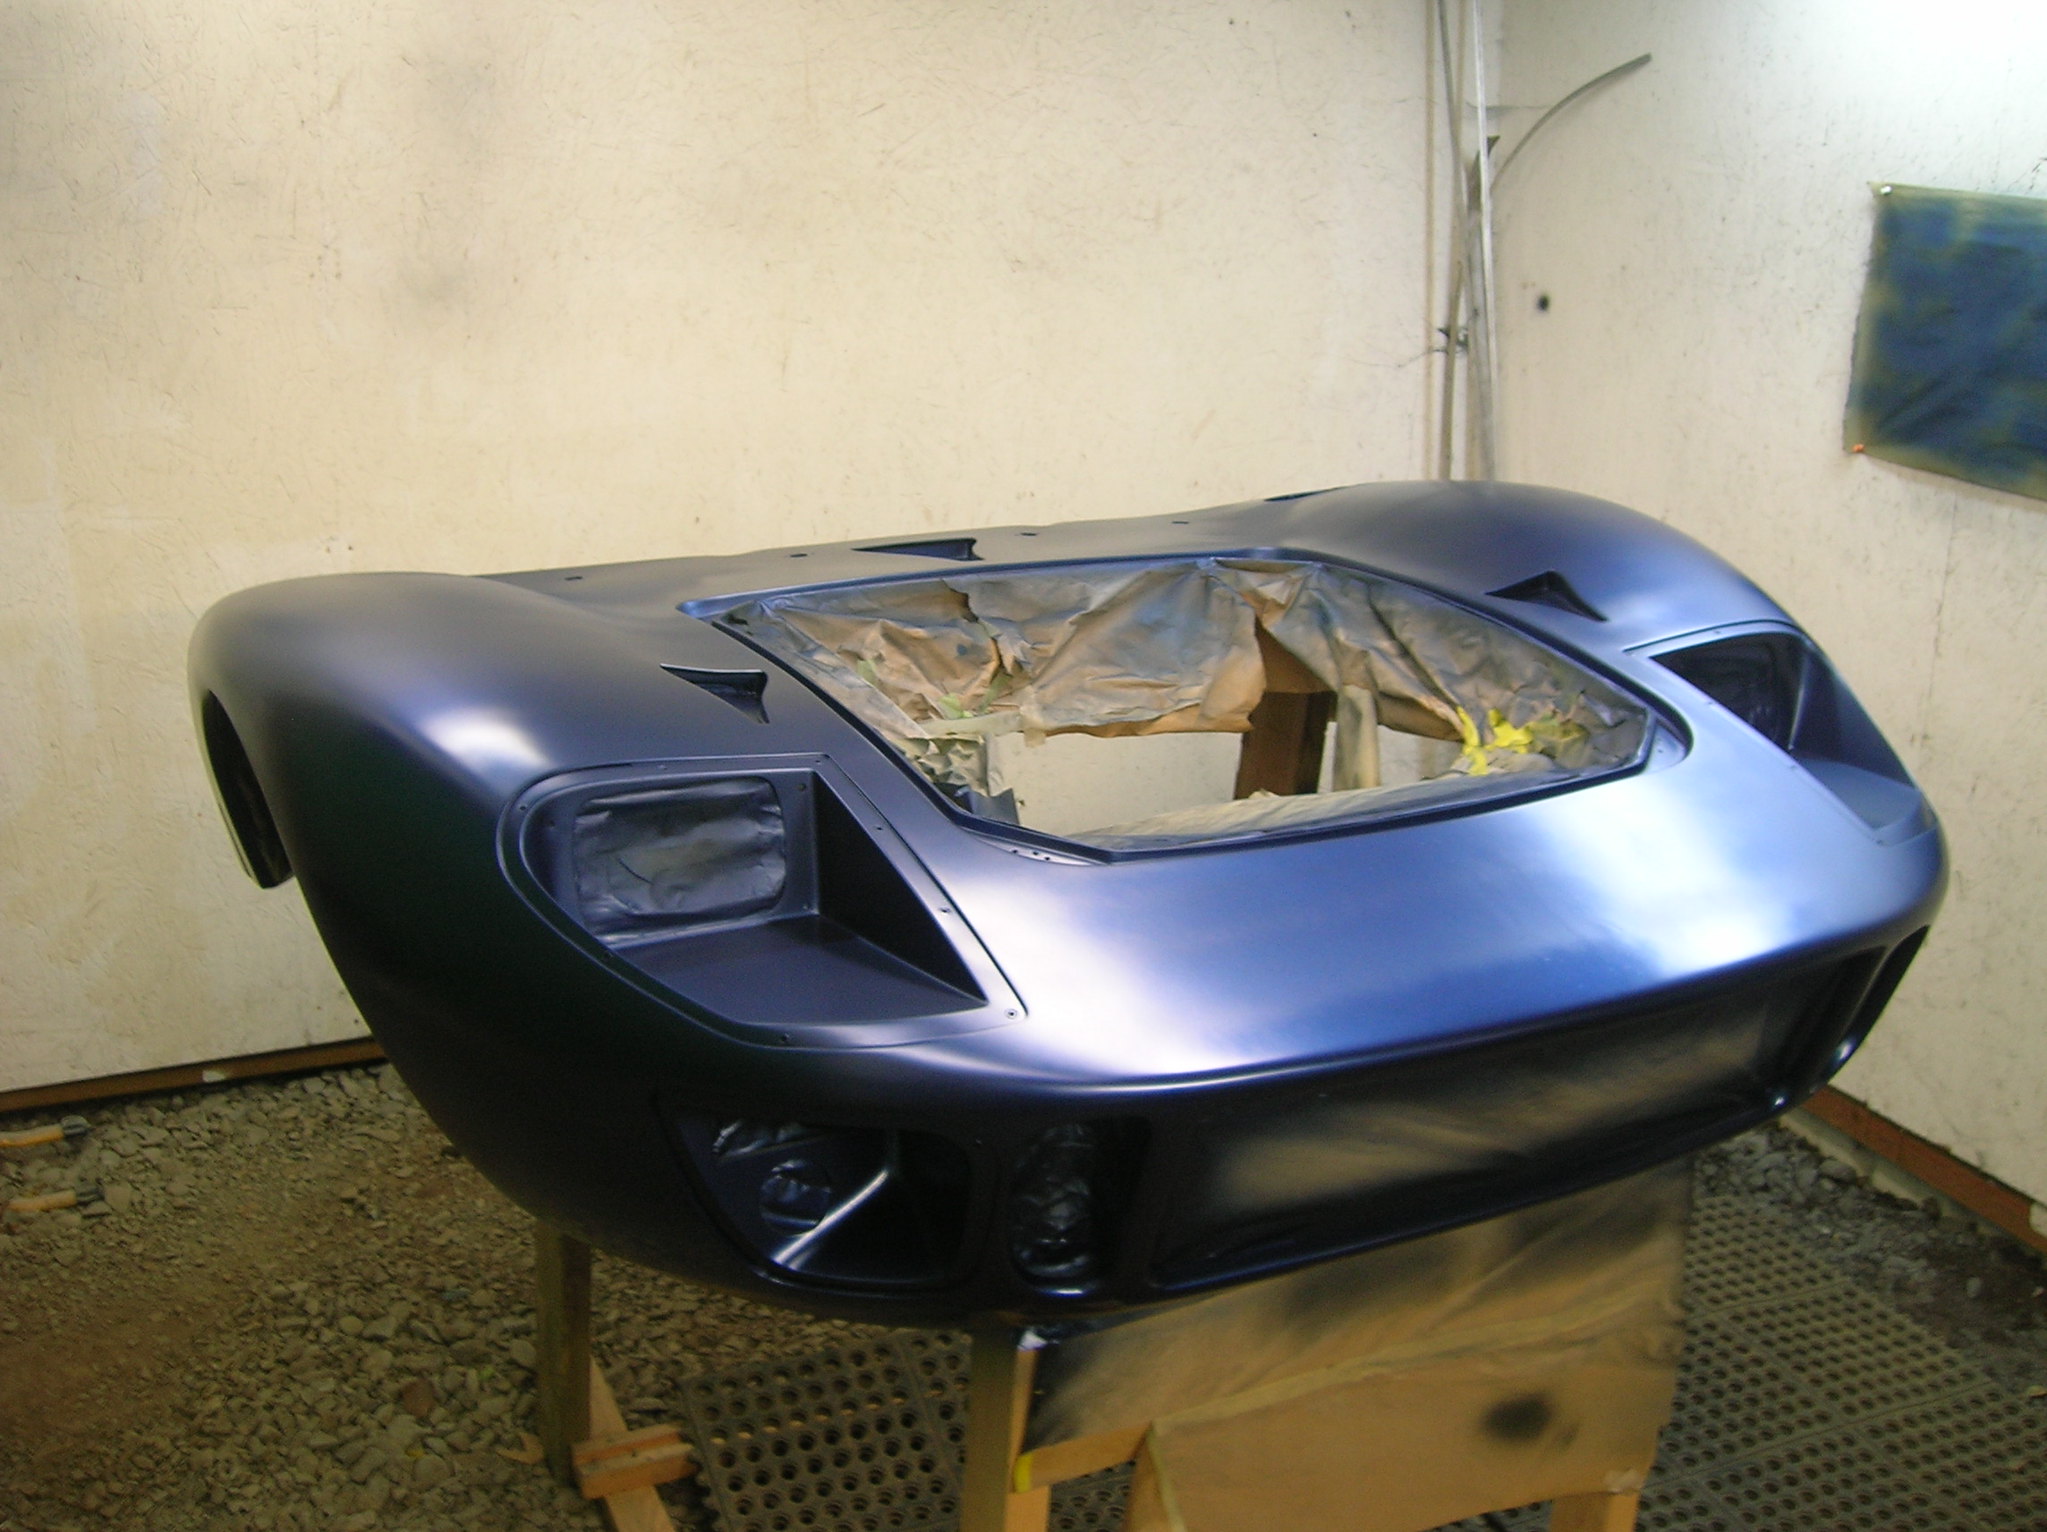
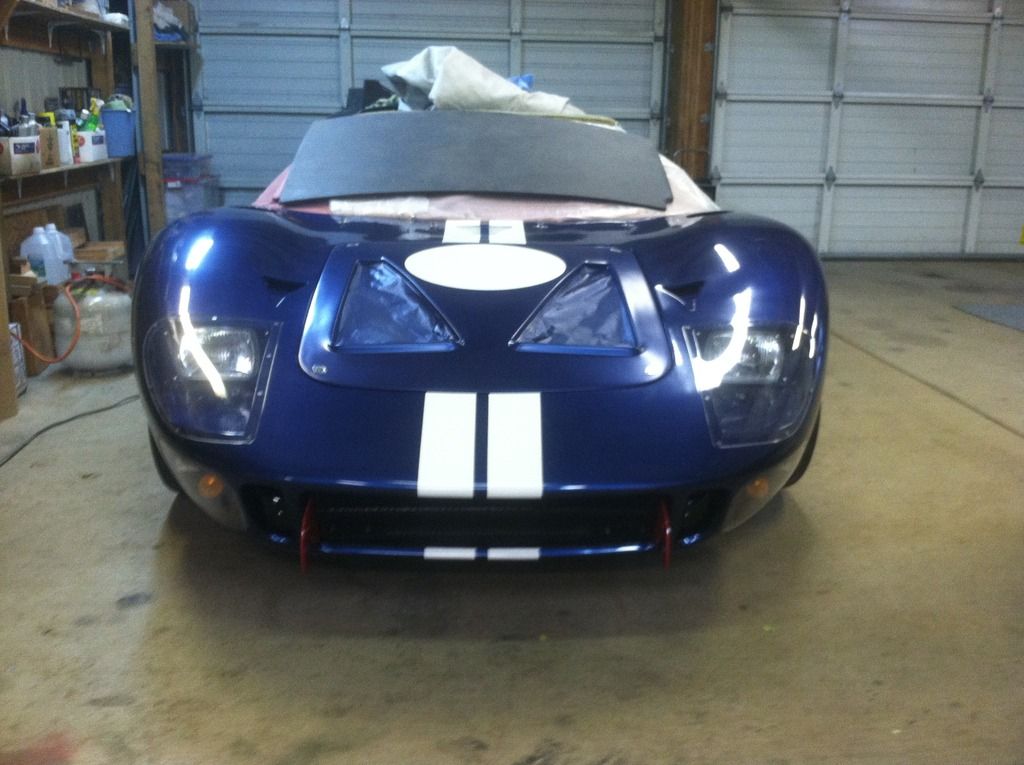
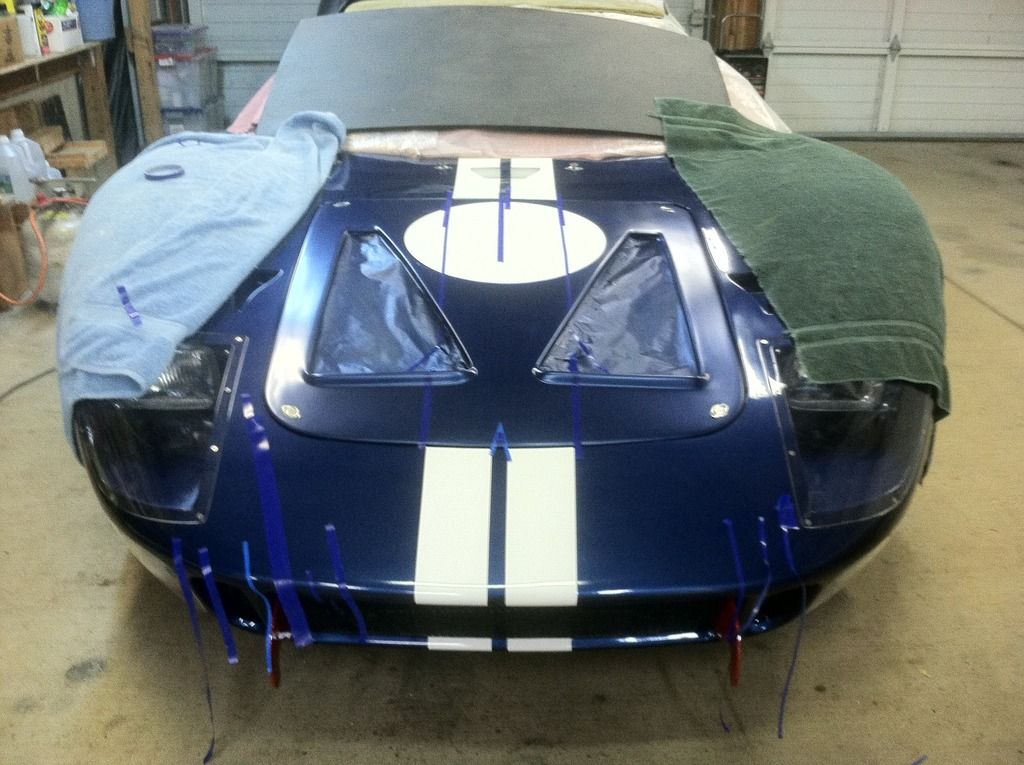
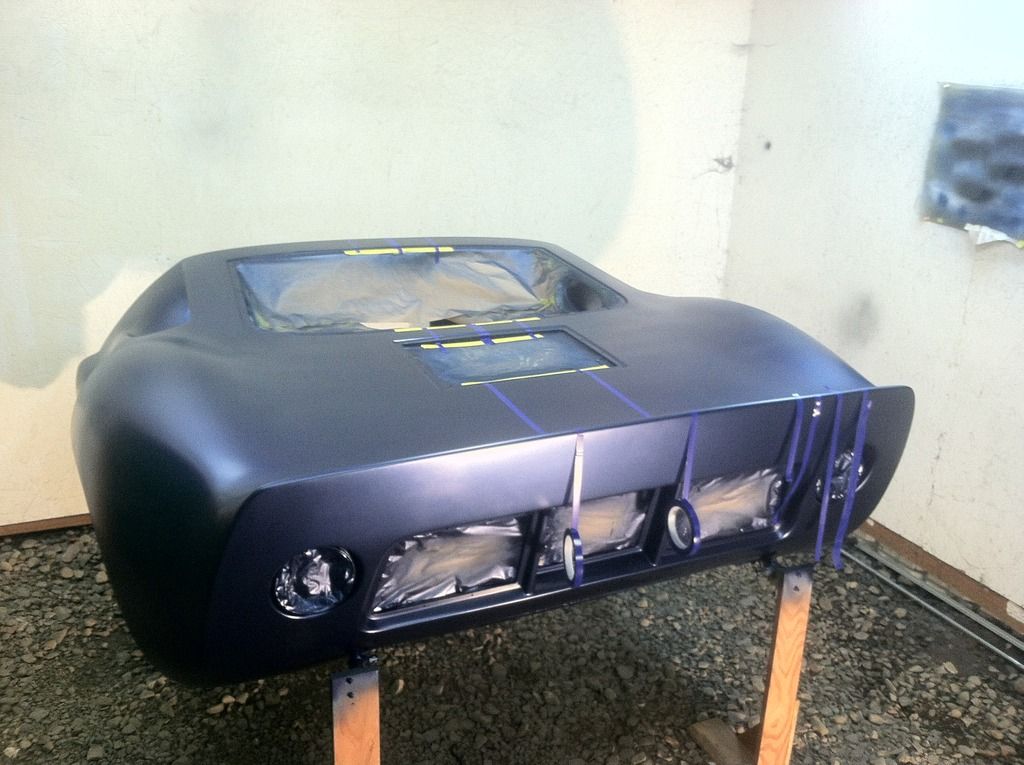
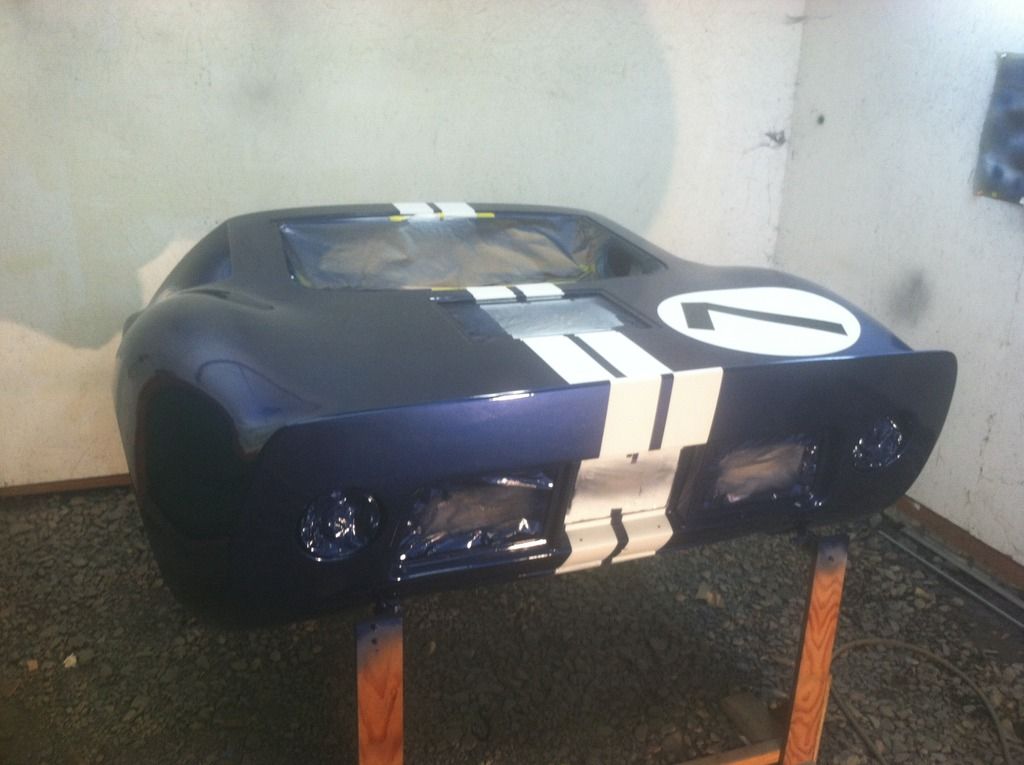
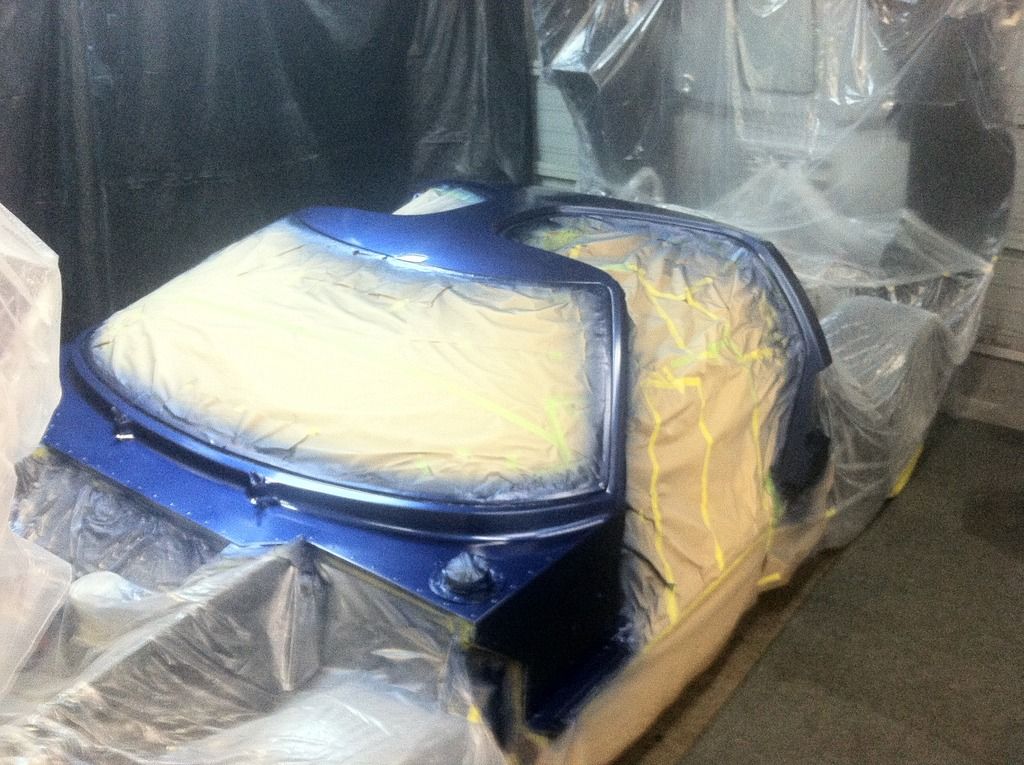
All set, so on went the blue... several good coats.
 DSCN9035 by Mike Sirr, on Flickr
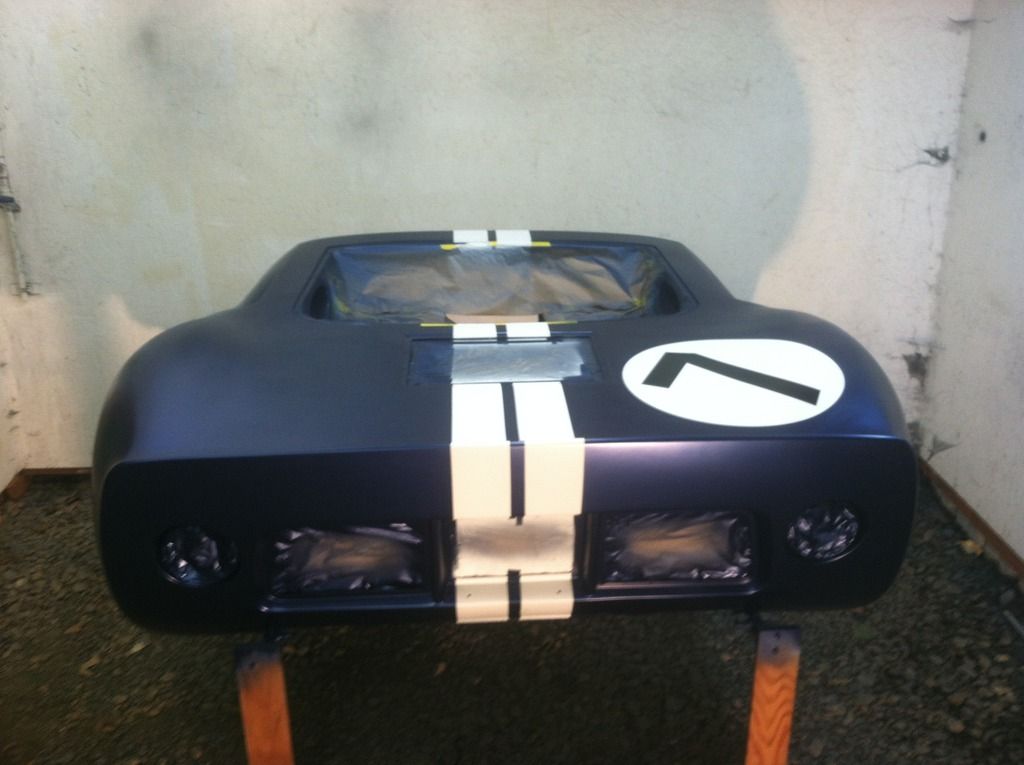
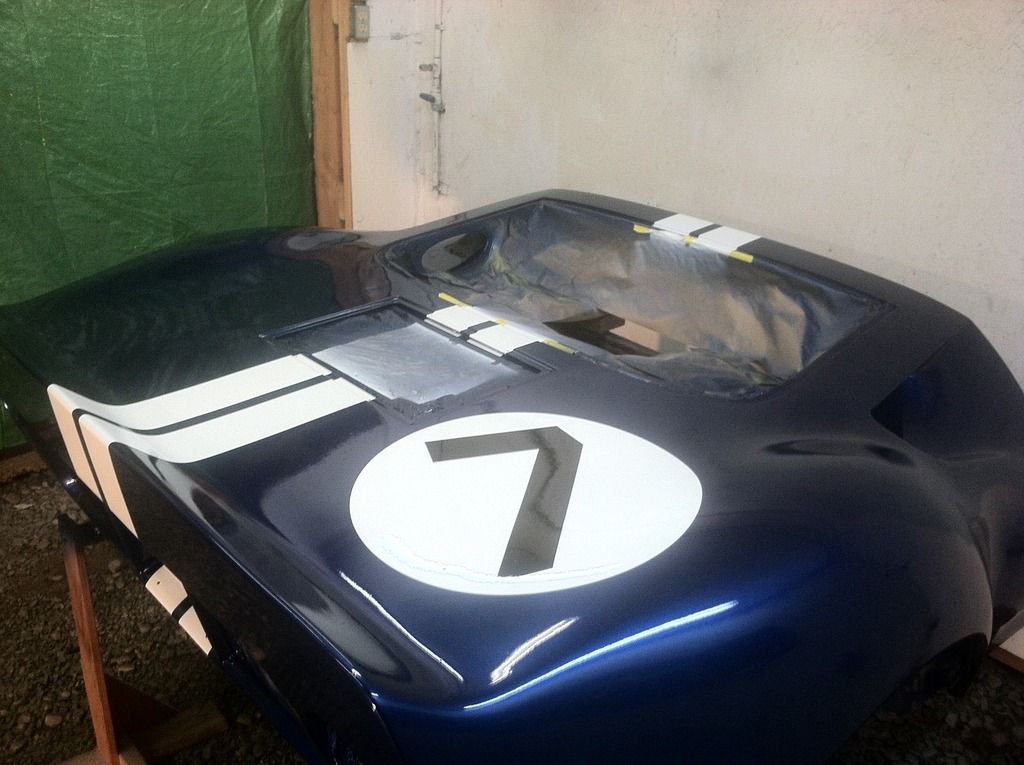
Stripes went on without too much hassle.
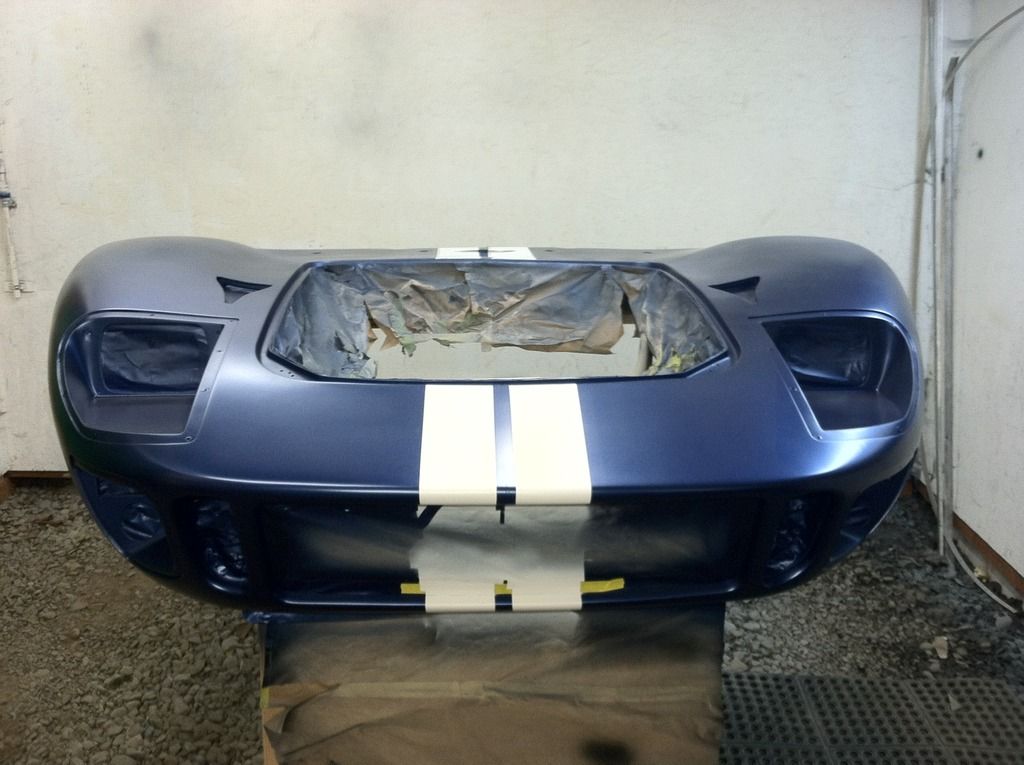
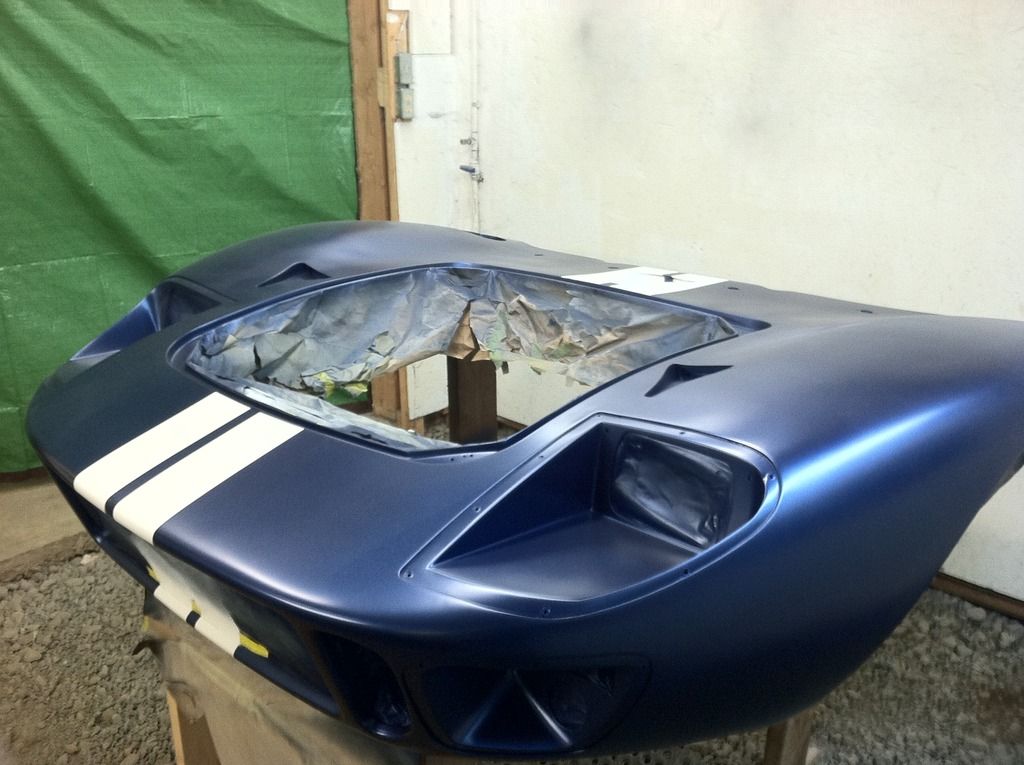
Nice satin look. Now for the most important step.....
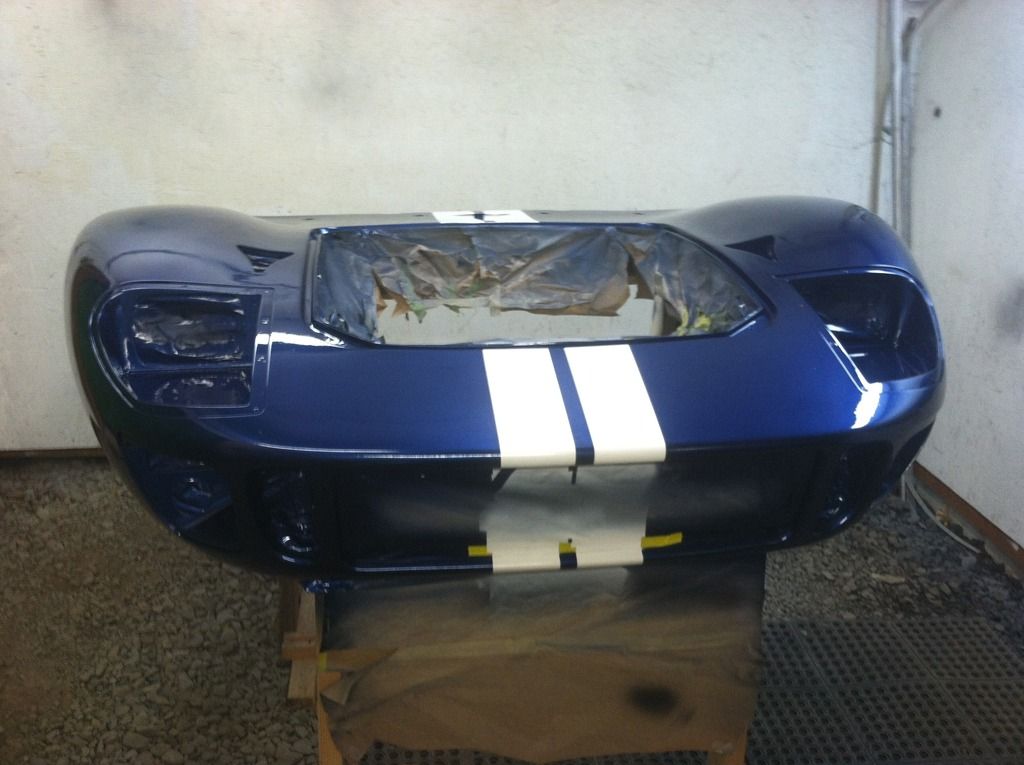
A few small drips/sags are present, but nothing too major. I put on 4 coats and the last one was a bit heavy. Let it cure then start to wet sand and polish.
Next up paint-wise is to do my nose panel. I have paint masks to do a 16" white roundel and black #7 in base coat prior to clear. need to do some dry fits and layout stripes properly.
Other than that nothing much... but lots of planning for spring final assy.
First up, the California Motorsports billet side cover arrived for the G50. Hoping to swap it out sometime this week.
DSCN9032 by Mike Sirr, on FlickrPainting prep has progressed ... focusing on the front clam first. Past couple weeks I have been spraying and block sanding to get ready for blue base.
DSCN8977 by Mike Sirr, on FlickrDSCN8981 by Mike Sirr, on FlickrAll set, so on went the blue... several good coats.
DSCN9035 by Mike Sirr, on FlickrStripes went on without too much hassle.


Nice satin look. Now for the most important step.....


A few small drips/sags are present, but nothing too major. I put on 4 coats and the last one was a bit heavy. Let it cure then start to wet sand and polish.
Next up paint-wise is to do my nose panel. I have paint masks to do a 16" white roundel and black #7 in base coat prior to clear. need to do some dry fits and layout stripes properly.
Other than that nothing much... but lots of planning for spring final assy.
Last edited:
Looks really nice! Did you paint the blue over the tape, then peel tape and paint stripes up to the parting line or? I'm always impressed more by DIY work like this than I am that of Professional shops...
You may need to check your bearing preload on the carrier when installing your side cover on the G50. I have mine yet to do as well..
You may need to check your bearing preload on the carrier when installing your side cover on the G50. I have mine yet to do as well..
Thanks for the positive feedback....
Regarding the stripes, I painted the white over the blue. After the base-coats had fully dried (about 45 mins) I lightly sanded the white/blue transition "ridge" with 600 to minimize it.
With the clear applied you can barely feel the transition...should be totally flat once wet sand and polishing is done.
Roger That on the bearing preload. I have swapped and set up gears on a number of conventional differentials over the years, but this is my first trans-axle, so being a little timid on it.
Any links to previous threads on the subject????
Good info on the stripes... I would have been fearful of a paint reaction as I've beed bitten too many times.
I am also looking for info on the sidecover install.. I've built a number of differentials over the years and well know how critical the bearing preload is.. So a leg-up on the transaxle would be great!
I am also looking for info on the sidecover install.. I've built a number of differentials over the years and well know how critical the bearing preload is.. So a leg-up on the transaxle would be great!
Just to add another paint detail and some peace of mind.......
The blue basecoat is TCP Global Urethane, thinned with their urethane reducer.
The white is PPG basecoat, DBC urethane product line and thinned with DT860.
Had no reactions between the two once the blue had flashed.
Did a little wet sanding this evening. First with 1500 followed by 2000. Smoothing out real nice. Getting pumped to finish that step and give it the final polish. Pics to follow at that time.
Everyone:. hints/tips on G50 bearing preload for cover swap????? Who has put on a billet plate and can relate shim, bearing, ring gear, etc. adjustments. Really hoping CMS has the mfg tolerances dialed in to match the cast part CLOSELY.
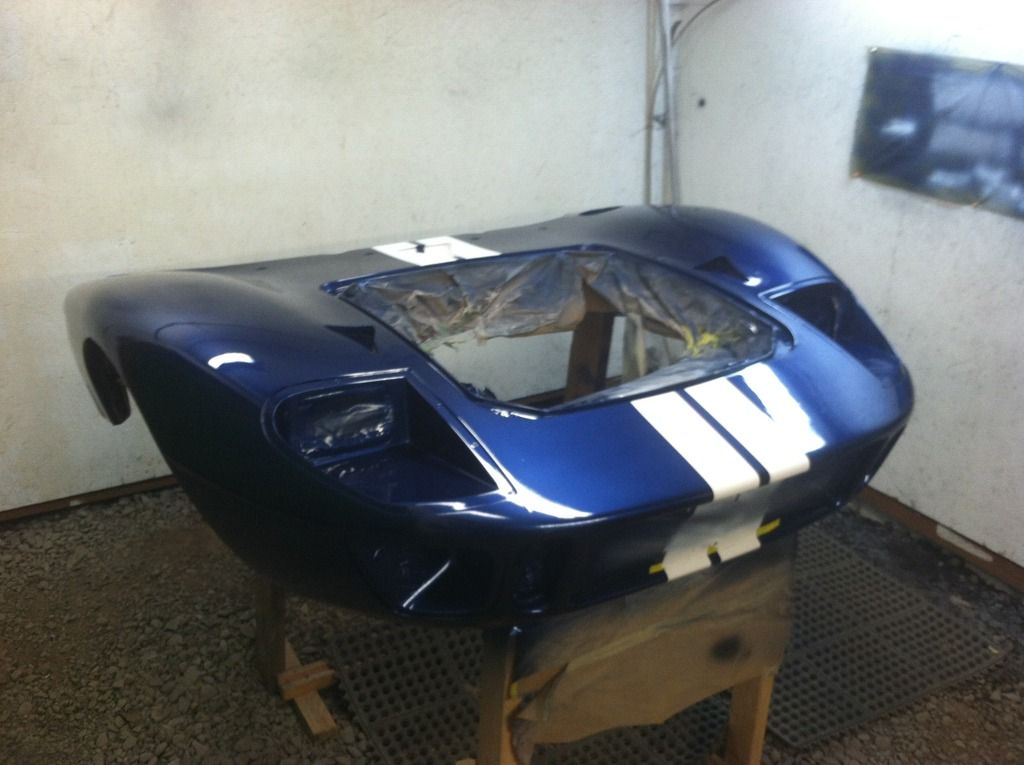
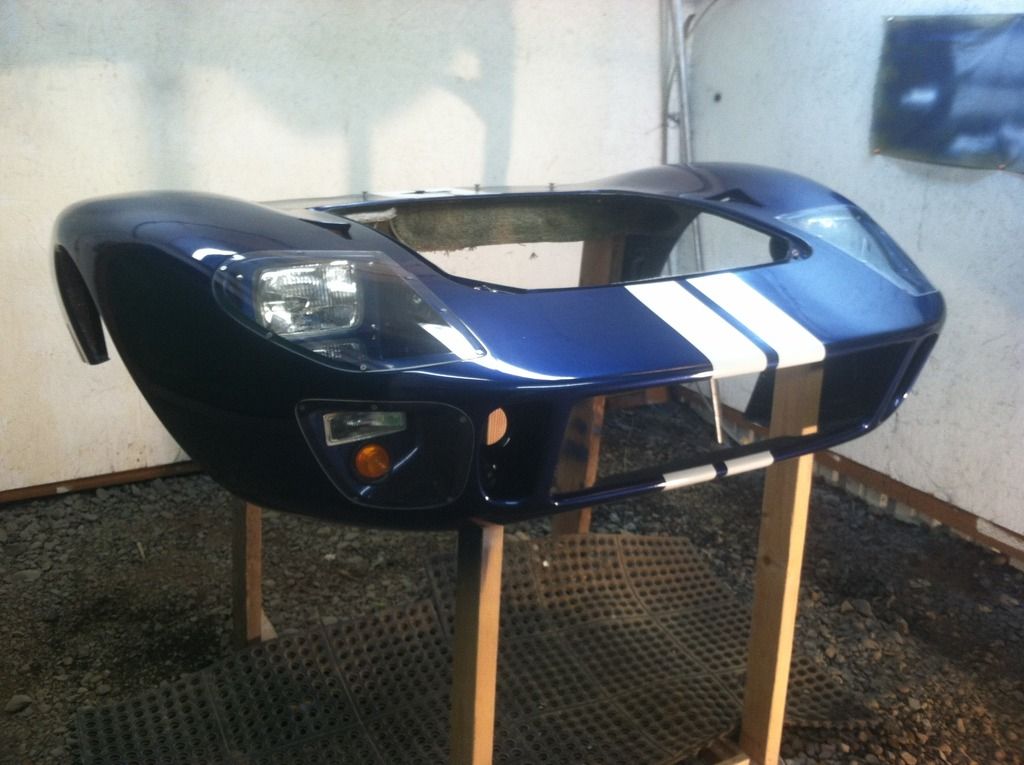
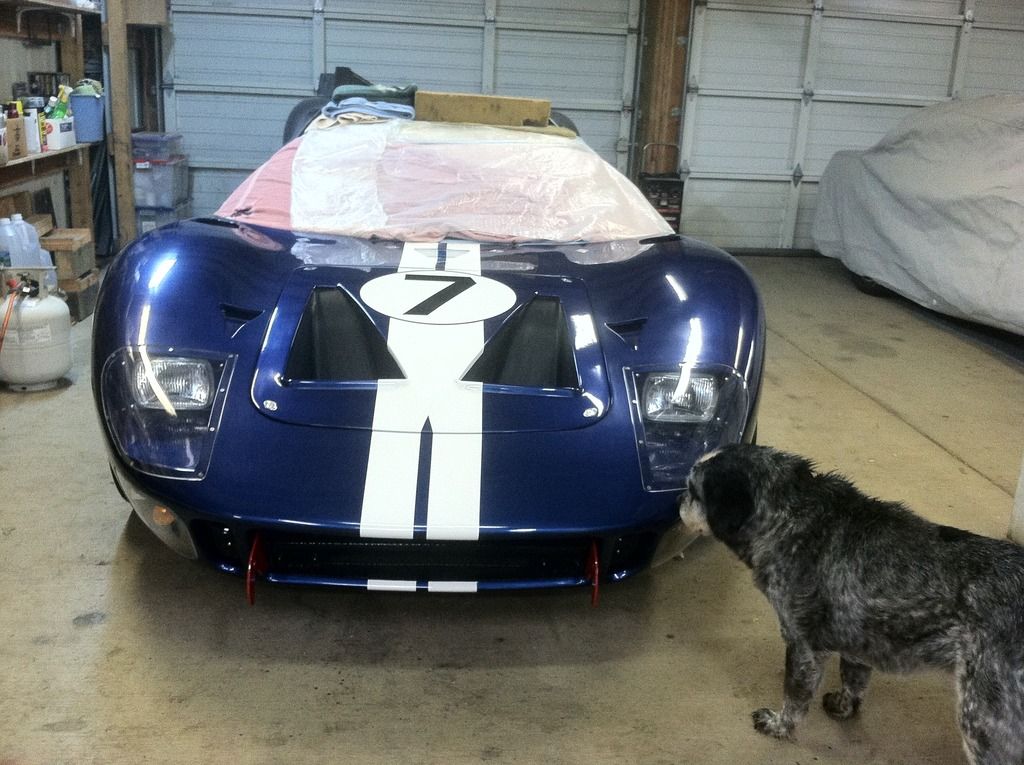
Promised an update once I had cut and polished the front clam....Here you go....
Stared with 1000 grit and worked through 1500 and 2000.
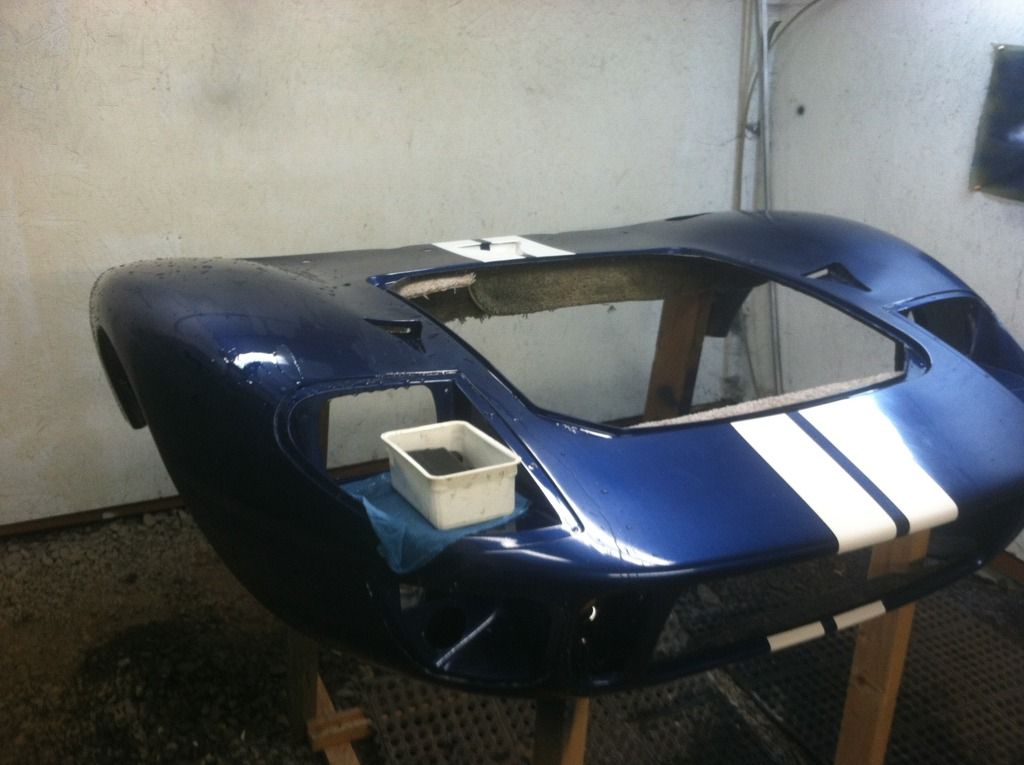
Once that was completed I used some Meguiars #2 on a cutting pad to do final cut and then #3 on a polish pad. A little wax to finish it off.

Satisfied with that, I installed the lights and covers. Countersunk all holes and used stainless #8 machine screws.
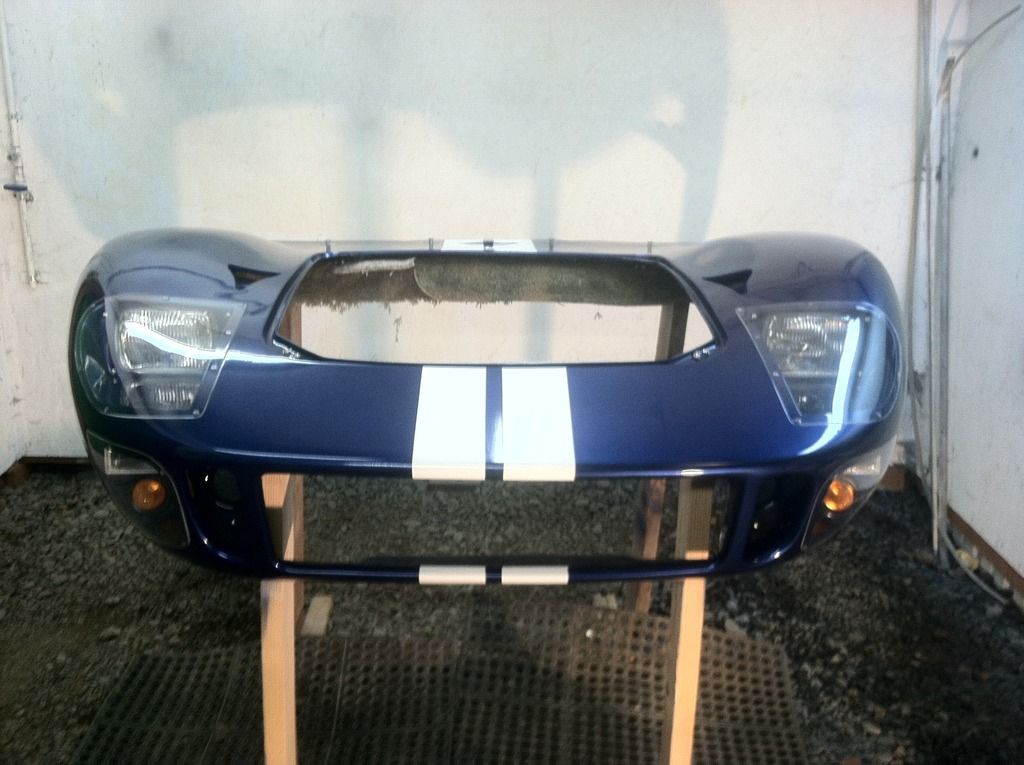
Next up was the nose panel, so I mounted the clamshell and installed the Grill I fabbed last summer. In the new position and lighting, I can still see a couple small blemishes, but they can wait until all body panels are attached to do a final detail. Very minor.....
Panel was already blue with white roundel sprayed. Placed it into the hole and secured with the Dzus fasteners for proper position. Stared laying out the stripes....
Fiddled around an hour or so until happy with the lines. Making a small deviation from the 'STD" twin stripe.......
Back to the booth for Lucky #7 and clear coat......
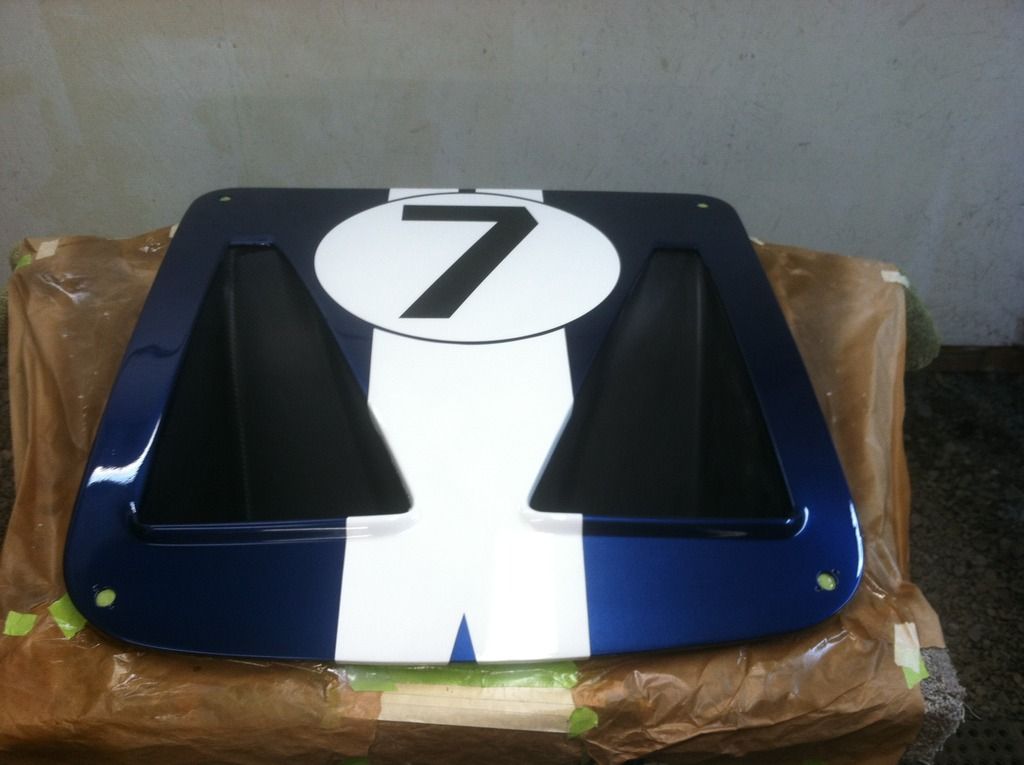
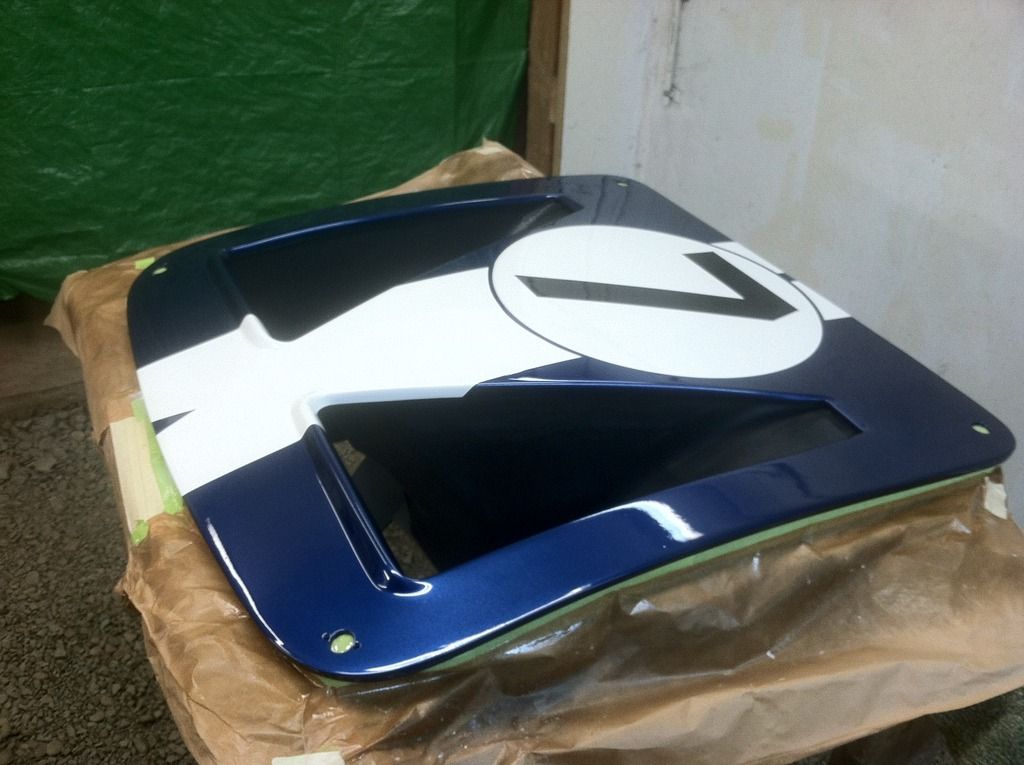
Letting it cure a day or two then I will wet sand...this time the clear laid down a bit nicer so should go pretty quick.
I still need to apply carbon fiber wrap to the LH nostril. Other than that, getting set to final prep and spray the Rear Clam. Next Weekend is already busy, but soon after.....
later.
Stared with 1000 grit and worked through 1500 and 2000.

Once that was completed I used some Meguiars #2 on a cutting pad to do final cut and then #3 on a polish pad. A little wax to finish it off.


Satisfied with that, I installed the lights and covers. Countersunk all holes and used stainless #8 machine screws.


Next up was the nose panel, so I mounted the clamshell and installed the Grill I fabbed last summer. In the new position and lighting, I can still see a couple small blemishes, but they can wait until all body panels are attached to do a final detail. Very minor.....

Panel was already blue with white roundel sprayed. Placed it into the hole and secured with the Dzus fasteners for proper position. Stared laying out the stripes....


Fiddled around an hour or so until happy with the lines. Making a small deviation from the 'STD" twin stripe.......
Back to the booth for Lucky #7 and clear coat......


Letting it cure a day or two then I will wet sand...this time the clear laid down a bit nicer so should go pretty quick.
I still need to apply carbon fiber wrap to the LH nostril. Other than that, getting set to final prep and spray the Rear Clam. Next Weekend is already busy, but soon after.....
later.
Paint update...
First a pic of the nose panel installed and Camlocs in place.
Finally got around to putting the carbon fiber wrap in the second nostril. Happy with it in general...if doing it again will sequence a bit different to make it easier to align the "grain" at each seam. But still looks cool...
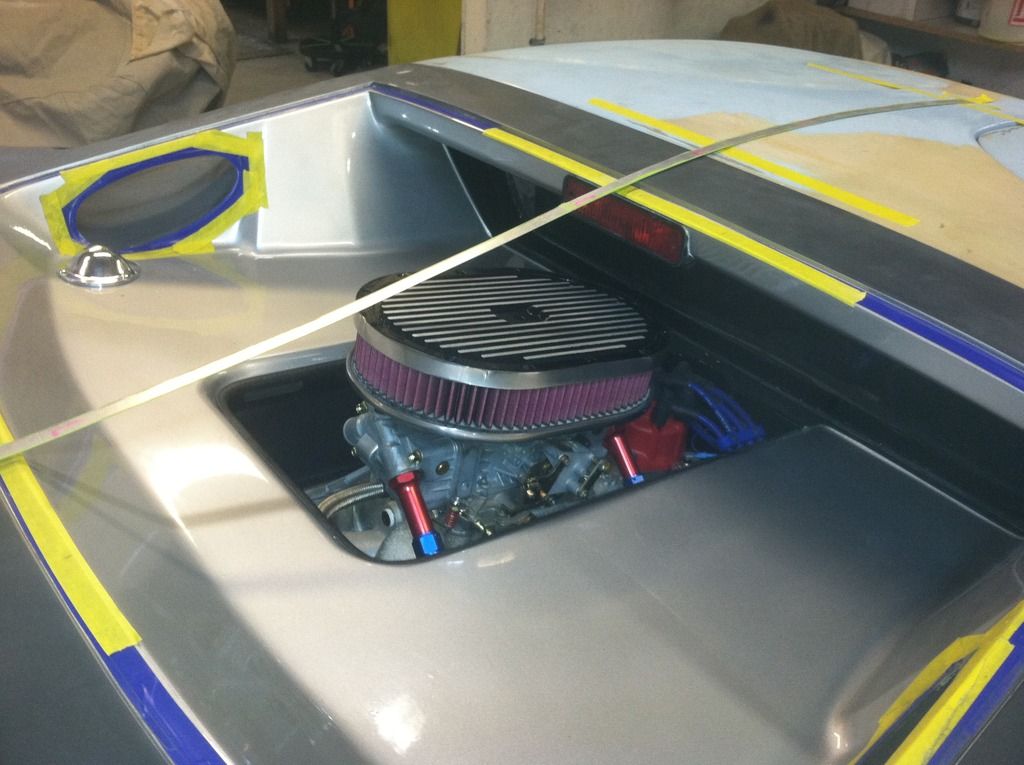
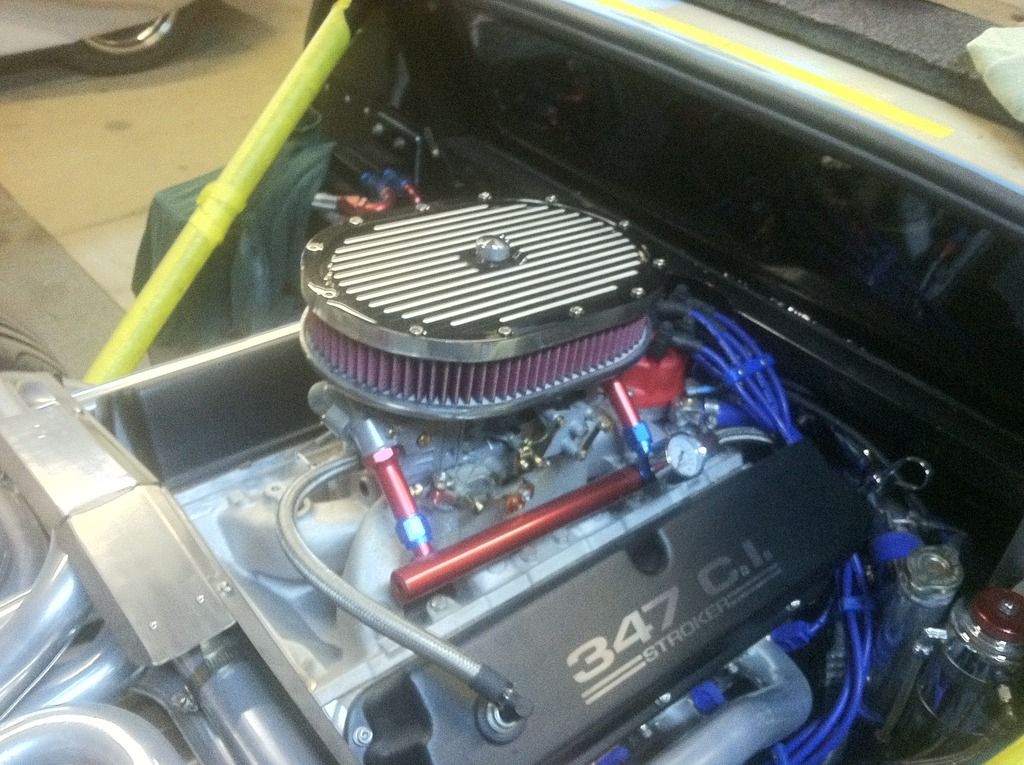
Finally ordered my air filter. Liked this style..but it lacked something.
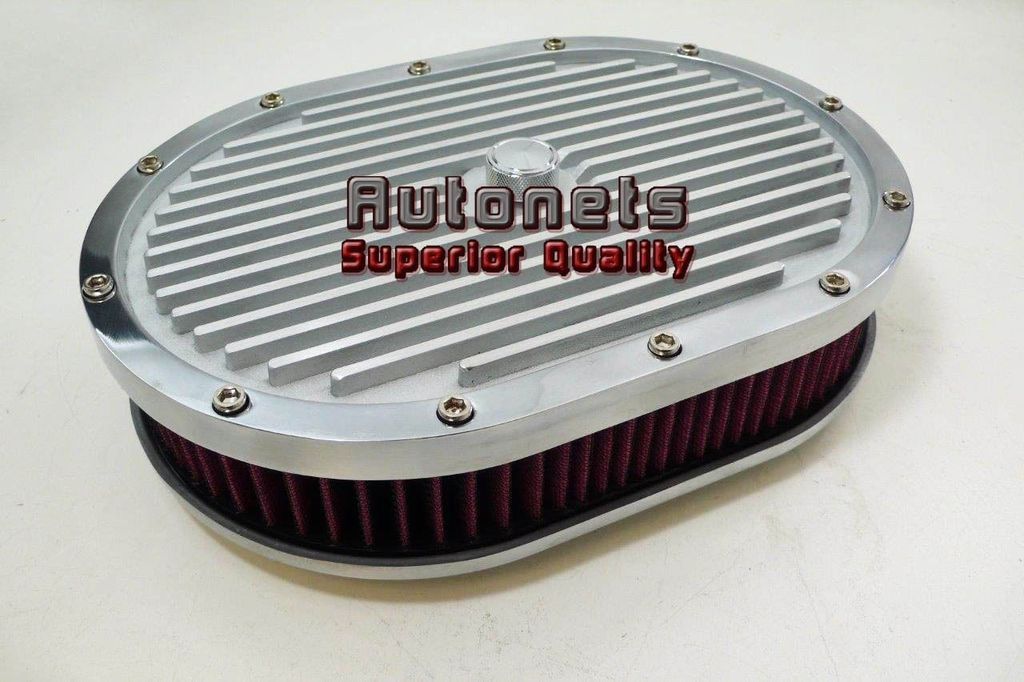
Decided to fancy it up a bit. Did some dis-sassy and painting, followed by sanding the ribs for some contrast.
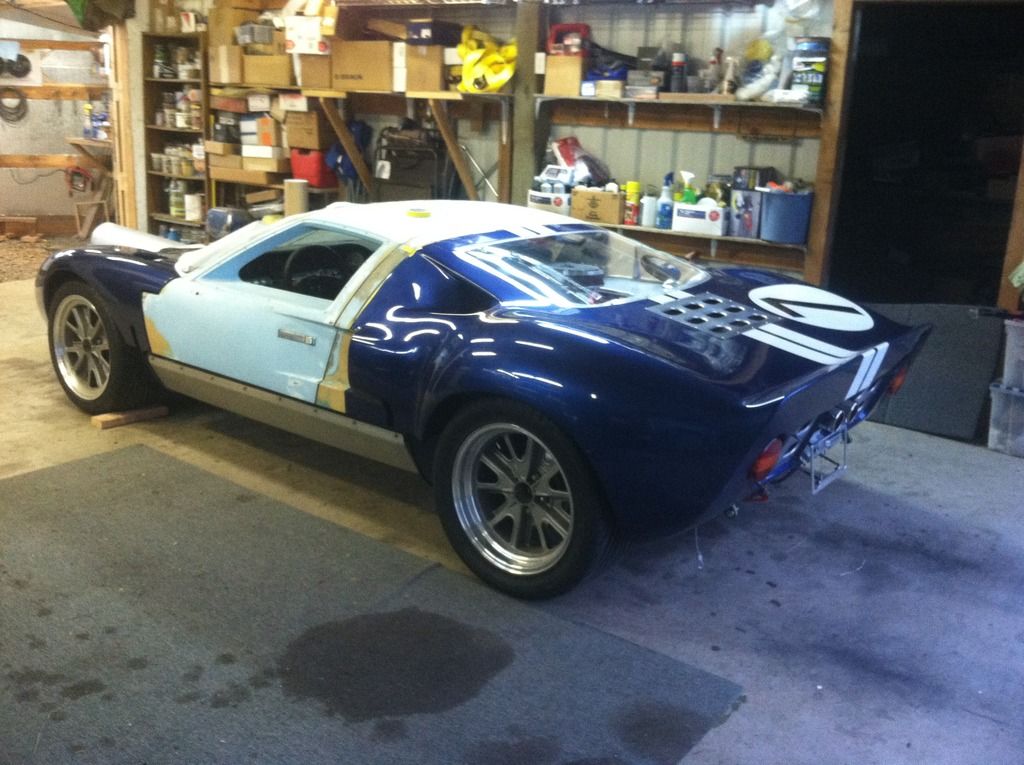
Moving on to paint the aft shell. I had Friday off work so that was designated paint day.
It has been black for quite a while, so back to the booth for final prep. before hand, I mounted it and did some stripe layouts.
Mixed and sprayed basecoat blue, then got to work on the stripes.......
I had an 18" roundel and #7 paint mask to complement the front. Placed it where it looked right to my eyeball......
Satisfied with those layouts and sprays, on went 4 coats of clear.
Has a couple small runs/sags as expected, but nothing worse than the front claip had. TLC on the wet sand and polish.
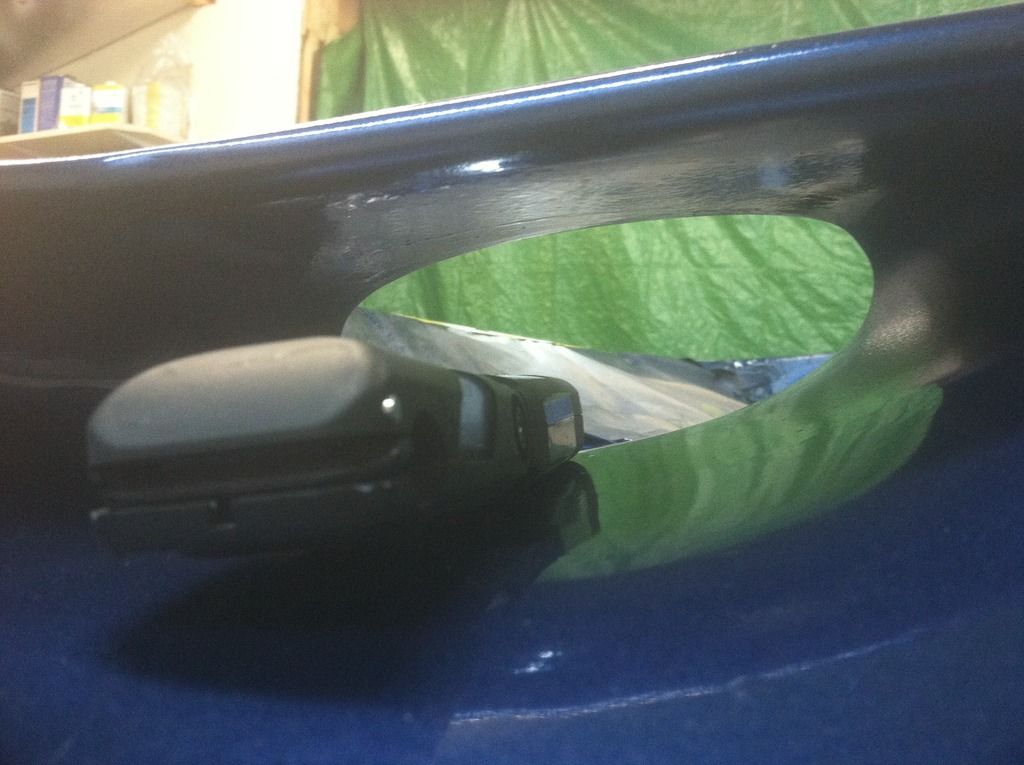
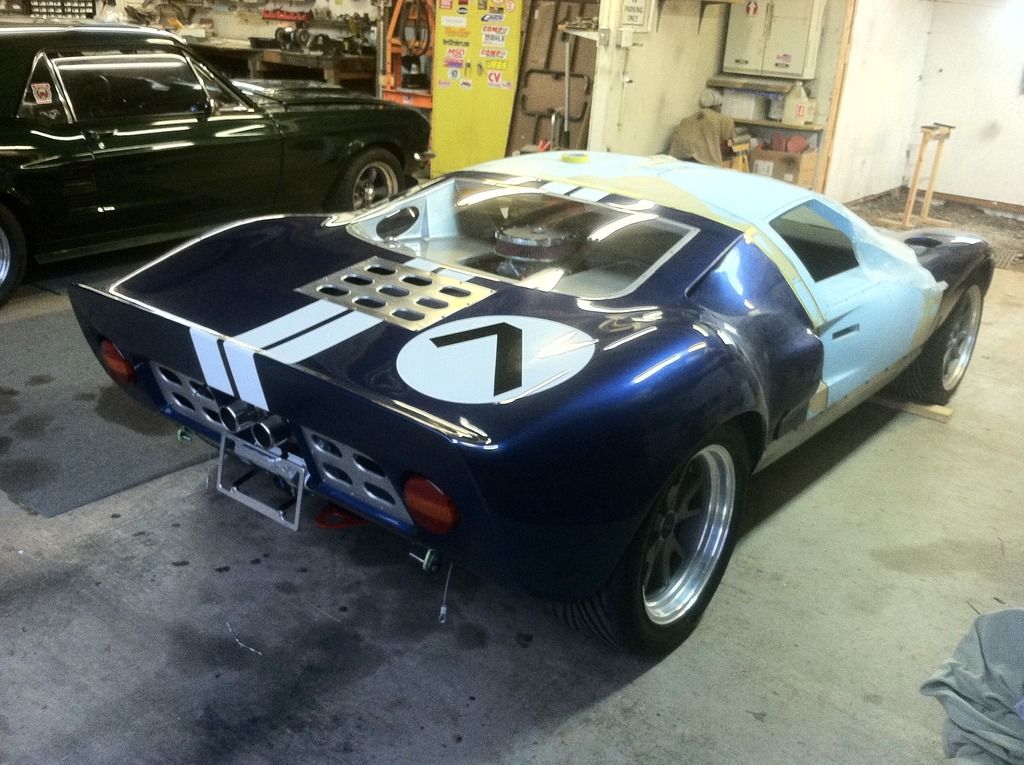
My biggest issue was the bottom side of the flying buttresses. I was unable to get a good solid coat of clear to lay in there and flow out decently. Even with a tight spray pattern and lots of volume, texture still was pretty rough. Ended up wet sanding a little with 1000 grit to make it acceptable for further coats.
Solution so far is to roll it in. I got a cheap roller from the hardware store for a trial run.
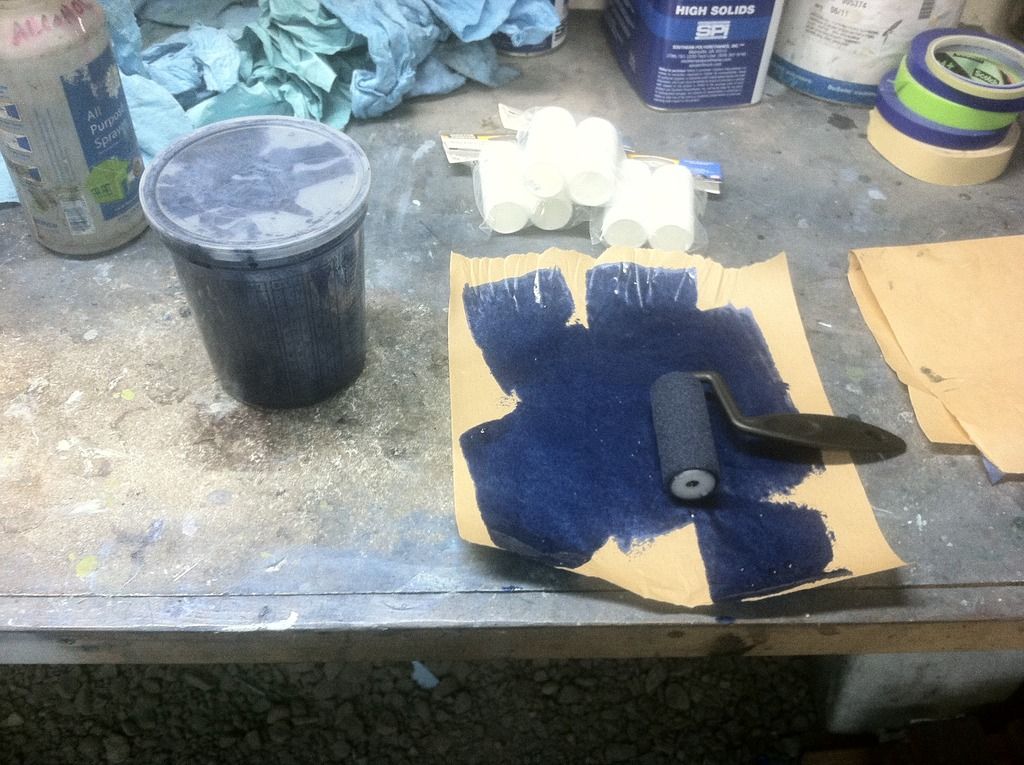
Rolled on 2 coats of base. After curing I did the same with 2 coats of clear. Actually, when putting on the first clear the "wet" roller contact re-activated the blue and it started to get blotchy. Solved that by mixing 25-30% base blue into the clear. That seemed to work well. Got home tonight and did a few minutes wet sanding with 1000 grit. I think it will end up OK, but can always roll on a bit more if needed. basically if I can keep it solid blue an smooth to the touch I will be happy.
As progress is made on sand/polish will update with more pics.
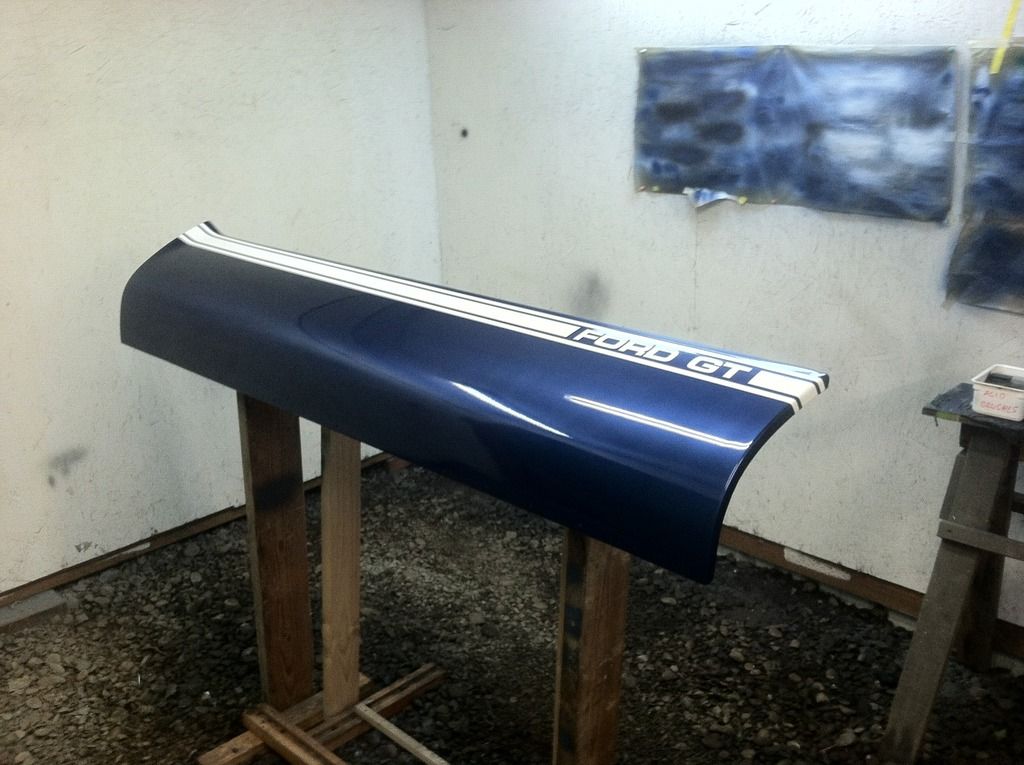
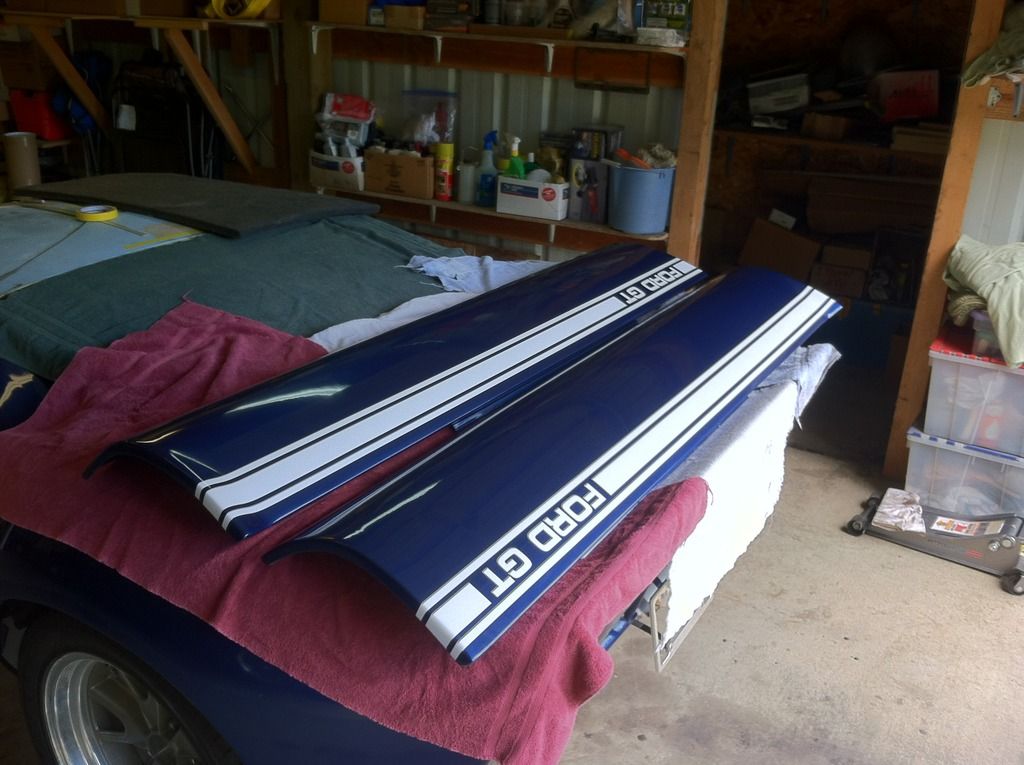
Next up will be my rocker panels. They will have the typical rocker striped with FORD GT livery. Paint masks are here and panels are prepped through DP90 black.
First a pic of the nose panel installed and Camlocs in place.
Finally got around to putting the carbon fiber wrap in the second nostril. Happy with it in general...if doing it again will sequence a bit different to make it easier to align the "grain" at each seam. But still looks cool...

Finally ordered my air filter. Liked this style..but it lacked something.

Decided to fancy it up a bit. Did some dis-sassy and painting, followed by sanding the ribs for some contrast.


Moving on to paint the aft shell. I had Friday off work so that was designated paint day.
It has been black for quite a while, so back to the booth for final prep. before hand, I mounted it and did some stripe layouts.


Mixed and sprayed basecoat blue, then got to work on the stripes.......

I had an 18" roundel and #7 paint mask to complement the front. Placed it where it looked right to my eyeball......

Satisfied with those layouts and sprays, on went 4 coats of clear.


Has a couple small runs/sags as expected, but nothing worse than the front claip had. TLC on the wet sand and polish.
My biggest issue was the bottom side of the flying buttresses. I was unable to get a good solid coat of clear to lay in there and flow out decently. Even with a tight spray pattern and lots of volume, texture still was pretty rough. Ended up wet sanding a little with 1000 grit to make it acceptable for further coats.
Solution so far is to roll it in. I got a cheap roller from the hardware store for a trial run.

Rolled on 2 coats of base. After curing I did the same with 2 coats of clear. Actually, when putting on the first clear the "wet" roller contact re-activated the blue and it started to get blotchy. Solved that by mixing 25-30% base blue into the clear. That seemed to work well. Got home tonight and did a few minutes wet sanding with 1000 grit. I think it will end up OK, but can always roll on a bit more if needed. basically if I can keep it solid blue an smooth to the touch I will be happy.

As progress is made on sand/polish will update with more pics.
Next up will be my rocker panels. They will have the typical rocker striped with FORD GT livery. Paint masks are here and panels are prepped through DP90 black.
So I have some good progress, time to update.
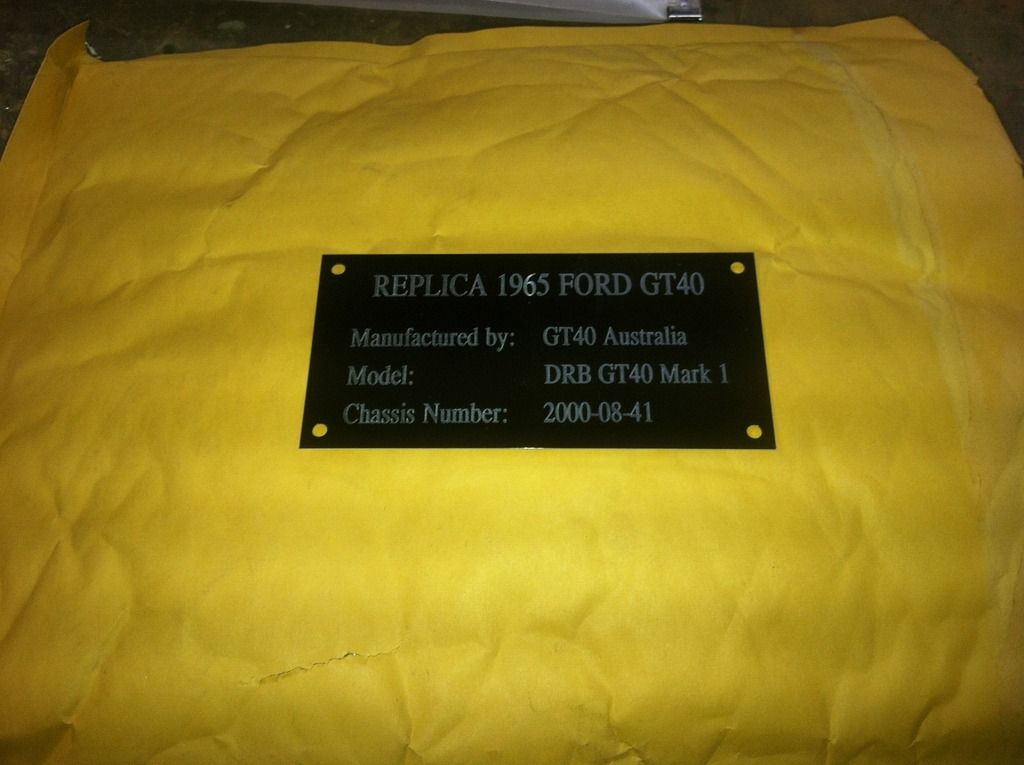
First up, I had a data tag made to suit my taste. Will attach it to the frame where it can be easily viewed when taking it to DMV for VIN inspection and registration . Shooting for May on that.
Did not get a picture, but I was able to final set the clutch pedal travel and install a pedal stop. Had my son run the pedal while I spun the wheel to feel when the clutch dis-engaged. About half pedal and I have wheel movement.... at 3/4 the pivot arm is VERY close to the flywheel/bolts. Set the stop just short of that.
Painting has moved along. Back clam is on and essentially done.
Moved on to the rocker covers. Again I had paint masks, so that worked out very nice. Actually, on the drivers side I had an issue with the "GT" and was not happy with how it looked. Rather than re-do the whole thing, I just had the 2 letters and short stripe section re-cut on a small mask so I could spray a repair. Worked great. Nice benefit of the base/clear system. Both sides are looking good and are ready to mount.
The genesis of my paint scheme selection was based on this image from Raceline Digital.
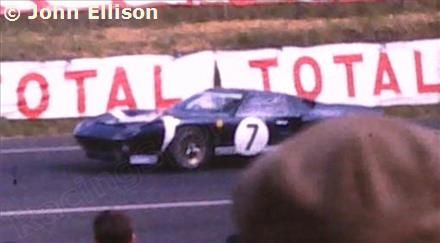
I wanted something with connection to an actual racer back in the day. Decided that was good, plus the added cool factor that P1004 went on to be part of the Shelby Cobra caravan after LeMans.

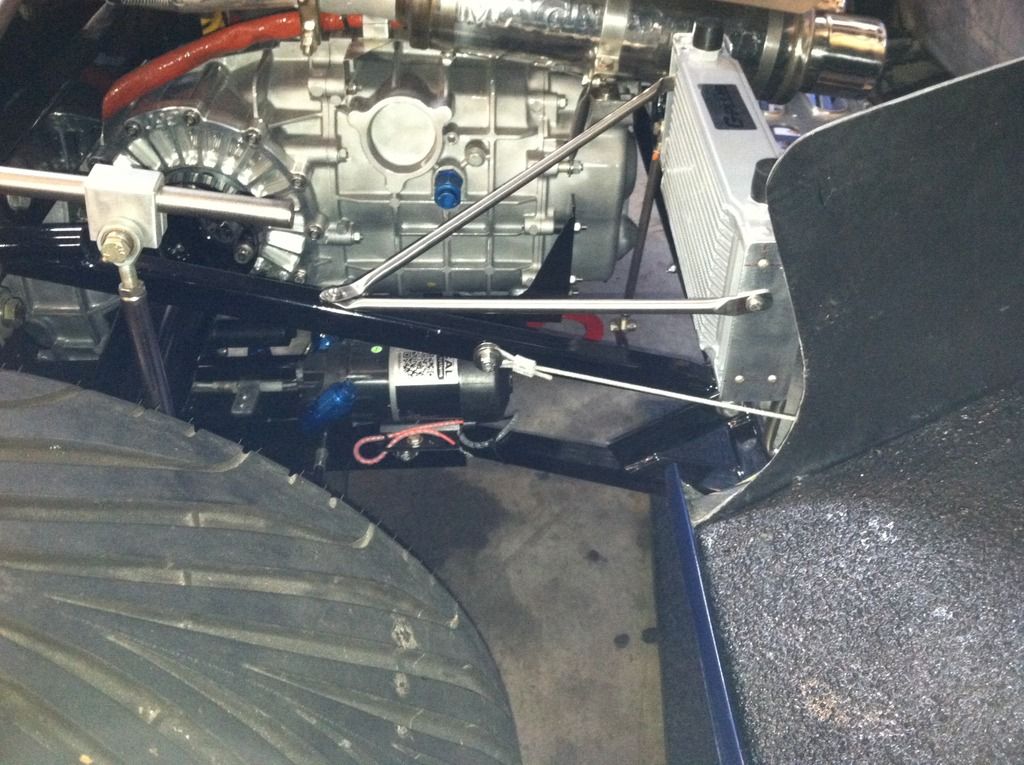
My Mocal Trans cooler pump arrived last week. Got it mounted in best available location to route lines to/from cooler.
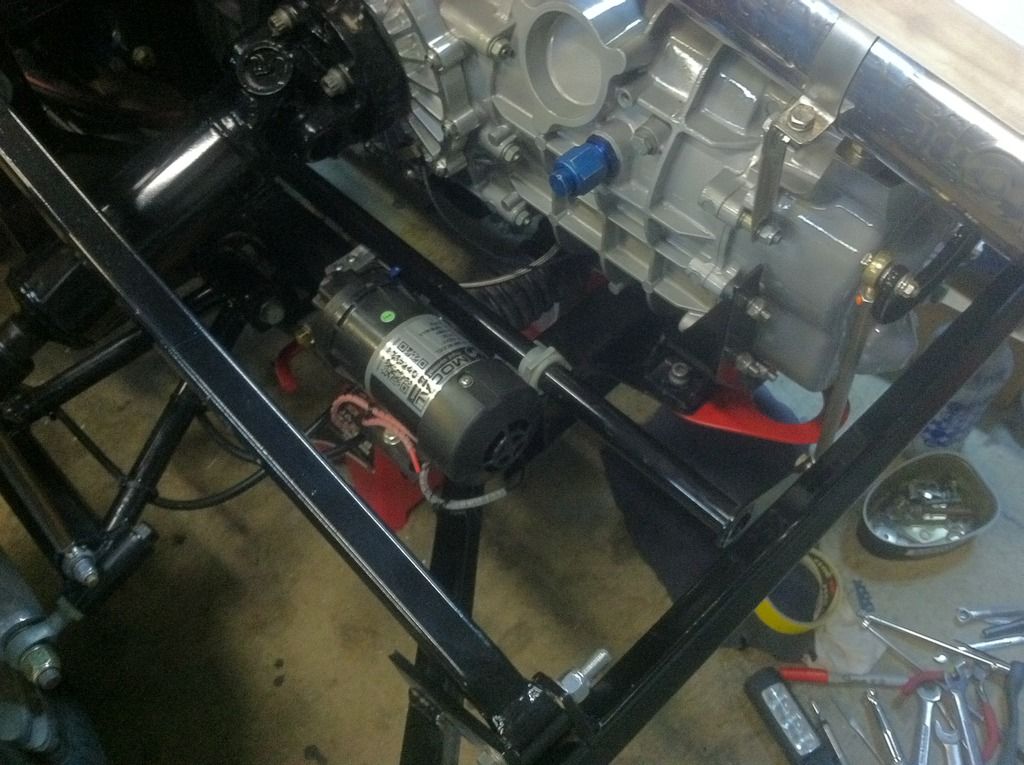
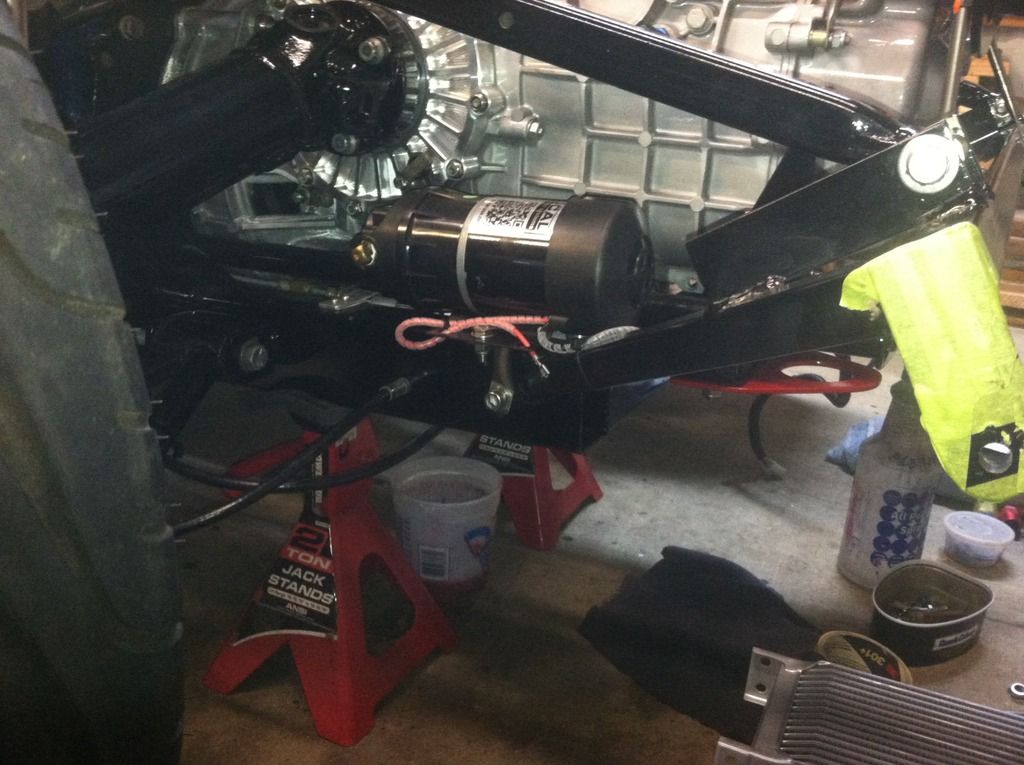
Also located and mounted the cooler itself. I should have some AN10 line and fittings arriving this week to complete the plumbing.
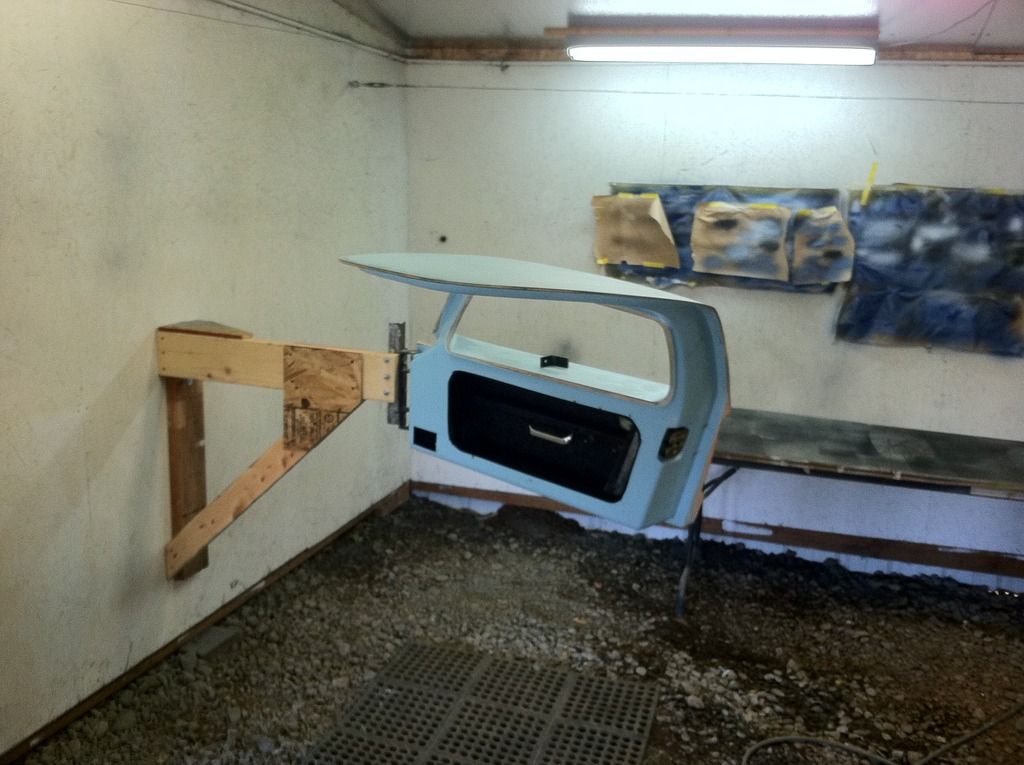
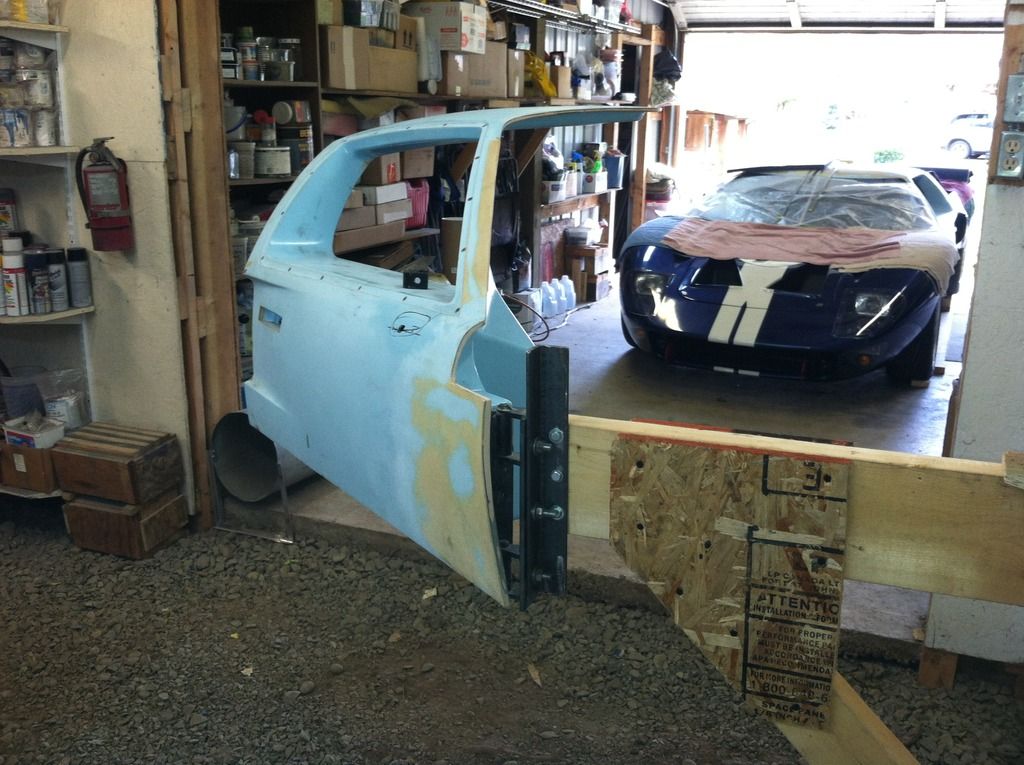
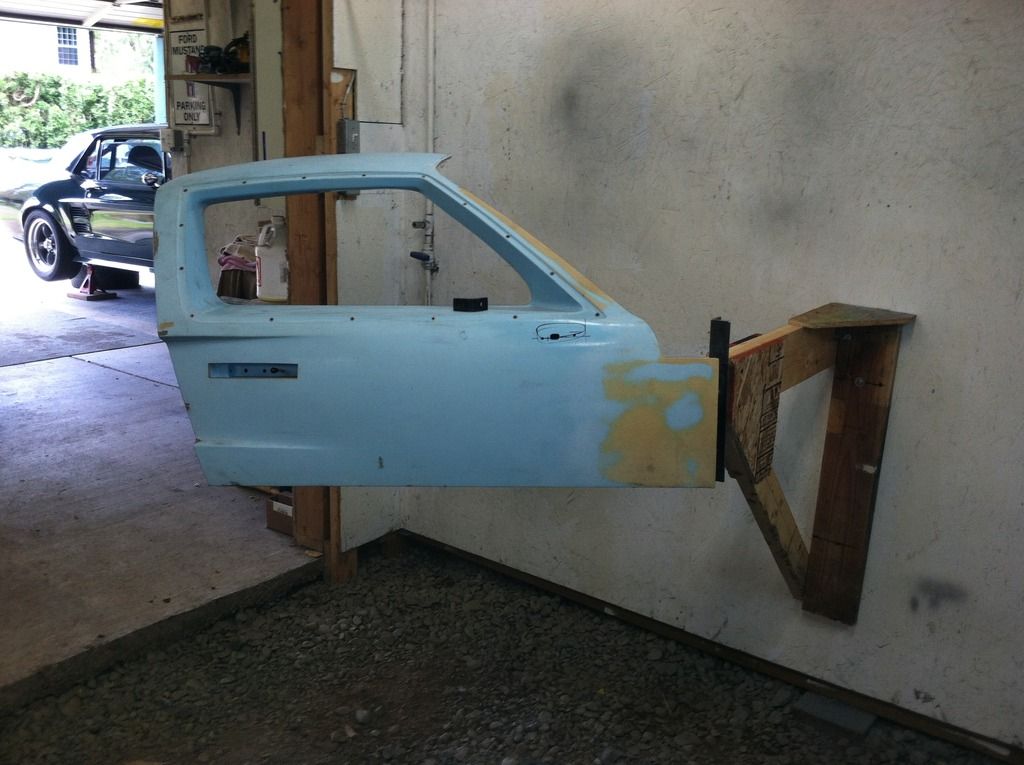
Moving on to door paint. Removal of the Pax door was pretty easy. I elected to build a a wall mount arm in the paint both to hang the door for paint. makes it real convenient to work on, and I can spray there whole thing at one time.
 .
.
More to follow...getting excited for Summer......:burnout:
First up, I had a data tag made to suit my taste. Will attach it to the frame where it can be easily viewed when taking it to DMV for VIN inspection and registration . Shooting for May on that.

Did not get a picture, but I was able to final set the clutch pedal travel and install a pedal stop. Had my son run the pedal while I spun the wheel to feel when the clutch dis-engaged. About half pedal and I have wheel movement.... at 3/4 the pivot arm is VERY close to the flywheel/bolts. Set the stop just short of that.
Painting has moved along. Back clam is on and essentially done.


Moved on to the rocker covers. Again I had paint masks, so that worked out very nice. Actually, on the drivers side I had an issue with the "GT" and was not happy with how it looked. Rather than re-do the whole thing, I just had the 2 letters and short stripe section re-cut on a small mask so I could spray a repair. Worked great. Nice benefit of the base/clear system. Both sides are looking good and are ready to mount.


The genesis of my paint scheme selection was based on this image from Raceline Digital.


I wanted something with connection to an actual racer back in the day. Decided that was good, plus the added cool factor that P1004 went on to be part of the Shelby Cobra caravan after LeMans.

My Mocal Trans cooler pump arrived last week. Got it mounted in best available location to route lines to/from cooler.


Also located and mounted the cooler itself. I should have some AN10 line and fittings arriving this week to complete the plumbing.


Moving on to door paint. Removal of the Pax door was pretty easy. I elected to build a a wall mount arm in the paint both to hang the door for paint. makes it real convenient to work on, and I can spray there whole thing at one time.


 .
.More to follow...getting excited for Summer......:burnout:
Well past time for an update, but busy on several fronts.
First.
MY 05 MCS finally died a couple weeks ago. 13 solid years of service. No complaints. Decided it was not financially worth it to repair/rebuild, so it has moved on. I found a nice condition BMW 318ti (E36) coupe locally on Craigslist so it will inherit the daily driving duties for a few years...so what transpires.
Second,
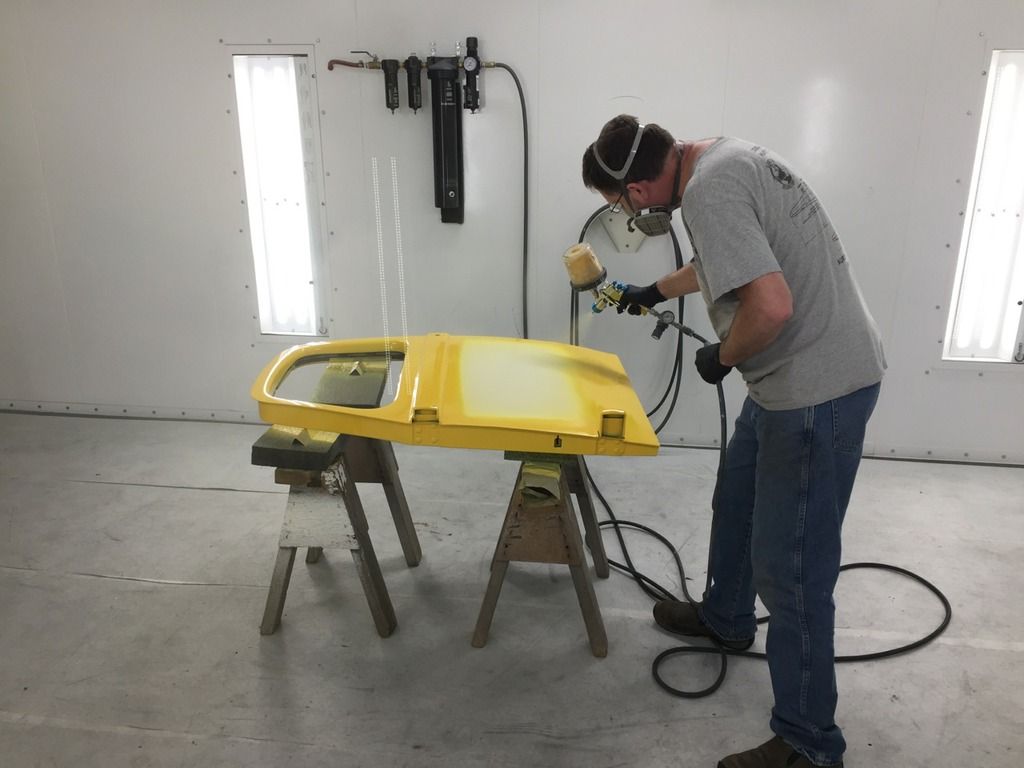
One of the guys at work needed some help on a rat rod build so I volunteered painting services. He had some Eastwood single stage urethane. I was initially skeptical about it, but it actually sprayed pretty nice and flowed well. He is very happy and I got some free pizza and beer for lunch. I guess he got the better end of that deal.:undecided:
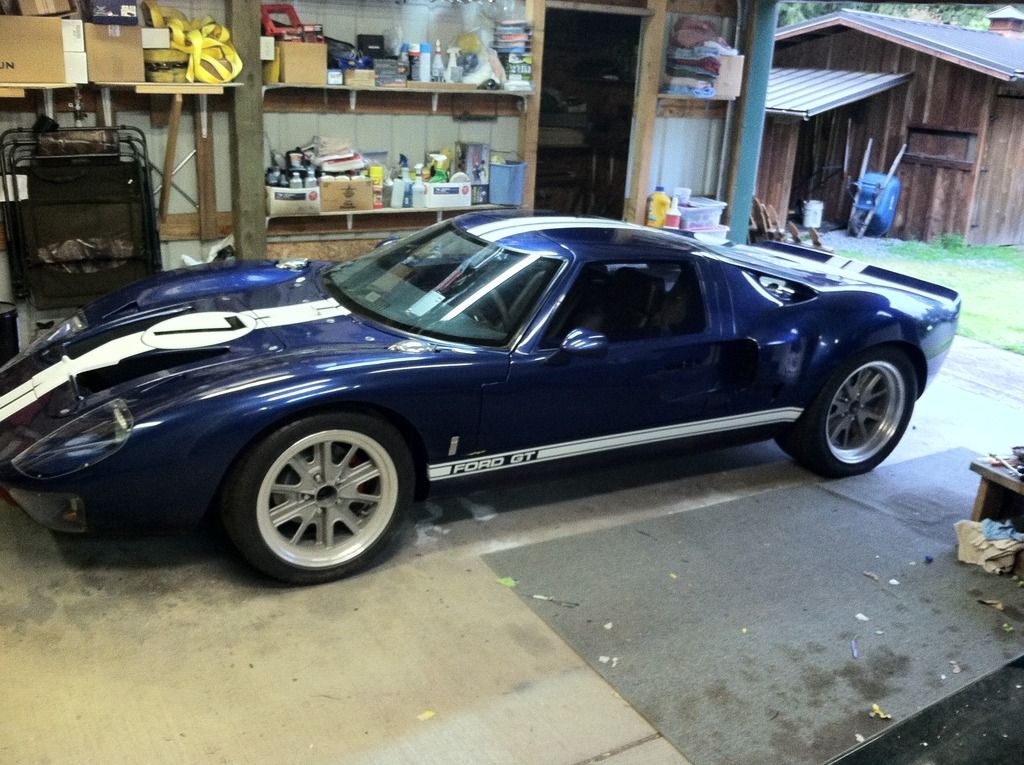
Last but not least....40 progress.
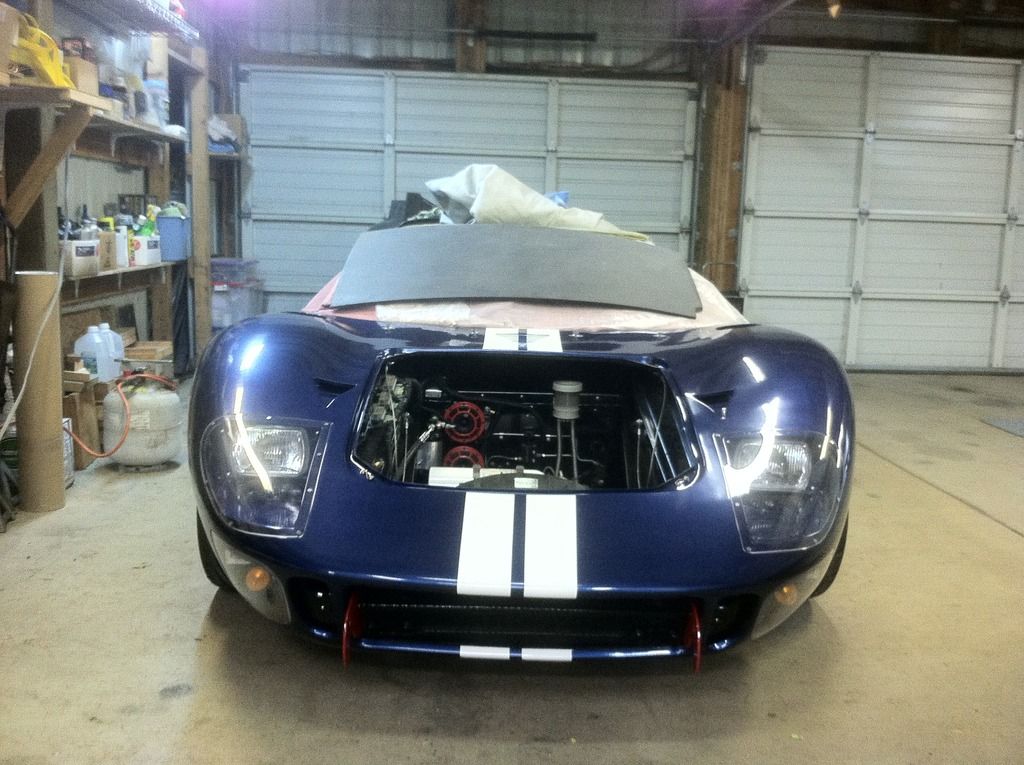
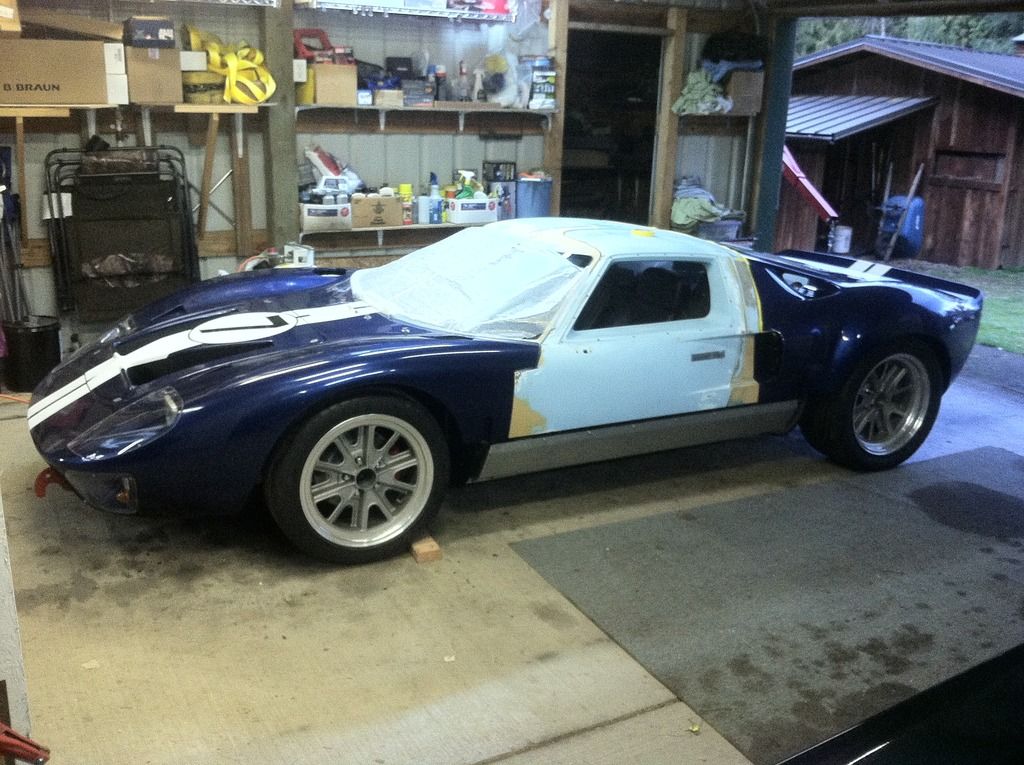
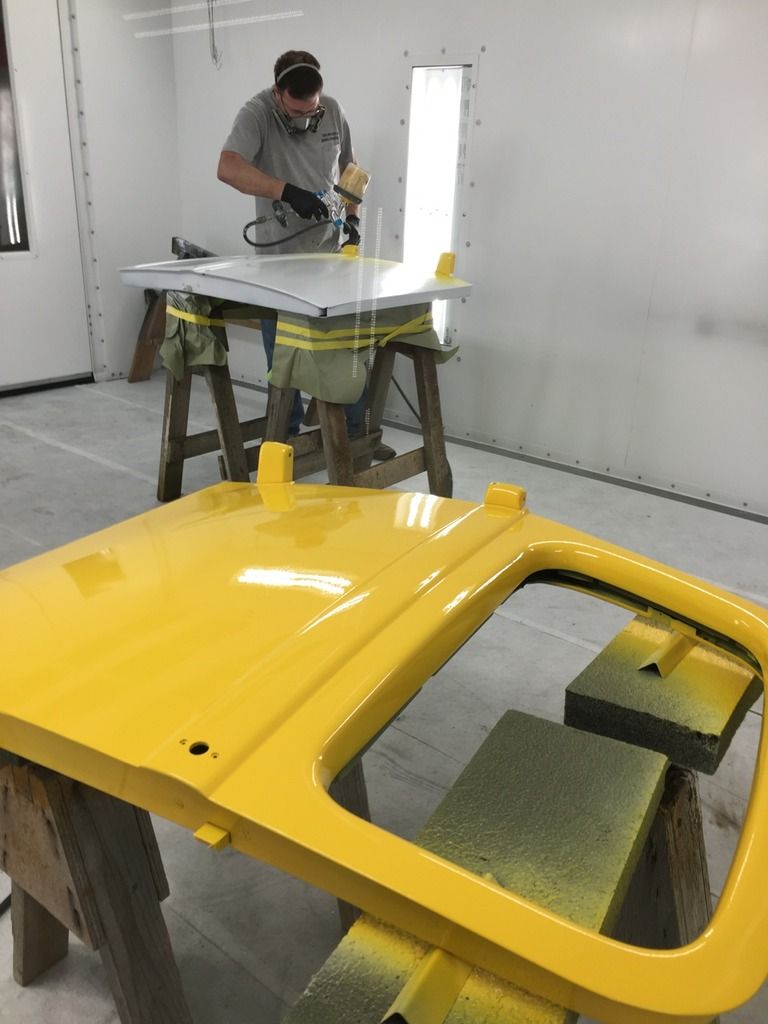
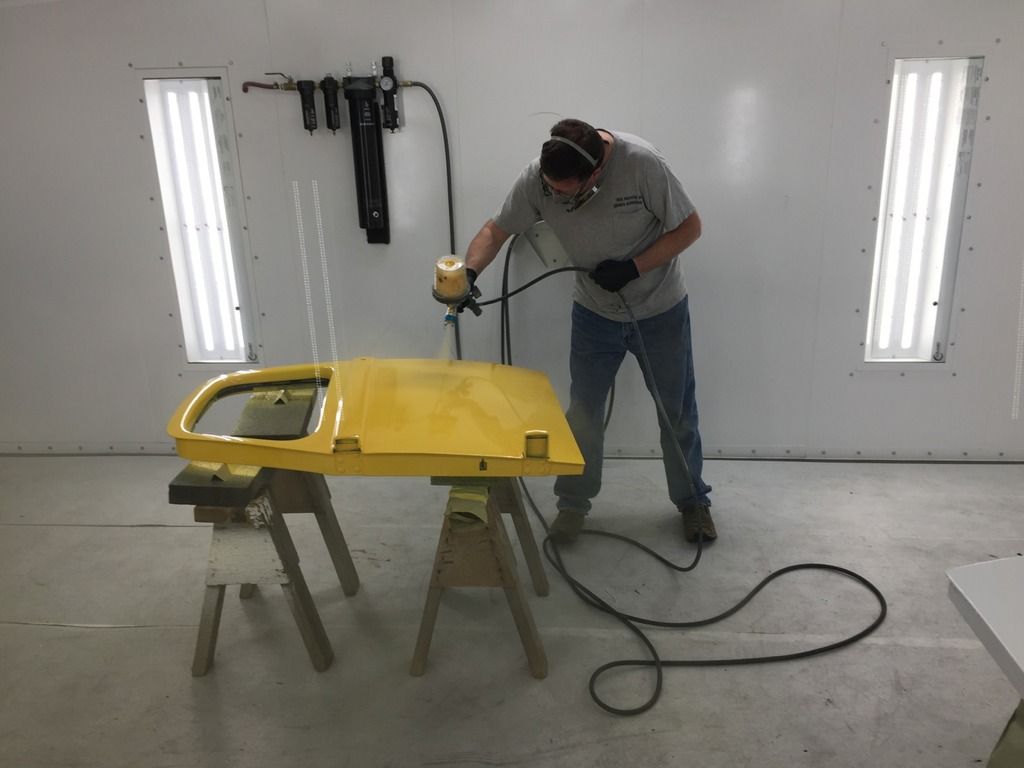
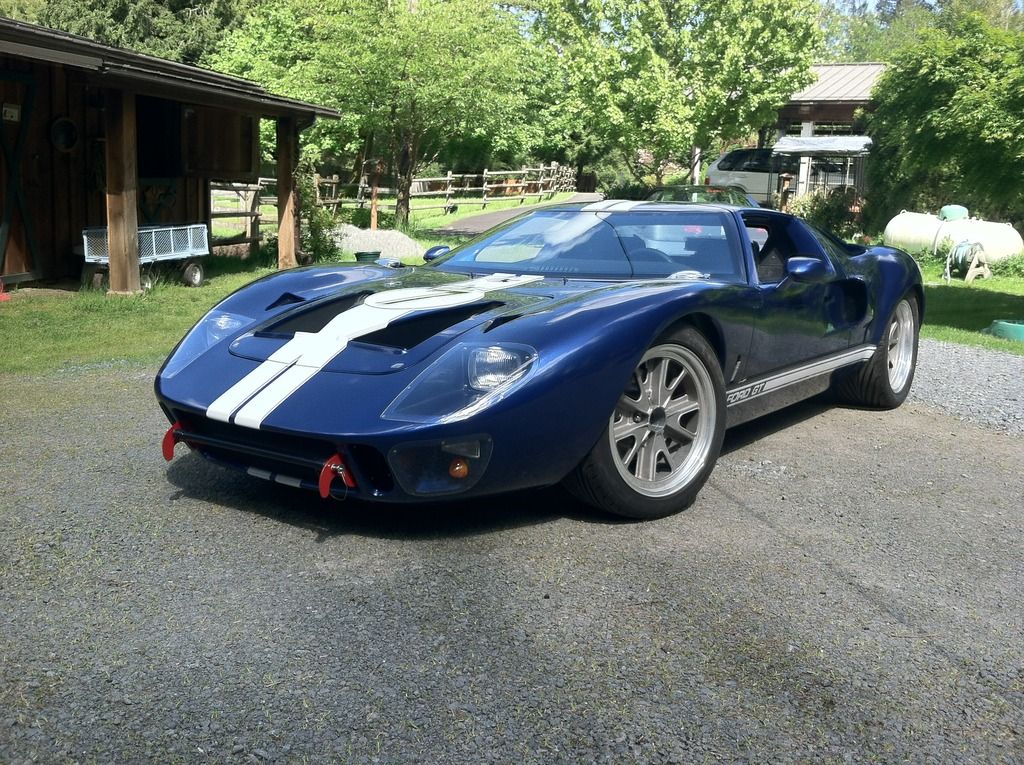
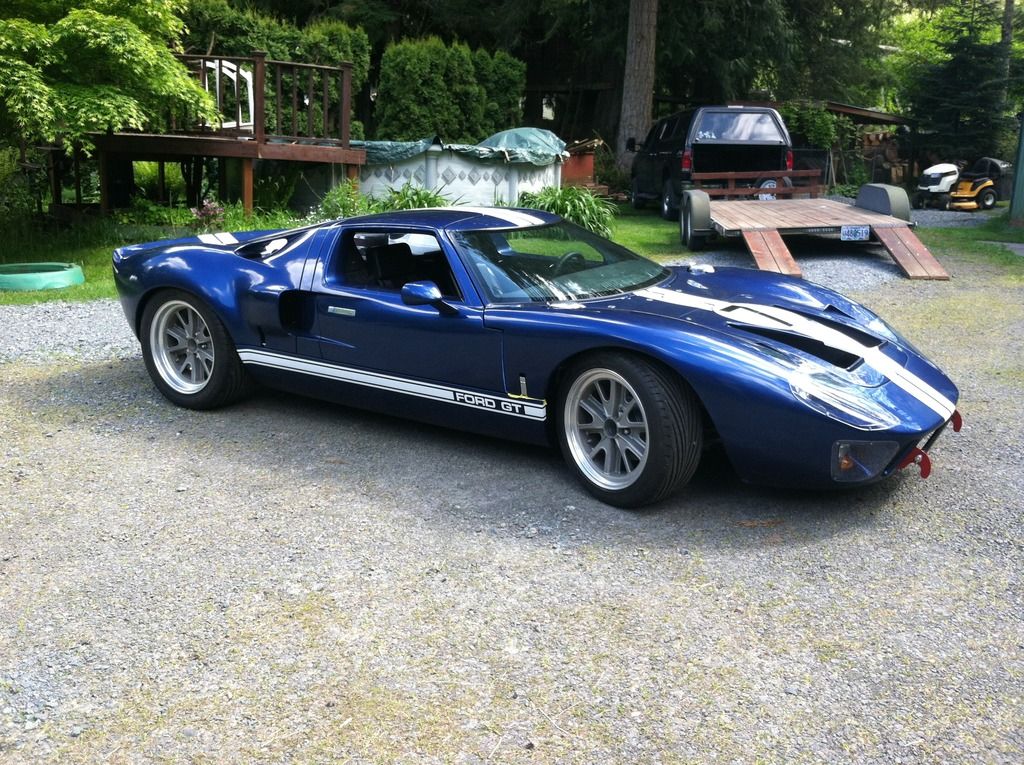
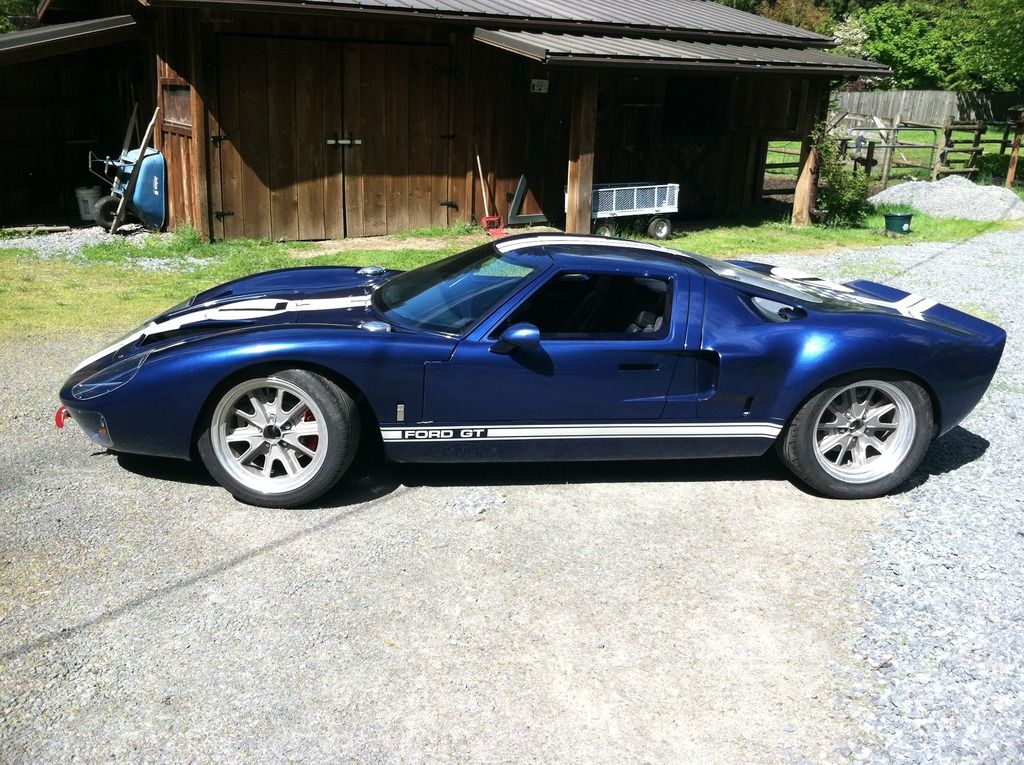
Paint is essentially completed. still a few details to touch up, but to the uneducated eye it looks done.
I have had a few visitors come by and all seem to be impressed. particularly considering I did it in a gravel floor paint "booth".
Roof section was done last.
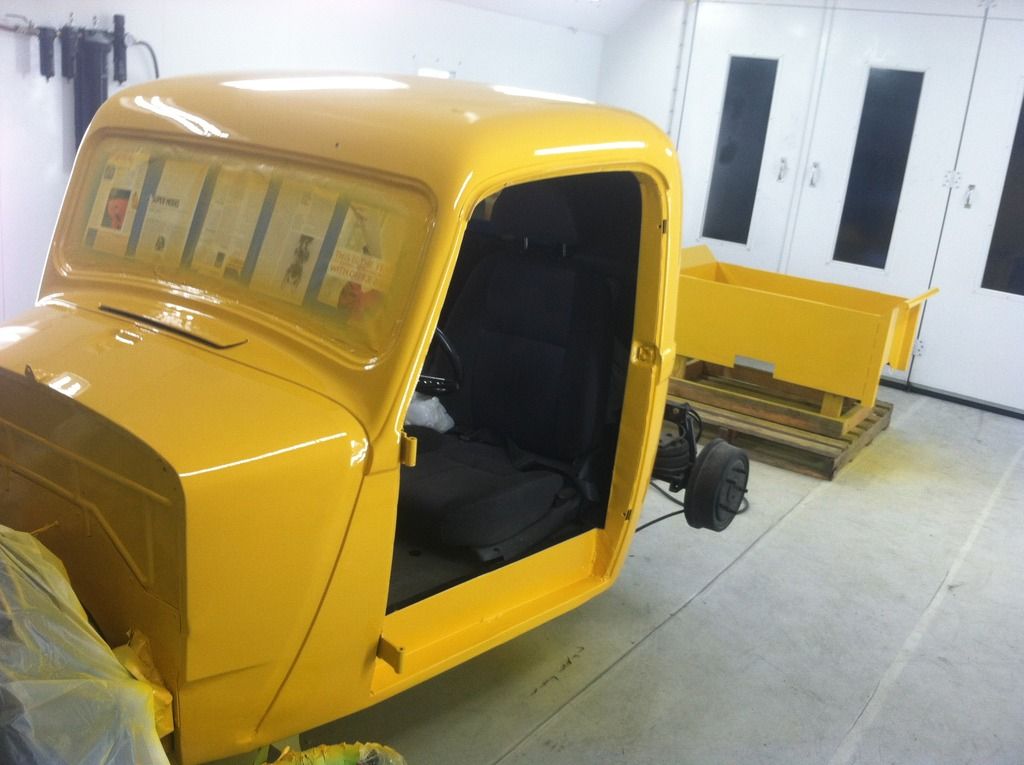
After cut and polish, I was able to start assy of big parts.
So i had Friday off work so that was the designated DMV Day.
loaded onto trailer and took care of business.
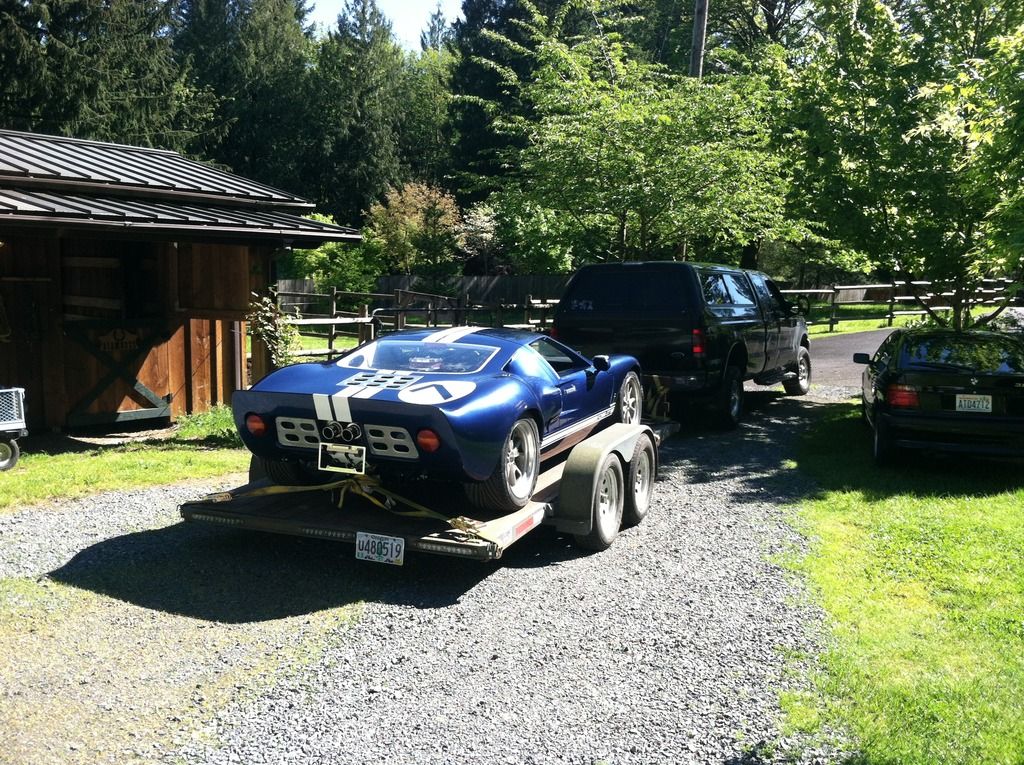
$314 later and I am registered, titled,etc...
Custom plates are in the works and due in 6 weeks. I chose "4 WINS" The faithful shall know what that means.
Still need to do some minor mechanical and wiring assy. My back-up camera is here so that needs sorted/installed also.
Insurance should clear in a few days while completing those tasks.
Looking forward to cruise in season. I am already thinking about next winter maintenance and upgrades...QAI coil overs, v-band on the exhaust, ????
Will update next when hitting the first cruise in.....
First.
MY 05 MCS finally died a couple weeks ago. 13 solid years of service. No complaints. Decided it was not financially worth it to repair/rebuild, so it has moved on. I found a nice condition BMW 318ti (E36) coupe locally on Craigslist so it will inherit the daily driving duties for a few years...so what transpires.
Second,
One of the guys at work needed some help on a rat rod build so I volunteered painting services. He had some Eastwood single stage urethane. I was initially skeptical about it, but it actually sprayed pretty nice and flowed well. He is very happy and I got some free pizza and beer for lunch. I guess he got the better end of that deal.:undecided:


Last but not least....40 progress.
Paint is essentially completed. still a few details to touch up, but to the uneducated eye it looks done.
I have had a few visitors come by and all seem to be impressed. particularly considering I did it in a gravel floor paint "booth".
Roof section was done last.


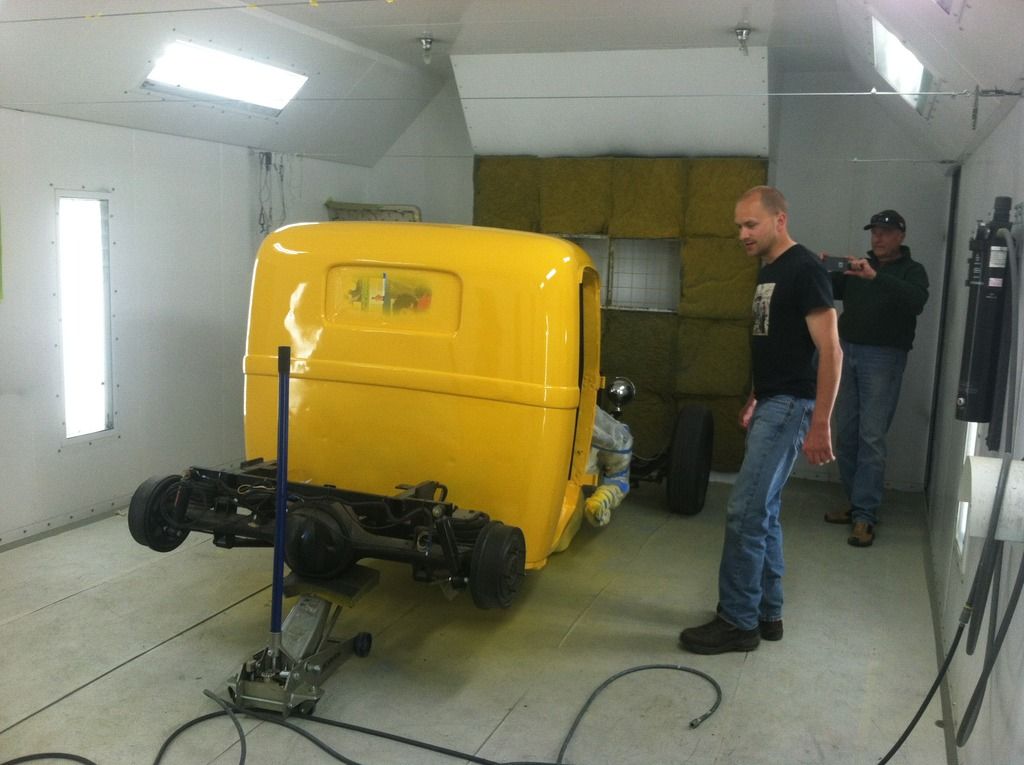
After cut and polish, I was able to start assy of big parts.

So i had Friday off work so that was the designated DMV Day.
loaded onto trailer and took care of business.

$314 later and I am registered, titled,etc...


Custom plates are in the works and due in 6 weeks. I chose "4 WINS" The faithful shall know what that means.
Still need to do some minor mechanical and wiring assy. My back-up camera is here so that needs sorted/installed also.
Insurance should clear in a few days while completing those tasks.
Looking forward to cruise in season. I am already thinking about next winter maintenance and upgrades...QAI coil overs, v-band on the exhaust, ????
Will update next when hitting the first cruise in.....
Congrats Mike !
Looks very nicely laid out and painted to perfection. Good luck with the first drive.
Regards Brian
Looks very nicely laid out and painted to perfection. Good luck with the first drive.
Regards Brian
OK, the plan today was to post a video link of the latest test drive.
I did a few short dives on Friday. nothing too major needed addressed. Biggest one was a stuck thermostat...couple hours to swap that out.
Saturday took a longer drive and stretched its legs. Was running /driving really good.
On the way home I noted the shifter was feeling spongy while shifting into 1st and 3rd gears. Upon examination I noted the “Teleflex” cable going back to the G50 was splitting and the inner cable was pushing out. I am unable to locate a part number in the paperwork supplied by previous owner.....so I'm pinging everyone I can to get some traction on that.
Hopefully Peter Ransom at DRB can advise...but any other DRB owners please chime in.
With the 40 on short term hiatus I spent the day bringing the Mustang out of hibernation. Cruise in season is here and I need to drive something fun.
Hi Mike
Here in OZ the go to people are Flexible Drive Agencies. They have a cable ordering system that you slot in your dimensions and they will supply you a cable, I think Peter was using one of their cables off the shelf. I had my made a little longer to better route it.
I used them often in my working life in heavy transport and plant industry and they are 100% switched on. Maybe there is someone over in the States similar?.
This is their website,I have not used it as i had and old catalog.
https://www.flexibledrive.com.au/products/02/hilex.php
Click on (find your part number) and you may be on your way, otherwise send me your dimensions and I can chase them up for you.
Darrell DRB LS1 G50
Similar threads
- Replies
- 11
- Views
- 837
- Replies
- 6
- Views
- 664