Nice bump steer gage

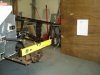
I was fighting the last bump steer gage that I made with two dial indicators on it when I came across this design in a book by Allan Staniforth called "Competition car suspension". It only uses one indicator and a following rod. It simply gives you the difference from front to back during travel. It takes out any of the extra indicator movement do to camber or if your way out it just made it so much easier. In the book he used a piano hinge and some wood but I had some nicer parts to work with laying around.
bumpsteergage.jpg
 
Hi Chip

thought of how to do it by myself. Great idea but it looks like the weight of the gauge is leaning on the dial. Doesn´t that give a false reading, becuase the springs of this dials are pretty weak. ? OR do i see something wrong ?


Thanks TOM weight of the
 
No, the wieght of the leaning frame is riding on the solid rod making contact with the plate at the other side. The hiems allow the frame to follow the plate and the toe in or out is measured by the indicator. With the set up I first built that had two indicators that were solid mounted I had to keep an eye on how many revolutions front and rear as the camber affected the dial count. This compinsates for the camber of the upright and simply just shows the difference in bumpsteer. I am just showing what I found in the book mentioned. It never said the other method was not as good or this way to be better, but I sure found it easy.
 
CHip

Thanks for the explanation, after looking at it onesmore i saw that the top horizontal bar is mounte on the vertical rods solidly. Will copy it if you don´t mind.

Thanks
TOM
 
This is my bump steer gauge, which is even simpler. It does need full access to the wheel, so a GT40 presents no problems and to improve the resolution, it’s a simple case of moving the target plate (in my case a sheet of ply against the wall) further away from the laser level. To stop the hub rotating, the bearing was slightly over-tightened for the exercise.
<?xml:namespace prefix = o ns = "urn:schemas-microsoft-com
P><P><FONT face=
Regards
<o:p></o:p>
Andy
 

Attachments

  • P2120653.jpg
    P2120653.jpg
    43.6 KB · Views: 434
Andy - how do you account for the arc that the suspension moves in? (And also camber change for that matter?) This will displace the laser point side to side just like a toe change will.

This kind of bump steer measuring system has been discussed here before sometime back...
 
Andy,
I did the simple route as well. I used a laser line which does vertical/horizontal lines. Just narrow the output/sight opening and you get a beam. Secure the hub and remove the coil over. Use the hydraulic jack and it is an easy test.

Bill
 
Chip,

The only thing I'm concerned with your design is a lack of torsional rigidity between the base and the upper connections. I fear that the upper rail can twist a little, canceling out a truly accurate reading from the gauges. IMHO, connecting the vertical tubes in a couple of places would help.
 
I was going to do some more cross braces but after pressing the 3/4" OD 1/8 wall cromoly into the top bar I saw how stiff it was I just had to try it. You should have seen the one in drawn in the book I found this in, it was a wooden 1x1 frame and piano hinge.
 
Back
Top