Scandinavian SL-C build

Johan

Supporter
Congrats Johan, looking forward to some driving reviews.

FYI, there were a couple comments recently in Kurtiss’ GT-R build thread post #180 and #182 he states that the correct setup for for the master cylinders on a GT-R are 3/4” front and rear and the 7/8” is for the clutch.
Yes that makes more sense, but I would say 7/8” front, 3/4” for rear and clutch even better. I think the GT-R and SL-C has the same weight ratio and total weight so it should be the same set up.
 

Johan

Supporter
Took the SL-C for the first cruise night downtown and took the opportunity on the freeway back home to do a couple of high speed passes. I let off at 240km/h and did some high speed braking, very stable on the road and the brakes are very good as well. At very hard brake application the front still locks up too early/easy. I’ll reduce front line pressure even more til next time.
Will drive it like this for a couple of months before upholsery and paint.
 

Attachments

  • 5CF56DD6-9882-43C0-9D7F-ED1DB79C60F9.jpeg
    5CF56DD6-9882-43C0-9D7F-ED1DB79C60F9.jpeg
    627.2 KB · Views: 705
Great stuff, congrats Johan! Car is looking beautiful, especially love the new McLaren style bonnet treatment!
 

Johan

Supporter
A couple of not so good things needed modification.
First the brakes are very squeeky. The company that makes the shim going between the brake pads and pistons are actually just 5min from my house and I know the guys working there, so about a year ago I got a big stack of those shims. I’ve sent a couple of sets to friends in need of those shims but I forgot to install them on my car. Will do so today and expect it to be silent.
Next thing was exhaust fumes in the cabin. Since the cabin/canopy of the car is shaped like an airfoil it will most likely be an area of low pressure on top of the car. I didn’t pay too much attention when installing my weather stripping since I’ll ripp it off again in a month or two when painting.
So small leaks in the seals around the door most likely create a lower pressure in the cockpit, that together with a not 100% tight aft bulkhead it will draw engine compartment air into the cabin.
The remedy was to install a roof vent, I had one of the Audi TT left over. It works great and seems to equalize the pressure diff inside/outside.
I guess you need a fresh air intake anyway if you seal up everything.
Third thing was the alternator, I was using the stock Camaro SS gen5/two wire plus the thick bat+ and I didn’t get it to deliver more than 13,7 volts. And it slowly drained my battery.
After some reading on other forums it lookes like this alternator is pulse width modulated and I don’t know how to figure this out. I had another laying around (4 wire) so I switched yesterday and it is now charging up to 14,8 V.
All problems solved so far, I bet there will be more.
 

Attachments

  • EE722BFE-B685-4CEF-B930-FD8BADD488B1.jpeg
    EE722BFE-B685-4CEF-B930-FD8BADD488B1.jpeg
    344.4 KB · Views: 685
  • 9586F5D0-E1CB-4361-9060-08BDC09BAEEF.jpeg
    9586F5D0-E1CB-4361-9060-08BDC09BAEEF.jpeg
    283 KB · Views: 596

Ken Roberts

Supporter

Johan

Supporter
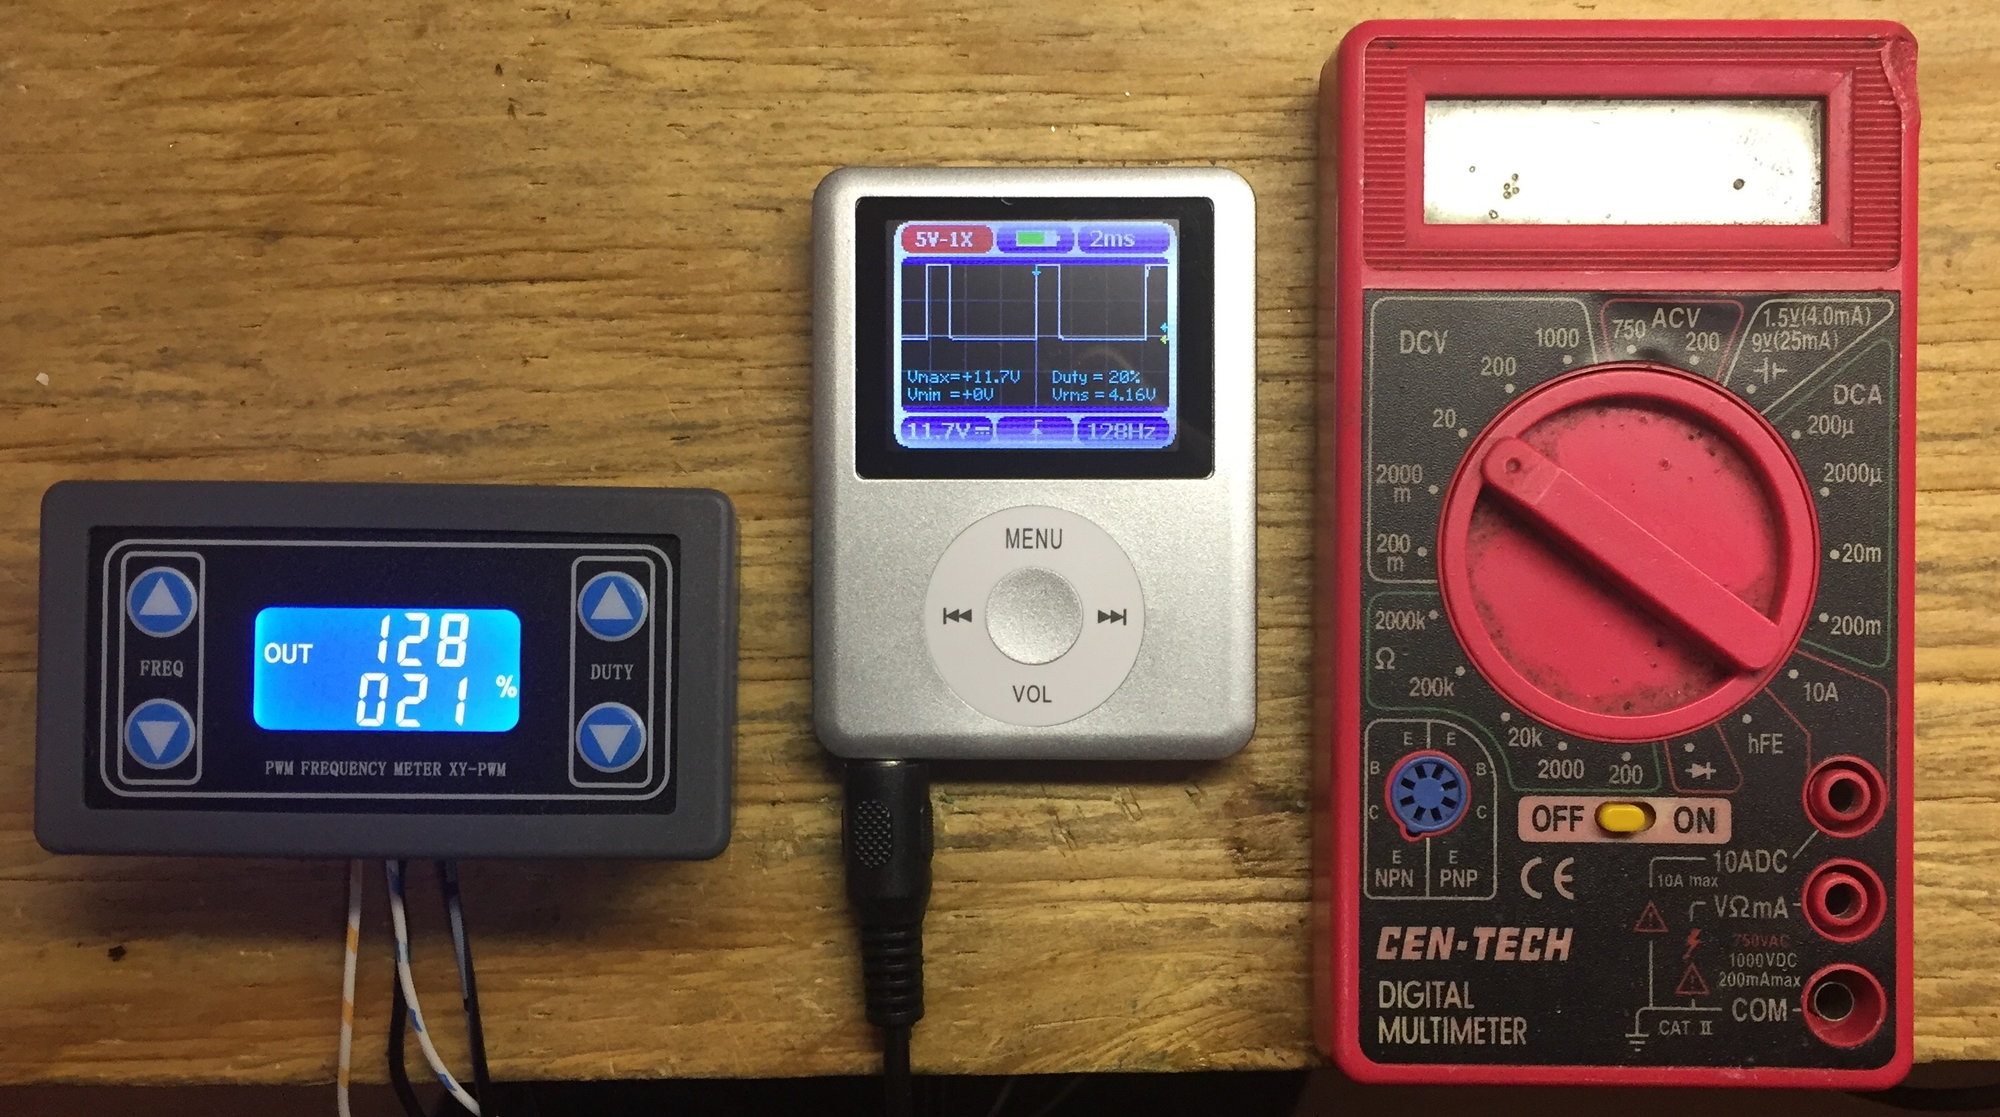
Would this have helped you Johan with your alternator problem?

Yes Ken, it would.
That LSswap guy seems to be a clever fellow when it comes to electronics.
I’ll order a PWM module, that way I have a spare alternator.
Thanks Ken.
 

Ken Roberts

Supporter
You'll need a 5v power source for the pwm module.

It might be better to use the adruino nano module instead. It uses a 12v input instead. He wrote the code for it here....


Johan

Supporter
Being Covid-bored I decided to build my 416", I've had the parts for a year and now was a goood time to start. After weight matching rods and pistons a buddy of mine balanced the rotating assy and also honed the block to 4.070". I made two alu plunges to make solid lifters out of two hydrualic ones nessessary for degreeing the camshaft and determining pushrod lenghts. Don't know why most rod manufaturers gives stretch values in stead of torque.(it's supposed to be more accurate) As it turned out I got the correct amount of stretch with exactly 108Nm on all 8 rods.
Since it happens from time to time that the o-rings leak and you get bad oil pressure I plugged the oil towers (VVT) under the valley cover. Tapped with UNC 3/8" and a hex plugg. I didn't touch the AFR 260 heads other than checking the spring install height. On top it's a Fast LSXR 102 manifold and a Nick Williams 102mm throttle body. Camshaft is a Comp 54-469-11 , a tuneable/driveable medium sized cam.
I've seen Richard Holdener dyno two identical engines and they make 630-640HP to the flywheel without accessories and elec waterpump so I think that will be on the upper limit to what I want.
The motor is in the car now and runs very good after two weeks of tuning. Later on I'll take it to a professional tuner once the engine and clutch is broken in.
DSCN1237.JPG
 

Attachments

  • DSCN1232.JPG
    DSCN1232.JPG
    775.8 KB · Views: 561
  • DSCN1236.JPG
    DSCN1236.JPG
    871.8 KB · Views: 519
  • DSCN1242.JPG
    DSCN1242.JPG
    791.4 KB · Views: 514
  • DSCN1239.JPG
    DSCN1239.JPG
    803.2 KB · Views: 498
  • DSCN1249.JPG
    DSCN1249.JPG
    828.9 KB · Views: 602
Woo! Looks beautiful Johan! Sometimes I regret having such a basic motor but then I remind myself I’m not a hero racer and I’m only using half of what my motor actually makes. Still, that’s a beautiful engine, great work! My new location will have a “winter” that will require me to hibernate the car, perhaps that’s when I’ll look into motor upgrades ... ;)

Stretch values are a much more accurate measure of bolt tension than installation torque. The manufacturers can’t monitor how everyone is preparing their threads, type of lube, etc.
 

Johan

Supporter
Woo! Looks beautiful Johan! Sometimes I regret having such a basic motor but then I remind myself I’m not a hero racer and I’m only using half of what my motor actually makes. Still, that’s a beautiful engine, great work! My new location will have a “winter” that will require me to hibernate the car, perhaps that’s when I’ll look into motor upgrades ... ;)

Stretch values are a much more accurate measure of bolt tension than installation torque. The manufacturers can’t monitor how everyone is preparing their threads, type of lube, etc.
Yes I know it’s more accurate, but the last three motors I’ve assembled the stretch has been dead on with the same torque on all rods. Just have to figure out the torque numbers if the manufacturer doesn’t include it in the instructions. It might help that I always use the same ARP assembly lub and clean the threads before.
 

Joel K

Supporter
Hi Johan,

I am in the process of designing the cooling tubes. Wondering if you were happy with were you put this union. Can you get to this area with the body on? Thinking either I would put it where you have it or further inboard behind the close out panel that has to be fabricated.

0B15C50C-77C7-4D02-8124-4219F1394D8F.jpeg
 

Johan

Supporter
Joel, that close out panel you have to fabricate will extend all the way to the extended floor panel. That is if you fab it to cover the bottom as well.
To answer your question, yes I’m happy with the union position, it’s accessible from below, just remove the close out panel before.
I’ll try to remember to take a picture of it tomorrow and post.
I also added a coolant drain plug just ahead of the union on both sides.
 

Joel K

Supporter
Joel, that close out panel you have to fabricate will extend all the way to the extended floor panel. That is if you fab it to cover the bottom as well.
To answer your question, yes I’m happy with the union position, it’s accessible from below, just remove the close out panel before.
I’ll try to remember to take a picture of it tomorrow and post.
I also added a coolant drain plug just ahead of the union on both sides.

Thanks Johan, appreciate the help.
 

Johan

Supporter
Joel, I forgot about the pictures but here they are.
I put one layer of 5mm thick tape on the coolant tube then filled the cavities between the tube and body with clay and smoothed it. From below I temporarely glue a piece of 3mm plexi from the extended floor panel to meet with the body then a layer of aluminium tape and fiberglassed over it.
If you put some effort to smooth the clay the outcome will be pretty good.
 

Attachments

  • DC2239E0-842F-4CBD-A537-73AF97AA39D7.jpeg
    DC2239E0-842F-4CBD-A537-73AF97AA39D7.jpeg
    268.2 KB · Views: 537
  • A126F196-E0D6-4337-A720-88E628712228.jpeg
    A126F196-E0D6-4337-A720-88E628712228.jpeg
    360.4 KB · Views: 540
Pardon my ignorance, but the tubes that came from the factory do not have a union at that location, is a solid tube all the way through the side of the car. Also why would you need a drain plug on both sides of the union at that location? I just have a drain plug next to the radiator. Beautiful close out panel Johan.
 

Ken Roberts

Supporter
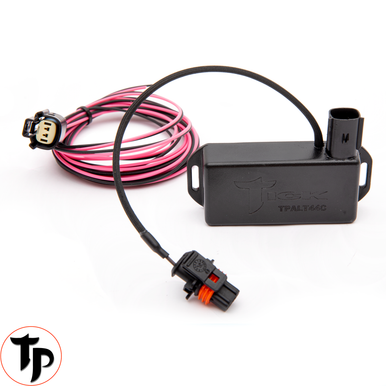
Johan....Tick Performance now sells a module for the 2 pin alternator problem.

 
Back
Top