
- Forums
- GT40 Replica Manufacturers' Corner
- RCR Forum - RCR40/SLC/917/Superlite Aero
- The SLC Clubhouse
You are using an out of date browser. It may not display this or other websites correctly.
You should upgrade or use an alternative browser.
You should upgrade or use an alternative browser.
SLC 24 Howard Jones
- Thread starter Howard Jones
- Start date
Howard,
Could you do a build and install on your windscreen and add it to the Garages and Tools section so we can see what is involved with the process. Especially the forming, shaping, size selection, tools you used and of course an estimated cost of materials. I for one would appreciate it as I have managed to go through 3 windscreens(so far). Love your attachment procedure.
Bill
Nice work as usual Howard.. I really enjoy watching your builds.. Some day maybe in person!
Are you going to put any sort of interior anti-intrusion protection on that windshield? Many sanctioning bodies require those when using polycarbonate windshields... I have some pictures stashed away of ones I have done and will forward if interested.
Are you going to put any sort of interior anti-intrusion protection on that windshield? Many sanctioning bodies require those when using polycarbonate windshields... I have some pictures stashed away of ones I have done and will forward if interested.
Do you have a plan on how to label all of your buttons and switches? If not, I have an idea that should work that's simple and easy. I use Kinko's to print vector files with their vinyl cutter. It can cut with very good accuracy, able to produce letters that are smaller than what you would need. I use them for a variety of things, one of which is stickers on the back window of my car. See the pic in my avatar. They charge by the square foot, its not expensive, but they have a 1sq ft min (about $25?). I will probably be submitting artwork in the near future and would have plenty of room to nest whatever you might want in my file, no additional cost :thumbsup:
that's some pretty solid mounting Howard - I just held mine in with 4 #6 screws/nylocks (one on each corner), heh
step 1 - phone fran
step 2 - order
or if you're adventuresome you can send your windshield to Shields to be made out of formed plastic
SHIELDS Premier Windshields - Formed and Hard Coated Polycarbonate Windshields and Windows World Leader
I'm happy with mine - seems to be just as tough as the lexan mr10 my cobra's windshield uses
Howard,
Could you do a build and install on your windscreen and add it to the Garages and Tools section so we can see what is involved with the process. Especially the forming, shaping, size selection, tools you used and of course an estimated cost of materials. I for one would appreciate it as I have managed to go through 3 windscreens(so far). Love your attachment procedure.
Bill
step 1 - phone fran
step 2 - order
or if you're adventuresome you can send your windshield to Shields to be made out of formed plastic
SHIELDS Premier Windshields - Formed and Hard Coated Polycarbonate Windshields and Windows World Leader
I'm happy with mine - seems to be just as tough as the lexan mr10 my cobra's windshield uses
Howard Jones
Supporter
Bill you can order a Lexan windscreen from RCR. That's where I got mine.
Howard,
Would love to get one from Fran. However, my car(DRB #5) is an Australian car and have been told that the windshields for these cars are flatter(5" curvature vs. 6") than Fran's.
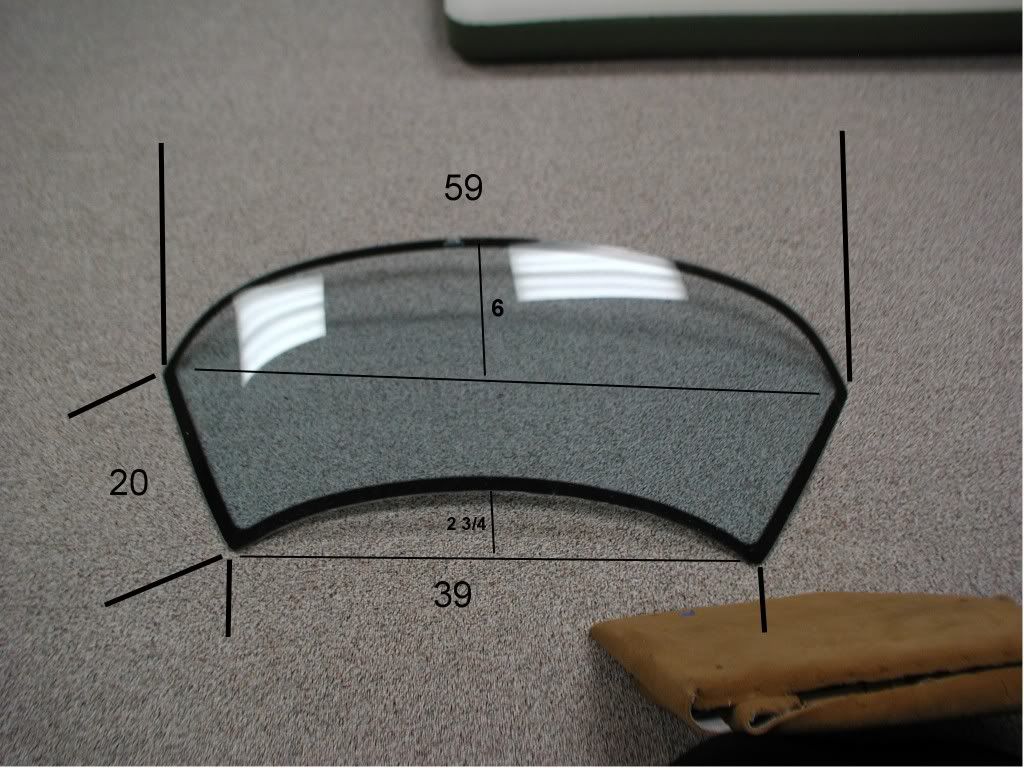
I believe the RCR cars are more accurate than mine in that respect(maybe others as well). I have been able to get glass through Dan White. My second one cracked while removing it to add the EPAS column(I am too old to be crawling around on my back and welding in one of these, though I still do at times(the crawling in and out).Dan furnished #s 2,3,and .4. My problem is that when #3 and 4 came and they were fogged out with some sort of substance that wouldn't come off with anything(believe me I tried everything) except Bon Amie.
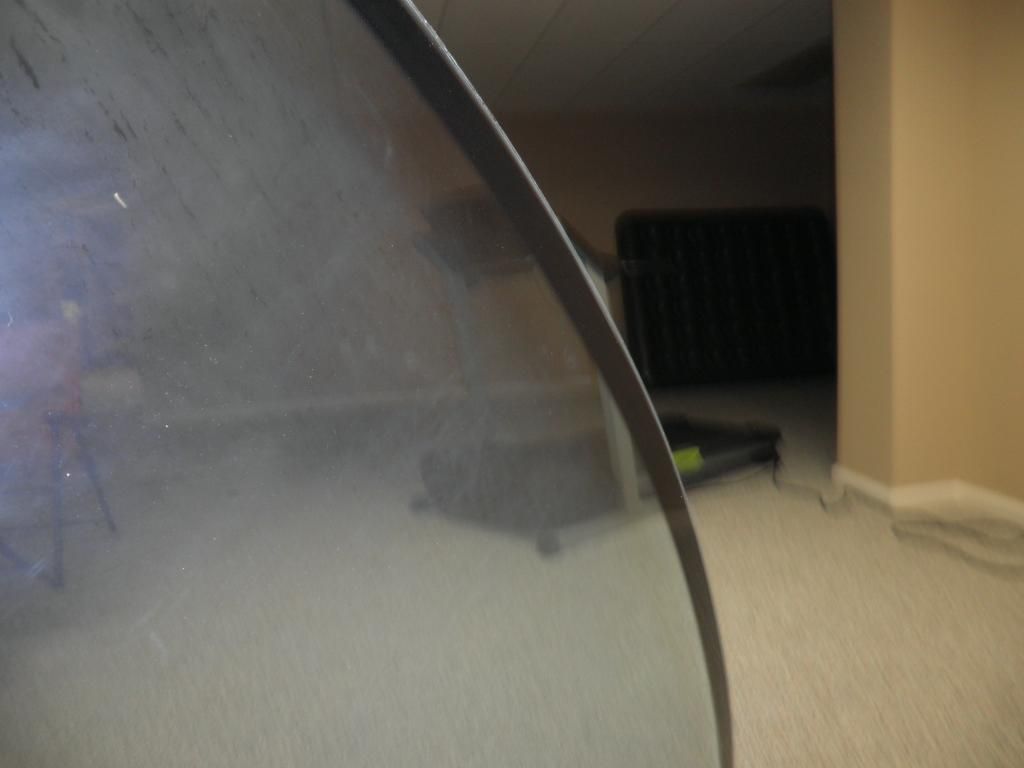
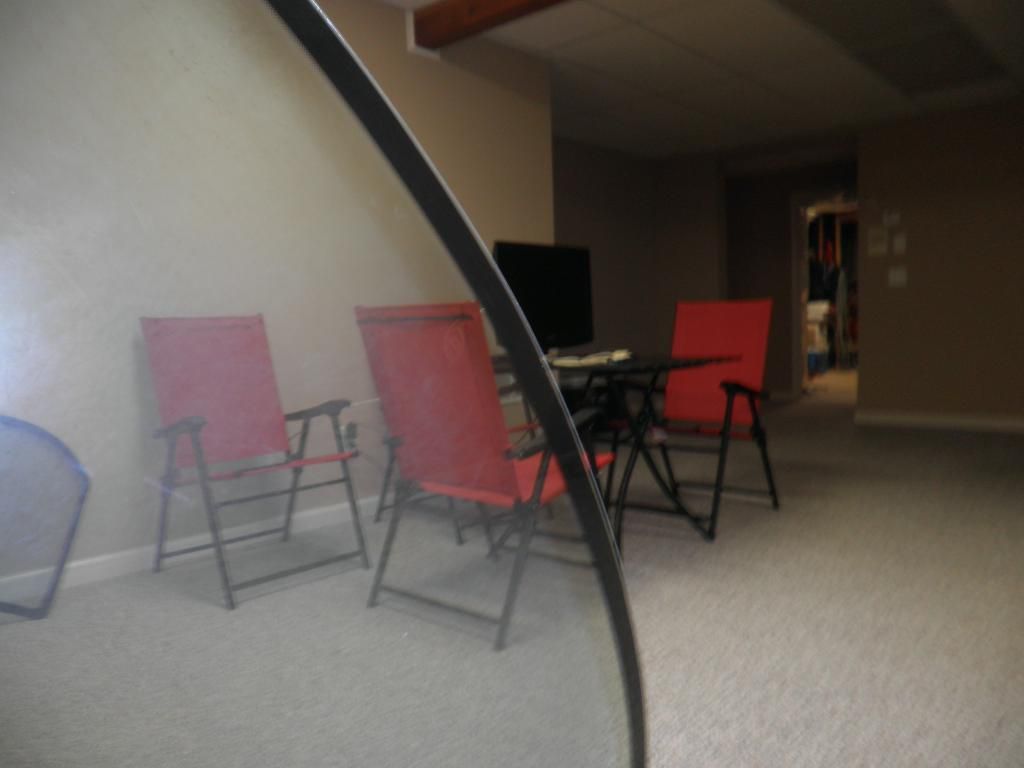
This left scratches on both 3 and 4. #3 wasn't so bad, and was hardly noticeable, so I installed it. When I repainted my car going from dark to light color, I tried to remove the calking around the glass to get the paint under the clalk line, and wound up cracking #3. I have some Cerium Oxide and Silica Carbide(pumise) powder that glass polishers use to get the scratches out. Took me a long time to find this stuff. It will take a lot of work also to get them out. With my luck I will crack #4 just doing this. I have contacted Shields to see what the expense will be for one of theirs. Being my luck they will need the car to do the job. Indiana ain't close to Snellville Ga. "So we will see" said the blind men.
Bill
Would love to get one from Fran. However, my car(DRB #5) is an Australian car and have been told that the windshields for these cars are flatter(5" curvature vs. 6") than Fran's.
I believe the RCR cars are more accurate than mine in that respect(maybe others as well). I have been able to get glass through Dan White. My second one cracked while removing it to add the EPAS column(I am too old to be crawling around on my back and welding in one of these, though I still do at times(the crawling in and out).Dan furnished #s 2,3,and .4. My problem is that when #3 and 4 came and they were fogged out with some sort of substance that wouldn't come off with anything(believe me I tried everything) except Bon Amie.
This left scratches on both 3 and 4. #3 wasn't so bad, and was hardly noticeable, so I installed it. When I repainted my car going from dark to light color, I tried to remove the calking around the glass to get the paint under the clalk line, and wound up cracking #3. I have some Cerium Oxide and Silica Carbide(pumise) powder that glass polishers use to get the scratches out. Took me a long time to find this stuff. It will take a lot of work also to get them out. With my luck I will crack #4 just doing this. I have contacted Shields to see what the expense will be for one of theirs. Being my luck they will need the car to do the job. Indiana ain't close to Snellville Ga. "So we will see" said the blind men.
Bill
Perhaps one of the cracked windshields would do?I have contacted Shields to see what the expense will be for one of theirs. Being my luck they will need the car to do the job.
Howard Jones
Supporter
To be clear I got my SLC Lexan windscreen from RCR. If you don't mind maybe you could carry on you windshield epic on the proper thread. This is my build thread. Thank you.
Howard Jones
Supporter
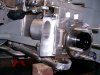
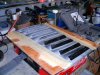
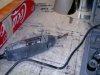
Made some brake cooling ducts. They are 1/16 steel. I tried to make them out of Alum but either the material was something that doesn't weld well (unknown alum type) or I was having a bad day.
From time to time I try to use leftover material and I just keep burning it up. I never have this problem with new 6061. Maybe if I stopped being so cheap............. anyway the light gauge steel ones are not that heavy. Someday I'll redo them but for now they will be fine.
From time to time I try to use leftover material and I just keep burning it up. I never have this problem with new 6061. Maybe if I stopped being so cheap............. anyway the light gauge steel ones are not that heavy. Someday I'll redo them but for now they will be fine.
Attachments
Howard Jones
Supporter
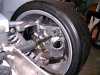
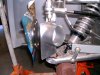
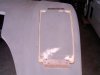
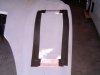
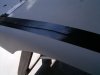
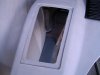
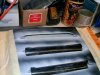
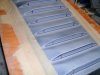
So there are a few different ways to install the front fender vents. You could just cut some holes in the top of the fenders and rivet the vents on.........................naaaaaaaaaaaaa.
I did it this way. The did take a bit longer but I do like it better than a simple slap in on the top of the fender method. The first few pictures are of the cut out fender top jigged up to set down into the fender and form a flange for the vent piece to set onto. Same PVA release and masking tape system I have used before. The fender cut outs are screwed in place with sheet metal screws that have the points ground off flush on the inside. The gaps are sealed with duct tape and the flanges are formed with multiple layers of fiberglass. Time consuming but easy to do.
The more careful you are cutting out the fender the easier it is to reuse the piece as a mold. I used a thin cut off wheel to open up a slot and then a fine blade in a sawsall to do the long cuts. The corners were done with a Drimmel tool.
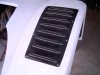
The little nut thingy's came from Pegasus racing. I used #6-32's
All that's left is to open up the vents. Any of you guys got a fool proof method to do that. Gig them up or free hand Drimmel tool ?
I did it this way. The did take a bit longer but I do like it better than a simple slap in on the top of the fender method. The first few pictures are of the cut out fender top jigged up to set down into the fender and form a flange for the vent piece to set onto. Same PVA release and masking tape system I have used before. The fender cut outs are screwed in place with sheet metal screws that have the points ground off flush on the inside. The gaps are sealed with duct tape and the flanges are formed with multiple layers of fiberglass. Time consuming but easy to do.
The more careful you are cutting out the fender the easier it is to reuse the piece as a mold. I used a thin cut off wheel to open up a slot and then a fine blade in a sawsall to do the long cuts. The corners were done with a Drimmel tool.
The little nut thingy's came from Pegasus racing. I used #6-32's
All that's left is to open up the vents. Any of you guys got a fool proof method to do that. Gig them up or free hand Drimmel tool ?
Attachments
-
 HPIM2065.jpg169.9 KB · Views: 323
 -
 HPIM2066.jpg144.3 KB · Views: 339
 -
 HPIM2067.jpg97 KB · Views: 324
 -
 HPIM2068.jpg101.3 KB · Views: 362
 -
 HPIM2069.jpg124.5 KB · Views: 316
 -
 HPIM2072.jpg123.8 KB · Views: 400
 -
 HPIM2074.jpg242.6 KB · Views: 367
 -
 HPIM2073.jpg104 KB · Views: 339
 -
 HPIM2071.jpg198.1 KB · Views: 308
 -
 HPIM2070.jpg165.5 KB · Views: 337
Ken Roberts
Supporter
Howard I mounted each panel to a board then used a special bit to open up all the holes I drilled into the individual vents. Time consuming for sure.


Howard Jones
Supporter
Thanks Ken, I do like your attachment to a large board. Much easier to hold onto. I have a bunch of cutting bits similar to yours. Here's one that will work in my Drimmel tool.
http://www.tools-plus.com/roto-zip-tc1.html
http://www.tools-plus.com/roto-zip-tc1.html
Dr. David
Lifetime Supporter
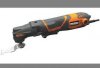
I drilled a 1/4" hole at each end, then connected them with two straight cuts, top and bottom, using a Ridgid JobMax oscillating saw, with a large 3/4-round blade. Finished it up with a Dremel bit at the ends. I also used an air file with a flat blade (Harbor Freight) to adjust and smooth the flat areas. Not much fun, but got it done.
Attachments
So there are a few different ways to install the front fender vents. You could just cut some holes in the top of the fenders and rivet the vents on.........................naaaaaaaaaaaaa.
why do i feel like your taking a shot at me Howard LOL :heart:
")
Howard Jones
Supporter
Eric, I never take a shot at anybody with out doing it directly and carefully aimed. In this case I have seen several installations of fender vents not only on SLC like ours ,but other racecars as well, that just screw them over a hole on top of the fender. I don't like that method because.............well just because. So I did it my way because I like it better. Not because it IS better just because I LIKE it better.
Buy the way I like you too. If we run into each other at some point I will be the first to offer to buy you a beer. That's a promise. We OK now? luv ya buddy.
See Robert wasn't that nice? (he knows what I mean)
Dr. That was more or less what I was thinking too with the holes at each end. Thanks for the confirm, sometimes the confirms are just as valuable as the idea in the first place. Most of the stuff I do is copying proven processes.
Eric, I never take a shot at anybody with out doing it directly and carefully aimed. In this case I have seen several installations of fender vents not only on SLC like ours ,but other racecars as well, that just screw them over a hole on top of the fender. I don't like that method because.............well just because. So I did it my way because I like it better. Not because it IS better just because I LIKE it better.
Buy the way I like you too. If we run into each other at some point I will be the first to offer to buy you a beer. That's a promise. We OK now? luv ya buddy.
See Robert wasn't that nice? (he knows what I mean)
LOL, no worries Howard, I was just giving you a kick in the pants.
And for the record... I pop-riveted mine from the BOTTOM of the fenders... SO THERE! HA!! Not from the top.
Honestly, I really did consider your idea and like your way quite a bit. I just know myself and the way I drive. One day a rock will come flying out of there and ruin all my effort!

Oh, and if we do run into each other... I. Will. Beat. You.....
.... to the punch and buy you a beer first
HEYOO!! Take my wife... Please!
Howard Jones
Supporter
So that means we will have two beers to drink then buddy. Teamwork.......I like teamwork.
Ken and Doc got me really thinking. I really liked the mount to a board idea and the holes at the end of the slot really helps make what is a very narrow window with a very small margin of error to work in a little easier.
But I think I took it a bit further. Man I really hate the dust. REALLY hate it. And this project is close to the eye and really promised to generate a lot of dust. So.............
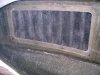
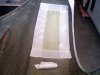
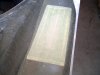
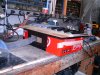
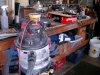
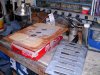
Vacuum box baby! Screw the panel to a box and attach a shop vac to it. MAN it really worked. At one point I was thinking a video.
I used all the drimmel bits I had but in the end settled on the small sanding wheel. If you use a drimmel for this practice on a piece of the cut off edge first and try different speeds.
Be very careful, it just takes a little loss of control and you will really F it up quick.
The pictures are self explanatory .
Ken and Doc got me really thinking. I really liked the mount to a board idea and the holes at the end of the slot really helps make what is a very narrow window with a very small margin of error to work in a little easier.
But I think I took it a bit further. Man I really hate the dust. REALLY hate it. And this project is close to the eye and really promised to generate a lot of dust. So.............
Vacuum box baby! Screw the panel to a box and attach a shop vac to it. MAN it really worked. At one point I was thinking a video.
I used all the drimmel bits I had but in the end settled on the small sanding wheel. If you use a drimmel for this practice on a piece of the cut off edge first and try different speeds.
Be very careful, it just takes a little loss of control and you will really F it up quick.
The pictures are self explanatory .
Attachments

Howard, I agree with you about preferring a certain appearance. Love how you made the flanges to flush mount the vents. What about the screws - did you think about trying to hide those? I was thinking of using a threaded stud and either fiberglassing them to the under side of the vents or epoxy them in. Then secure with nuts from the bottom of the flange. Would this provide enough strength or would the pressure blow the vents off? I don't want to fiberglass the vent into the body. Mainly because this will be a track car and I figure the vents will be a wear item.
Similar threads
- Replies
- 14
- Views
- 2K
- Replies
- 5
- Views
- 2K