SLC 24 Howard Jones

Howard Jones

Supporter
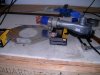
Well there you go! the same mistake the probe to Mars guys made! Metric/English conversion error. Ya that makes sense doesn't it. Pretty small pump to pump out three 55 gal drums a min. In any case the comparisons do stand up abet with the proper values.

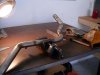
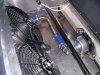
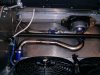
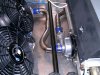
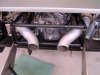
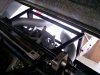
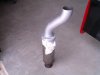
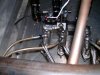
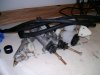
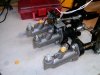
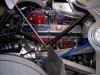
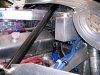
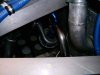
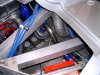
I did some reading on cavitation and found this one that I especially thought helped me understand our mid engine race car problem. Where it mentions velocity think impeller speed and the consideration of head height is really the most improvable variable along with reducing the number of tight radius turns and restrictions in the piping systems.

http://www.ewp.rpi.edu/hartford/~ganzs/FW/Project/FW_Project_Report Cavitation.pdf
 
Just move your radiators closer to the engine :)


Ltr/Gal....I wonderin' why those little Aussie cars took like 40 "gallons" of fuel ;) (?)
 

Howard Jones

Supporter
Here's the pump placement. I made the little flat plate to mount the pump. I had to open up the original piping at the radiator to side pod tubing and weld up some new pipe. Good thing I made this easy to remove from the car the first time. At first I used the 90 degree fitting that I bought from DC on the inlet side. But I didn't like the tight small bend in the fitting so I made a second piece to replace it. As you can see the front of the car is a pretty good place to locate the pump nice and low to the water volume.

The last picture was an attempt to show you the front of the engine. Sorry there's just isn't a good shot to be made but it's just like the picture above.

So now on to the electronics.
 

Attachments

  • HPIM2233.jpg
    HPIM2233.jpg
    184.2 KB · Views: 438
  • HPIM2234.jpg
    HPIM2234.jpg
    136.7 KB · Views: 450
  • HPIM2235.jpg
    HPIM2235.jpg
    142.2 KB · Views: 426
  • HPIM2236.jpg
    HPIM2236.jpg
    206.5 KB · Views: 467
  • HPIM2237.jpg
    HPIM2237.jpg
    134.4 KB · Views: 420
  • HPIM2238.jpg
    HPIM2238.jpg
    198.4 KB · Views: 473
  • HPIM2239.jpg
    HPIM2239.jpg
    168 KB · Views: 454
  • HPIM2240.jpg
    HPIM2240.jpg
    213.5 KB · Views: 481
  • HPIM2243.jpg
    HPIM2243.jpg
    115 KB · Views: 418

Howard Jones

Supporter
Report on first engine start and warm up with the Davies Craig Water pump.

So I learned something so basic that I can't believe that I missed this the first time. The sender for the controller MUST be located at a point that will see the hottest water. I had first put in the front near the pump housing. NOT!!! Hot water never will get there if the pump isn't turning!!! Took it all apart and moved the sender to the top of the intake manifold and it works just as advertised.

The one thing to know is you will need to burp the pump housing from a completely dry fill/startup. It may hold air in the top half above the centerline of the inlet pipe. Read the directions they explain how to do this.

Anyway once it was all bled of air the controller came right on at 185F like it was programed to and if you run the fans manually then if they are off the high temp warning light comes right on at about 200F. Flipped on the fans and they pulled the water temp right back to the programed system temp hold value.

So far so good and much better than the mechanical. I Think that the belt driven pumps are a thing of the past. At least in mid engine cars, like ours.
 
Howard,
That pump looks like a good option. Thanks for taking the time to show me your car. Really impressed with how you have thought everything out and the assembly and fabrication you have done. Really top notch. Looking forward to getting mine done so we can play on the tracks together.

Welcome to Texas. Nice place you have there. And I have shop envy for sure. :)

John
 

Howard Jones

Supporter
Here's the latest. I am near the end of the punch list that came from Willows last year. So far I did the electric water pump and a couple of small fixes. The other big things were the brake masters and the exhaust extensions.

The brakes were ok generally but I thought that the peddle effort was too high for my liking. So the fix would be to reduce the size of the master's. I had 3/4 inch piston sizes in it so the next size smaller is 5/8. But another punch list thing was friggin wildwood plastic brake remote reservoir pieces leaking out every possible place it could leak. I gotta tell ya I really tried to make them work but even as cheap as I am I just couldn't stand it anymore. So I replaced all the masters with Tilton like pieces.

They are OPM parts and I got them from Pegasus Racing Parts. They are well made and 2/3's the cost of Tiltons. I then made my own hoses with AN fittings on each end and now no more leaks. I should have done this the first time.

The other thing was the mufflers were fine but they didn't really leave the bodywork and exhaust crap was all over the back of the wing mount and other stuff. So I added some tubing to the mufflers to correct this. It doesn't look like much but this was really a difficult thing to do because I wanted to be able to remove the mufflers without taking the whole back of the car apart. After quite a lot of cardboard and hot glue I finally found a was to get the extensions on AND be able to take the mufflers off the car without removing anything else.

Here's some pictures.

I will offer the old brake masters and assorted pieces to the group. If you feel the need contact me and we can get them to you cheap! I have:

2ea 3/4" piston
2ea 7/8" piston
1ea 1" piston
a bunch of reservoirs hose and plastic stuff.
 

Attachments

  • HPIM2295.jpg
    HPIM2295.jpg
    116.2 KB · Views: 409
  • HPIM2296.jpg
    HPIM2296.jpg
    176.8 KB · Views: 397
  • HPIM2297.jpg
    HPIM2297.jpg
    156.9 KB · Views: 420
  • HPIM2298.jpg
    HPIM2298.jpg
    170.8 KB · Views: 420
  • HPIM2300.jpg
    HPIM2300.jpg
    141.5 KB · Views: 420
  • HPIM2301.jpg
    HPIM2301.jpg
    146 KB · Views: 421
  • HPIM2302.jpg
    HPIM2302.jpg
    167.6 KB · Views: 399
  • HPIM2303.jpg
    HPIM2303.jpg
    121.1 KB · Views: 413
  • HPIM2299.jpg
    HPIM2299.jpg
    138.3 KB · Views: 427

Howard Jones

Supporter
I moved the inlet to radiator (hot coolant from engine) to the top from the bottom. I could not see where it was a good idea to have both inlet and out lets at the bottom so I moved the hot side to the top and left the cooled water outlet at the bottom. Now the water must flow the full height across the radiator. I think that it was marginally flowing mostly across the bottom and leaving a hot zone at the top before.

I also added the linked washers to the CV joints, applied the removable (blue) lock tight, and torqued to 58 foot pounds in 3 steps, 20,40,58.

I also had previously changed the master cylinders from 3/4 to 5/8 diameter pistons along with cleaning up the plumbing and adding a tilton 3 pot reservoir. See post above.

Then I went to a local track yesterday and ran the car. The track is Harris Hill in San Marcos Tx. It's a nice little club track with really nice people. I was invited to run the SLC there when I was there with the Texas Cobra Club a few months ago. With their limited budget its a bit bumpy and I couldn't really go much faster than holding a steady 60-80mph around the track, but I did get in some useful laps.

So............the brakes are quite a bit better. I now don't have to push the peddle through the floor to stop the car. The smaller MC's did add just a bit more travel but that's normal when reducing MC size. Still good just a bit more travel. I would say from 1/2 to 3/4 inch to about 1 1/2 inches. I couldn't really get the brakes or tires hot but I can tell that I improved the system from the 3/4 MC's

This is just about all that can be done with out changing the calipers. To get more clamping force the caliper pistons would need to increase piston area. I don't think this will be necessary because I have relatively low friction coefficient pads on the car. I might start changing them out as I get the car out to a track that is faster.

I will try and post the calculator sheets that I have used to get to this point. But the basic setup is:

F MC = 5/8
R MC = 5/8
F caliper = 1.62, 1.12, 1.12, 6 pot
R caliper = 1.25, 1.25, 4 pot

F rotor = 13 X 1.25 two piece wilwood
R rotor = 12.88 X 1.25 two piece wildwood

Cooling. Better but not done yet. Water temps continue to climb to about 245-250F (air temp was 100F) with fans held off while running laps. Turning on fans from the beginning of the second session dropped the temp to about 235-240F.

The problem is I am experiencing water being pumped out of the system into the overflow tank and then out of the car as it fills. I am pretty sure this is related to having the expansion tank inlet hose on the hot side of the system at the engine outlet. This happened when I moved the electric pump to the front of the car. I can either run a line down the side pod to the cool side of the radiator before the pump inlet or move the pump back into the rear of the car to the spot where I have the oil/water heat exchanger and relocate the expansion tank line. This will require a new oil cooler and it's location mounting etc.

I also am thinking about the extra heat load to the coolant system that is the result of the oil/water heat exchanger dumping the oil heat into the water. Maybe that wasn't as slick of an idea as I once thought. Around and around we go....ea?

I am going to do some thinking on this one, but I don't think it is a coolant volume issue. It may come down to the radiator fan system or the radiator itself.

CV joints held up, no problem on quite a bucking bronco track.
 

Attachments

  • HPIM2309r.JPG
    HPIM2309r.JPG
    131.4 KB · Views: 384
  • HPIM2310r.JPG
    HPIM2310r.JPG
    150.9 KB · Views: 383
  • HPIM2311r.JPG
    HPIM2311r.JPG
    160.9 KB · Views: 351
  • HPIM2308r.JPG
    HPIM2308r.JPG
    101.5 KB · Views: 365
Last edited:

Howard Jones

Supporter
Here are the brake calculator work sheets. The first one is for my SLC and the second is what I think is used for the current Camaro caliper version. I used a few fixed variables so that comparison's can be made "apple to apple"

1. leg force = 100lbs, that's quite a lot and something like 50 to 60 is about normal I think.
2. weights F&R = F1000 R1500
3. center of gravity = 12 inches, that's my guess after really looking at the car. 12"s puts it at about the centerline of the crank.
4. F&R tire dia.= F27" R28"
5. wheelbase = 102"
6. pad Mu = .45, this is a street/performance pad friction coefficient value.
7. target deceleration = 1G
8. brake adjustment offset = none or 0, this would be with the bias bar set to center.

What I am trying to do is get torque values front and rear high enough to stop the car in a linear manner as foot pressure is applied. Not lock up all for corners as soon as I touch the brake peddle. The interesting thing is the model target torque number and the calculated torque numbers are very different, with what I ended up with being nearly double the "required" number. This carried over in a proportionally manner regardless of the part selection. I don't know why.

The MC, caliper, rotors, pads values in the SLC24 model are what is on my car now and with the experience of the limited track session I did the other day I think I am pretty close with the exception of pad selection. More than likely I will end up with a much higher Mu pad in the .6 -.7 range.

So that's what I have got. If you want to do your own math I include the link to the calculator.

Dual Bias Calc.
 

Attachments

  • slc24 brake setup.pdf
    502.2 KB · Views: 343
  • slc oem brake setup.pdf
    502.5 KB · Views: 318
Last edited:

Howard Jones

Supporter
I have the worksheet for my GT40. It's a GTD with the original peddle vacuum system and the master is a tandem 5/8 diameter MC. With the 4.5 to 1 assisted system equivalent to the 6.6 to 1 Tilton floor mount peddle in my SLC you can see the comparison.

This car has been my target as the brakes work perfect.
 

Attachments

  • gt40 brake info.pdf
    502.2 KB · Views: 355

Howard Jones

Supporter
After thinking about the cooling issue for awhile I decided to move the pump to the more common location that I have seen these pumps used. At the same time I took out the water to oil heat exchanger and put the water pump in it's previous location. I also added a 3/4 inch diameter restrictor in place of the thermostat to build a bit of pressure in the system. That's something I read somewhere.

This motor will certainly need a oil cooler so I added one along side the engine in front of the driver side air scoop. At this point the engine bay space is pretty much used up. I still need to add so ducting for the air in and out of the cooler but for now I need to run some tests.

Here's some pictures.
 

Attachments

  • HPIM2312r.JPG
    HPIM2312r.JPG
    124.6 KB · Views: 391
  • HPIM2313r.JPG
    HPIM2313r.JPG
    106.3 KB · Views: 382
  • HPIM2314r.JPG
    HPIM2314r.JPG
    157.8 KB · Views: 364
  • HPIM2315r.JPG
    HPIM2315r.JPG
    123.6 KB · Views: 395
  • HPIM2316r.JPG
    HPIM2316r.JPG
    165.1 KB · Views: 382

Howard Jones

Supporter
So after some driving around and thinking I have come to the conclusion that the OEM radiator is marginal for my application. I also have not seen a race only version of a SLC with a OEM radiator installed. So...............I started looking at a new radiator and decided on C&R Racing.

After a few calls I just send my old one to them and then called back to talk about it. Their engineering department is in Indianapolis and I went over what I was doing with them. First the oem radiator while Ok is made out of a low cost core used quite often for hot rod type stuff. It's ok but could be improved on. So I had them make me a radiator that fits in the same area but would be as thermally efficient as possible.

Not cheap but I got a part number, customer number and a drawing so I can order a new one without any fuss in the future.

I also worked on the nose a bit to seal the ducting to the radiator to prevent spillage as much as possible along with removing the restrictions in the fan system. The only thing left to do now to improve airflow through the radiator would be to remove the fans all together or cut a bigger hole in the "hood" or both.

I have signed up for a two day track event at MRS Houston in December so time will tell.

Here's some pictures. The 1st is a little bit of alum to seal the bottom of the inlets at the sides. The next ones are the new radiator and it's installation. And the last two are a little bit of fiberglass work to prevent air from spilling over the top of the radiator.
 

Attachments

  • a001.JPG
    a001.JPG
    196.1 KB · Views: 341
  • a002.JPG
    a002.JPG
    143.7 KB · Views: 366
  • a003.JPG
    a003.JPG
    135.9 KB · Views: 385
  • a004.JPG
    a004.JPG
    107.2 KB · Views: 369
  • a005.JPG
    a005.JPG
    140.5 KB · Views: 412
  • a006.JPG
    a006.JPG
    127 KB · Views: 340
Last edited:
Dear Howard:

Here are a couple of articles from the website Mulsanne's Corner (www.mulsannescorner.com), a site dedicated to sports car design. These articles have to do with wing and endplate design.

1. CFD Analysis of Endplate Effect (Text and images copyright Emanuele Brandimarti and Cornelis van Steenbergen)
Mulsanne's Corner: CFD Analysis of endplate effect

"Applying small endplates will thus result in an increase in the lift generated by the wing by 7%."

2. Wing Endplate Depth
(Images copyright Juha Kivekas, Text copyright Michael J. Fuller)
Mulsanne's Corner: Wind Endplate Depth

"Wing endplates act as span increase aerodynamically. That is, in general terms, a wing with an endplate is equal to a wider wing with out one."

Audi-JK3.jpg

Audi endplate

Both articles give lots of mathematics to figure out how big you want your wing and endplates to be. I hope this helps.

Bassanio et Portia :)
Simply awesome! great links, thank you!
 

Howard Jones

Supporter
Here's some more recent pictures of the electric pump install and other plumbing of the bleed system on the engine. Also a couple of sorta overall engine room pictures.
 

Attachments

  • HPIM2324.JPG
    HPIM2324.JPG
    75.7 KB · Views: 316
  • HPIM2329.JPG
    HPIM2329.JPG
    72.8 KB · Views: 313
  • HPIM2330.JPG
    HPIM2330.JPG
    73.6 KB · Views: 299
  • HPIM2331.JPG
    HPIM2331.JPG
    40.5 KB · Views: 283
  • HPIM2332.JPG
    HPIM2332.JPG
    66.6 KB · Views: 295
  • HPIM2333.JPG
    HPIM2333.JPG
    45.1 KB · Views: 274
  • HPIM2334.JPG
    HPIM2334.JPG
    72.8 KB · Views: 284
Back
Top