Transaxle mounting

Ken Roberts

Supporter
Than maybe its use should be omitted from the build manual. Every Ricardo build log seems to be using it. Kinda odd why this is being mentioned now.

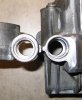
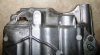
The above mentioned transmissions and transaxles were designed with those particular number of mounting points. The Super T10 and Muncie are held with 4 bolts to the bell housing but we are talking about the mounting from the bell housing to the engine. The Ricardo was designed to be mounted with 8. Plus the fact that it weighs nearly 30lbs more than most. It just bothers me to use less than what it was designed for. I think this is a typical "ALEX" moment for me. (over thinking things)
 
Last edited:
The three mount system can cause the bellhousing to crack in the most severe of cases...as Jac eluded to.

So why does Ricardo have 3 mount setup? I imagine it needs it because w/o it the darn thing sinks down and back and I can't imagine tat's a good thing in the long-term....i could install my alloy t5 by myself with no problems, but this heavy bugger needed the bloody engine hoist to get it moving around
 
I agree...must be a Canadian trait...

Its your car and you are free to do whatever you want obviously , Alex...whoops....:thumbsup:....

On my personal LS7 /Ricardo SLC , I used one small tab 1/8th steel tab and one 3/8th bolt as a "helper" for hanging the drivetrain in the car but never used a transaxle mount...I did mount a small piece of Delron under the trans on the chassis rail as a bump stop type arrangement but it was never a mount and I dont recall it ever seeing any wear....

The Ford GT uses a large mount on the trans and a pair on the engine....no middle mount at the bellhousing...this longer moment arm actually creates a lot more bending potential at the block/bellhousing interface than using 4/5 bolts and cantilevering the transaxle does.

Cantilevering the trans the bending moment is now the axle shaft output flange, which is much closer to the block/bellhousing and its torque/moment effect is reduced even further by the slip of the wheels/tyres...

Porsche/VW has built far more transaxle cars than anyone else on the planet and the majority are 4 bolt attachments to the engine block...

The transaxle mounting system we use at RCR has been discussed before, in much the same way and that was many years ago and also many car builds and track miles ago too...as with anything in life YRMV...but I stand by my thought process and will continue to do it this way.
 
Last edited:
I am thinking you fellows are talking solid mount only. If I hadn't added the rear mount to my Ricardo the rubber mounts in my adapter plate would have squeezed right out of the holes it is fricken heavy. I don't think anyone using a rubber mounted set up will have to worry about stress the top mount on the transaxle will still allow rotation on the center line so long as it rubber mounted.
 

Ken Roberts

Supporter
This is a contradiction. In the RCR SLC build manual it's shown being used but you say it's best not to use it. Good thing I haven't welded my 3rd mount to the X brace yet. WHEW!
 
I recommend solid mounts especially when using the LS based engine package, I have always done so.......the Chevy engines are incredilbly smooth and create almost zero buzz. through the engine and trans mounts.(adapter plate)

The build manual shows a soft mounting example should anyone want to go that route...the manual also states thats any items shown are examples and are not the only one way that anything can be done.

Just because something is shown in the manual , does not automatically mean its the only way to be done or that I completely agree with the method shown.
We often bow to customer pressure and offer a solution or an idea for its execution...such as a center console with cup holders....not exactly what I had in mind when designing the SLC but they are available all the same...so there you have it.....or a 917 with a Chevy engine....or an RCR40 with an LS7, RCRP4 with a SBF...not my idea of Nirvana but all have been done more than once...
 
Last edited:

Randy V

Moderator-Admin
Staff member
Admin
Lifetime Supporter
I feel I must say something to somewhat defend the position I took with the competition support bracket system I built.

If you look in the MOUNTS section of my blog, you'll see some of what I did to ensure the proper engine position as well as secure mounting of the engine and the transaxle. The ENGINE ADAPTER section shows the rear mounting bosses of the engine adapter. These bosses have hard plastic/nylon/delrin Bushings which were to be held firmly in place by 1/2" diameter bolts. The engine mounts themselves are a poly mount.
DRIVELINE Master album

Now, if you look through some of the other pages, you will see that the G50 transaxle hangs on 4 very long studs that are only 10mm in diameter and have relatively shallow threads into the engine adapter. I don't have a measurement of the length of the studs handy, but they are long enough to pass all the way through the bellhousing and starter mount. Roughly 8" I would say. I felt that under competition or hard track use, that these threads could pull or the studs could stretch.
I simply did not want to take that chance.

Now for referencing T10 transmissions and their four bolts. The T10 that bolts into my Trans-Am car is held in place with 4 - 2-1/2" long 7/16" bolts. These are substantially beefier than the Porsche studs. Also the T10 uses a tailshaft housing mount.

Well, that's my story and I'm sticking to it... :)
 
Alex r confused still :(

My cage came w/ the mount installed already ... is it safe to use it for street driving w/o fear of cracking something? Cam's hasn't cracked so I'm thinking I may be safe since he tends to break everything, hmmmmm.
 
We can all agreee to disagree...

there are some smart guys on this forum and most of us seem to be able to appreciate others opinions and points of view...I certainly dont always agree with the choices that my customers make but as the cars we manufacture are their dream as much as mine, who am I to shoot down their ideas (unless I see something that is downright dangerous of course)

In short...do what makes you feel warm and fuzzy about your choice and if it breaks then so be it and if it doesn't then you need to drive harder until it does....:lipsrsealed:

I know where I stand and I will continue to manufacture and race what I design...I cannot be any more fair,objective or diligent than that ....and currently having won a national championship with the said design I feel quite justified in continuing to do so...

Alex you have a similar hanger as I described earlier from my own car ,...you will be fine as is...a one bolt point of attachment does not constitute a mount per se , in the case of a Ricardo transaxle mount.
 
Last edited:

Dave Lindemann

Lifetime Supporter
Time may prove that I made a mistake but my plan is to solid mount the LS3, adapter plate, and top of the Ricardo (using RCR supplied tabs and mounting plate) to the chassis.......someday, when I get to that point ;-)
Dave L
 
who am I to shoot down their ideas (unless I see something that is downright dangerous of course)

Hmmm :idea::idea::idea:

23247069-997-565-Kasse-Big-Block-Ford-Engine.jpg


+

porsche01_1439719i.jpg


Ehehehehehehehehe :devilish:
 
I feel I must say something to somewhat defend the position I took with the competition support bracket system I built.

If you look in the MOUNTS section of my blog, you'll see some of what I did to ensure the proper engine position as well as secure mounting of the engine and the transaxle. The ENGINE ADAPTER section shows the rear mounting bosses of the engine adapter. These bosses have hard plastic/nylon/delrin Bushings which were to be held firmly in place by 1/2" diameter bolts. The engine mounts themselves are a poly mount.
DRIVELINE Master album

Now, if you look through some of the other pages, you will see that the G50 transaxle hangs on 4 very long studs that are only 10mm in diameter and have relatively shallow threads into the engine adapter. I don't have a measurement of the length of the studs handy, but they are long enough to pass all the way through the bellhousing and starter mount. Roughly 8" I would say. I felt that under competition or hard track use, that these threads could pull or the studs could stretch.
I simply did not want to take that chance.

Now for referencing T10 transmissions and their four bolts. The T10 that bolts into my Trans-Am car is held in place with 4 - 2-1/2" long 7/16" bolts. These are substantially beefier than the Porsche studs. Also the T10 uses a tailshaft housing mount.

Well, that's my story and I'm sticking to it... :)

Bigfoot,

Your GT-Forty build blog is a great site! I time-warped and lost about 2 hours in there. It was particularly informative about the G50 tail shortening (with no welding), the cable shift modifications, G50 clutch fork installation and front clam tilt mechanism.
 

Randy V

Moderator-Admin
Staff member
Admin
Lifetime Supporter
Thanks Bill... Glad you found it informative.. One day I will be able to take the time to bring it current as it's been more than a year...
 
Bigfoot,

The instructions in your blog were so good on how to shroten the G50 tail case, that I'm considering doing the surgery myself!

Bigfoot shortened his case 2.75" to fit the GT40. Can I ask someone to measure how long a "shortened" case is in their SLC?


Blog Ref: GT-Forty.com
 

Randy V

Moderator-Admin
Staff member
Admin
Lifetime Supporter
Glad you liked it Bill.

Direct link here:
Transaxle & clutch

One thing though.. I was not set up with my mill at the time so I did have to have a local machine shop rebore the shifter shaft hole for the linear bearing and seal.. I think that cost me something like $30 for 30 mins time (their min charge)..
 
Yup exactly, I will do all the cutting and let a machine shop drill the releif for the bearing.

Also, Did you reuse the bearing or did you buy a replacement?
 
How to shorten a G50 6 Speed

I finished shortening my G50/20 6 Speed.

After I cut the case, I took it to a local machine shop to get a 2 step bore for the linear bearing and seal.

The seal has a “Press” fit that exerts a fair amount of pressure on the surrounding aluminum when pressed into place. After the cut, the aluminum case that surrounds the seal is a bit thinner than the original. To reduce the stress on the thinner aluminum, increase the seal’s bore .001” - .002” (I.E from .949” to .950” of .0951”). This provides a “Bump” fit which means the seal fits snuggly, but does not require a press or hammer to insert it. The linear bearing should remain a Press fit.

The end result is a nearly square cut with the end of the case. The final length of the shortened case is 7 ¼”. I finished it off by grinding down the cut lines for a more OEM look.

I struggled trying to find information on how to shorten the the G50 tail case. So I trolled this forum and other forums/blogs to understand exactly what to do. My apprehension was compounded by the anxiety of cutting into a transaxle that cost more than a used Corolla. Here is a 16 page document below with the information I collected on shortening 5 speed and 6 speed transaxles. I hope you fine these instructions helpful -> https://docs.google.com/open?id=0B2mA517zVglRTHlDZ2c5NUFNb0U
 

Attachments

  • IMG_2761.jpg
    IMG_2761.jpg
    107.9 KB · Views: 243
  • IMG_2763.jpg
    IMG_2763.jpg
    228.7 KB · Views: 235
  • IMG_2762.jpg
    IMG_2762.jpg
    159.6 KB · Views: 230
Last edited:

Randy V

Moderator-Admin
Staff member
Admin
Lifetime Supporter
Bill, I was curious about the document, but evidently it is locked down so no one can access it.. Glad you got all the machine work done and it does look factory fresh now!
 
Back
Top