M6B Tragic

Terry Oxandale

Skinny Man
Loved this build Udo. One question if you would indulge me. Do you have any photos or drawing you would share of how you affixed the roll hoop in place? I've studied the few photos that include that part of where the hoop joins the chassis behind the seat area, but not sure what I'm looking at.

Thanks,
Terry
 
Nice improvement.
It seems early Mclaren can-am cars had an unusual/unnecessary amount of wheel arch above the tire. This was not only in the opening as you have addressed but, in the arch of the fender itself. IIRC Penske additionally shaved down the top of their fenders, which made the front of the car more 'pointy'.
 
That's a seriously tuff car your are building Udo.

I bet you cant wait for it to be finished and finally get behind the wheel.
 
Thanks guys for the compliments. I'm glad you like the new look. You're right Mesa.
Michel, luckily we don't have much of a problem here in the Northern Territory with the China Virus, The same as Ricky in W.A., we just have to keep the southerners out. It must be a real concern in Europe, U.K. and the States. Probably a lot of the rest of the world too, but the media seems to concentrate on those areas mainly. Thanks for your best wishes, and you and your family have a safe 2021 also.
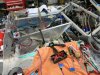
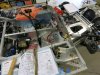
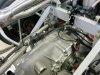
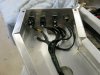
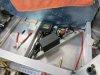
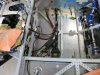
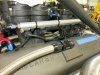
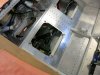
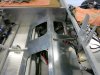
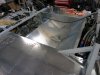
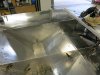
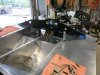
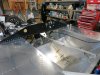
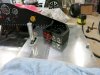
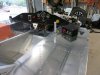
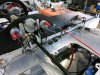
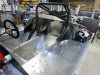
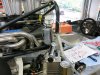
Terry, I made two rear bulk head towers up ( for lack of a better description ) out of 40mm which I reinforced with various gusseting. they were to pick up the front of the rear suspension with three alternate points. at the top I welded a square plate to take the 40mm Chrome Moly Tube which was also welded onto it. I know I have some photos of those when I made them, I'll have to look for them. In the mean time, if you look at page 6 near the bottom, there's image 1486, also Page 7, image 1519 you can sort of see them there. I'll get back to you.
 

Terry Oxandale

Skinny Man
Thanks Udo. My query was about the front mounting of the hoop. It appears you have two "shear" bolts per side? Does the hoop slide down into a larger square tube and then use through-bolts to attach it?
 
Hi Terry, I see what you mean now. The hoop is welded on to the top of the two towers. The two bolt holes you mention are there to take a separate brace that strengthens that open space up and the race harnesses fix onto it. Have a look at page 6 again, and there are some close up photos my mate Clayton put on there. About the fourth one down there is a good clear close up photo of the brace and you can see the bolts either side that you mentioned.
Hope that's what you meant.
Regards, Udo.
 
Hi Udo,
Happy New Year, we are very lucky to be in the position our locations have allowed us with this darn Virus. Love the new posts you have shared and as always the workmanship is superb. I have all but finished my car now and its going to a show next weekend so we'll see how it goes and then it will have its first outing at the Skope Classic in ChCh at the start of Feb. I need to put up some photos too.
keep up the work I look forward to your Photos.

Cheers Leon.
 
Good to hear from you Leon. Happy New year to you too.
Looking forward to seeing some photos. I was at the Skope Classic the same year they had the earth quake. We actually felt tremors while we were there and the earthquake happened a day or two after we left. It was a great event and I took some photos of an M12 that was there. Story goes that the guy who owns it, bought it from a restaurant owner in Japan who had it on display in his restaurant. Do you know if that's true?
Regards, Udo.
 
Yes Udo I have heard that same story from reliable friends in the Know. I have just walked in the door after 3 days up in Auckland at the Kumeu show the car got a lot of attention and was good to see it out for the first time. We have decided that there isn't enough time to get it properly ready to do the ChCh event mores the pity but it would be disappointing to tow it all the way there to have it fail in front of a big crowd at its first run so we will take our time and test it properly before we go in front of lots of people.
 
We have decided that there isn't enough time to get it properly ready to do the ChCh event

I think that's a good call Leon. When I got the M1 going it ran well but had transaxle oil breather niggles that resulted in it puking oil everywhere and was was far from OK in the chassis set-up/handling department. Took a full couple of test days and a month or so of fettling in between before we ran acceptably in anger.

Cheers, Andrew
I agree with Andrew Leon, Best to get it sorted out with a few test and tune days at the track before getting in amongst the other track cars.

You're way ahead of me though. I just finished sorting electricals. I hate the stuff because I don't understand it. My good friend Clayton came to the rescue again and showed me the way. I now know what a lot of stuff does, how to crimp, splice, terminate, sheath, heat shrink, you name it.
I've been taught by the best. Even finished it off by myself in the end. All the depinning, and sorting out of the computer stuff was Clayton's Department. I have become dangerous enough as it is.
 

Attachments

  • IMG_2128.JPG
    IMG_2128.JPG
    497.5 KB · Views: 373
  • IMG_2130.JPG
    IMG_2130.JPG
    479.4 KB · Views: 371
  • IMG_2169.JPG
    IMG_2169.JPG
    407.4 KB · Views: 348
  • IMG_2170.JPG
    IMG_2170.JPG
    332.8 KB · Views: 320
  • IMG_2171.JPG
    IMG_2171.JPG
    303 KB · Views: 339
  • IMG_2172.JPG
    IMG_2172.JPG
    311.2 KB · Views: 325
  • IMG_2178.JPG
    IMG_2178.JPG
    382.3 KB · Views: 335
  • IMG_2179.JPG
    IMG_2179.JPG
    280.1 KB · Views: 311
  • IMG_2180.JPG
    IMG_2180.JPG
    408.8 KB · Views: 308
  • IMG_2181.JPG
    IMG_2181.JPG
    347.4 KB · Views: 358
Now I can start fitting all the panelling, making sure it all fits over the electrical components and hides them away. Also making a start on completing the dash. a step closer every time. Next step is to tackle the battery box and trolley.
 

Attachments

  • IMG_2185.JPG
    IMG_2185.JPG
    349.8 KB · Views: 342
  • IMG_2187.JPG
    IMG_2187.JPG
    326.1 KB · Views: 339
  • IMG_2188.JPG
    IMG_2188.JPG
    313.4 KB · Views: 347
  • IMG_2193.JPG
    IMG_2193.JPG
    378.1 KB · Views: 349
  • IMG_2194.JPG
    IMG_2194.JPG
    375.3 KB · Views: 345
  • IMG_2199.JPG
    IMG_2199.JPG
    324 KB · Views: 348
  • IMG_2203.JPG
    IMG_2203.JPG
    324.1 KB · Views: 375
Thanks for the compliments Andy and Rex.
Clayton, sorry mate, I'll be off camping at the Douglas Daly on Sunday. I'll give you a call.
Regards, Udo.
 
Hi Udo, ditto what Andy said, you really do keep the standard high. The electrical stuff is something I don't do well, thank the lord I only have 1 x 4 core cable running through the car and that is the ignition switch, starter button, rain light that's it. I love mechanical gauges and injection so simple. I have now filled the trans with oil, oil and water in the engine and fitted the Battery just tonight so we are looking at a test run on stands in the next few days and then I'll take it to the dyno to run it under some load to see what breaks or leaks, so we are close.

Cheers Leon
 
Hi Guys, I haven't been doing much on the car lately.
We decided to sell our property and move in a bit closer to civilization. Plus a much smaller and easier to clean and maintain house. We finally found something and snapped it up quick, but it only had a 4.0m X 4.0m shed on it. Good enough to park the mower.
Put our house on the Market and it sold that day, so we scrambled to move. Which meant pack up the McLaren and put it in storage at our workshop.
As you can see in the pictures, I made a battery box and reinforced the floor with some 2mm Stainless steel, tidied up the back of the dash, pressure tested the cooling system, painted the seat and put a series of solid rivets in the side panels to make them look monocoque.
Then throw bodywork on and trailer to work.
 

Attachments

  • IMG_2206.JPG
    IMG_2206.JPG
    366.7 KB · Views: 202
  • IMG_2209.JPG
    IMG_2209.JPG
    280.9 KB · Views: 228
  • IMG_2227.JPG
    IMG_2227.JPG
    398.3 KB · Views: 216
  • IMG_2238.JPG
    IMG_2238.JPG
    378.9 KB · Views: 221
  • IMG_2232.JPG
    IMG_2232.JPG
    431.1 KB · Views: 228
  • IMG_2255.JPG
    IMG_2255.JPG
    339 KB · Views: 249
  • IMG_2256.JPG
    IMG_2256.JPG
    323.9 KB · Views: 238
  • IMG_2262.JPG
    IMG_2262.JPG
    324.5 KB · Views: 264
Back
Top