TY for the input. I will look over those options... amazing technology no doubt.

- Forums
- GT40 Replica Manufacturers' Corner
- RCR Forum - RCR40/SLC/917/Superlite Aero
- The SLC Clubhouse
You are using an out of date browser. It may not display this or other websites correctly.
You should upgrade or use an alternative browser.
You should upgrade or use an alternative browser.
Fling SLC Build Thread
- Thread starter mcfling
- Start date
Fran expressed concerns about my rear wing mount connecting to the bar under the hinges (the bar connects to the hinges), and not connecting directly to the chassis. If the forces were directly transferred to the chassis, that would be better.... So, here is what I came up with...
I had brackets fabricated that are bolted directly to the rear hinge/chassis. The vertical uprights are extended to the new brackets. This is very rigid. The upper "U" shaped bracket that I previously posted (which tucks under my cold air box) will be mounted to provide even more lateral stability. I also extended the height of the vertical uprights to set the wing slightly higher.


I had brackets fabricated that are bolted directly to the rear hinge/chassis. The vertical uprights are extended to the new brackets. This is very rigid. The upper "U" shaped bracket that I previously posted (which tucks under my cold air box) will be mounted to provide even more lateral stability. I also extended the height of the vertical uprights to set the wing slightly higher.
Accomplished a few things...
Got the Vintage Air controls fitted. The ECV was put into the 3rd knob position and the existing thermostat was fitted into position 4. I also got the new air vents from Vintage:


Now that the rear wing assembly is complete, I fabricated a diffuser that covers the rear of the transaxial. The Graz required that the inside bar on the street tail be sectioned resulting in weakness. I incorporated another bar that is on the outside of the body that is bolted to the sectioned inside bar. This outside 1 piece bar is encapsulated inside the fiberglass of the new diffuser.
Inside sectioned bar:

Outside bar inside fiberglass:

Diffuser:


The new roof air inlet is ready for bodywork. The exterior piece is fitted along with a fiberglass tunnel that directs air back to the engine bay. (Adjustable air vents will allow bleed air from this tunnel into the cabin also).


Lastly, I test fit the frames I had fabricated for the rear vent area. They are made to have the Spal fans mounted to them on the inside...

Got the Vintage Air controls fitted. The ECV was put into the 3rd knob position and the existing thermostat was fitted into position 4. I also got the new air vents from Vintage:
Now that the rear wing assembly is complete, I fabricated a diffuser that covers the rear of the transaxial. The Graz required that the inside bar on the street tail be sectioned resulting in weakness. I incorporated another bar that is on the outside of the body that is bolted to the sectioned inside bar. This outside 1 piece bar is encapsulated inside the fiberglass of the new diffuser.
Inside sectioned bar:
Outside bar inside fiberglass:
Diffuser:
The new roof air inlet is ready for bodywork. The exterior piece is fitted along with a fiberglass tunnel that directs air back to the engine bay. (Adjustable air vents will allow bleed air from this tunnel into the cabin also).
Lastly, I test fit the frames I had fabricated for the rear vent area. They are made to have the Spal fans mounted to them on the inside...
Looks good! I really like the vents and the roof inlet.
I returned from a trip to Atlanta to visit my son. He and I have been connected at the hip since he was born (racing almost every weekend it seemed)... So, while I really miss him, I am soooo happy that he has a job he really loves!


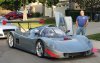
The new $100 million dollar North American Porsche Headquarters is now open for business. The building is amazing and there is so much eye candy there.


I was the first retail customer on track, with my son as my coach. Imagine him telling me what to do! He did a fantastic job. I drove a GT3 and a Turbo 911 for 11/2 hours. We drove them hard. I had never experienced "Launch Control" from a Turbo 911. My almost exact words were " You have to be freakin' kidding me?". It was amazing. The PDK is amazing too. There are a host of things you can do on track... kick plate, drift pad, off camber turning act. We mostly did the go fast stuff. For $100, insurance protects you with only $2000 liability. Good news for one guy who had a 180 degree spin in a GT3 on his first lap and damaged a $8600 carbon fiber splitter.

They have a restoration shop, a restaurant, a gift shop etc. The cost is very reasonable. You can track a Boxster for $300ish or a GT3 for $700ish.
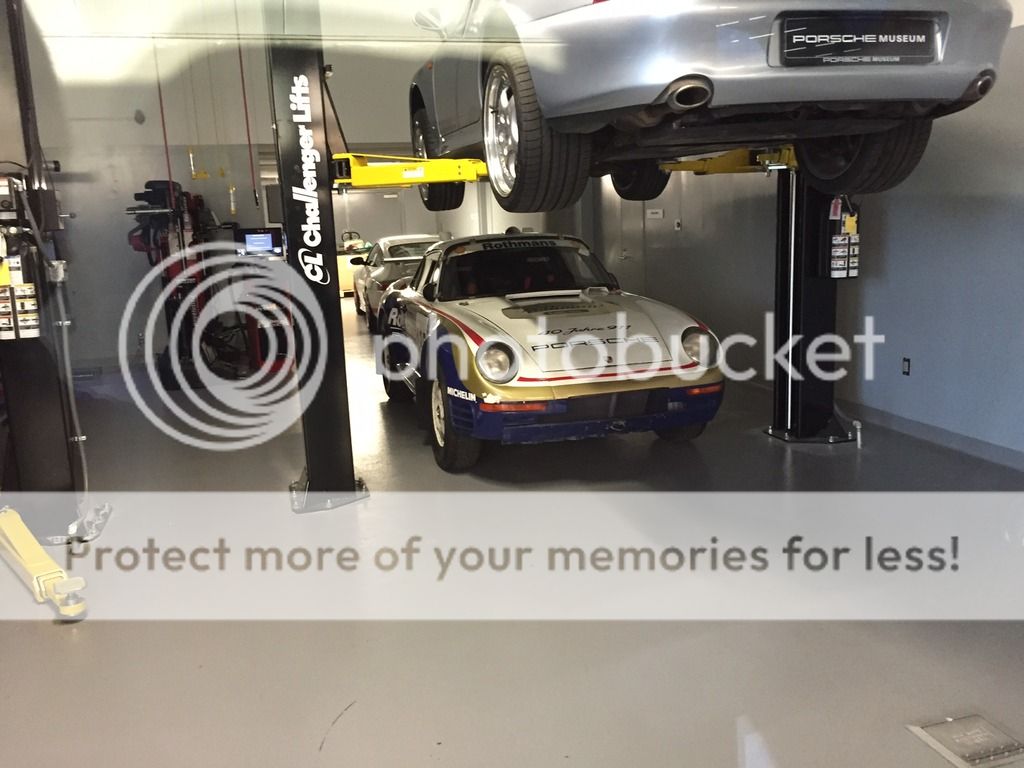
Make a trip to Atlanta and the PEC (Porsche Experience Center). If you go to drive, be sure to request Tyler as your driver/coach. He has tons of driving experience and I promise that you will NOT be disappointed.
BTW- Once/month they will allow any car on track. My SLC will be there next year.
The new $100 million dollar North American Porsche Headquarters is now open for business. The building is amazing and there is so much eye candy there.
I was the first retail customer on track, with my son as my coach. Imagine him telling me what to do! He did a fantastic job. I drove a GT3 and a Turbo 911 for 11/2 hours. We drove them hard. I had never experienced "Launch Control" from a Turbo 911. My almost exact words were " You have to be freakin' kidding me?". It was amazing. The PDK is amazing too. There are a host of things you can do on track... kick plate, drift pad, off camber turning act. We mostly did the go fast stuff. For $100, insurance protects you with only $2000 liability. Good news for one guy who had a 180 degree spin in a GT3 on his first lap and damaged a $8600 carbon fiber splitter.
They have a restoration shop, a restaurant, a gift shop etc. The cost is very reasonable. You can track a Boxster for $300ish or a GT3 for $700ish.
Make a trip to Atlanta and the PEC (Porsche Experience Center). If you go to drive, be sure to request Tyler as your driver/coach. He has tons of driving experience and I promise that you will NOT be disappointed.
BTW- Once/month they will allow any car on track. My SLC will be there next year.
I was thinking of a way to make my seats recline and it turns out the solution I settled on is pretty much what you talked about doing (pins for the forward seat attach point). Did that concept work out? And what size bolts did you use to secure the seat to the floor?
I'm really enjoying your build log. We are doing many of the same things and it helps tremendously looking at what you did. Plus you're way ahead of me so I don't have to wait for updates :laugh:
A.J.
I'm really enjoying your build log. We are doing many of the same things and it helps tremendously looking at what you did. Plus you're way ahead of me so I don't have to wait for updates :laugh:
A.J.
I want a seat that allows the back to recline so that my wife can drive the car too.
I have been working with a company to develop a prototype that accepts 5 point and reclines. It has a slider for front/back adjustment, but that runs into the interior tub. So it will just recline. It is back at the manufacturer having a few adjustments to allow even lower seating. Once I give the final approval, it can be ordered in various colors and Fran said we can even include the SLC logo. Stay tuned...

I have been working with a company to develop a prototype that accepts 5 point and reclines. It has a slider for front/back adjustment, but that runs into the interior tub. So it will just recline. It is back at the manufacturer having a few adjustments to allow even lower seating. Once I give the final approval, it can be ordered in various colors and Fran said we can even include the SLC logo. Stay tuned...
Fran expressed concerns about my rear wing mount connecting to the bar under the hinges (the bar connects to the hinges), and not connecting directly to the chassis. If the forces were directly transferred to the chassis, that would be better.... So, here is what I came up with...
I had brackets fabricated that are bolted directly to the rear hinge/chassis. The vertical uprights are extended to the new brackets. This is very rigid. The upper "U" shaped bracket that I previously posted (which tucks under my cold air box) will be mounted to provide even more lateral stability. I also extended the height of the vertical uprights to set the wing slightly higher.
Very nice work on your wing support connecting it to the frame, looks like it goes back and gives your gearbox that extra protection in a mild rear end bump moving energy to your frame instead of you prized gearbox.
A few minor things accomplished...
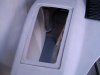
I didn't like the "accessory" and "constant" fuse boxed on the hinges. They could not be accessed well with the dash in place. So i decided to remount them.

This required me to create a glove box...

The glove box door is hinged from the bottom.When open, visibility to the mounted fuse boxes is very accessible...

I have almost finished the rear diffuser fabrication. It was widened and shaped to cover the Graz...


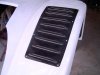
I have added a NACA duct. It will be routed for engine cooling from 1 side and for air to the cold airbox from the other side...

Literally the day before I learned of RCR's new vents for th rear clam, I added these vents for cooling...


I have placed the front fender vents...

I have finished the gross shaping of the from clam/ headlight area. Keep in mind that my clam is hinged for opening/closing. It will be secured to the diffuser. I continued the bodywork in the from center area to give it a different look...


Here are the headlights that will be in the final ones...

I didn't like the "accessory" and "constant" fuse boxed on the hinges. They could not be accessed well with the dash in place. So i decided to remount them.
This required me to create a glove box...
The glove box door is hinged from the bottom.When open, visibility to the mounted fuse boxes is very accessible...
I have almost finished the rear diffuser fabrication. It was widened and shaped to cover the Graz...
I have added a NACA duct. It will be routed for engine cooling from 1 side and for air to the cold airbox from the other side...
Literally the day before I learned of RCR's new vents for th rear clam, I added these vents for cooling...
I have placed the front fender vents...
I have finished the gross shaping of the from clam/ headlight area. Keep in mind that my clam is hinged for opening/closing. It will be secured to the diffuser. I continued the bodywork in the from center area to give it a different look...
Here are the headlights that will be in the final ones...
Nice work, going to look good!
Michael,
I just finished reading your build thread and agree with all the other comments, really nice work! Although I have to say I think you were sandbagging with your early comments about your knowledge limitations.")
I lived in OKC for a few years, and if I'm ever up that way I'd love to meet you and see your car in person.
I just finished reading your build thread and agree with all the other comments, really nice work! Although I have to say I think you were sandbagging with your early comments about your knowledge limitations.
I lived in OKC for a few years, and if I'm ever up that way I'd love to meet you and see your car in person.
http://vid900.photobucket.com/albums/ac206/mcfling/IMG_7318.mp4
Just messing.... pulled the car out of it's cave so it could bake in the sun tomorrow. I have spacers etc. in place. I want it to get a few heat cycles before I start serious body work. I want the body gaps to be perfect. It will take some attention. My daughter thought she was going really fast. I must say it is kind of exciting when it actually starts to look like a car... and sounds like a real car too!
Just messing.... pulled the car out of it's cave so it could bake in the sun tomorrow. I have spacers etc. in place. I want it to get a few heat cycles before I start serious body work. I want the body gaps to be perfect. It will take some attention. My daughter thought she was going really fast. I must say it is kind of exciting when it actually starts to look like a car... and sounds like a real car too!
Very cool video. It looks fantastic and I think your daughter is looking forward to the day you give her the keys for her first drive.
Incredible work Michael. Are those GTM vents in the back window location? The NACA ducts on the rear fenders are fantastic. I've considered that to be an ideal spot for NACA ducts.
Is there an ideal fore/aft location to put the front fender vents? I was thinking of starting mine at the top center of the wheel arch, but I see yours are forward a bit.
A.J.
Is there an ideal fore/aft location to put the front fender vents? I was thinking of starting mine at the top center of the wheel arch, but I see yours are forward a bit.
A.J.
Howard Jones
Supporter
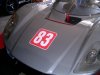
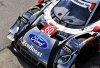
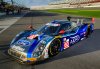
A.J. Airflow in the front wheel well is: under the nose along the bottom of the splitter, into the wheel well, up over and around the tire, and then out the vent and wheel opening and exhaust slot behind the tire. There is also some radiator exhaust air coming into the wheel well from the little triangle openings at the rear of the side vertical radiator supports. I closed these on my car.
The fender top vents are trying to deplete the high pressure zone at the front top of the tire so it is placed to best present the low pressure area on top of the fender to allow air flow through the fender and out of the car decreasing lift and/or improving downforce.
Place the vent with the leading edge on the first vent slot a inch on so ahead of the centerline of the front wheel. Be sure that the trailing end isn't obscured by the center section bodywork when the nose is on the car. The picture on Mikes car above, post #289, is just about right.
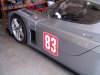
Here's some pictures of mine, the 01 car and other modern prototypes.
The fender top vents are trying to deplete the high pressure zone at the front top of the tire so it is placed to best present the low pressure area on top of the fender to allow air flow through the fender and out of the car decreasing lift and/or improving downforce.
Place the vent with the leading edge on the first vent slot a inch on so ahead of the centerline of the front wheel. Be sure that the trailing end isn't obscured by the center section bodywork when the nose is on the car. The picture on Mikes car above, post #289, is just about right.
Here's some pictures of mine, the 01 car and other modern prototypes.
Attachments
-
 HPIM2072.jpg123.8 KB · Views: 414
 -
 HPIM2073.jpg104 KB · Views: 411
 -
 HPIM2167.jpg161.5 KB · Views: 392
 -
 HPIM2166.jpg136.9 KB · Views: 386
 -
 Superlite_SLC_Green_170-RaceCar_Instagram_Small_FrontCornerFront_zpsjqmllxsg.jpg173.5 KB · Views: 401
 -
 2011-highcroft-racing-hpd-arx-01e-alms-race-car_100344074_m.jpg69.7 KB · Views: 364
 -
 done slc.jpg194.4 KB · Views: 515
 -
 shankdp.jpg288.4 KB · Views: 410
 -
 singlecar14aero_0.jpg870.3 KB · Views: 386
 -
 tusc-daytona-january-test-2014-02-chip-ganassi-racing-riley-dp-ford-ecoboost-tony-kanaan-k.jpg200.5 KB · Views: 415
 -
 tusc-daytona-24-2015-02-chip-ganassi-ford-riley-scott-dixon-kyle-larson-jamie-mcmurray-ton.jpg202.7 KB · Views: 427
Last edited:
Similar threads
- Replies
- 14
- Views
- 2K