Grant's SL-C Build tread

At first I ordered a GT40 but later on discovered the SL-C and it took over my dreams couldn't stop looking at it so needless to say canceled the GT40 and ordered my SL-C Feb 03 2011.
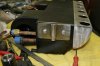
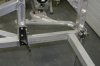
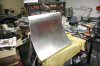
I was gonna wait til I had more completed before I posted anything but what the hay, heres some things I have been up to in the hopes it may help some others along their journey. I may bounce around a bit as I am in mock mode right now and won't be putting anything together for keeps till I have put the whole car together and am happy with everything, then it all comes apart again gets cleaned up, fixed and or changed for its final fit and install ( I hope). Some parts I have already pulled back out and I forgot to take pic's so you will have to wait till I start putting it back together to see what I have done Sorry.

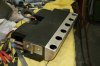
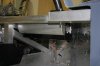
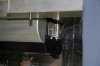
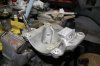
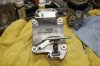
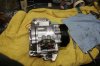
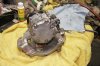
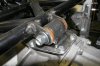
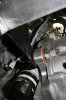
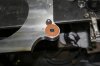
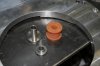
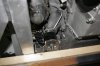
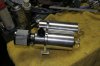
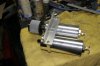
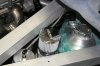
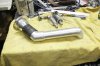
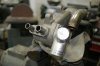
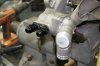
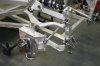
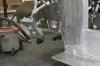
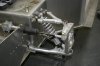
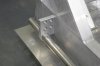
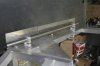
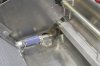
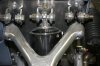
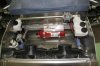
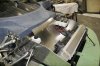
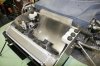
Started like everyone else by blowing it all apart and taking pic's so I could remember how is go's back together.
 

Attachments

  • _MG_5678.jpg
    _MG_5678.jpg
    150.3 KB · Views: 1,066
  • _MG_5677.jpg
    _MG_5677.jpg
    109.5 KB · Views: 991
  • _MG_5681.jpg
    _MG_5681.jpg
    133 KB · Views: 1,044
  • _MG_5693.jpg
    _MG_5693.jpg
    122.2 KB · Views: 954
Next covered the interior with Hush mat and started plumbing the brake line and Stainless cooling lines. Made some custom brackets to hold all the lines in one mount.
 

Attachments

  • _MG_5699.jpg
    _MG_5699.jpg
    89 KB · Views: 987
  • _MG_5702.jpg
    _MG_5702.jpg
    118.8 KB · Views: 995
  • _MG_5703.jpg
    _MG_5703.jpg
    106.3 KB · Views: 1,026
I replace the stock fans with some Maradyne fans, these things are powerful, and of course I had to make a custom fan shroud, took a little fiddling to get these placed on the rad as they are a bit bigger, but if my engine dies these could just about pull the car over to the side of the road lol.
 

Attachments

  • rad shroud.jpg
    rad shroud.jpg
    118.5 KB · Views: 991
then the shocks and steering, I bought the lift kit for the front only. There is a small gap between the ram and the rings that need to be taken up so I machined some shims to do this. Also I mounted the lift pump facing forward to get that the pressure screws easier but to keep the hoses together I had a make a custom fitting to keep it clean looking.
in the pic you can see where I mounted the A/C drier and remote fire extinguisher.
 

Attachments

  • front lift system.jpg
    front lift system.jpg
    80.1 KB · Views: 1,069
  • Lifting ram.jpg
    Lifting ram.jpg
    162.3 KB · Views: 945
  • Lift pump.jpg
    Lift pump.jpg
    159.3 KB · Views: 1,005
I am leaping forward here a bit to show the heat deflector this I am hoping will keep the fire extinguisher from blowing up LOL and slow down or better yet stop the heat sink into front of the tub and assist in air flow through the front clip.
 

Attachments

  • Inside Front end.jpg
    Inside Front end.jpg
    168 KB · Views: 1,230
  • _MG_6177.jpg
    _MG_6177.jpg
    184.6 KB · Views: 1,063
  • _MG_6173.jpg
    _MG_6173.jpg
    175.8 KB · Views: 1,025
  • _MG_6178.jpg
    _MG_6178.jpg
    141.3 KB · Views: 1,089
  • _MG_6179.jpg
    _MG_6179.jpg
    175.7 KB · Views: 1,103
Nice clean work Grant, like all the brackets you are making and the detail work makes a difference. I see you mounted your shock 'clicker' knobs in the up position just like I did, I machined the collar in order to get the Ram Lift to nest properly. I do like the current rear toe link brackets, nice and stout. I want to somehow retro fit that lower bracket-to-upright piece for my car.

Looks like you are moving right along!
 
....and takes it out of single shear. Like Rob I need to come up with a solution for mine as well.

Grant - you're doing a wonderful job with your build!

Be lazy and leave it as is - my theory is if Cam's hasn't failed, it's probably good as is! (sorry Cam :) )
 
Here are some pic's of what I did for the A/C it is a mini slim from Vintage air.
I replaced the front panel with a new deflector I made to change flow of air upward through the holes in the upper deck of the chassis. The side mounting brackets are pretty much self explanatory.
Two studs threaded into upper deck hold it in place and make for an easy install and remove set up. I had to open up the condenser unit and flip the coil to run the lines out the back left side as they were to tight on the right side of the tub and would have left no room to hook up the lines.
 

Attachments

  • AC deflector.jpeg.JPG
    AC deflector.jpeg.JPG
    91.3 KB · Views: 1,156
  • AC mounting bracket.jpeg.jpg
    AC mounting bracket.jpeg.jpg
    135.6 KB · Views: 1,231
  • AC mounted 2.JPG
    AC mounted 2.JPG
    60.8 KB · Views: 1,035
  • AC mounted 1.JPG
    AC mounted 1.JPG
    76.5 KB · Views: 1,058
For the A/C compressor pump I used the factory CTS-V pump mount. Welded a small block of Alum to the top as a Hinge and made a small turn buckle which fit nicely into the cavity at the bottom of the mount which allows it to hinge as it tensions the belt its nice because it is all one piece and looks factory. Also there is a flat spot on the bottom of the mount that helps to keep your oil hoses away from the pump and the exhaust if you are using a dry sump system.
 

Attachments

  • AC pump mounting bracket 1.jpg
    AC pump mounting bracket 1.jpg
    135.2 KB · Views: 955
  • AC pump mounting bracket 2.jpg
    AC pump mounting bracket 2.jpg
    200.1 KB · Views: 1,043
  • AC pump mounting bracket 3.jpg
    AC pump mounting bracket 3.jpg
    174.5 KB · Views: 1,060
  • AC pump mounting bracket 4.jpg
    AC pump mounting bracket 4.jpg
    184.6 KB · Views: 1,073
Here’s a couple of pic’s on how I rubber mounting the engine pretty self explanatory.
all the bushings were custom machined out of 85a polyurethane. The motor mounts I used were the Hinson motor sports short polyurethane mounts.
 

Attachments

  • Adapter plate mounting hole.jpg
    Adapter plate mounting hole.jpg
    109.5 KB · Views: 837
  • Adapter plater bushing and sleeves.jpg
    Adapter plater bushing and sleeves.jpg
    142.7 KB · Views: 1,002
  • Adapter plate bushing installed.jpg
    Adapter plate bushing installed.jpg
    122.2 KB · Views: 911
  • Engine adapter mount 2.jpg
    Engine adapter mount 2.jpg
    66.4 KB · Views: 949
  • Transaxle mount.jpg
    Transaxle mount.jpg
    194 KB · Views: 1,035
  • Hinson Engine mount.jpg
    Hinson Engine mount.jpg
    116.5 KB · Views: 805
Shown in these pic's is a bracket which holds the oil catch can and my expansion tank over flow tank, these are made by Moroso and fit very nicely in the opening next to the Peterson oil tank.
It’s like they were made for the SL-C.
 

Attachments

  • _MG_6187.jpg
    _MG_6187.jpg
    201.9 KB · Views: 827
  • _MG_6186.jpg
    _MG_6186.jpg
    190 KB · Views: 801
  • _MG_6188.jpg
    _MG_6188.jpg
    149.7 KB · Views: 791
The expansion tank also made by Moroso I mounted it 3.25" off the bulk head panel with some 3/4" dia Alum RB, gun drilled so I could run my Gas tank fill tube in behind it and its give me room to fill the expansion tank without a goose neck funnel and should help stop heat sink into the bulk head.

The Gas tank fill tube I made using Alum 2.25" tube for the top portion and 2" for the lower this took a little figuring out as there were multiple angles but it ended up fitting perfect after a couple of try's.


The water pump I tapped and installed #10 AN fittings and then capped them so I could use them in the future if needed. I won't be using a heater in the cab of the car so I just sealed them up.
 

Attachments

  • _MG_6171.jpg
    _MG_6171.jpg
    74.5 KB · Views: 961
  • _MG_6170.jpg
    _MG_6170.jpg
    229.1 KB · Views: 800
  • water pump before.jpg
    water pump before.jpg
    100.7 KB · Views: 1,134
  • water pump after.JPG
    water pump after.JPG
    46.3 KB · Views: 918
Back
Top