
You are using an out of date browser. It may not display this or other websites correctly.
You should upgrade or use an alternative browser.
You should upgrade or use an alternative browser.
Jason's Coyote Powered RCR40 Downunder
- Thread starter jferraro
- Start date
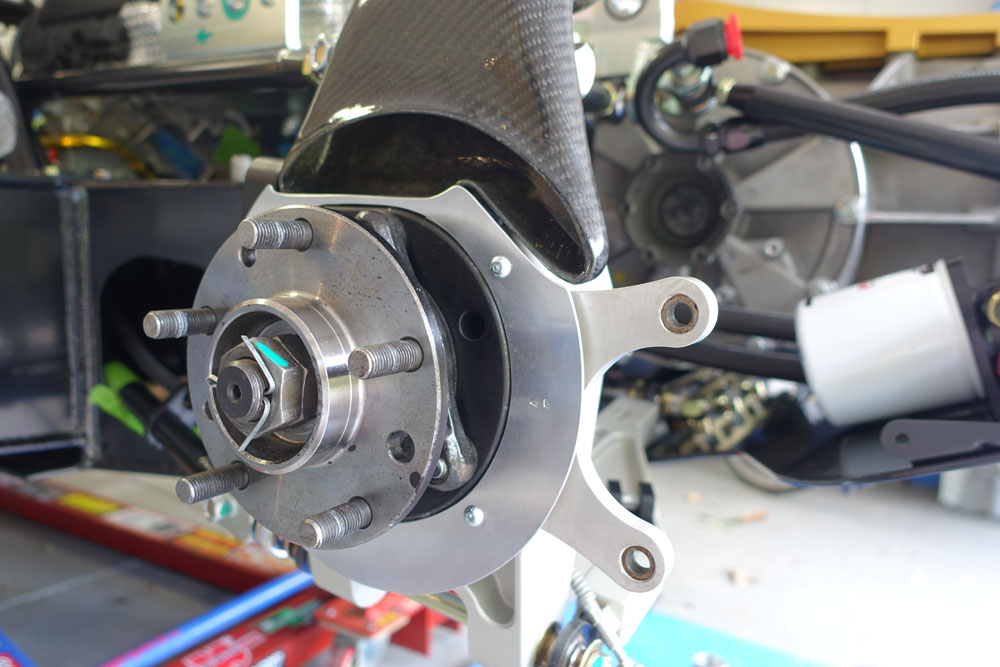
Just working to put the brakes on the car and I found something strange. One of the 4 vintage wheel adaptors from RCR are a different height. I have never had them all together like this before. I'm checking everything on the final install. 3 of them are 4 1/2" high and one is 4 3/8" inch high.
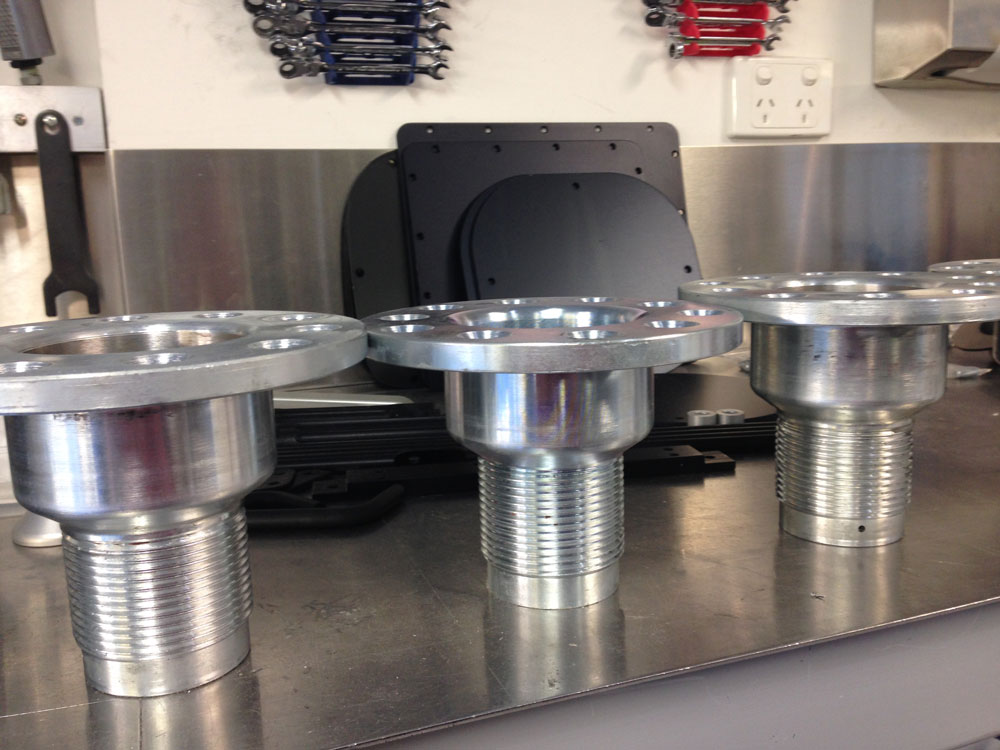
Has anyone seen this in these before? I really don't want one different so will need to work something out. These things always happen on holidays")
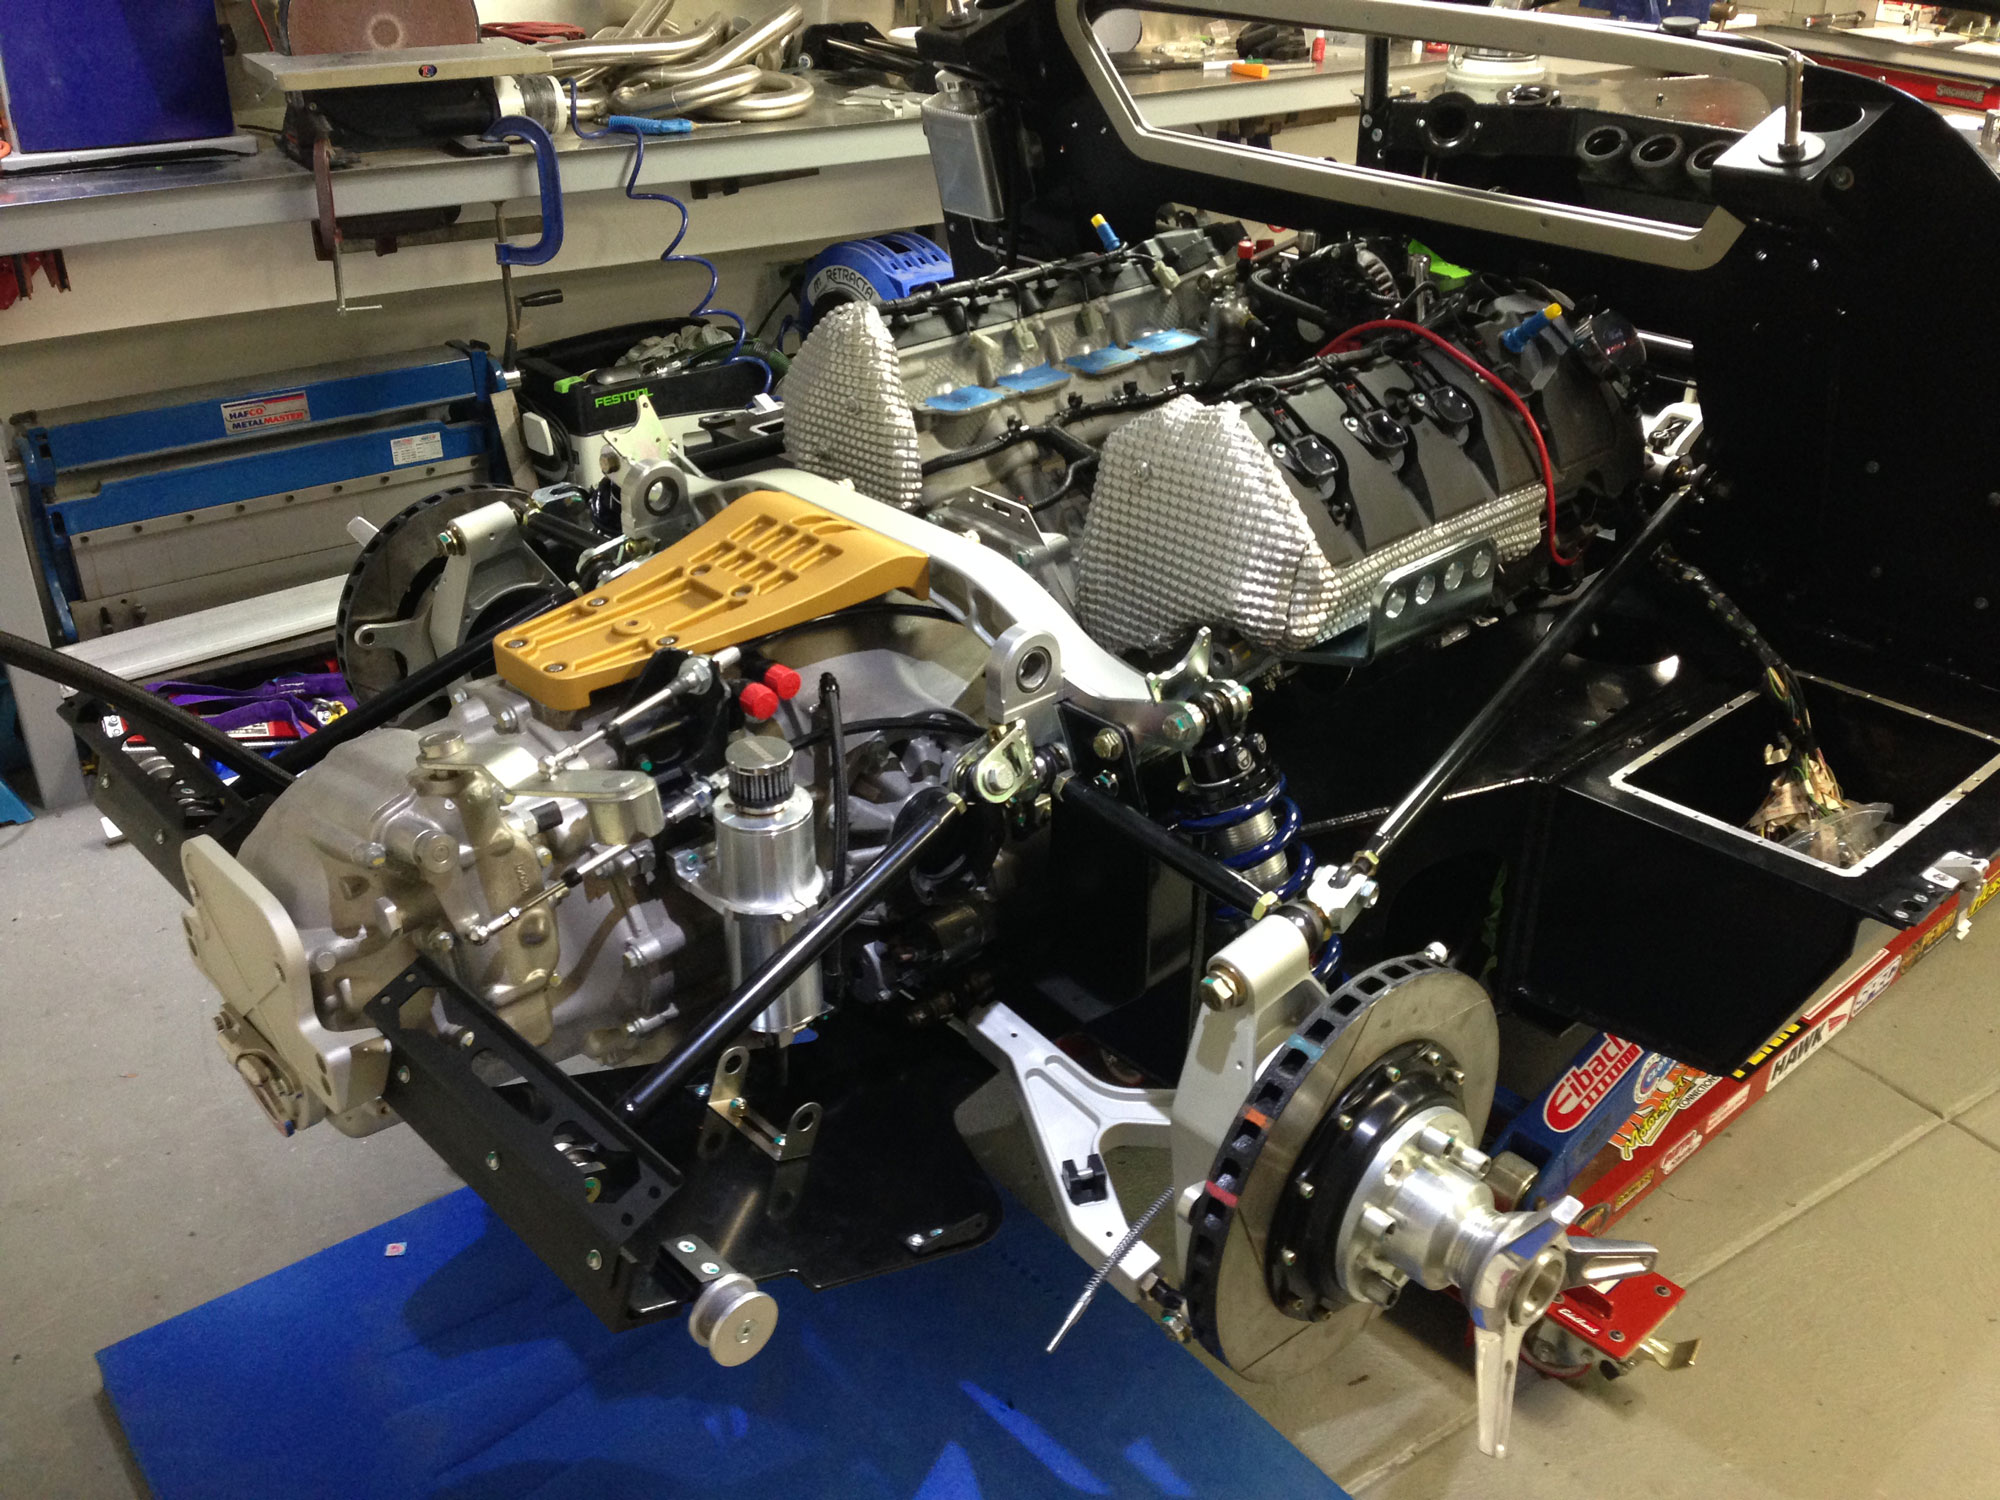
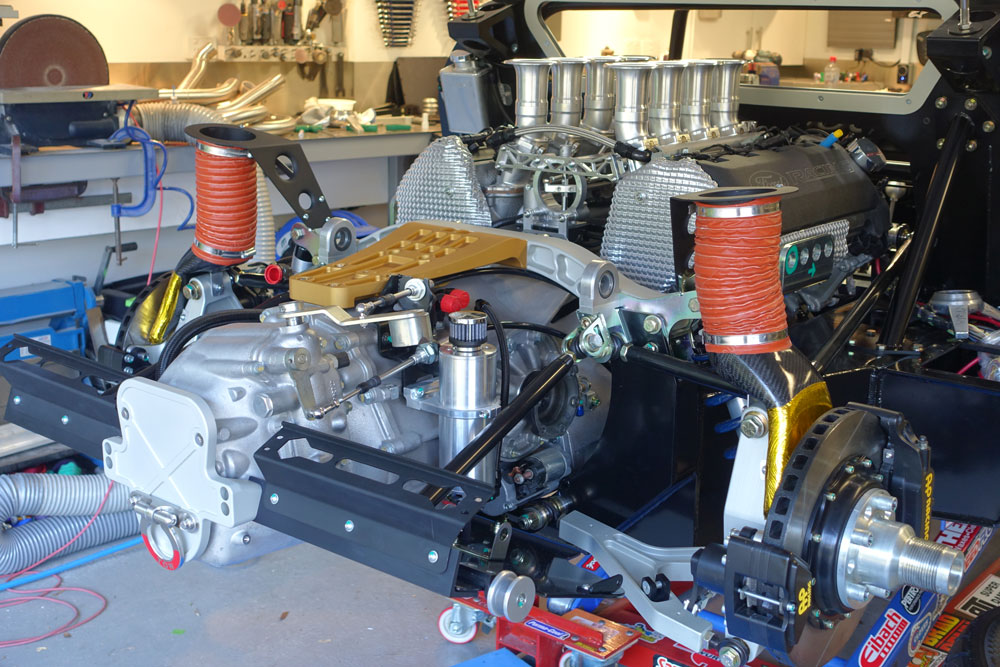
Put the engine in to ensure the trial fit of the body is spot on. The engine does move the rear mounts for the clip ever so slightly. It will come out again soon, I'm an expert on getting it in and out and have made a custom lift hook system to make it as easy as possible, even though its a tight fit in the car.
Has anyone seen this in these before? I really don't want one different so will need to work something out. These things always happen on holidays
Put the engine in to ensure the trial fit of the body is spot on. The engine does move the rear mounts for the clip ever so slightly. It will come out again soon, I'm an expert on getting it in and out and have made a custom lift hook system to make it as easy as possible, even though its a tight fit in the car.
I never checked mine like you have Jason.. I do, however, have one of my wheels that is very difficult to seat... Its like one of the pins is off distance from the center of the axle..
Hey Randy, I noticed your post and remembered I had the same issue with one back wheel on mine. That particular hub may be slight oversize but in my case the wheel ID where it slides onto the hub was undersize causing the tight fit. I just ran a flapper sanding wheel and cleaned up the inside of that BRM enough so it slides on/off easily on both L and R hubs. If it's the pin fit on yours then you should be able to fix that easily.
Good luck!
Tom
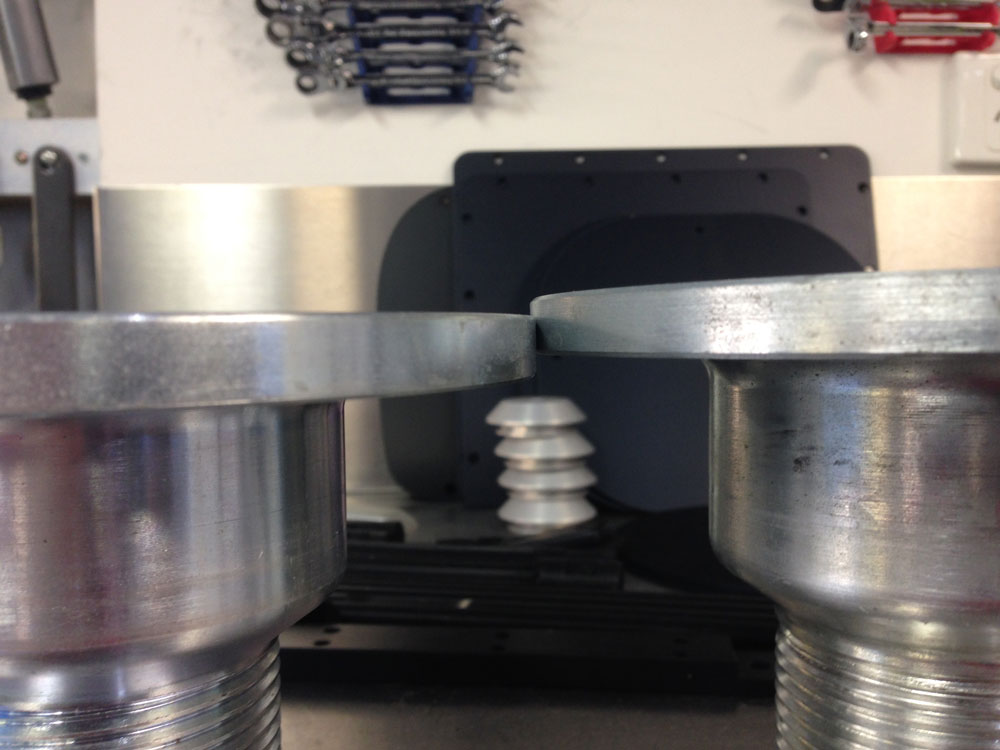
Is it possible that the nose portion of the one that is short, is shorter than the others?
As long as the mounting flanges are the same thickness and the rest of the bodys of the adapters are the same through the splines, then everything will be fine. Then to make them match up would just require machining the difference of the ends of the long ones.
When they machined them they may have cut the end slightly shorter on the one.
Is it possible that the nose portion of the one that is short, is shorter than the others?
As long as the mounting flanges are the same thickness and the rest of the bodys of the adapters are the same through the splines, then everything will be fine. Then to make them match up would just require machining the difference of the ends of the long ones.
When they machined them they may have cut the end slightly shorter on the one.
SPLINES?, or did you mean the spigot & thread area?
The difference on mine is in the area between the mounting face and the taper before the threads. I will check with Fran after the holidays to get it swapped out. It makes no sense to have one different.
Rear Brake Cooling
In between gaps on paint work I have done a bit of work on the rear brake cooling. The duct I made fed the air into the centre of the rotor but gaps could let it leak out as can be seen below.
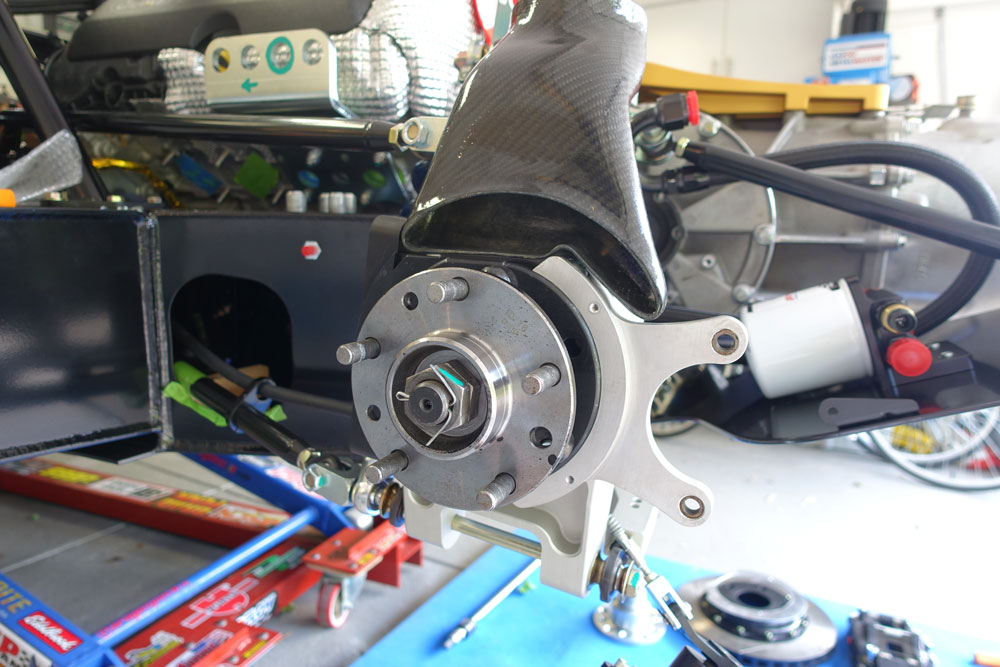
So an alloy plate was constructed to seal off around the inner edge of the rotor to a clearance of approve 1mm.
Then the entire assembly could be completed. I added some heat reflecting tape to try and save the carbon duct. I hope it does protect it from the radiant heat of the rotor. It may not but we will see how it goes.
This completes my 962 style rear brake cooling. It really was a lot of work for questionable gains in cooling but I enjoyed it. With the extractors on and the oil coolers fitted will not dominate the rear of the car so much.
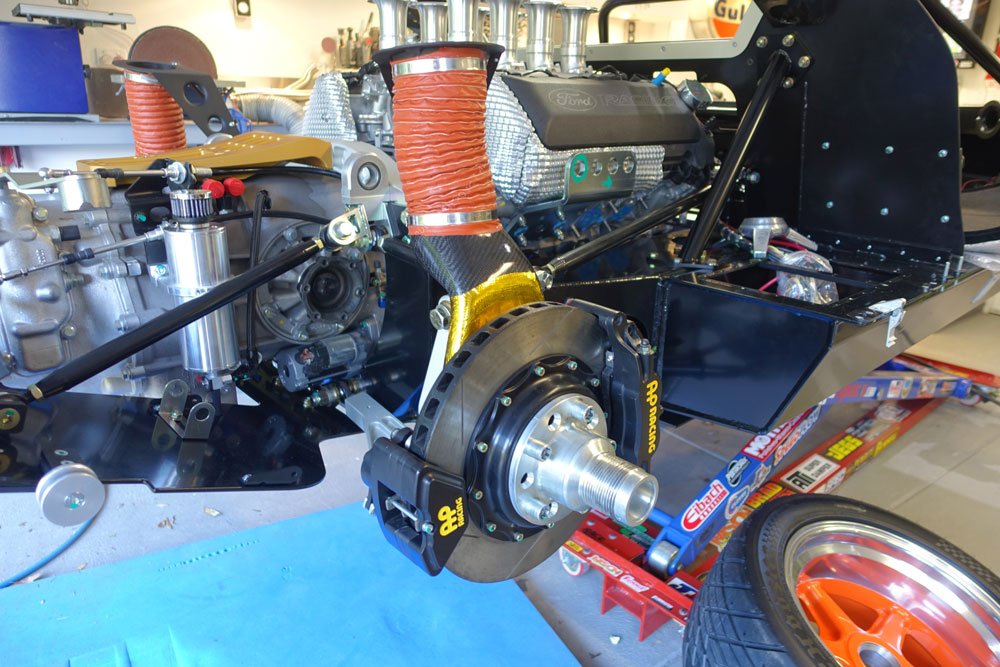
Still many things to do before it runs, and I must get going on that blasted electrical system!
In between gaps on paint work I have done a bit of work on the rear brake cooling. The duct I made fed the air into the centre of the rotor but gaps could let it leak out as can be seen below.
So an alloy plate was constructed to seal off around the inner edge of the rotor to a clearance of approve 1mm.
Then the entire assembly could be completed. I added some heat reflecting tape to try and save the carbon duct. I hope it does protect it from the radiant heat of the rotor. It may not but we will see how it goes.
This completes my 962 style rear brake cooling. It really was a lot of work for questionable gains in cooling but I enjoyed it. With the extractors on and the oil coolers fitted will not dominate the rear of the car so much.
Still many things to do before it runs, and I must get going on that blasted electrical system!
Last edited:
Hi Jason ,Conrad here,great to see the car coming along at a rapid pace since I last saw it earlier in the year.The body work work looks great,obviously very skilled guys.It must be satisfying to be fitting it all back together after annodising all those parts you designed and made,it is a truly professional job.This build is would be right at the top for design/fabricating skill on the forum.Congratulations,cant wait to see it come together.Keep up the great work.Cheers Conrad.:thumbsup:
Hi Jason (and Conrad)
I completely agree with what Conrad had to say. I saw it a couple of month back when Kaber had it to work on, and it was jaw dropping even then. It was at the time they were working on the Sonia Payes head for the McClelland Gallery Sculpture Survey and Award.
looking forward to seeing it finished at some point.
Regards Ryan in Melbourne
Paint Getting Close
Please let me start by saying that getting your GT40 painted can be a little like having a child, billions have done it before but when its your own its very special. I have a child and she does not compare to my care but I think you get what I mean.
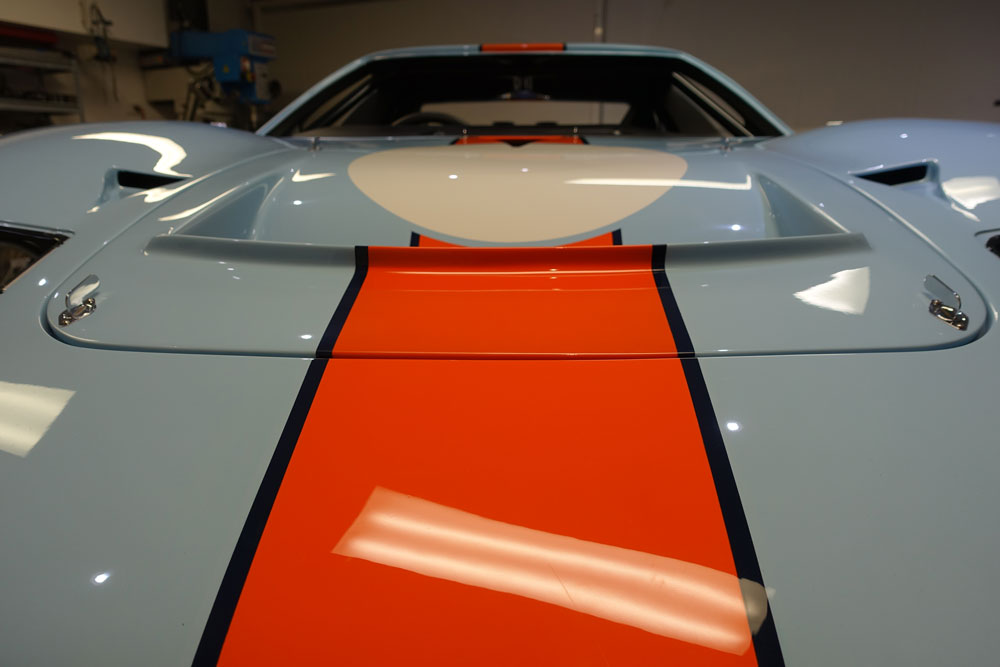
So anyway I will share what I have done even though many have before. My car is to be based on the 1076 car from the 70's as I prefer no "moustache" on the front. It will have all the decals as well.
After the blue base was applied (not gloss as there is clear to be applied) my painter and I masked out the car. What a tough job. It took a day to get a stripe on and a few roundels!
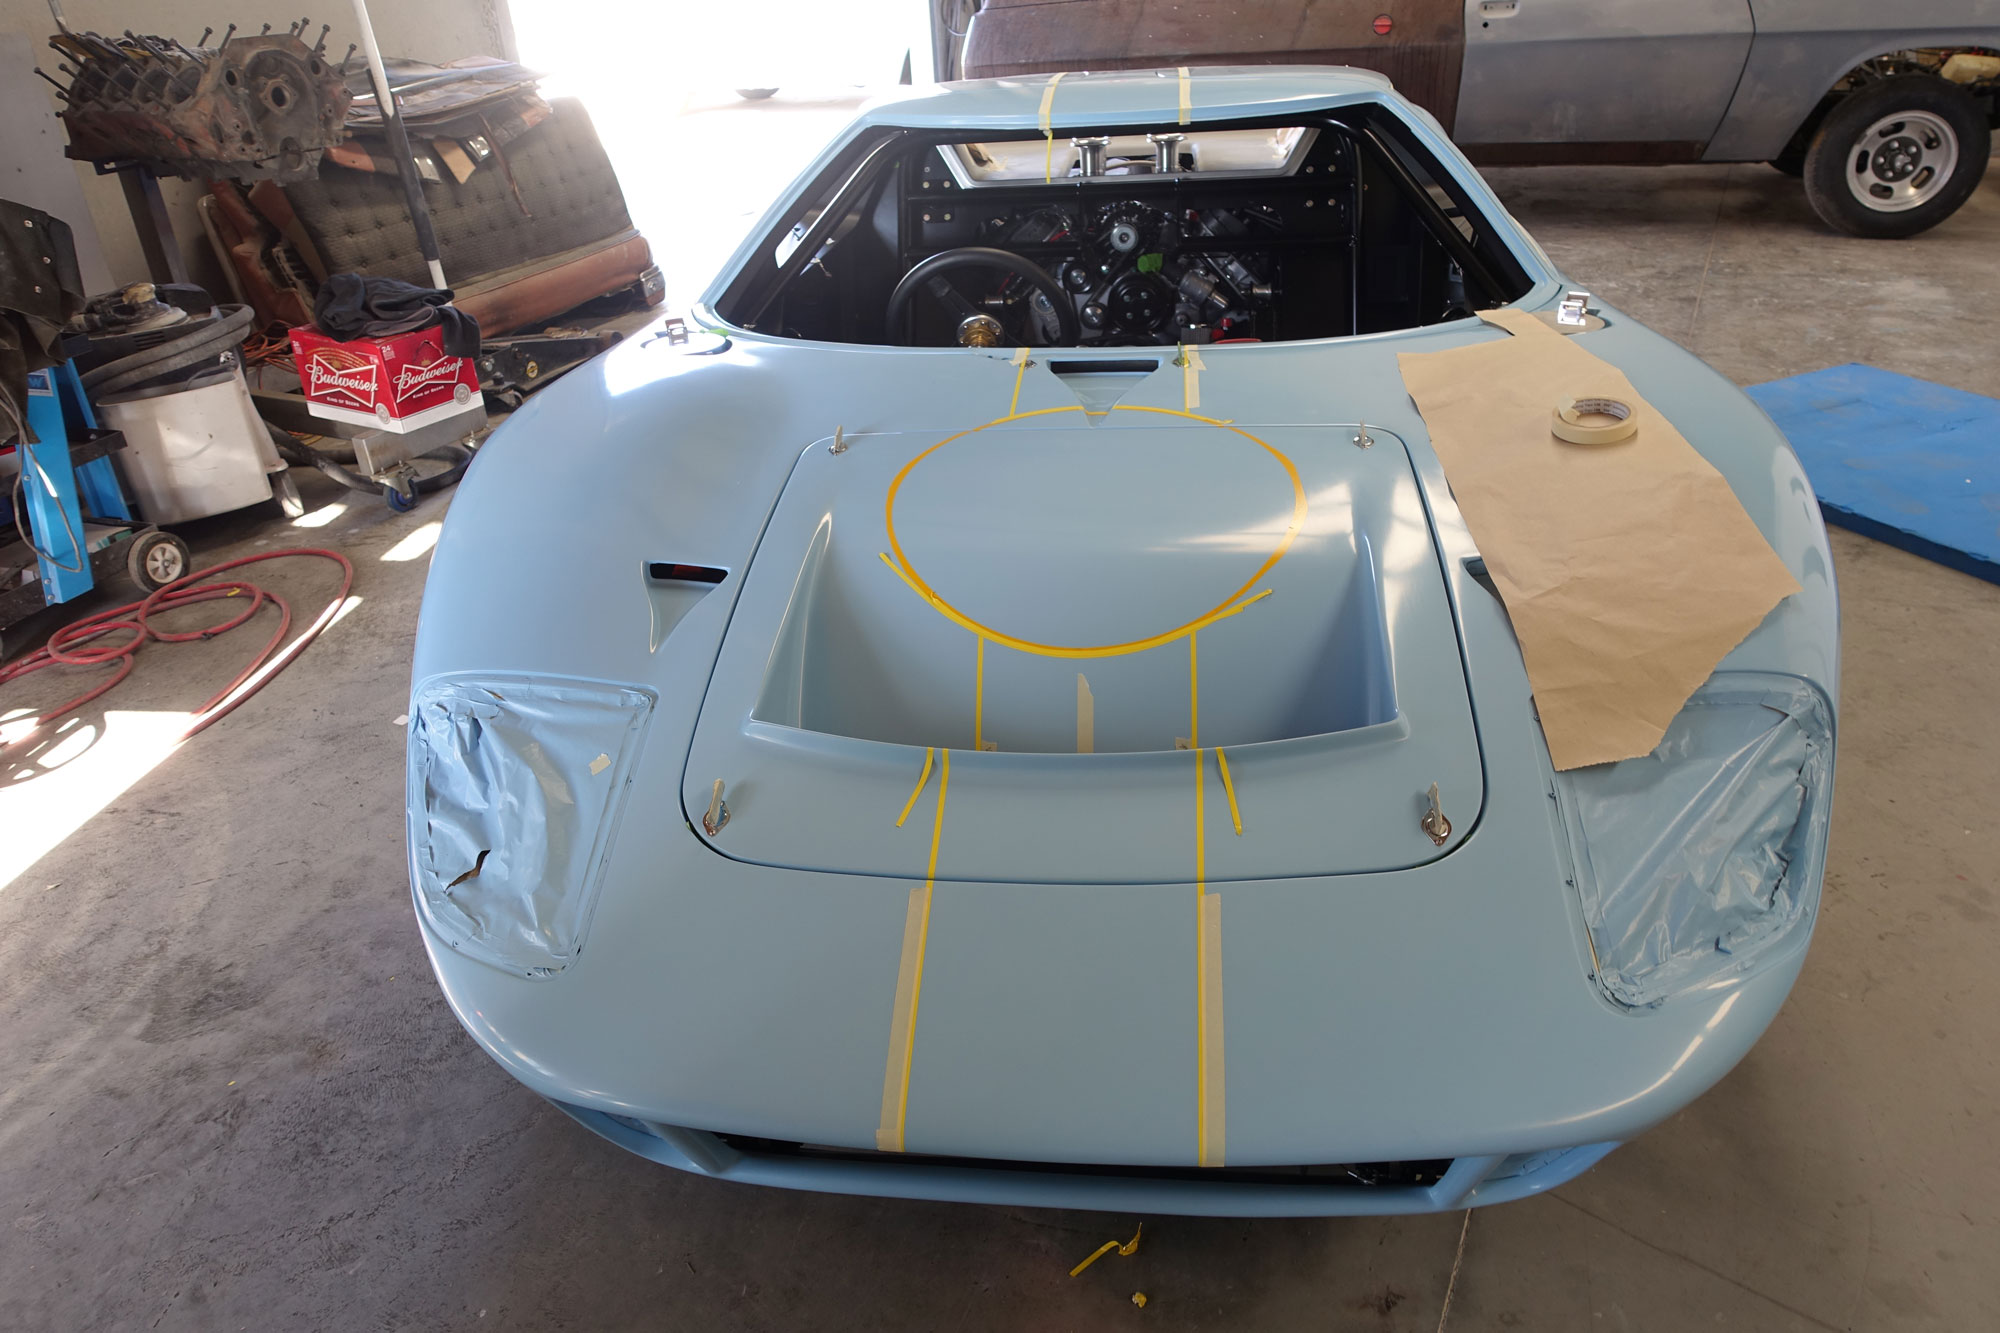
Both front nostrils had to have the stripe and roundel applied in the same position.
The car height is way up to allow loading on the trailer. Panel alignment is only close enough for the stripe alignment etc. It will be adjusted further.

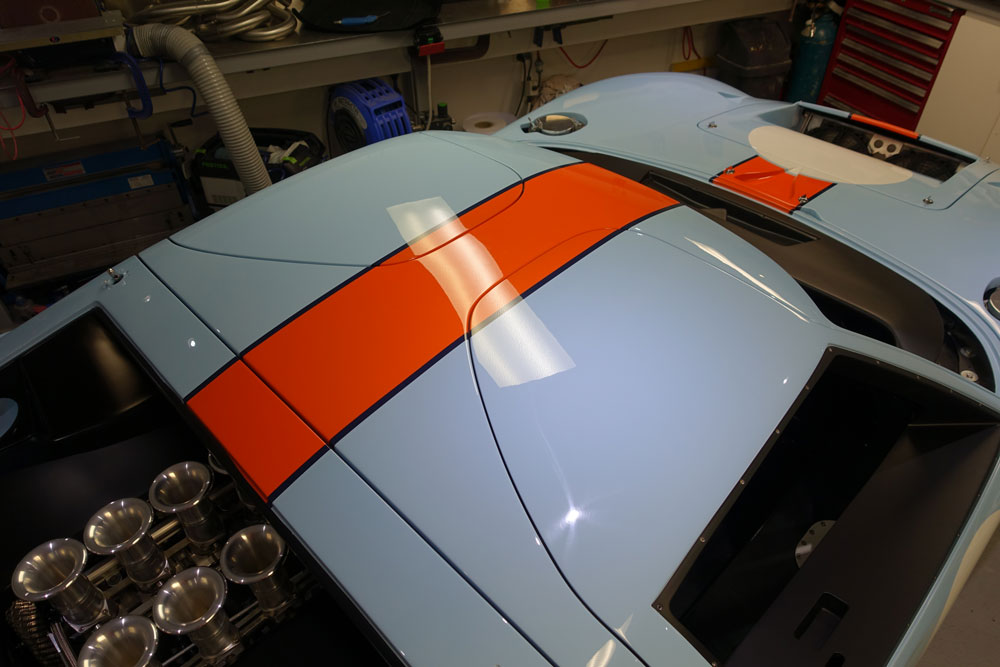
It all came out really well. Now I have decided, as with the whole car to do things different or take the hardest way possible so the following things were done:
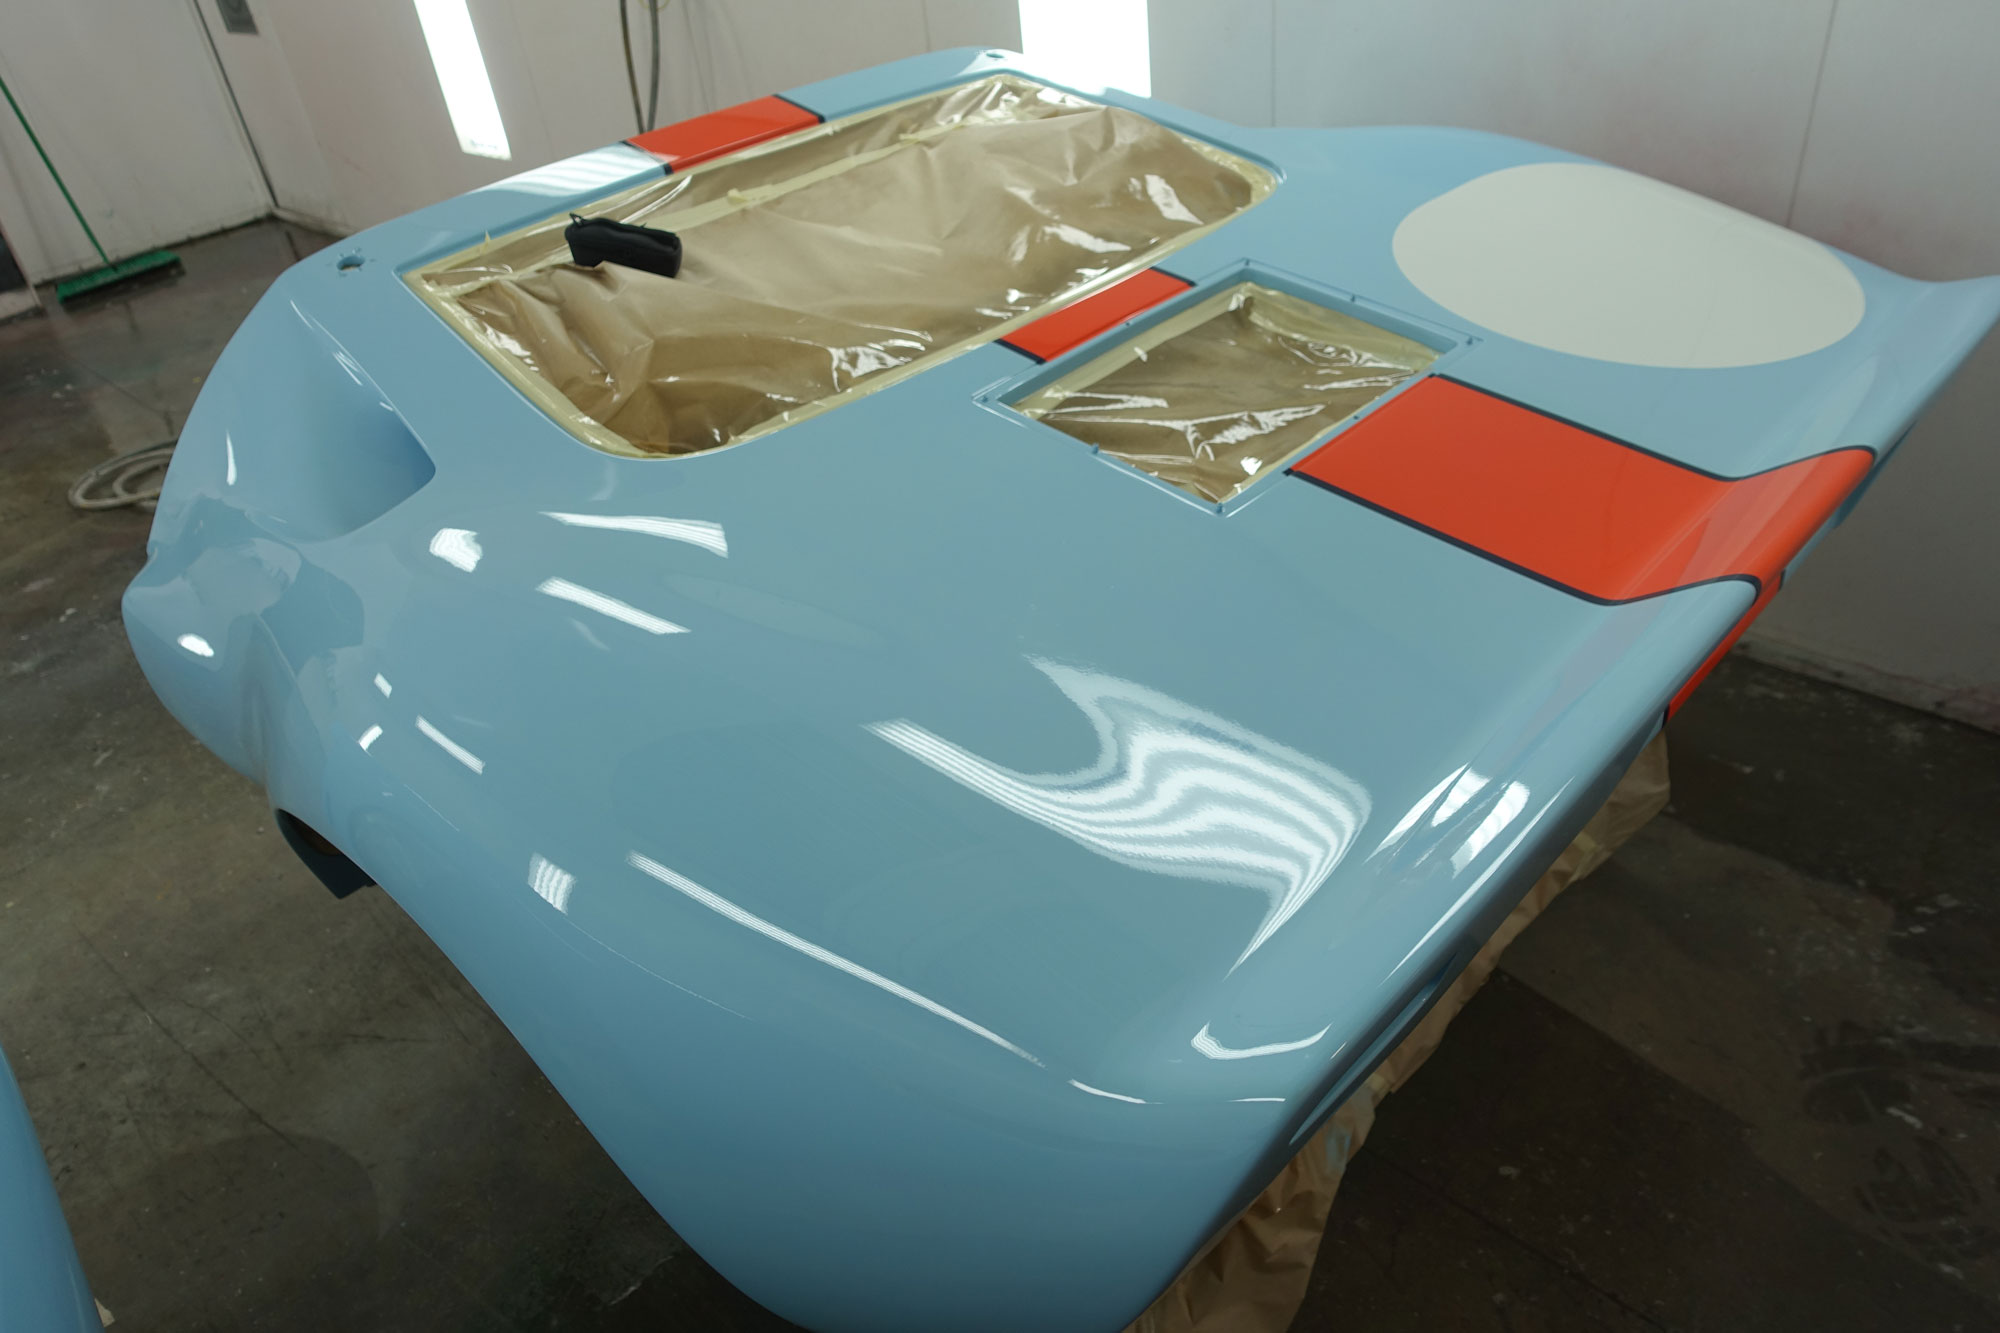
- Gaps between the roundel and orange stripe would exists as per some images I have seen of original cars. Mainly though because I liked the look.
- Pin stripes were to be dark blue and painted.
- Roundels would be painted.
- The way stripes and roundels end on the panels would be different, I did not like running them through to the panel edges at the top of sills, under nostril panels etc.
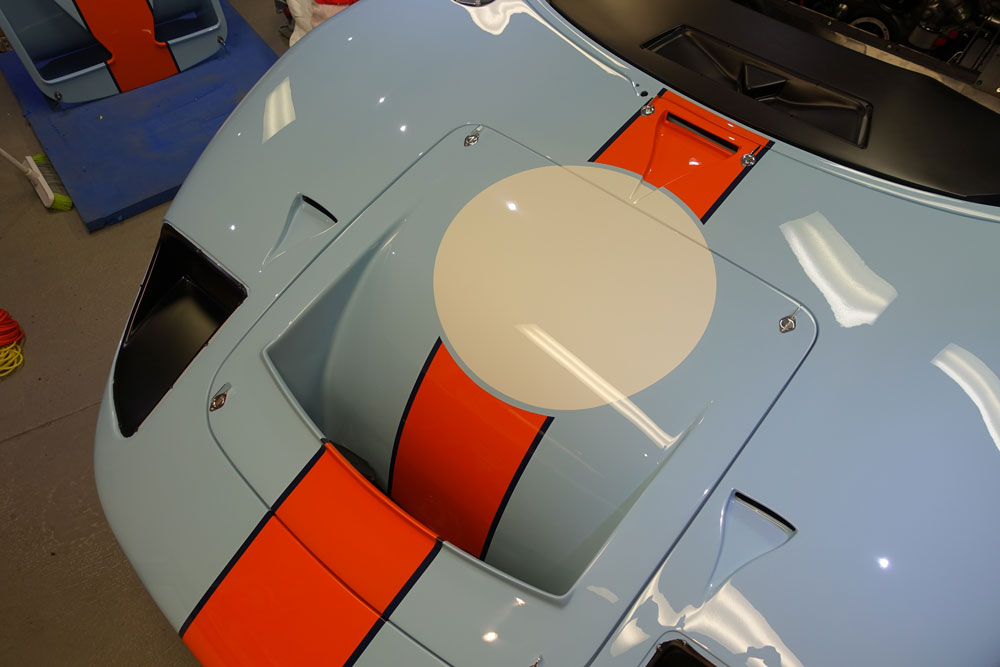
- The twin nostril (only have it because at the time with Fran I could not decide what car I was doing) would be painted differently where the stripe is wider than the nostril.
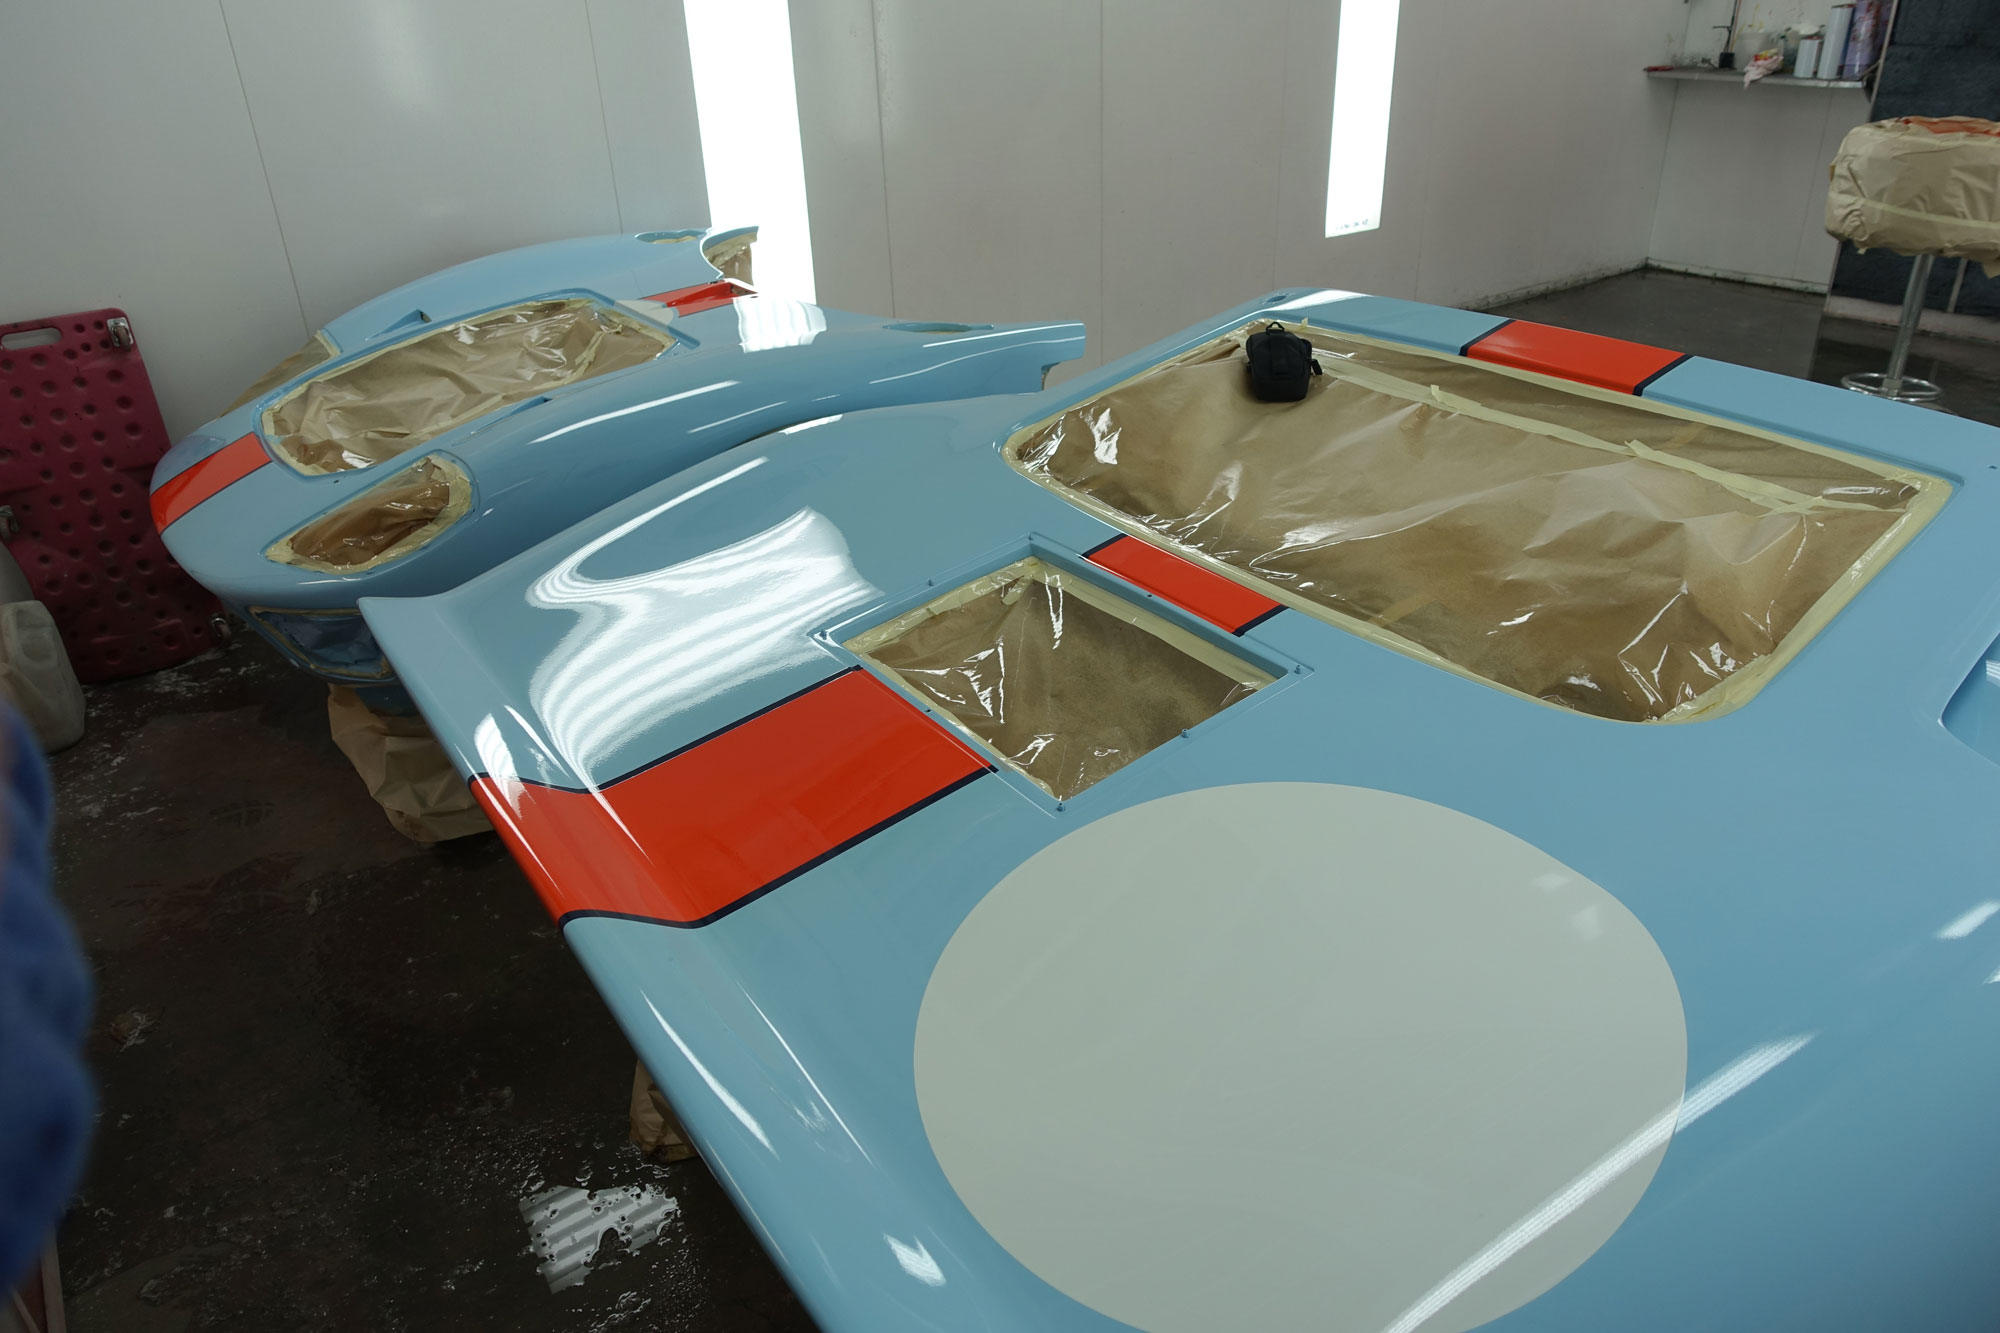
Satin black inserts and colour sand is yet to be done.
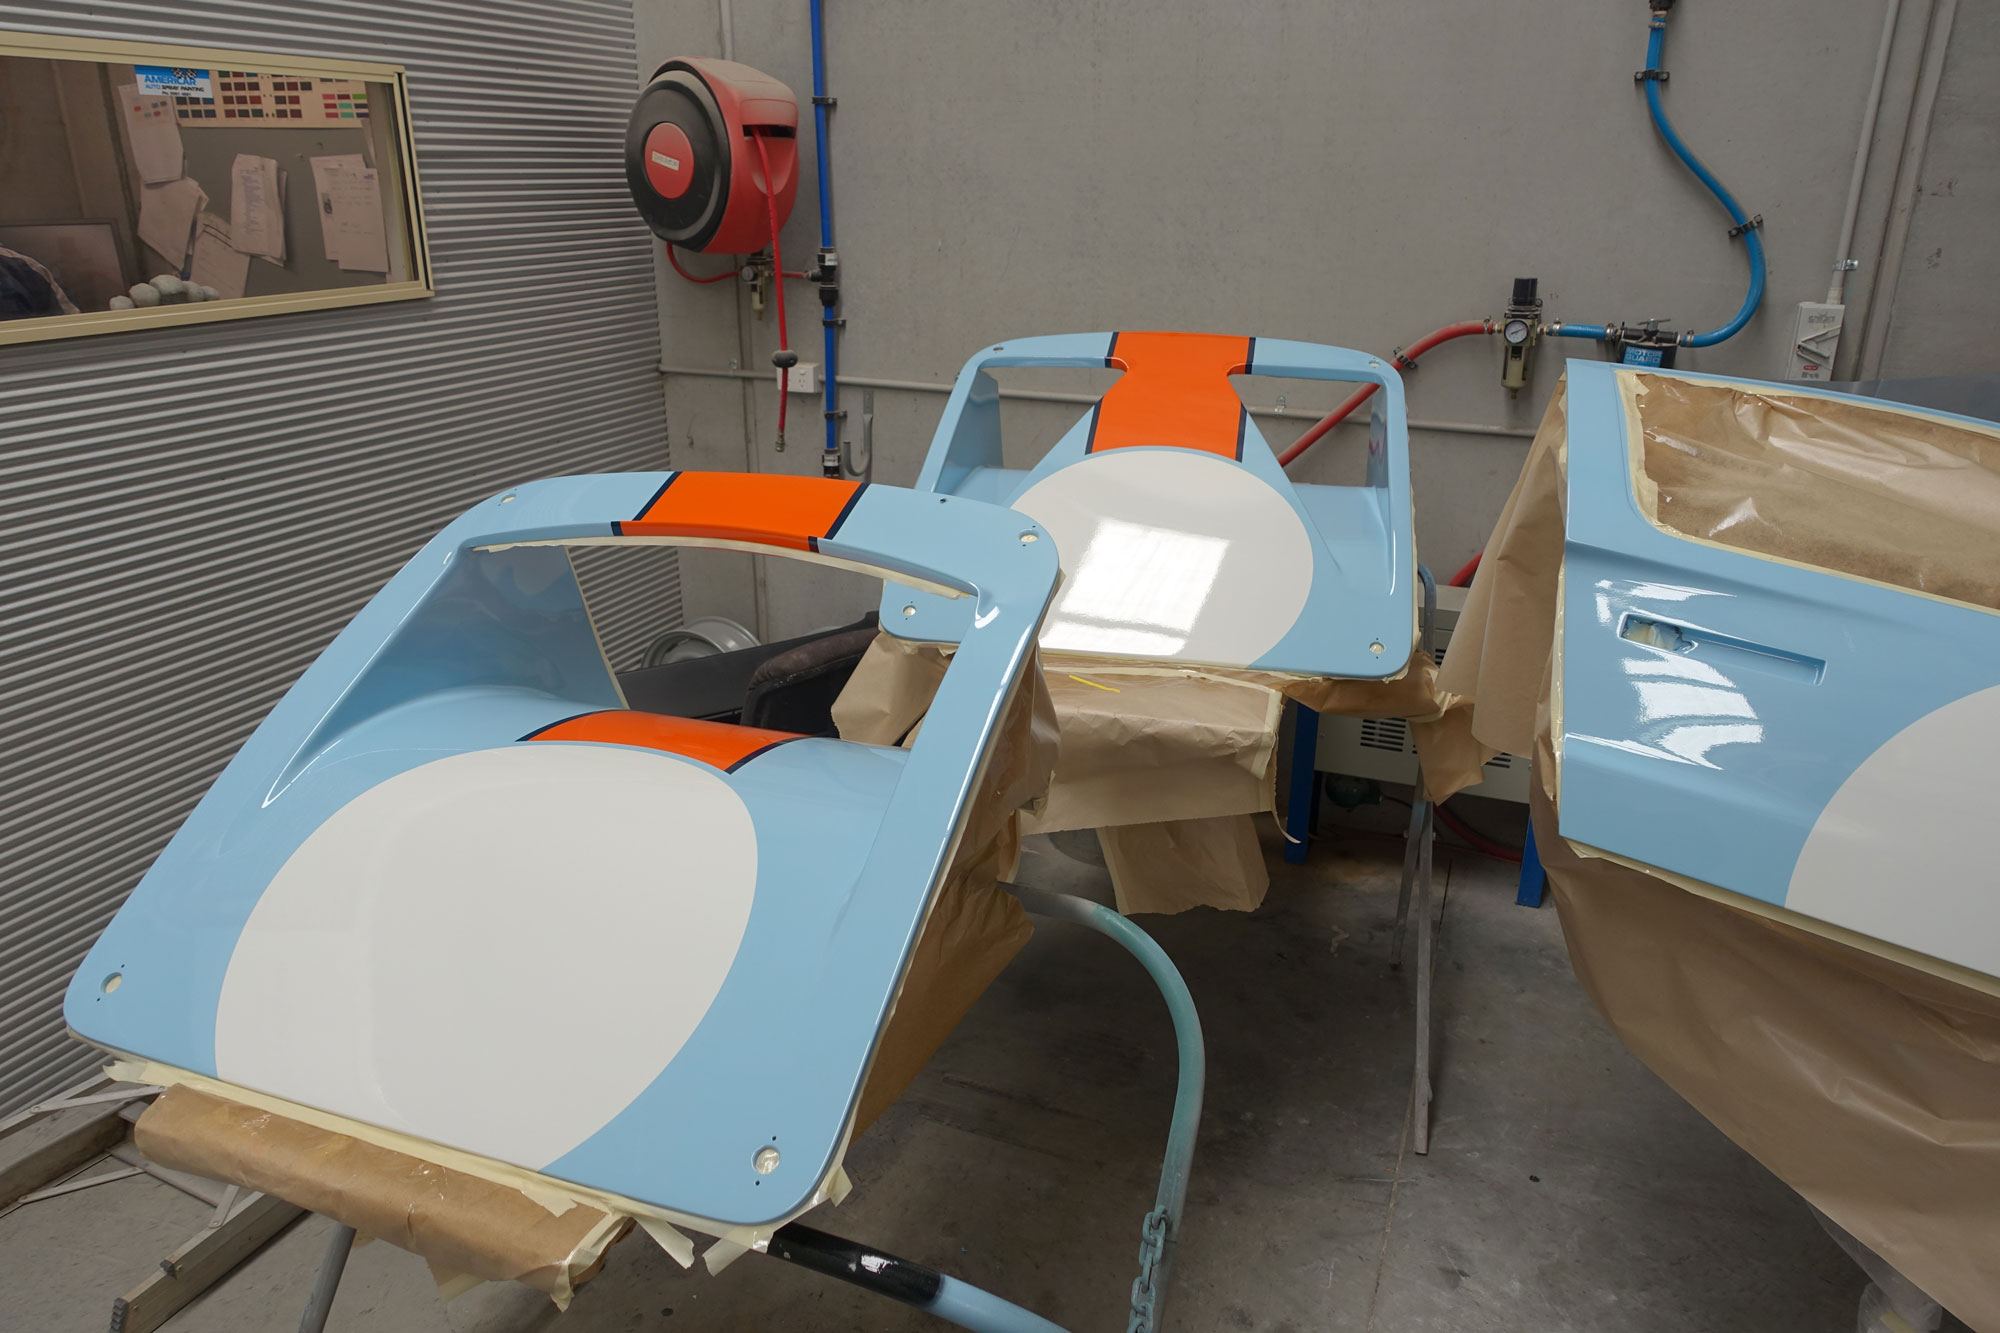
Flares turned out really good. Many thanks to Kaber and Americar Auto for this.
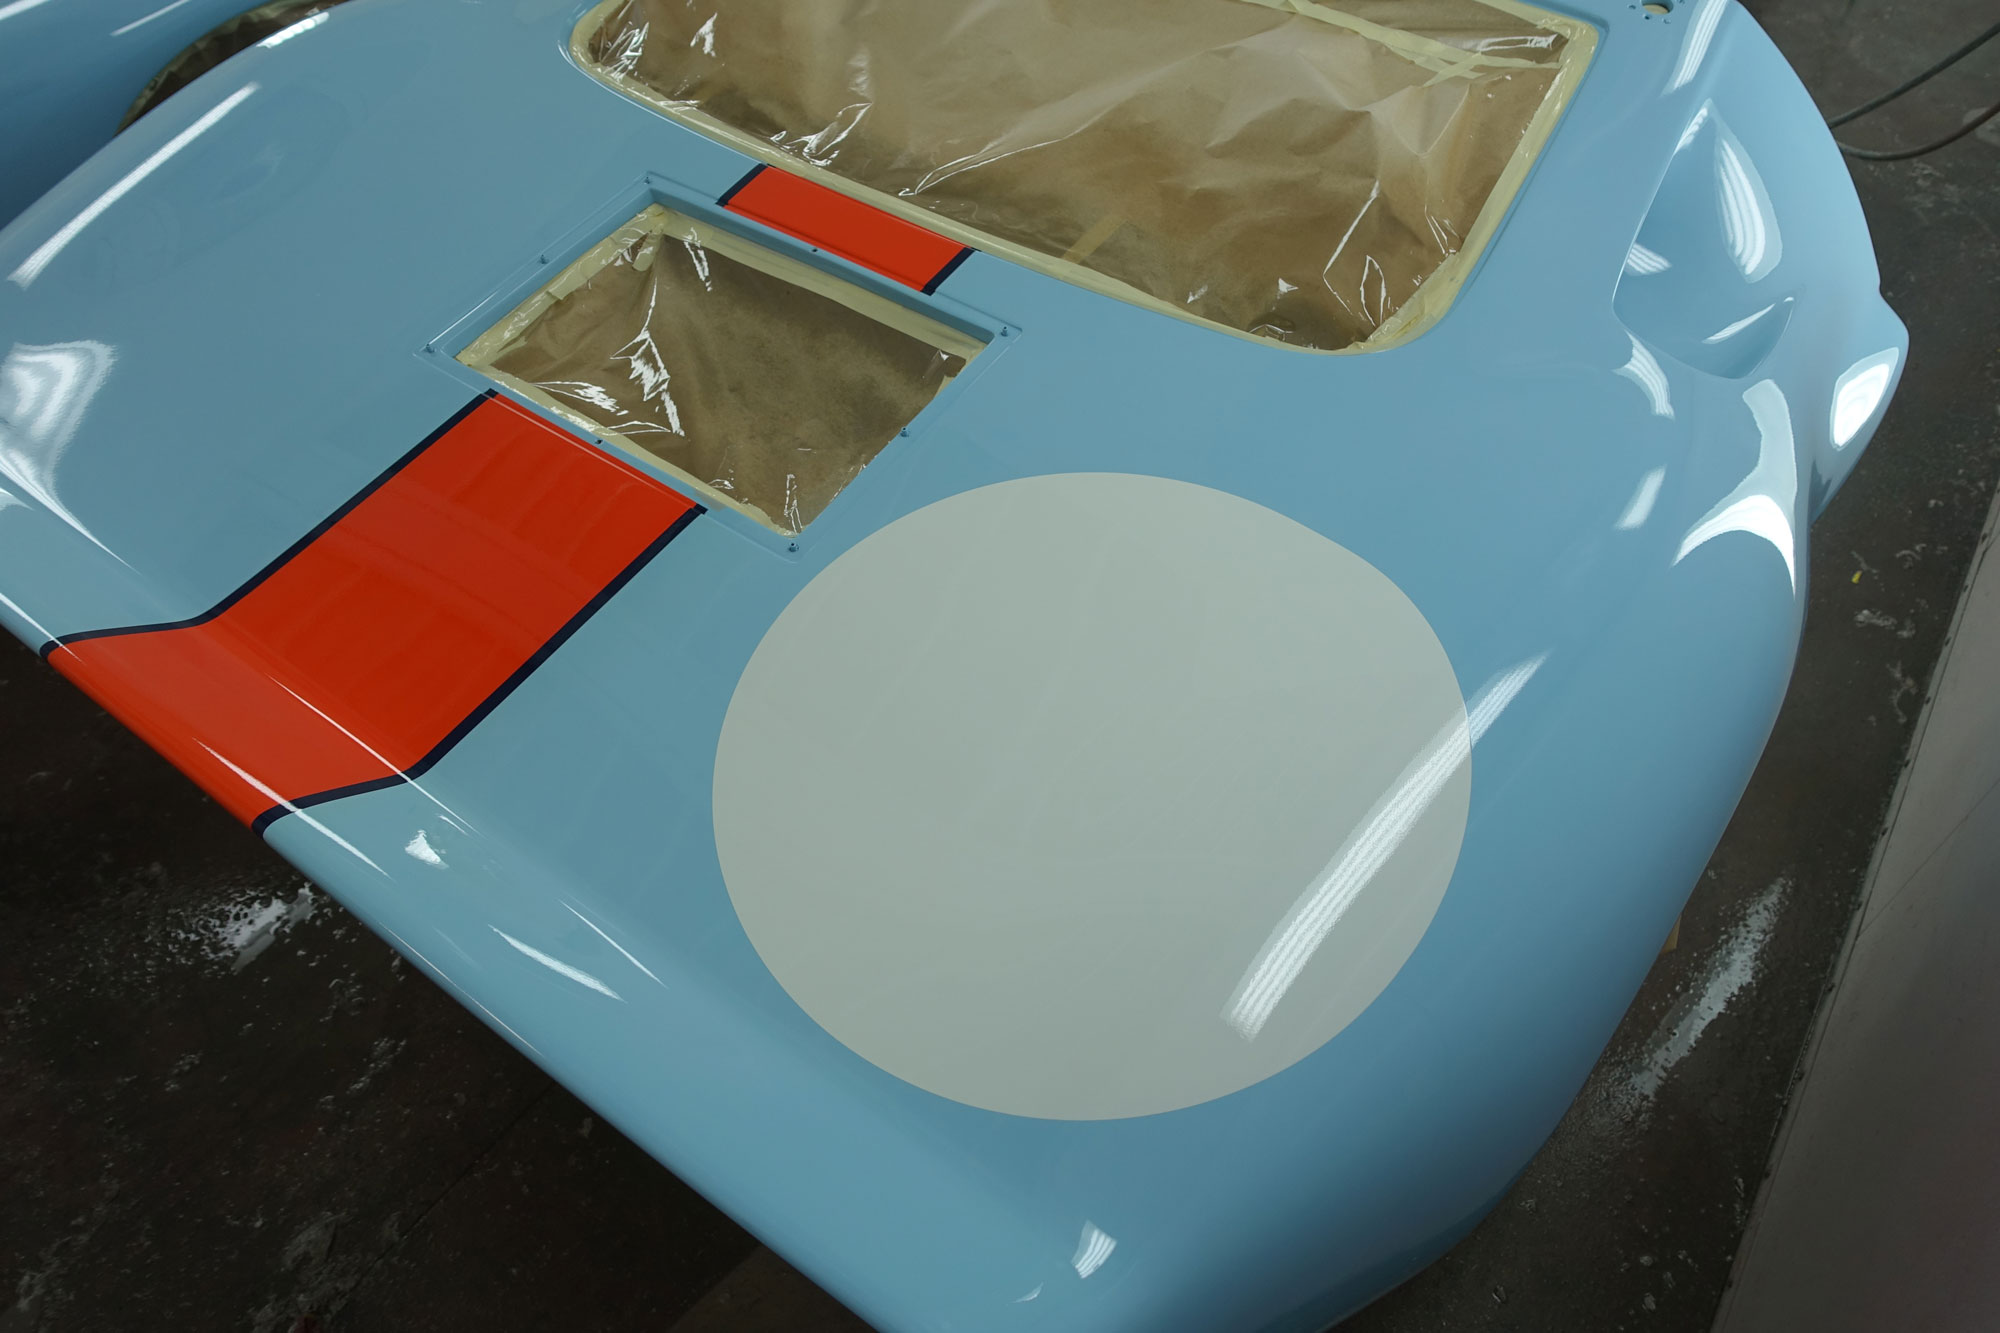
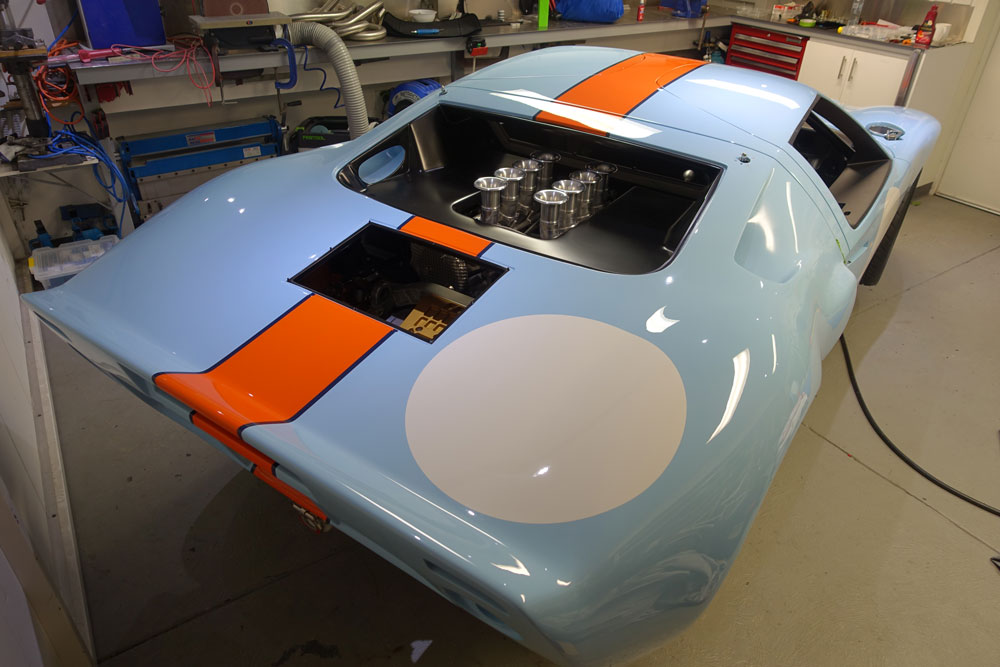
The white paint for the roundels was chosen to not look to bright, I'm happy with it.
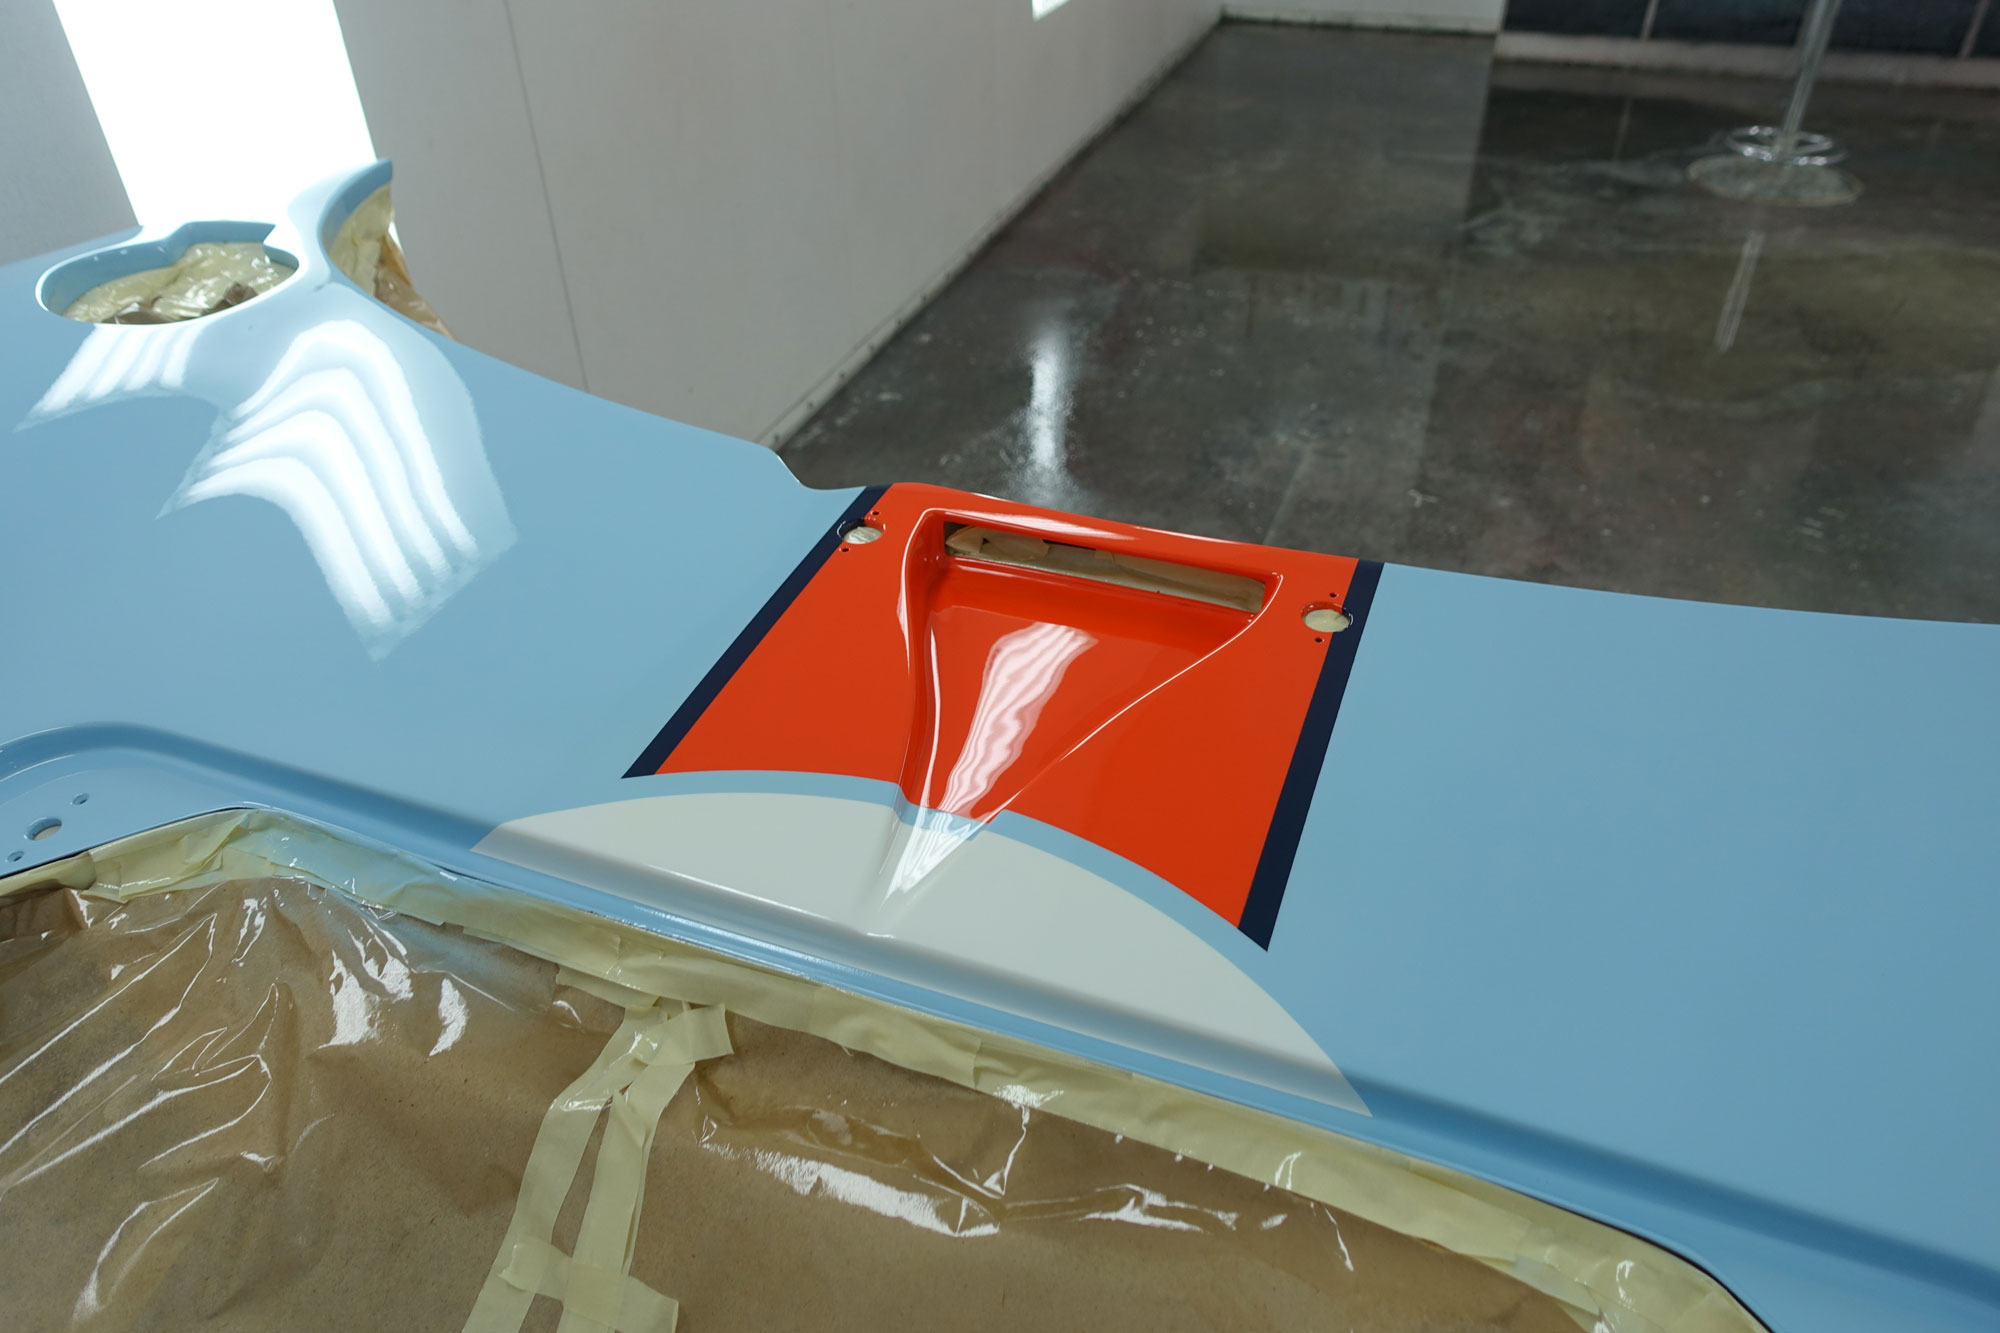
You can see the 12mm gap I wanted on the roundel. I love it, my painter hated it. You can also see how I wanted the paint to stop before some edges. Not sure why but I like it, and my painter hated it Credit needs to go to the painter, his patience and workmanship was first class in my book.
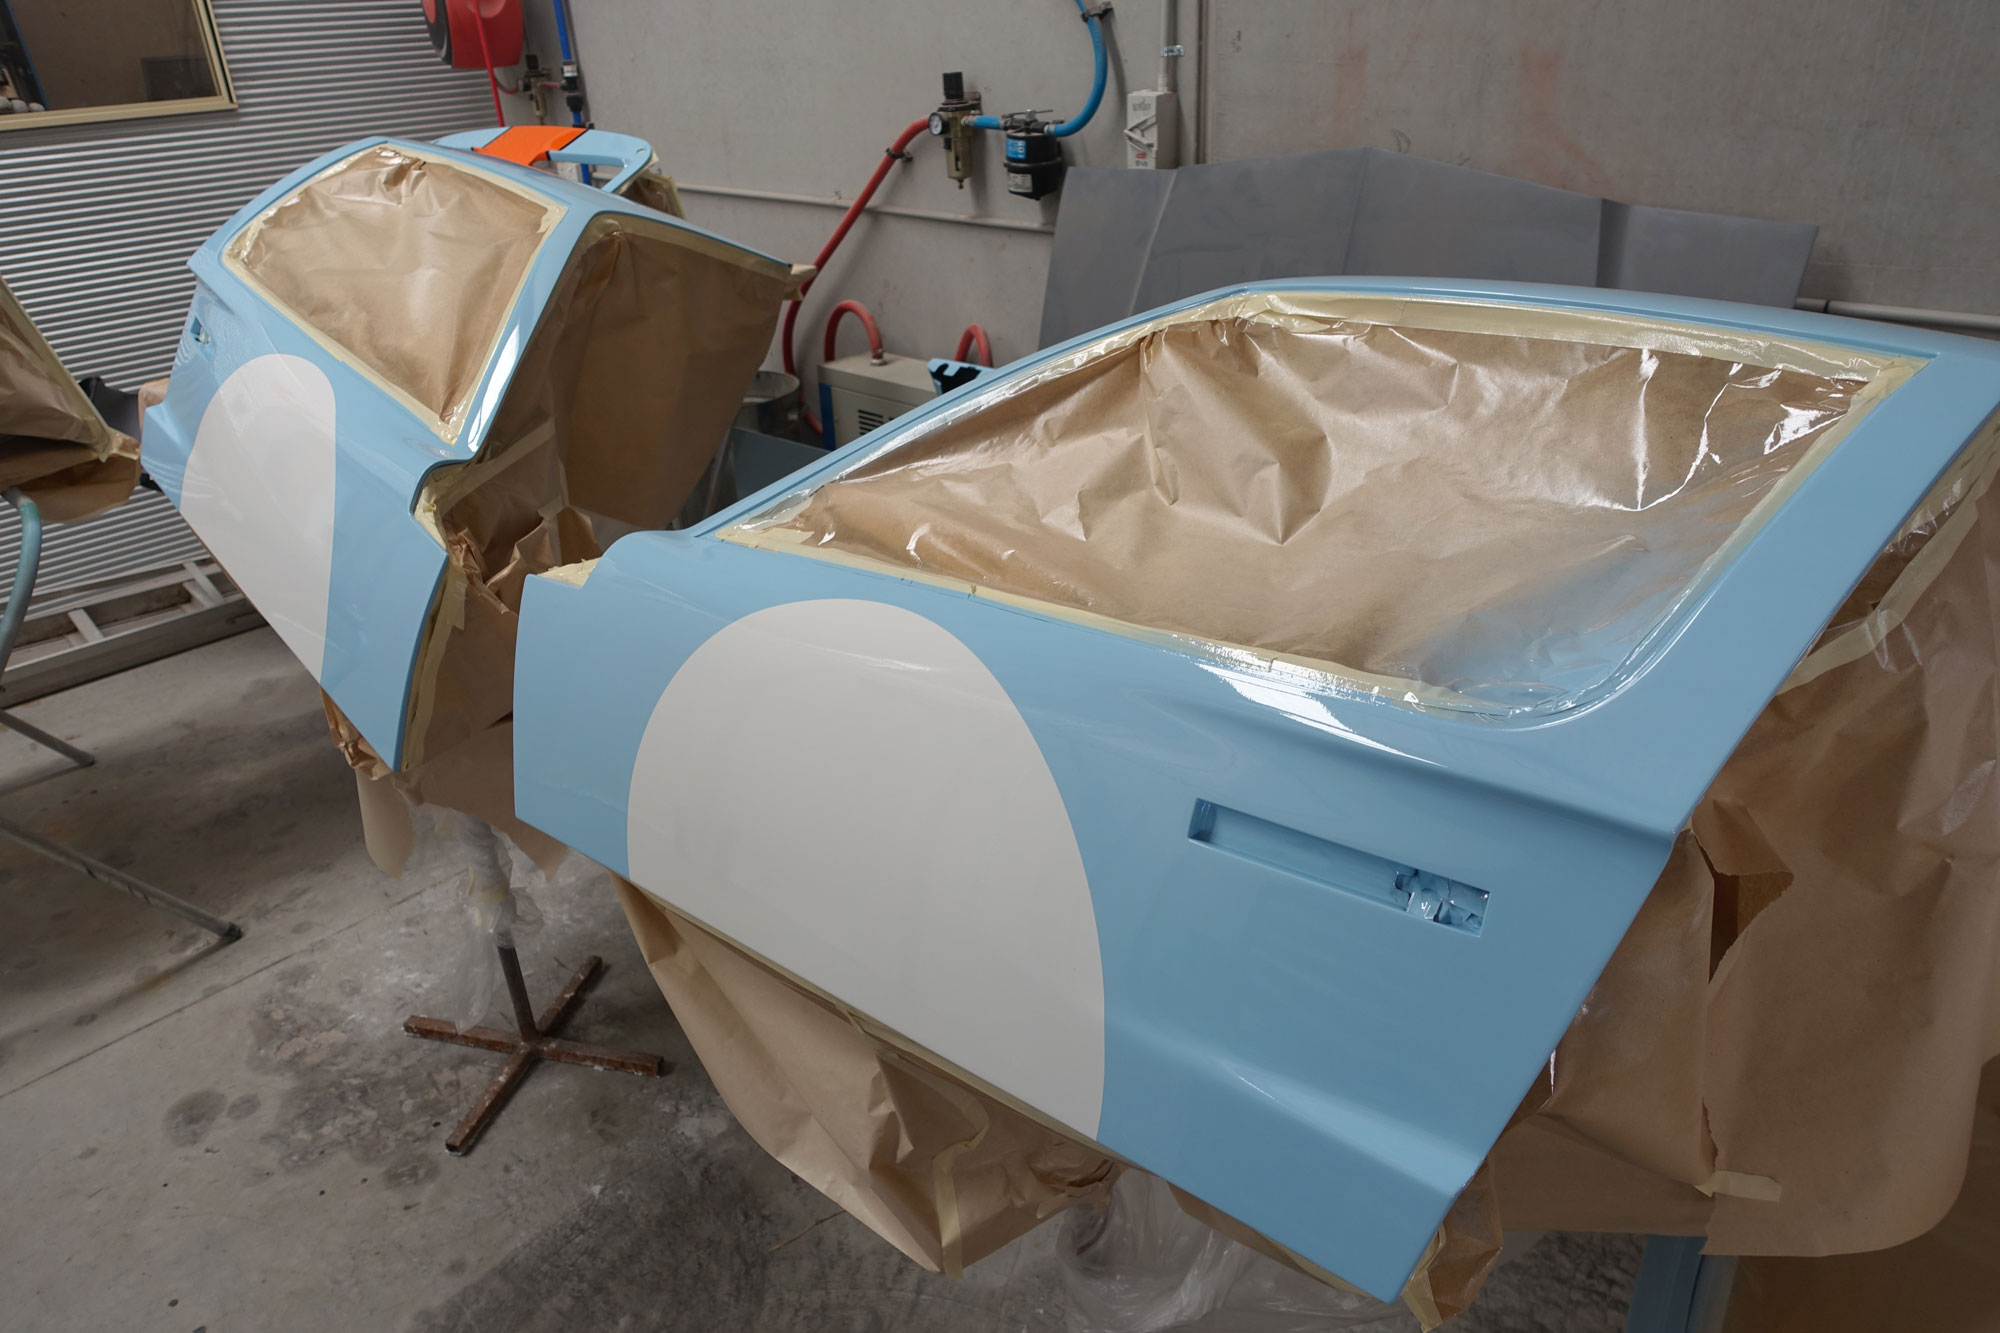
Roundels on the doors look great.
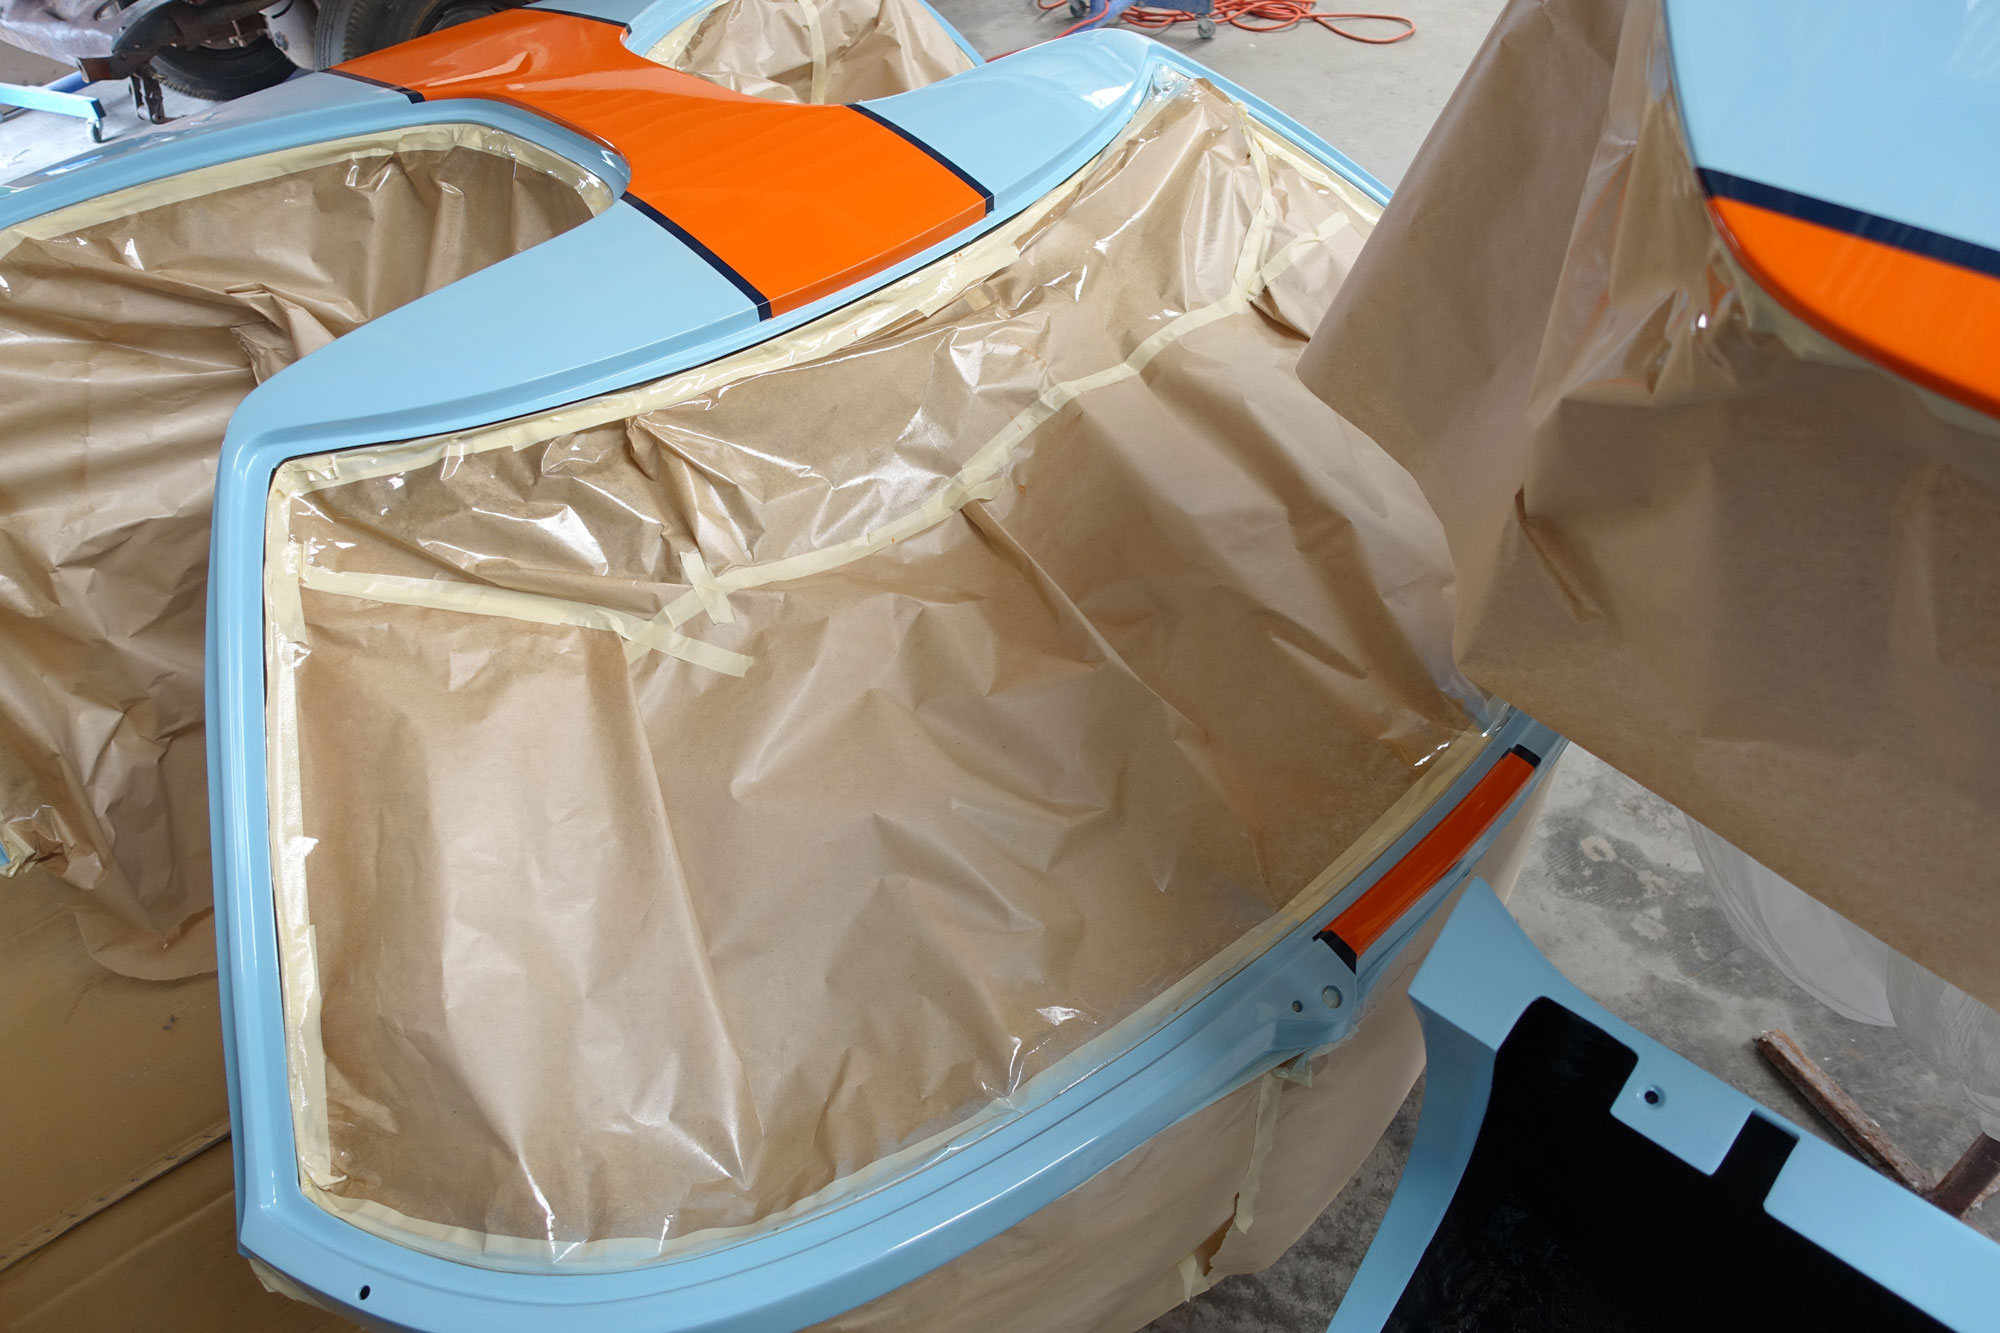
The blue and orange look great with the dark blue pin stripe. The colour formulation was a long process but it came out to my liking. I actually wanted them quite subdued like they may have been in the 70's.
Yes the single nostril is the one meant for the car but it may be swapped for the twin from time to time. The twin will make a good bit of wall art if I don't use it much! All up I'm very happy with it and with a colour sand to remove the peel and the decals it will look good. Just like others I have seen out there.
Please let me start by saying that getting your GT40 painted can be a little like having a child, billions have done it before but when its your own its very special. I have a child and she does not compare to my care but I think you get what I mean.
So anyway I will share what I have done even though many have before. My car is to be based on the 1076 car from the 70's as I prefer no "moustache" on the front. It will have all the decals as well.
After the blue base was applied (not gloss as there is clear to be applied) my painter and I masked out the car. What a tough job. It took a day to get a stripe on and a few roundels!
Both front nostrils had to have the stripe and roundel applied in the same position.
The car height is way up to allow loading on the trailer. Panel alignment is only close enough for the stripe alignment etc. It will be adjusted further.
It all came out really well. Now I have decided, as with the whole car to do things different or take the hardest way possible so the following things were done:
- Gaps between the roundel and orange stripe would exists as per some images I have seen of original cars. Mainly though because I liked the look.
- Pin stripes were to be dark blue and painted.
- Roundels would be painted.
- The way stripes and roundels end on the panels would be different, I did not like running them through to the panel edges at the top of sills, under nostril panels etc.
- The twin nostril (only have it because at the time with Fran I could not decide what car I was doing) would be painted differently where the stripe is wider than the nostril.
Satin black inserts and colour sand is yet to be done.
Flares turned out really good. Many thanks to Kaber and Americar Auto for this.
The white paint for the roundels was chosen to not look to bright, I'm happy with it.
You can see the 12mm gap I wanted on the roundel. I love it, my painter hated it
. You can also see how I wanted the paint to stop before some edges. Not sure why but I like it, and my painter hated it Credit needs to go to the painter, his patience and workmanship was first class in my book.
Roundels on the doors look great.
The blue and orange look great with the dark blue pin stripe. The colour formulation was a long process but it came out to my liking. I actually wanted them quite subdued like they may have been in the 70's.
Yes the single nostril is the one meant for the car but it may be swapped for the twin from time to time. The twin will make a good bit of wall art if I don't use it much! All up I'm very happy with it and with a colour sand to remove the peel and the decals it will look good. Just like others I have seen out there.
Last edited:
Jason.... I am just about Linden Green with envy.... That looks FABULOUS!!!! I hope mine comes out that nicely.. Like glass...
I also have both hood panels and will paint them at the same time. While I prefer the double nostril, I wanted the single in case I should ever decide to sell the car..
I also have both hood panels and will paint them at the same time. While I prefer the double nostril, I wanted the single in case I should ever decide to sell the car..
Thanks for the comments. I will never sell this car. My wife may but I never will :laugh:
And your wife's first name is ???????
Don't you think wayne needs a mention by name, afterall he has to be the best painter of 40's in this part of the world! He is the only one I know who has done two or more,. I am a little biased of course, having experienced his work in 2008!
Pleased to see it meets your exacting expectations. Only the best will do in your case.
Can't wait to see the finished product.
That's funny. Remember Wayne has not finished painting it yet, I cannot give full credit too early! :drunk:
Last edited:
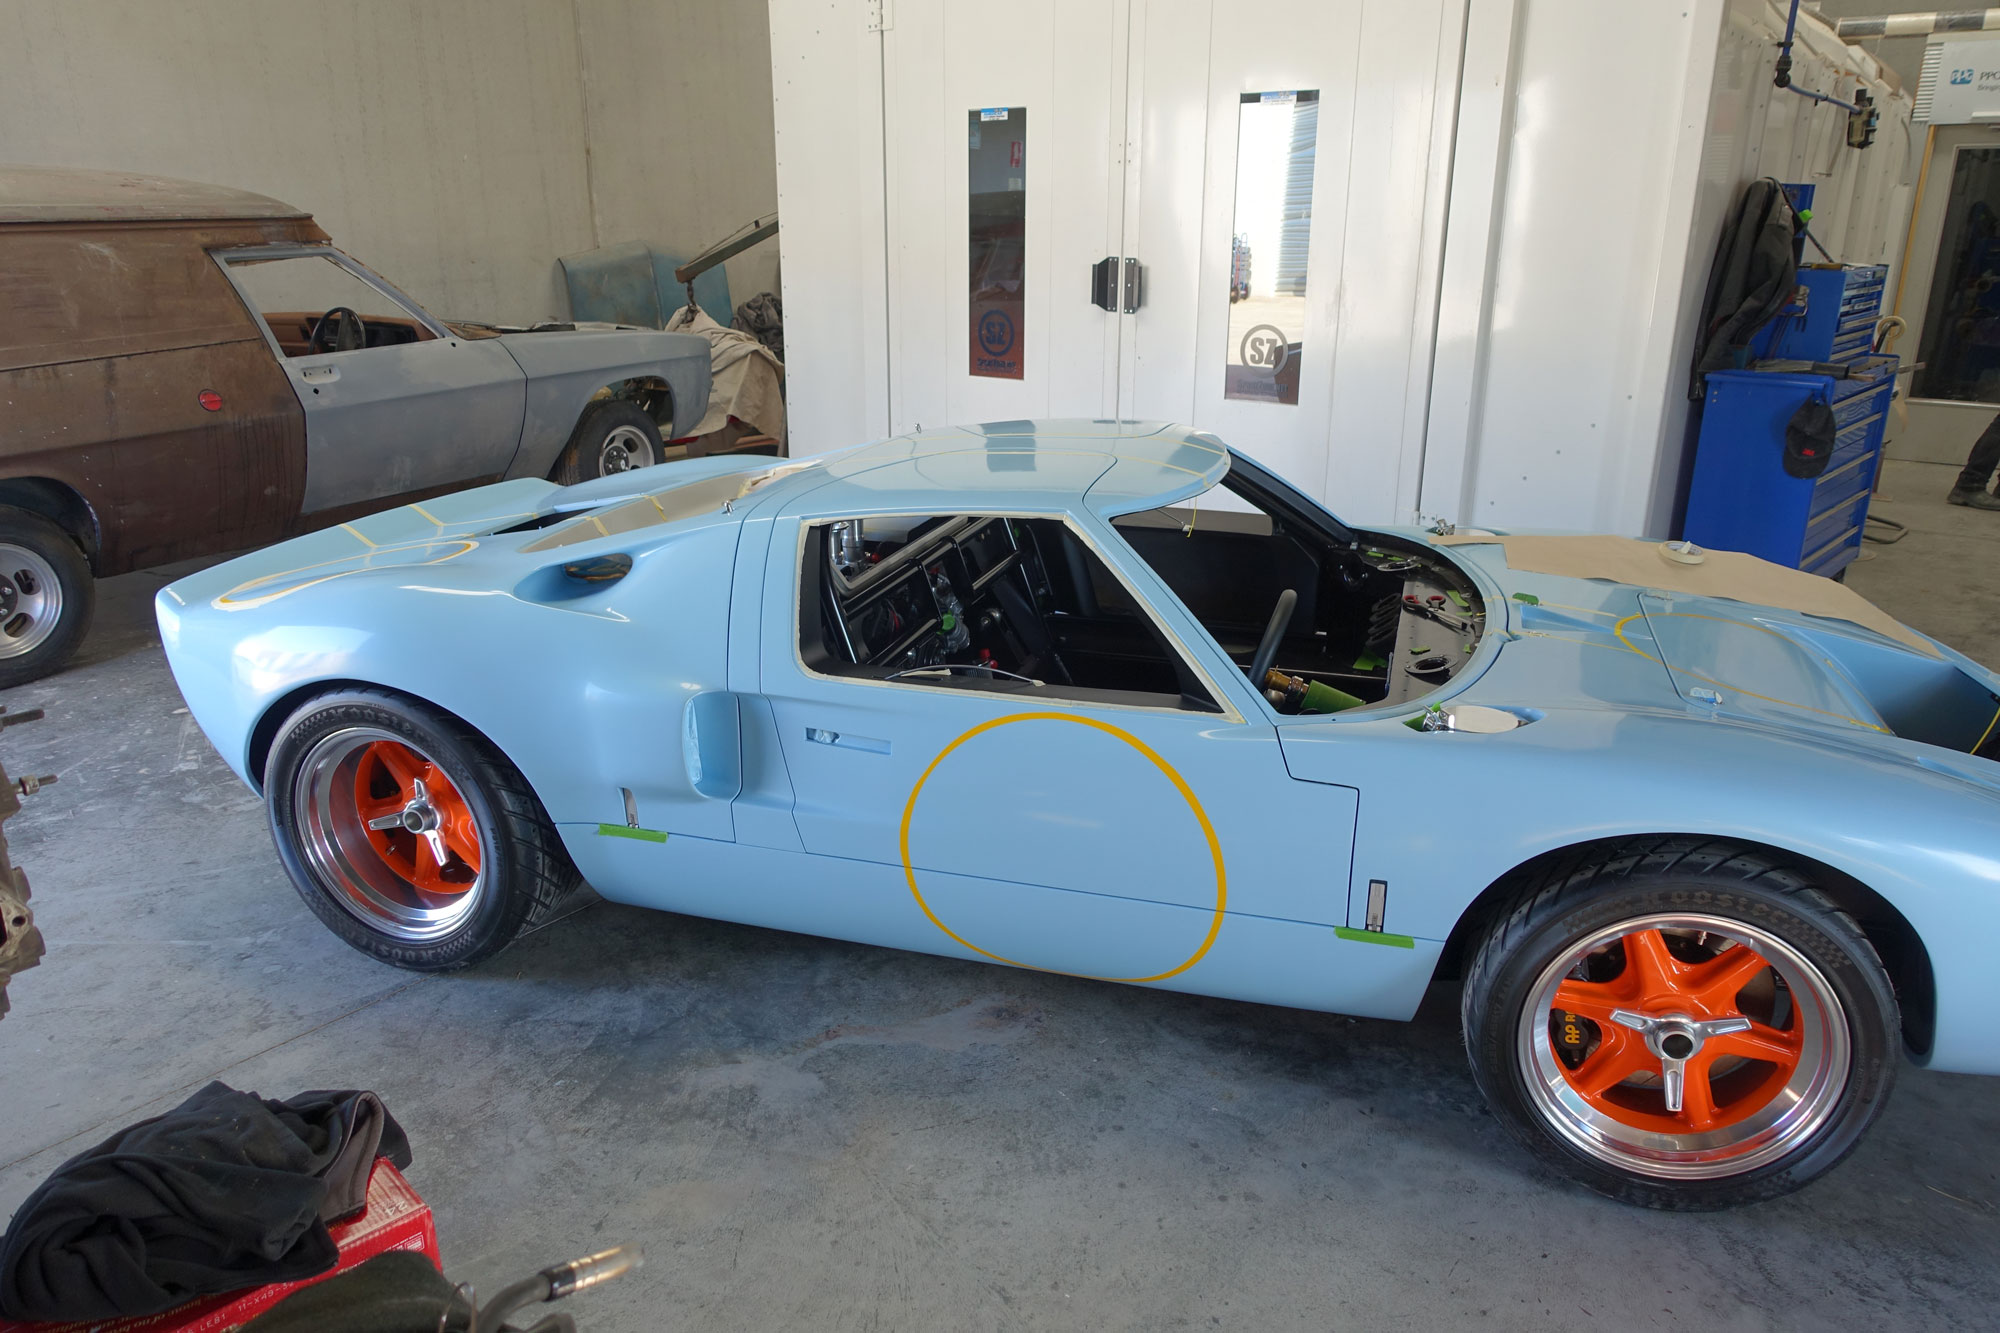
Body Assembly
Body assembly has continued with many parts still to do. Its all looking good but its really hard to assemble in such a small place without damage.
Doors line up pretty well and Americar Auto in Dromana did a great job. Very happy.
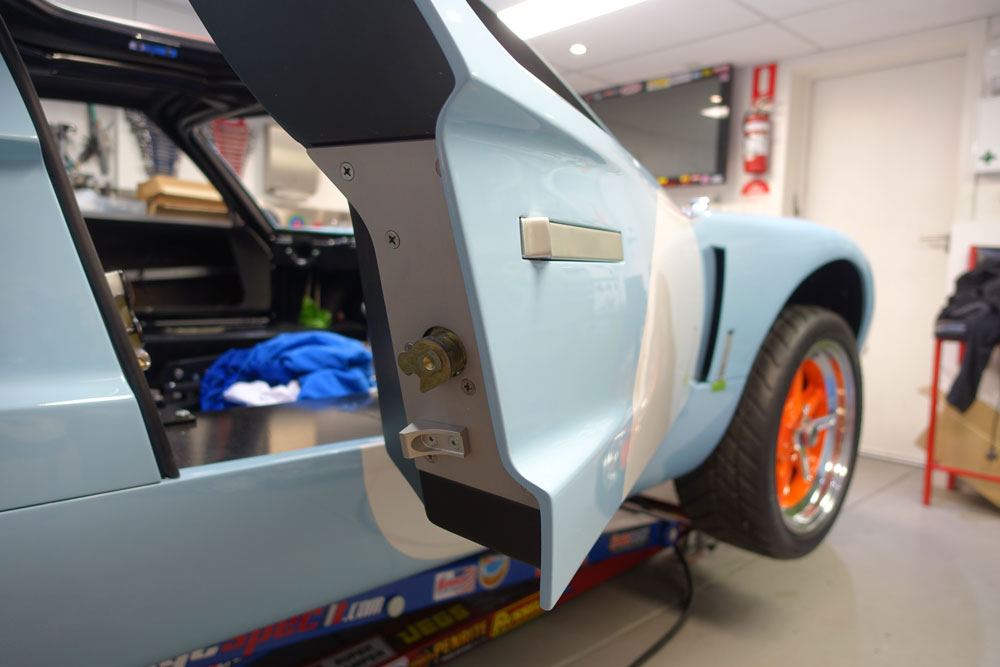
Rear clip still needs some adjustment but I'm keeping the gap large to ensure things settle without damage.
Even though I have a single and twin nostril I think I will keep the single on most of the time.
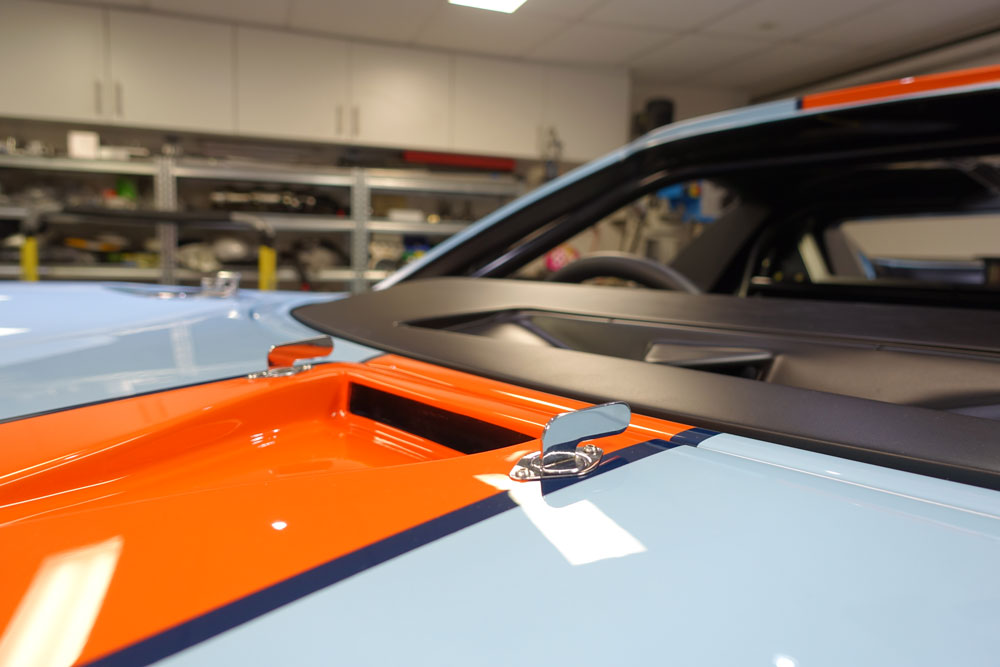
The work to make the eared dzus clips was well worth it.
For a stripe painted off the chassis its a great job by my painter. Dark blue stripe looks great to me.
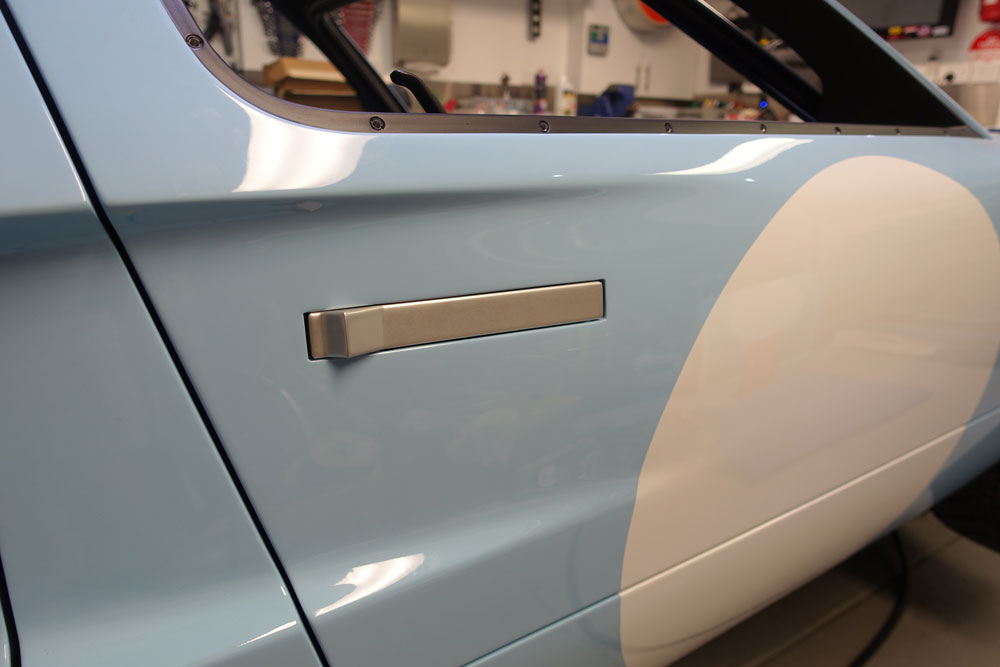
Anodised door handles suit what I wanted. I don't like too many shiny bits and this finish looks a little more subdued. Getting these gaps and maintaining them without paint damage required well engineered door handle pivots and adjusters.
Use of the 911 locks worked well. I'm very familiar with them from past project cars.
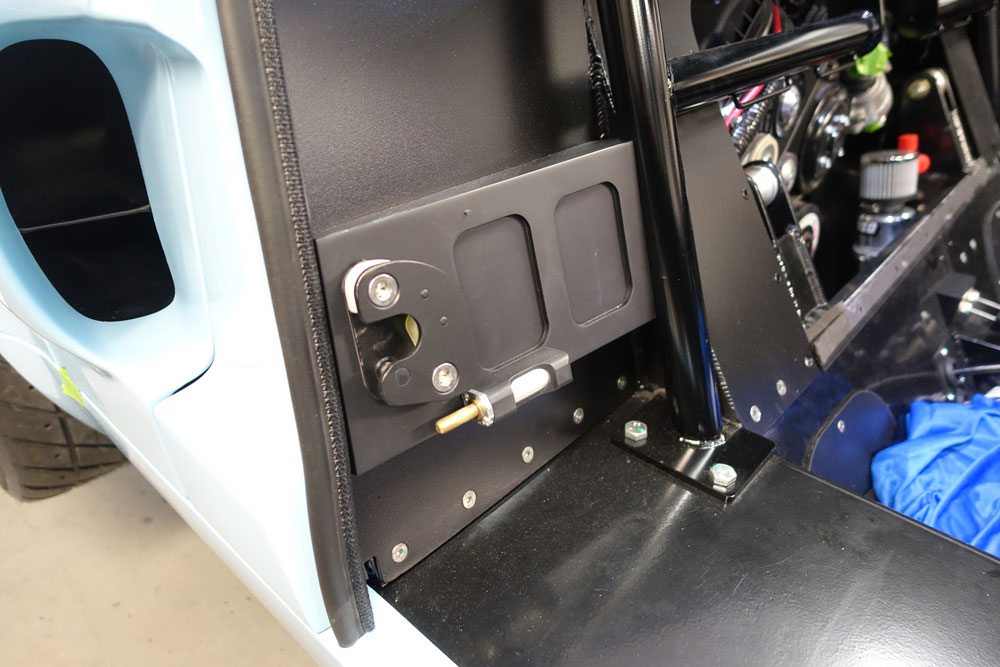
You can see the custom latch support. Also the door "popper". It really pops the door open even with considerable door seal drag from the roof area. It gives the car a good OE feel to door opening and was well worth the effort.
Body assembly has continued with many parts still to do. Its all looking good but its really hard to assemble in such a small place without damage.
Doors line up pretty well and Americar Auto in Dromana did a great job. Very happy.
Rear clip still needs some adjustment but I'm keeping the gap large to ensure things settle without damage.
Even though I have a single and twin nostril I think I will keep the single on most of the time.
The work to make the eared dzus clips was well worth it.
For a stripe painted off the chassis its a great job by my painter. Dark blue stripe looks great to me.
Anodised door handles suit what I wanted. I don't like too many shiny bits and this finish looks a little more subdued. Getting these gaps and maintaining them without paint damage required well engineered door handle pivots and adjusters.
Use of the 911 locks worked well. I'm very familiar with them from past project cars.
You can see the custom latch support. Also the door "popper". It really pops the door open even with considerable door seal drag from the roof area. It gives the car a good OE feel to door opening and was well worth the effort.
Similar threads
- Replies
- 21
- Views
- 2K