
You are using an out of date browser. It may not display this or other websites correctly.
You should upgrade or use an alternative browser.
You should upgrade or use an alternative browser.
Jason's Coyote Powered RCR40 Downunder
- Thread starter jferraro
- Start date
New Door Hinges
To get better detail alignment of the door and install a full length stainless steel pin and door plates I made the following.
The door plate hinge is original RCR with the rod end boss welded on and the assembly zinc plated. This has allowed me to fine tune the door position and have zero "slop" in the door hinge. With the way a GT40 door passes over the roof when closing this was important.
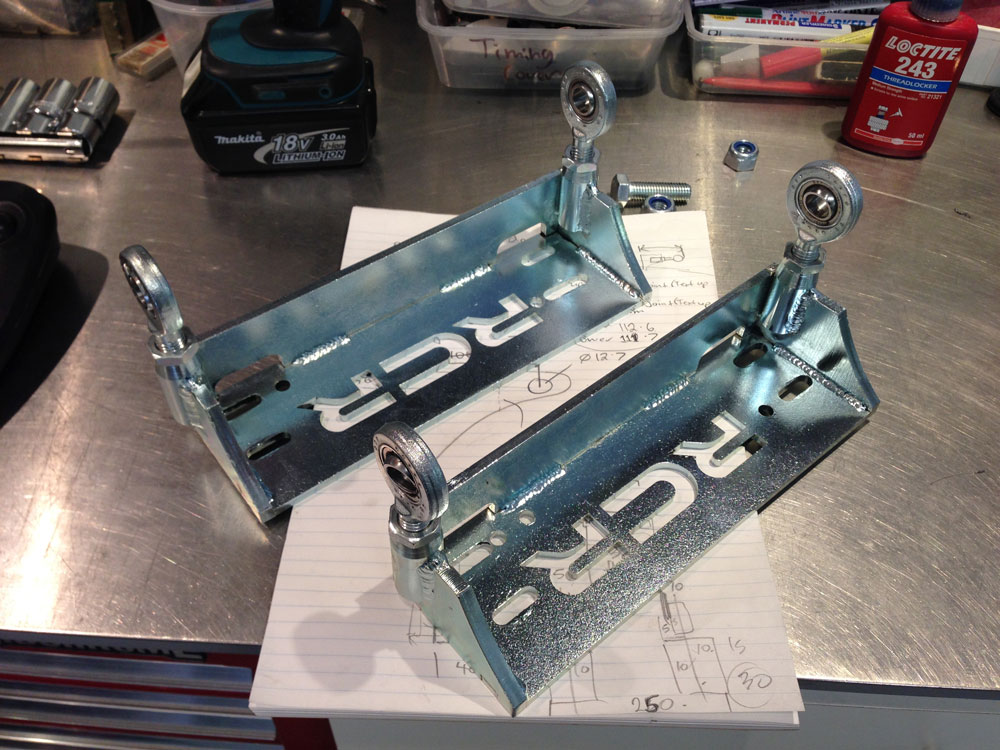
Rear Brake Cooling Ducts
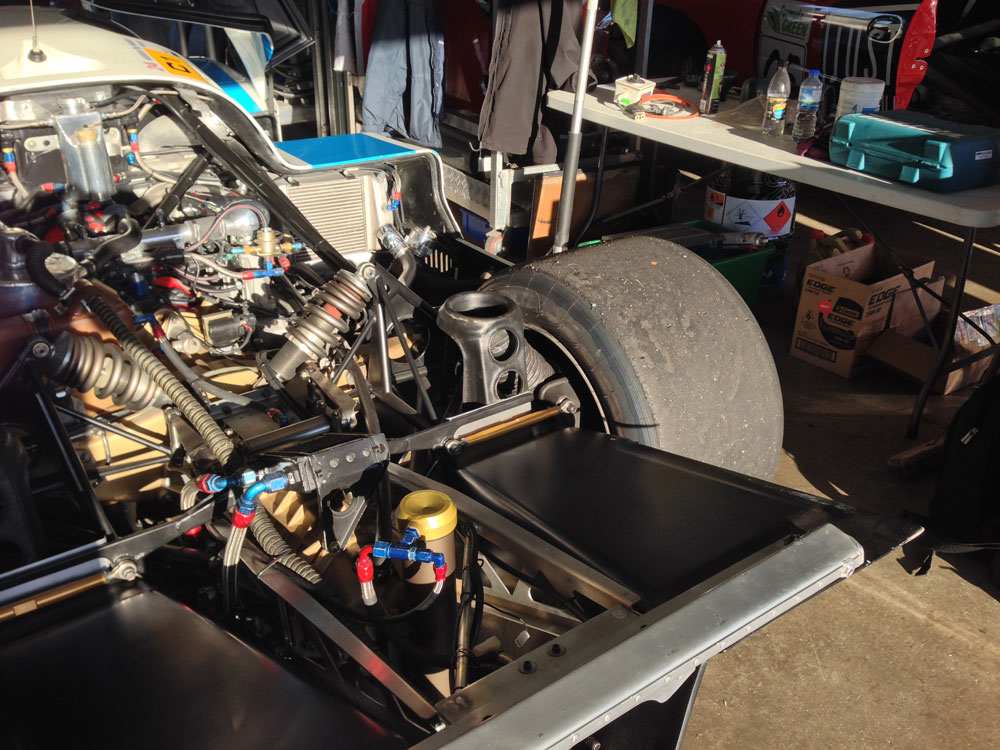
I always wanted to make functional rear brake cooling. I really liked the cooling setup on a Porsche 962 when I saw one at the races this year (my photo below).
Air coming in from the top down and the flexible hose compressing vertically is very neat.
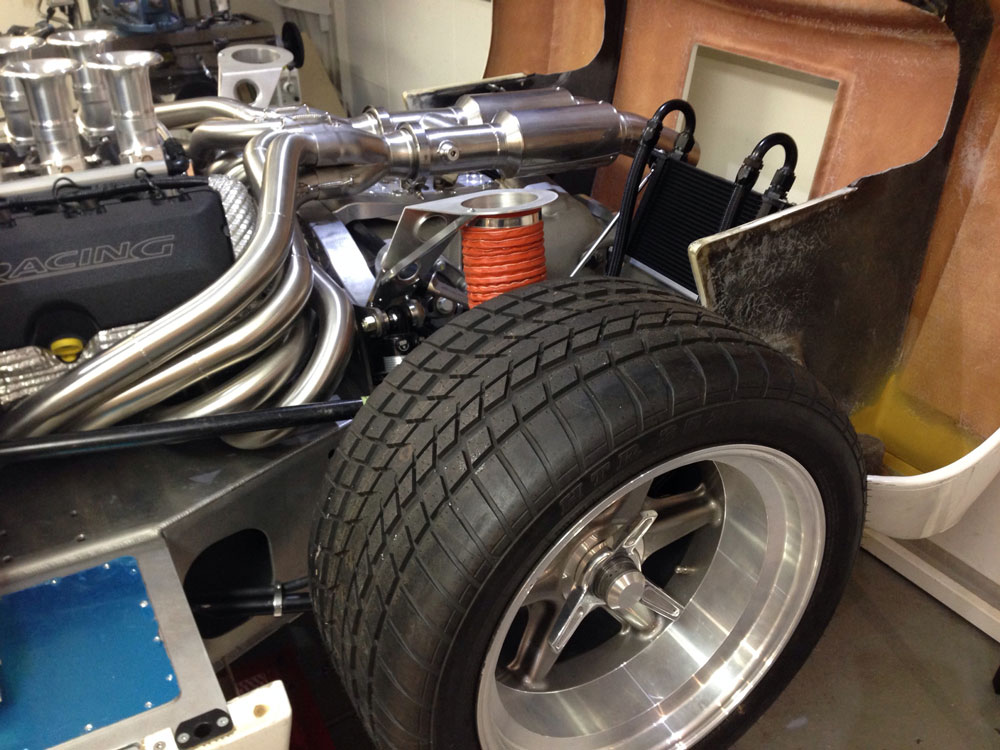
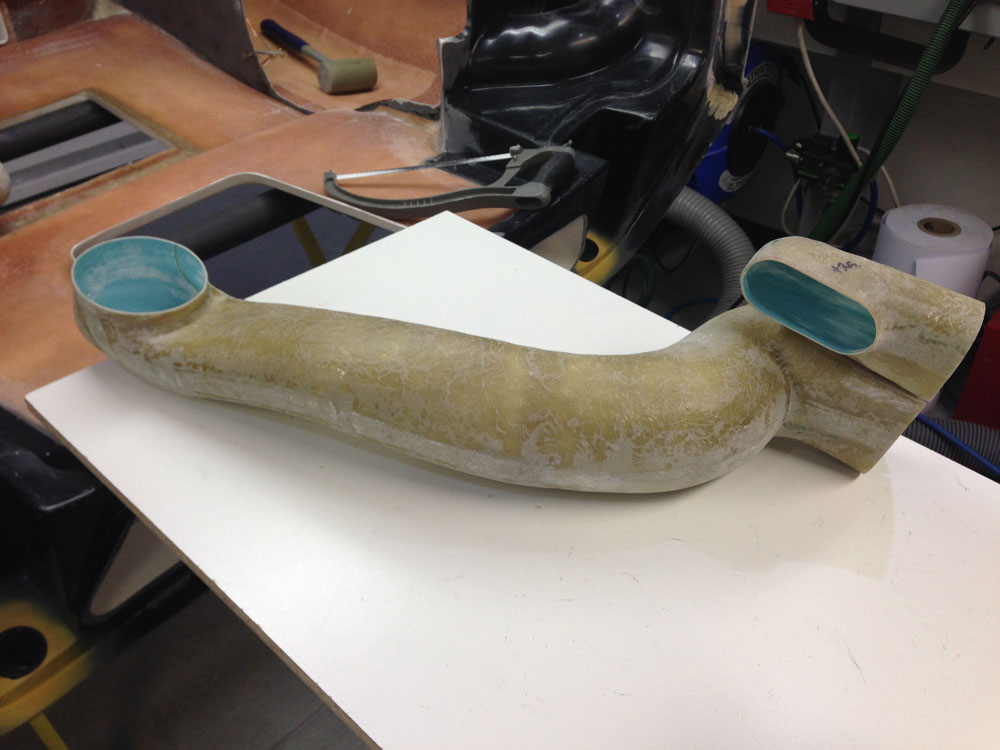
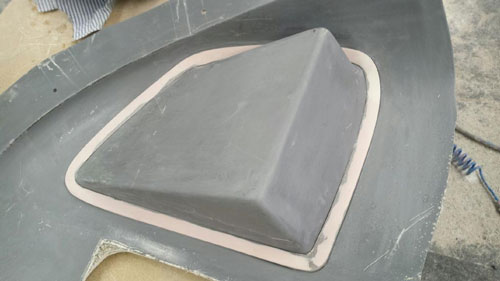
First step was to get air into the middle of the rotor (as I did in the front brake cooling duct I made earlier). Space was tight. I made a foam pattern and then constructed the duct out of carbon fiber. I will cover the area near the rotor in gold heatproof material to protect it somewhat from high radiant heat from the rotor.
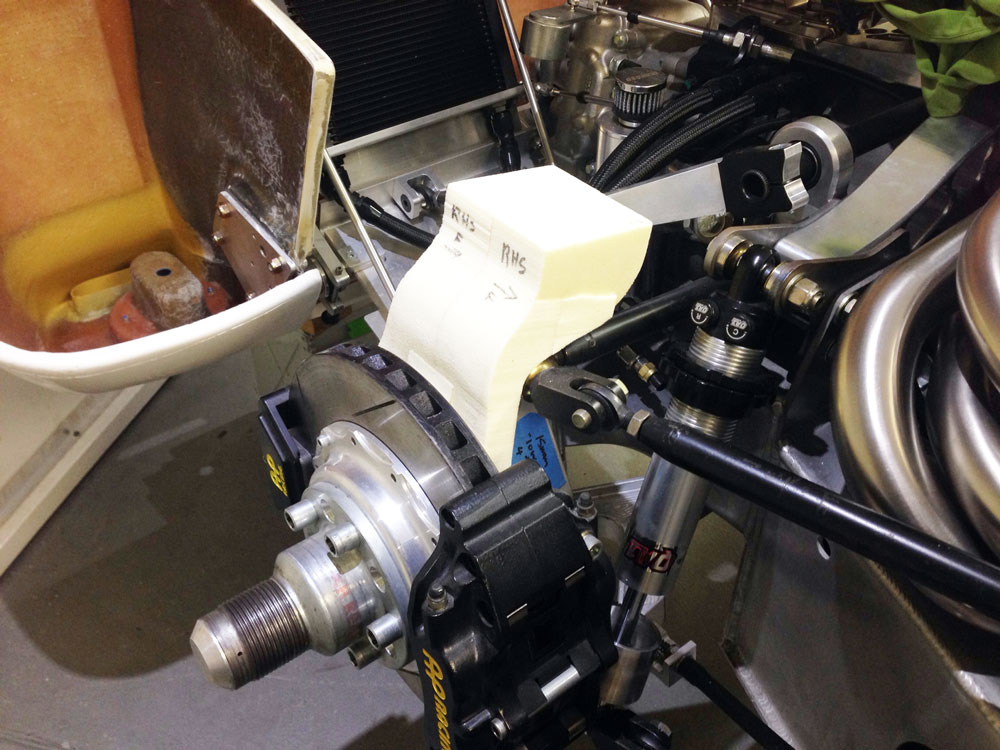
Foam patterns ready for carbon lay up. They do neck down near the rotor as space is tight but the air will accelerate and flow OK.
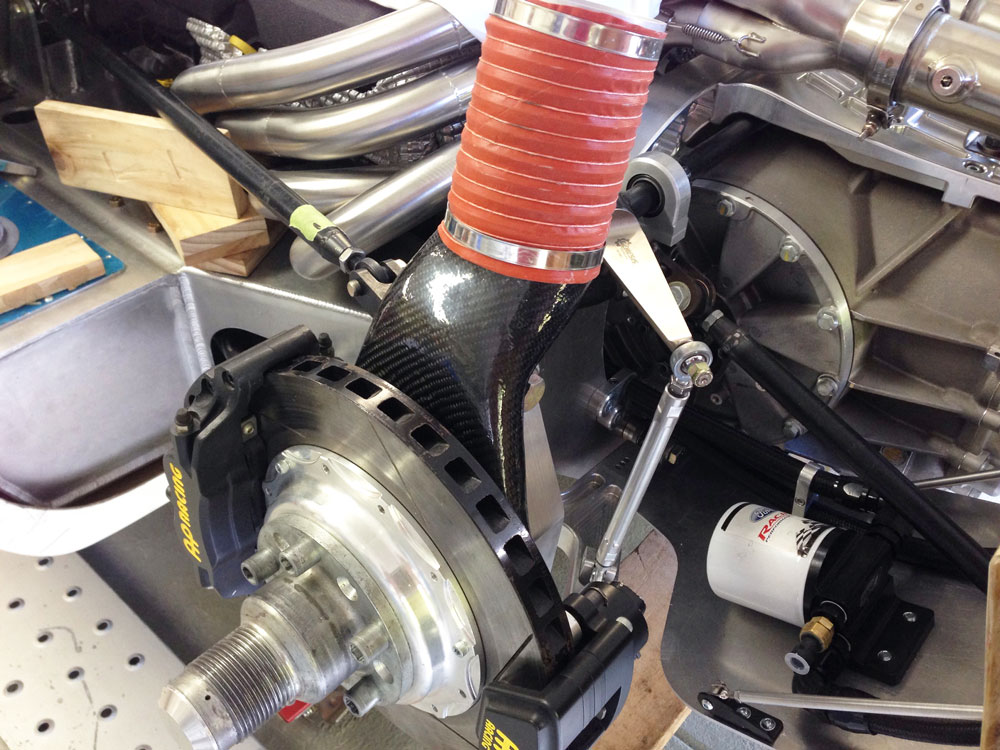
Carbon dust bolts securely to the aluminium upright in three places.
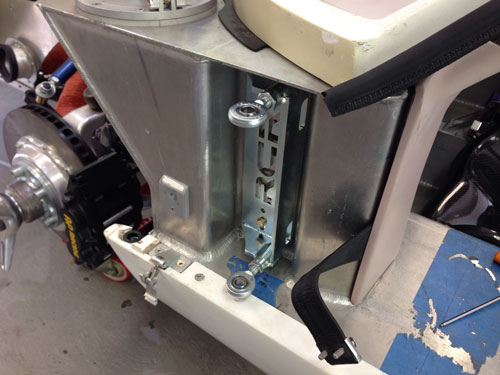
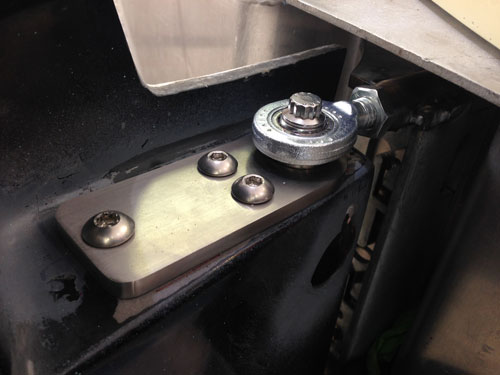
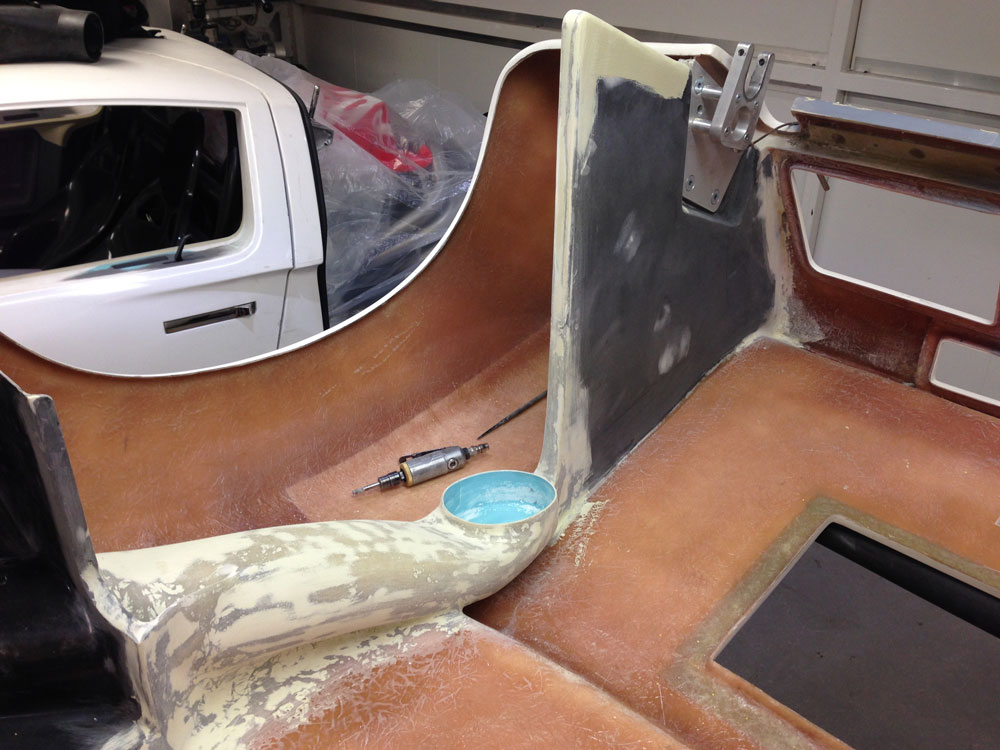
Next step was to create a fixing point for the top of the hose to marry to the body. The trick is to keep this whole system low enough to fit under the rear clip and allow full suspension travel. An alloy spacer on full suspension travel was used to position the upper mount that is fixed to the chassis.
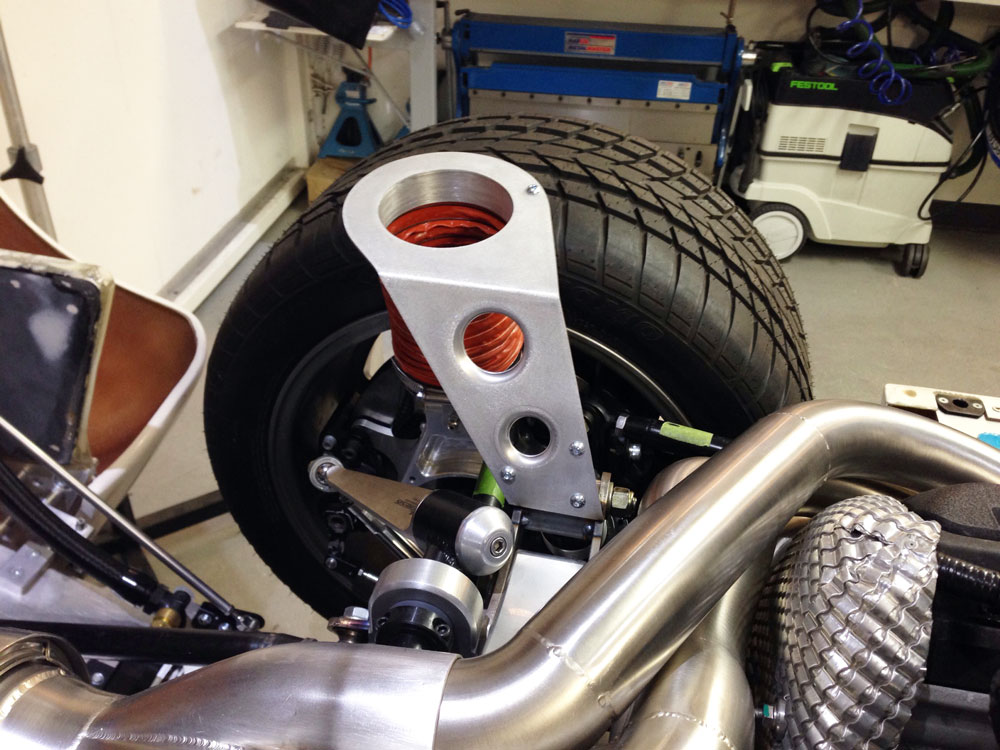
This alloy plate will allow a pinch weld rubber seal on a body duct to seal correctly when the rear clip is lowered.
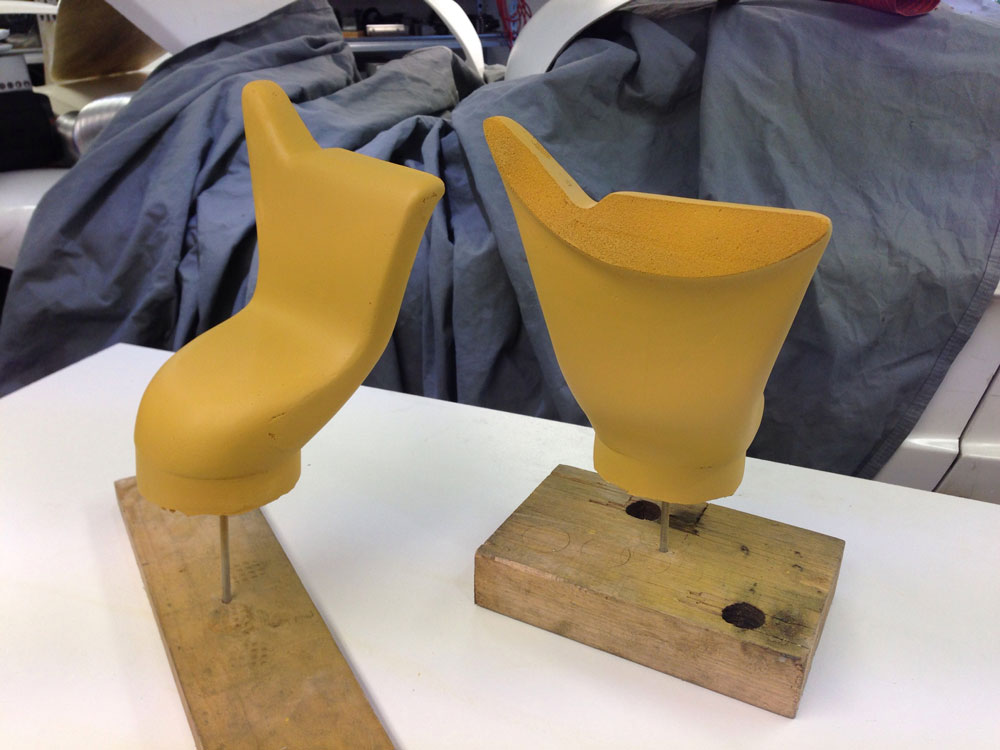
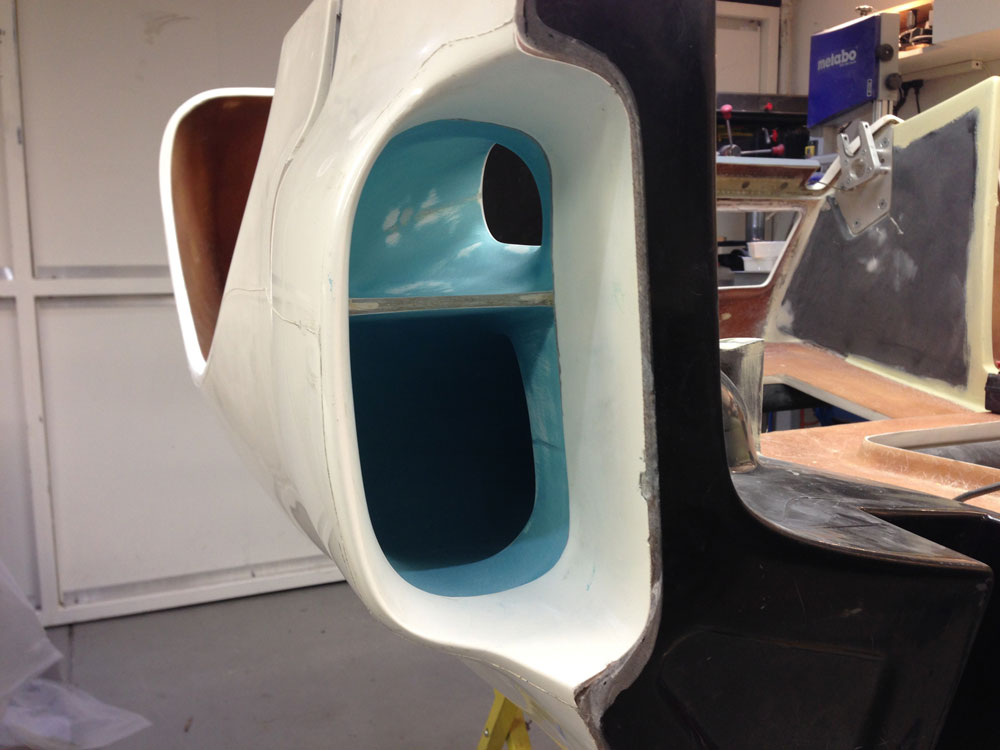
Now for the ducts. First foam patterns were constructed. This took a while!
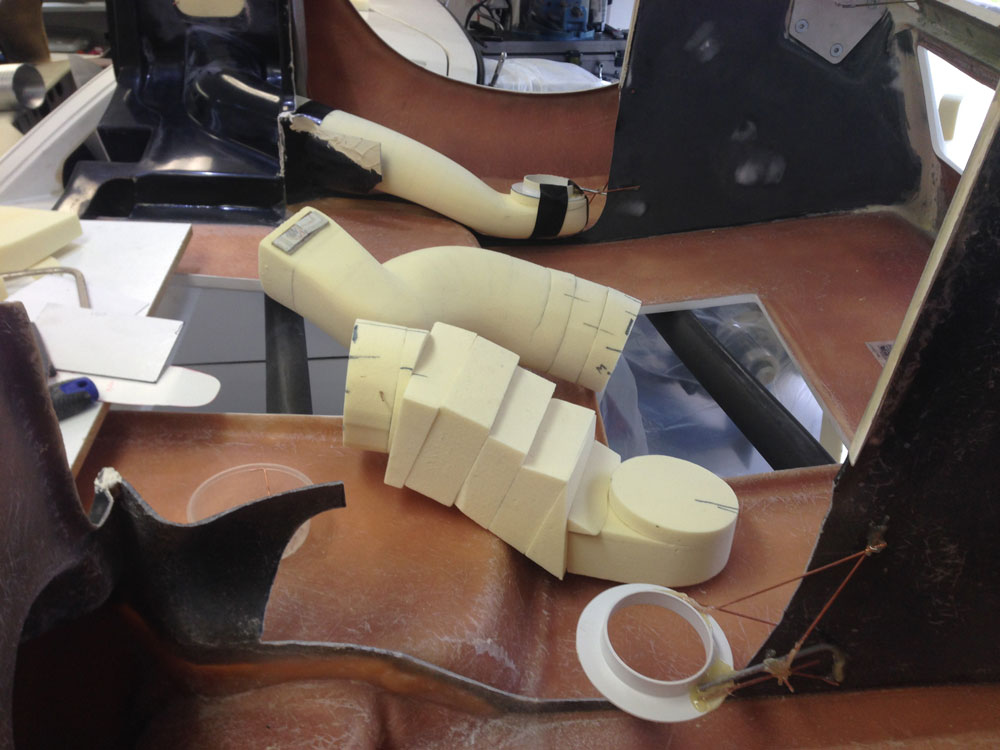
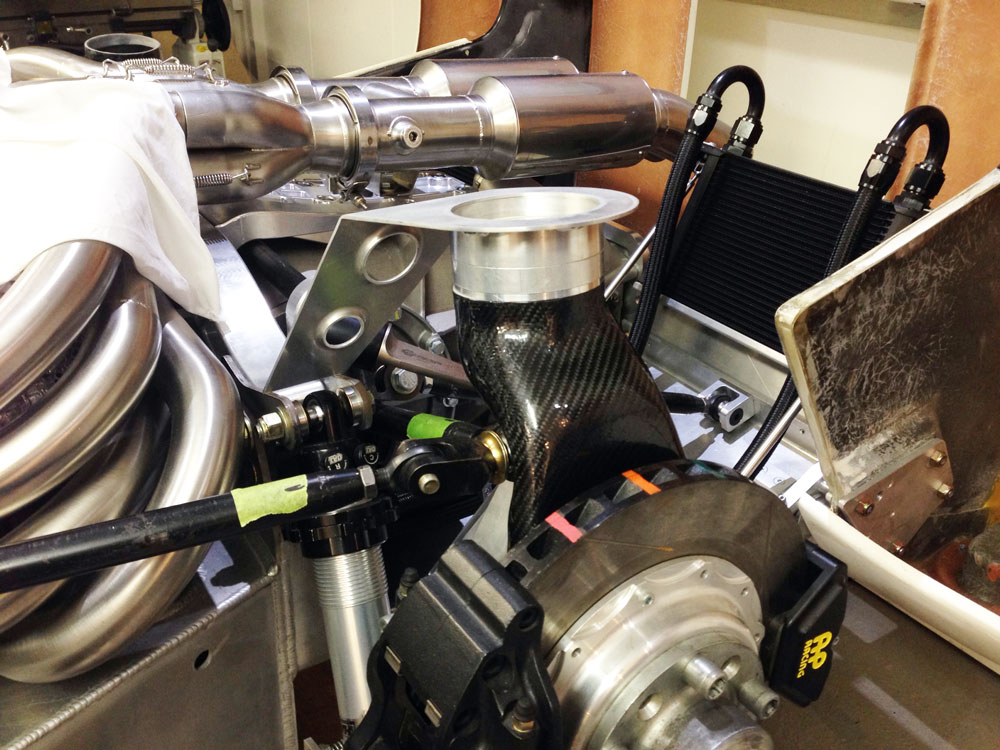
Plastic fitting was the exact point of the allow chassis mounts so a perfect seal could be made. I also made the smaller ducts that channel air to the original cars cooler positions. On my car this will simply cool the extractors a little.
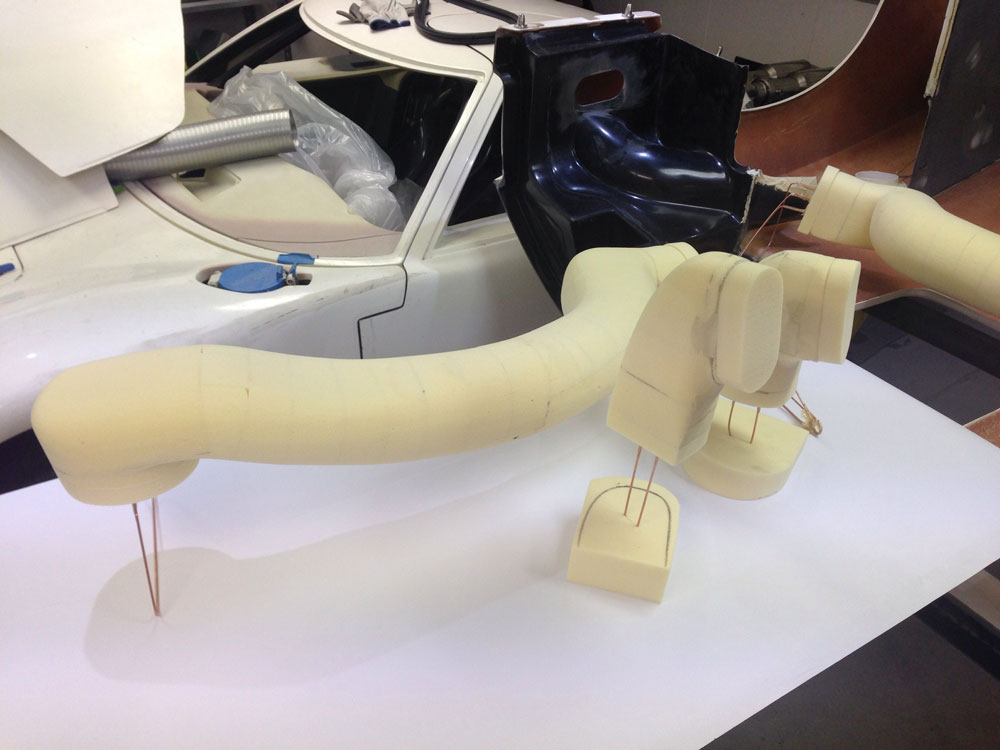
Now to cover in fibre glass, split, remove foam, join again and fill the internal cut line. I wanted perfectly smooth inner surfaces so that when you look down the duct it will be perfect. Nothing looks worse than raw fibre glass.
Finished duct was then fixed into the rear clip.
As you can see below, the duct has to be mounted high on the clip to allow suspension compression. Outer surface of the duct was also smoothed off.
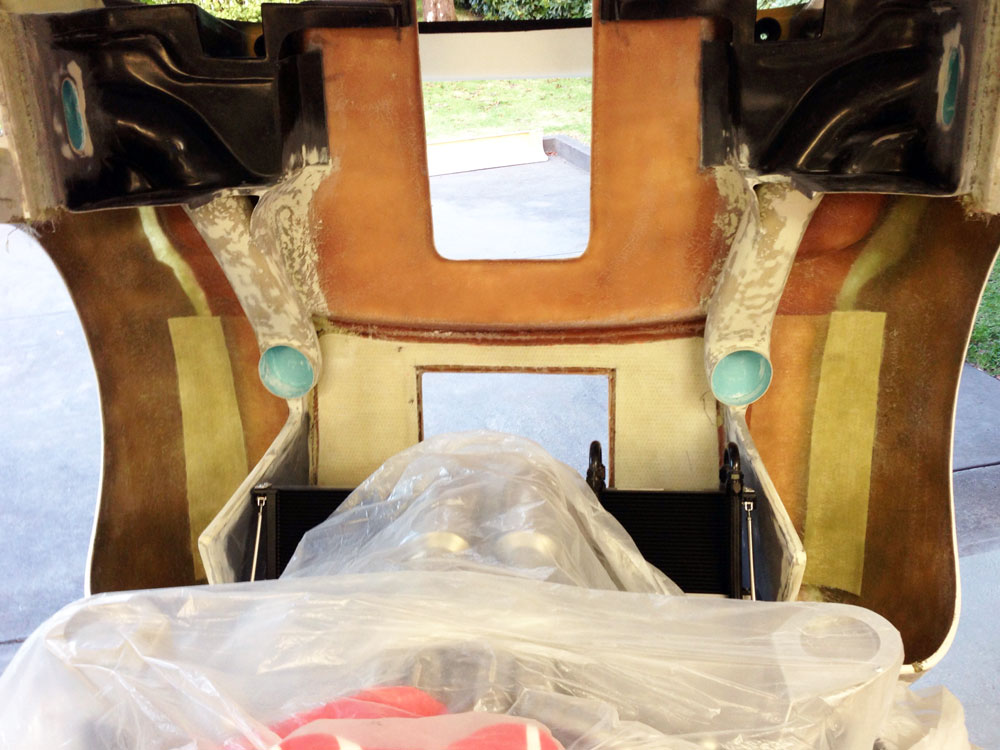
Ducts are symmetrical and don't look too out of place. Not original looking but hell none of the guts of the car does.
Then I also put the gulf rear flares on. What a hell of a job that is, lining them up to be within 1mm side to side took 3 nights!
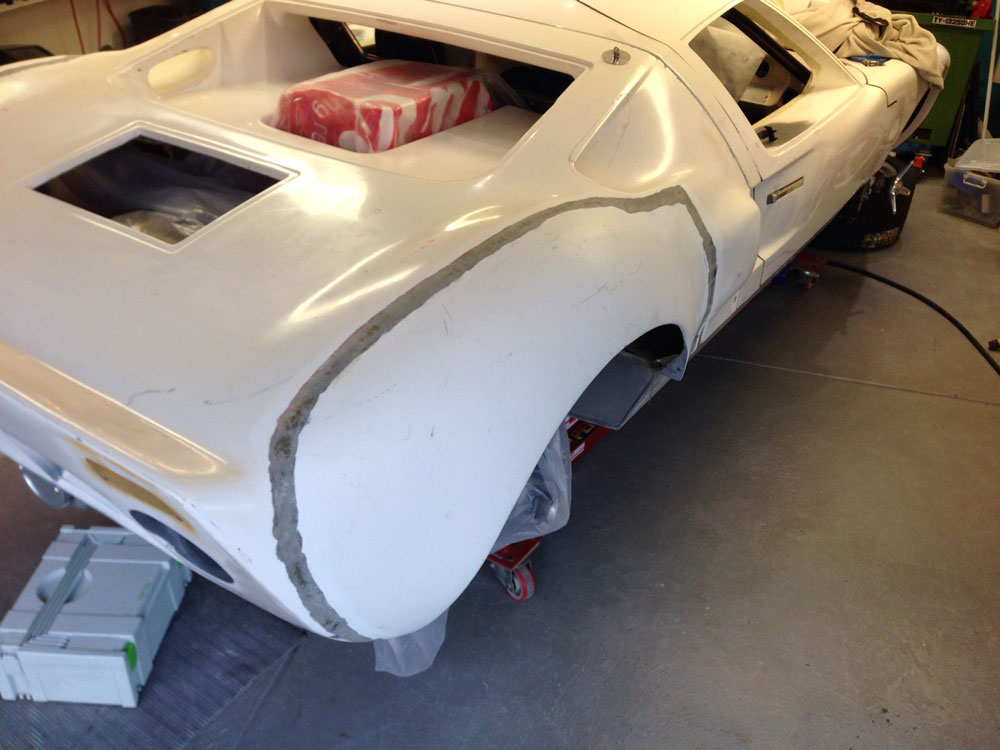
Edges were feathered on top but without removing too much of the top surface, underneath they were feathered and 4" of glass either side of the join was added along with additional core mat where it had been cut off. Seriously, pay someone to do this if you can it was a PITA! I should have got RCR to do it when they offered!

I always wanted to make functional rear brake cooling. I really liked the cooling setup on a Porsche 962 when I saw one at the races this year (my photo below).
Air coming in from the top down and the flexible hose compressing vertically is very neat.
First step was to get air into the middle of the rotor (as I did in the front brake cooling duct I made earlier). Space was tight. I made a foam pattern and then constructed the duct out of carbon fiber. I will cover the area near the rotor in gold heatproof material to protect it somewhat from high radiant heat from the rotor.
Foam patterns ready for carbon lay up. They do neck down near the rotor as space is tight but the air will accelerate and flow OK.
Carbon dust bolts securely to the aluminium upright in three places.
Next step was to create a fixing point for the top of the hose to marry to the body. The trick is to keep this whole system low enough to fit under the rear clip and allow full suspension travel. An alloy spacer on full suspension travel was used to position the upper mount that is fixed to the chassis.
This alloy plate will allow a pinch weld rubber seal on a body duct to seal correctly when the rear clip is lowered.
Now for the ducts. First foam patterns were constructed. This took a while!
Plastic fitting was the exact point of the allow chassis mounts so a perfect seal could be made. I also made the smaller ducts that channel air to the original cars cooler positions. On my car this will simply cool the extractors a little.
Now to cover in fibre glass, split, remove foam, join again and fill the internal cut line. I wanted perfectly smooth inner surfaces so that when you look down the duct it will be perfect. Nothing looks worse than raw fibre glass.
Finished duct was then fixed into the rear clip.
As you can see below, the duct has to be mounted high on the clip to allow suspension compression. Outer surface of the duct was also smoothed off.
Ducts are symmetrical and don't look too out of place. Not original looking but hell none of the guts of the car does.
Then I also put the gulf rear flares on. What a hell of a job that is, lining them up to be within 1mm side to side took 3 nights!
Edges were feathered on top but without removing too much of the top surface, underneath they were feathered and 4" of glass either side of the join was added along with additional core mat where it had been cut off. Seriously, pay someone to do this if you can it was a PITA! I should have got RCR to do it when they offered!
Jason,
Nice job sir!! As the rear clip gets heavier, you will notice that the stock mounting system flexes a LOT. Since you are going all-out on your build, you may want to take a good look at the front and rear sub-frames Tom made for his track racer. After having that clip on and off several times and removing almost the whole back-half of the car to get at the starter/suspension mounts, NOW is definately the time to do it!
Keep up the great work, Scott
It was a challenge with the inner fenders on. The rear mounting system on my car is upgraded along with the way it is stabilised. Good point and on mine I'm covered. I have a glass rear window that will load it more.
Hi Jason
Great work with fantastic attention to detail...
Seeing this is great inspiration for my own GT40.
Thanks for posting
Cheers Craig Young
Great work with fantastic attention to detail...
Seeing this is great inspiration for my own GT40.
Thanks for posting
Cheers Craig Young
Body Work
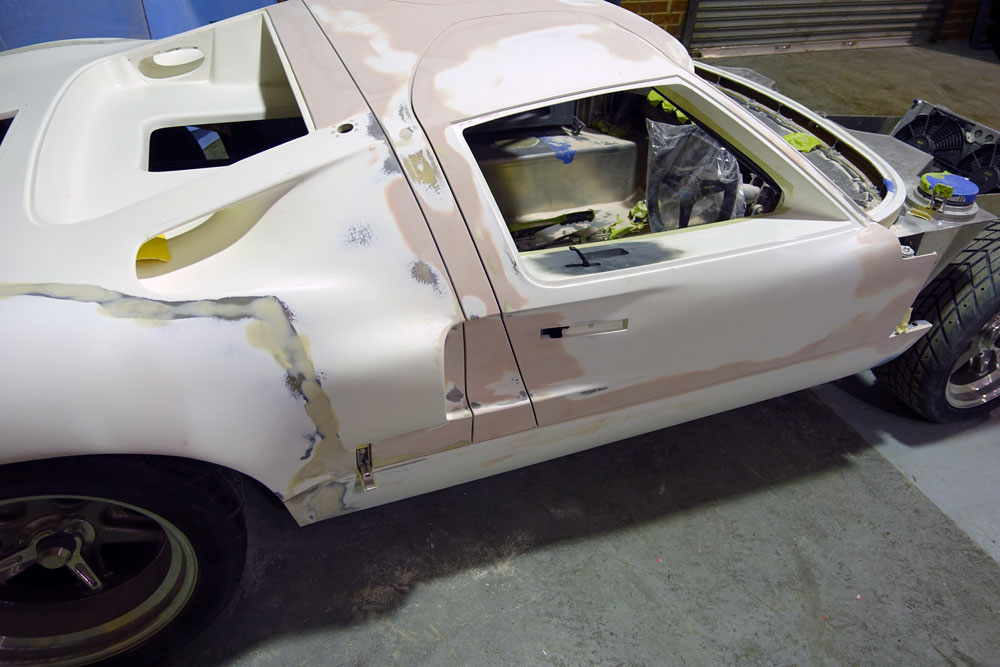
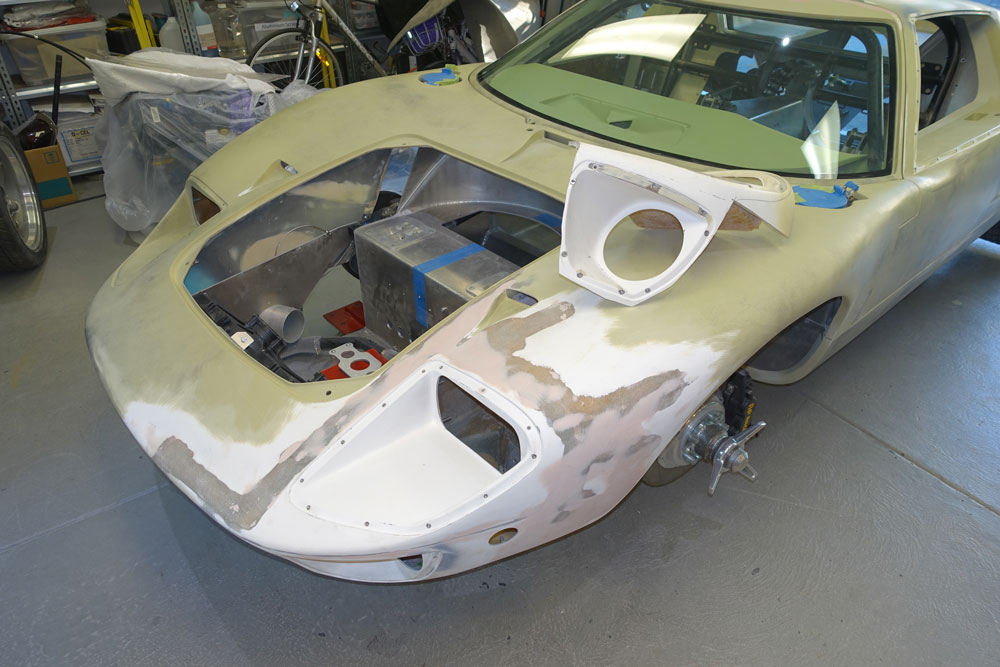
Its been a while since my last post, but I have been working on the car.
Many nights of late work. Much sanding. A lot of work from Kaber, laser scanning, mould making and body symmetry fixes. Its now ready for the painter to finish panel work and paint. What an ordeal! I think I will just list some images and a bit of text.
Yes I think the LHS and RHS rear flares do not match perfectly. Lets laser scan the car, make a mould and remake the LHS of the car at the back!

LHS now perfectly mirrors the RHS in every detail.
The LHS front also does not really perfectly mirror the RHS, lets remake that off a laser scan of the RHS as well. More cutting.
New LHS made and placed on car by Kaber. Car is now perfectly symetrical when viewed front on. Originals were not so this is a bit overboard but what the hell!
Precision hinges allowed for tight body gaps all round.
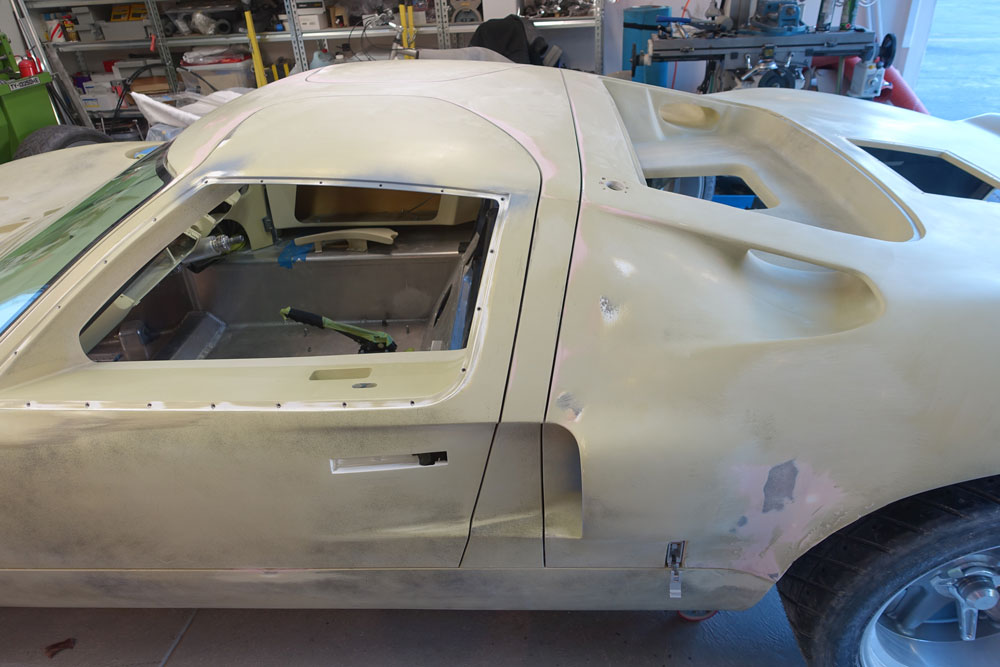
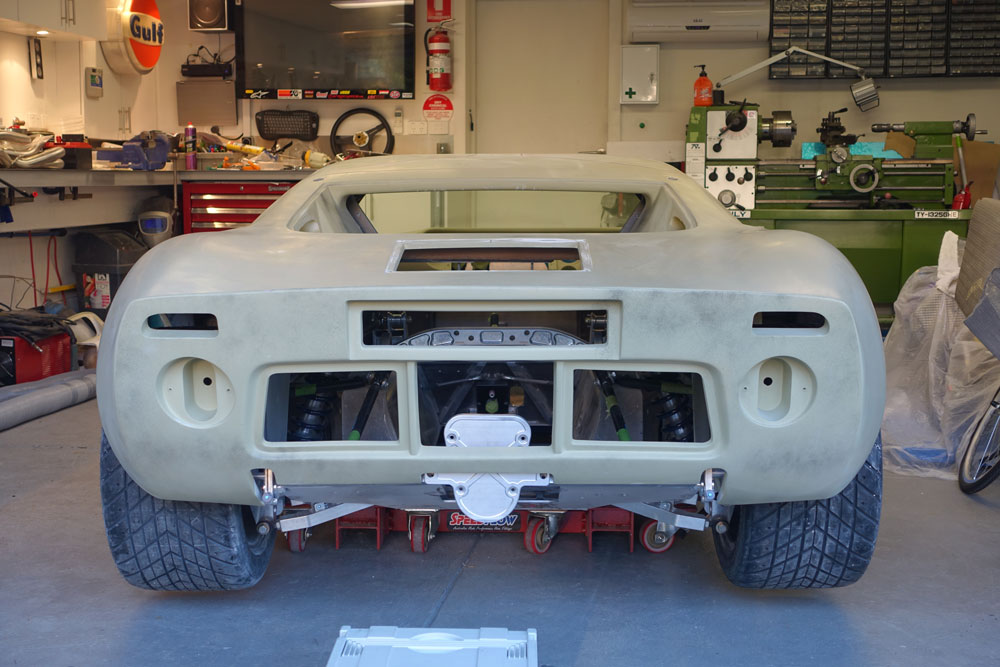
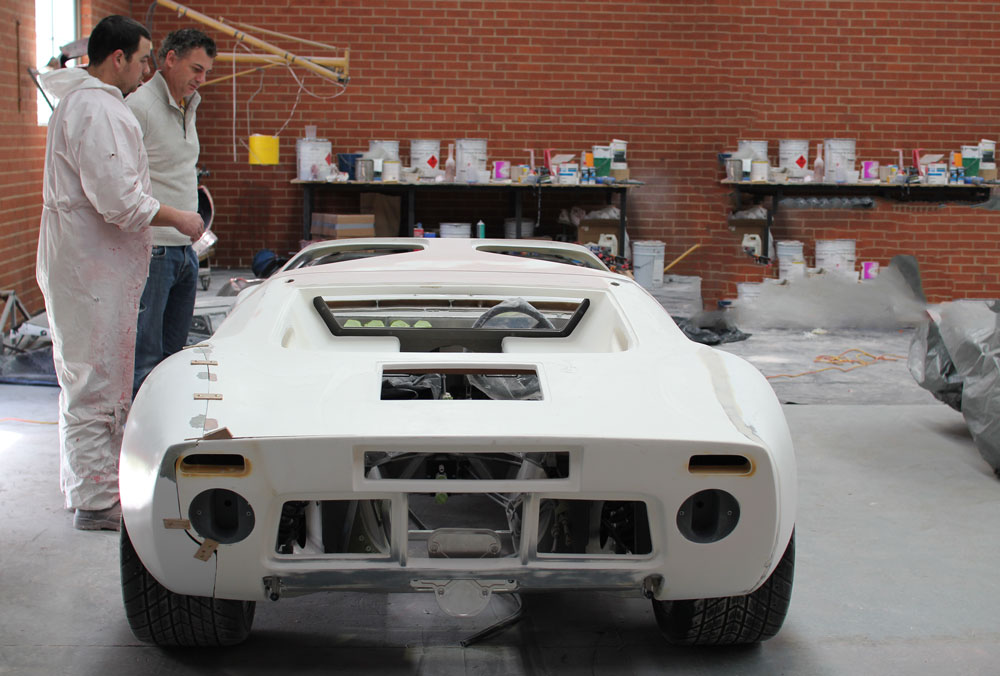
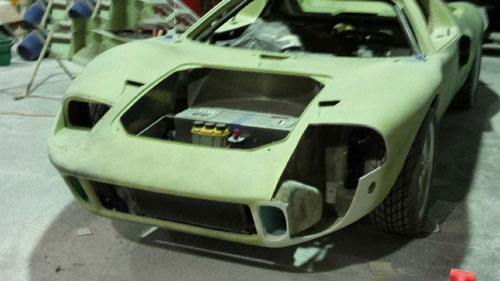
Car is now at the painters for 1.5 months. Full gulf paint and full colorsand finish. I want the car like a mirror, not what the originals were but this is just a replica so I am doing what I want.
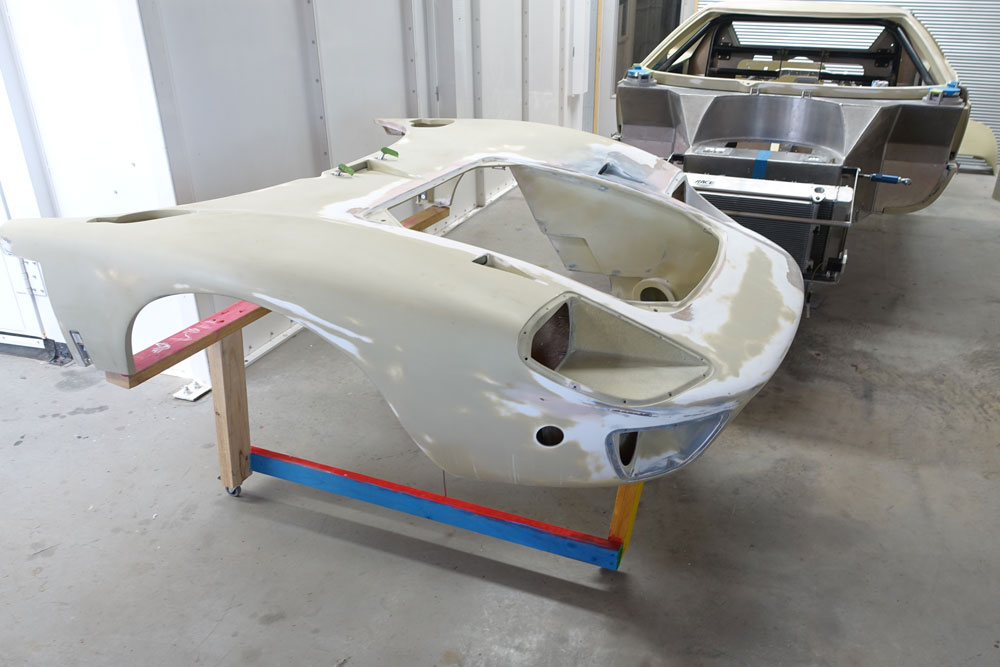
I think these are boring photos to all but those that have done this or are about to!
Its been a while since my last post, but I have been working on the car.
Many nights of late work. Much sanding. A lot of work from Kaber, laser scanning, mould making and body symmetry fixes. Its now ready for the painter to finish panel work and paint. What an ordeal! I think I will just list some images and a bit of text.
Yes I think the LHS and RHS rear flares do not match perfectly. Lets laser scan the car, make a mould and remake the LHS of the car at the back!
LHS now perfectly mirrors the RHS in every detail.
The LHS front also does not really perfectly mirror the RHS, lets remake that off a laser scan of the RHS as well. More cutting.
New LHS made and placed on car by Kaber. Car is now perfectly symetrical when viewed front on. Originals were not so this is a bit overboard but what the hell!
Precision hinges allowed for tight body gaps all round.
Car is now at the painters for 1.5 months. Full gulf paint and full colorsand finish. I want the car like a mirror, not what the originals were but this is just a replica so I am doing what I want.
I think these are boring photos to all but those that have done this or are about to!
Awesome work Jason!!!! The lack of "even close" symmetry in this body has driven me almost mad... I worked for months to get things lined up and finally gave up on the front clip's left front corner up to that NACA duct. I ended up writing it off and accepting the 5/8" "goof" in that corner. But I managed to pull the left side out roughly 1" which was in the left side door, spider and rear clip.
I grant you that these cars were built in 1964 without the benefit of CAD etc, but sheesh what a mess these cars truly were and so few ever knew - until, they tried to mount the body squarely on the chassis...
Kudos to you for all your efforts!
I grant you that these cars were built in 1964 without the benefit of CAD etc, but sheesh what a mess these cars truly were and so few ever knew - until, they tried to mount the body squarely on the chassis...
Kudos to you for all your efforts!
Thanks all for the kind comments.
One could say the standard body has "character". Some of it is not that noticeable other bits are a little more noticeable. I have a problem that when I notice something, or it is pointed out to me, I cannot leave it alone. Its my character flaw :drunk:
The LHS front corner was ultimately totally cut off and replaced, including the whole front brake duct area. Also the naca ducts on the top of the front clip were made symmetrical. Now while its all not 100% perfect it is very close and to me looks great.
Cars that were left as they are simply have character, mine is now devoid of that character. As its not an original car and as such I have no issue in changing it to suit my tastes.
Roll Cage
I'm pretty tall and did not want my head to hit the middle cage bars so they were modified as shown. The two central bars were replaced and moved closer together to give my head more room to move inboard without striking the bars. I will put some impact foam on them but just wanted it as safe as possible (hard in these small cars).
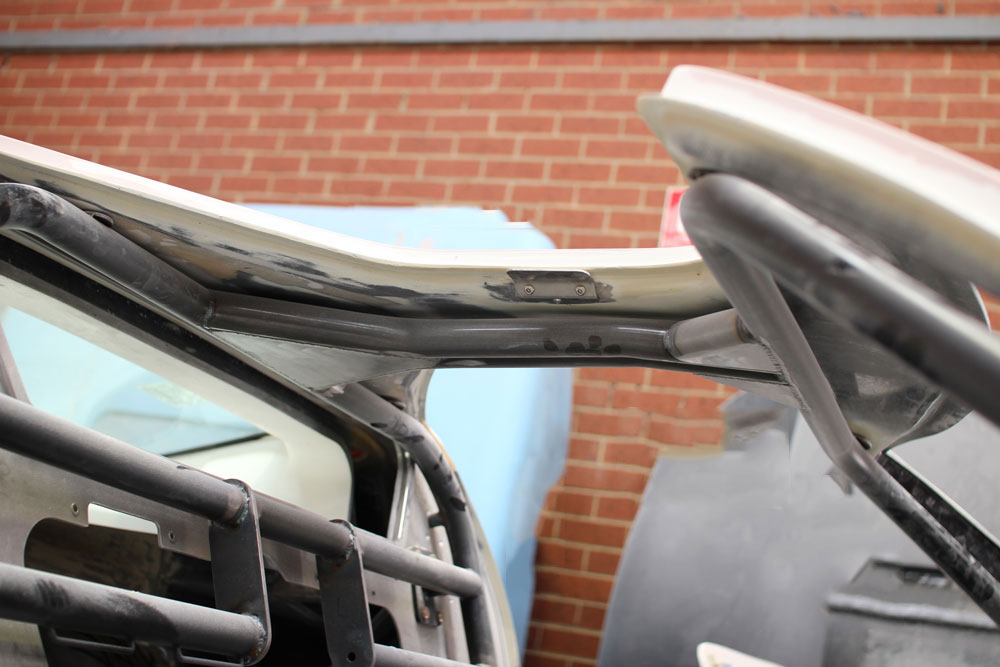

Job was done by Roaring Forties and I am very happy with the result.
I'm pretty tall and did not want my head to hit the middle cage bars so they were modified as shown. The two central bars were replaced and moved closer together to give my head more room to move inboard without striking the bars. I will put some impact foam on them but just wanted it as safe as possible (hard in these small cars).
Job was done by Roaring Forties and I am very happy with the result.
Awesome work by Kaber.....I see my red spider in the top left of your pic sitting on a stand in the crap.......no wonder my new car is running late....:laugh:
Jason i have a similar cage made by RF and I am struggling with if I should fit it or not, do you plan to drive your car on the street? Are you thinking of wearing a helmut? or just padding the cage?
Jason i have a similar cage made by RF and I am struggling with if I should fit it or not, do you plan to drive your car on the street? Are you thinking of wearing a helmut? or just padding the cage?
Attachments

Hi Dave, that photo is well over 2 months old now and I do not know who's parts were in the background.
Regarding the cage I will be on the street occasionally. I will not be fully registering mine, just club registration so I expect no issues there.
I would feel safer in a helmet but I would look like a &%$# wearing it. I will be padding the cage.
Regarding the cage I will be on the street occasionally. I will not be fully registering mine, just club registration so I expect no issues there.
I would feel safer in a helmet but I would look like a &%$# wearing it. I will be padding the cage.
Last edited:
My advice since I have a cage, is to first, set the seat at a level that with body movement in the harness, will not allow your head to hit any part of the frame. Even with FIA padding or the level just under FIA(can't remember it), and you hit it with your head(in a helmet) it can still do damage depending on the decelerating forces. Then if you don't wear a helmet, you know you won't hit any of the structures. I am making an assumption here that you will wear your full harness all the times. I hope you have a Hans device for track days. Take a look at the Rally drivers(Utube) that crash with in car cameras and see how violently the head(with helmet on) moves in a shunt. My bones are too old for that kind of movement.
Bill
Bill
Exactly right Bill. I only have a 6 point harness so I'm strapped in tight. I cannot hit any part of the roll cage with my helmet on (have Hans device too). Without a helmet clear everything well. I needed very low carbon seats to achieve this as I'm 6,2 tall. No Gurney bubble was needed. If you sit so high that you need a bubble you possibly hit the cage.
Similar threads
- Replies
- 21
- Views
- 2K