Jason's Coyote Powered RCR40 Downunder

I did a similar modification to my cage also, but I am getting ready to delete the front portion of the cage. Despite a 6-point harness super tight, I can still just get my head to touch the front hoop (the center is not a problem). Granted, that is with dual density foam, but I think on the road the front hoop is more of a danger than a safety measure; if you can get close sitting still, you will nail it in a crash where the forces are waaaay beyond you leaning your head forward or to the side. On track with a HANS and helmet it is a different thing, so I am going to make mine convertible where I can remove or replace the entire front section.

I have standard seats, and I am 5'10".
 
I would be interested in how you do that conversion. My front part of the cage is lower than i would like and limits visibility. It was added with the cabin installed, and was impossible to take off at the time. Believe it was installed at the factory. At red lights I have to bend forward and look up to see them. Would be nice to have it convertible.

Bill
 
This head strike issue is an important one for me. I have spent a lot of time looking at ways to reduce its likelihood.

I can see how sitting in a standard padded seat may cause your head to be close to the front bar. I have tried some standard seats vs my carbon ones. The carbon ones put me only 5mm off the floor. Padded seats that I borrowed to test move me up a lot. Also my carbon seats have some decent recline. All this together means I sit nice and low in the car and with a six point harness on I will not hit the bars. I worked very hard to achieve this. Also I worked hard to comply 100% to the Schroth belt fastening position requirements.
 
Preparing for Final Assembly

I had the alloy parts wet blasted before anodising. Wow the parts do look great. These shots are before anodising of just a few of them. Basically doing all alloy parts on the car.

GT40-Alloy-Parts-1.jpg


GT40-Alloy-Parts-2.jpg


I have parts out at platers, anodisers and powdercoaters as I'm leaving Australia for SEMA in Las Vegas this weekend. Never been and just wanted to go to check it out. It out to be great. Possibly see Fran there from RCR as well.
 
SEMA = Candy store for big kids. I'll actually get some time off from our booth to get around the rest of the show this year.
 
Anodised Parts

Had the first lot of parts anodised. Wow they come out good. Costs a bit here in Australia to do this but it looks cool.

GT40-Anodised-Parts-1.jpg


GT40-Anodised-Parts-2.jpg


GT40-Anodised-Parts-3.jpg


Also went to SEMA this year for the first time for fun. WOW what a show, it was great.

SEMA1.jpg


Saw lots of stuff to buy, just need more cars to use it on!.
Also had a good driving holiday for 1.5 weeks with a few Aussie mates as well. Could not look at all those cool cars at SEMA and spend 1.5 weeks in the USA in a crappy rental. I got hold of a 2014 Mercedes SL550 and went from Las Vegas, Death Valley (Vmax), Mammoth, Yosemite, San Francisco, Big sur to LA and back to Vegas. Approximately 1,700 miles in the best twin turbo V8 Mercedes I have driven. Great car.

SEMA4.jpg


SEMA3.jpg


SEMA2.jpg


Anyhow back in Australia and need to finish the GT40. I somehow think the GT40 may not have the driver comfort that the Mercedes had!
 
Last edited:
Looking at my chassis today and the finish looks a bit average compared to all the parts. It is scratched up and dull.

Looking for feedback on powder coating it satin black. Any comments or suggestions?

Thanks.
 
I think powder coating is one of the strongest finishes you can put on something that will see some abuse, heat, chemicals, solvents etc.I had a bad experience with brake fluid, but i feel it was my mistake that cause the failure of the coating.
PB230015_zps3018e599.jpg

PB230012_zps69fb0ee8.jpg


It is a hard, textured coating that is semi shiny, much like powder coating. I undercoated my DRB with it and it has stood up to daily abuse(including oil and trans fluid leaks) as well as jack stands and the like. The one thing it didn't like was brake fluid. I had an unnoticed leak that showed up when I noticed the reservoir had dropped. It pooled in the areas where the frame members and the belly pan meet and it pretty much broke the bonding of the Linex. The belly pan was attached with large stainless rivets(drilled and installed after the coating was applied) and this may have led to the fluid getting underneath the coating. I probably should have addressed this with the Linex people when discovered, but this was in the middle of the build and the car wasn't transportable at the time. It had sat next to the Linex for a long period of time(months), so it should stand up to the brake fluid if it is attended to, and there aren't any breaks in the finish. Here is their spiel on the product.LINE-X Sprayon Bedliners, Protective Coatings, Truck Bed Coating, Floor Coating, Industrial Flooring
PB230016_zps7a0f655e.jpg


Even though it is hard coating, I was able to peel it off as the coating was not attached to the small(1x1) square tube frame members at those points and just painted them black. Haven't tried any of the spray on liner coatings in the spray cans, so can't vouch for their ability to withstand any solvents. I have cured the leak so I may address that area this winter.
 

Dimi Terleckyj

Lifetime Supporter
Looking at my chassis today and the finish looks a bit average compared to all the parts. It is scratched up and dull.

Looking for feedback on powder coating it satin black. Any comments or suggestions?

Thanks.

Hi Jason

I have found that the best paint for chassis is good old engine enamel.

Available in a number of finishes and gloss levels and is resistant to all oils and solvents and can be sanded back and sprayed from a rattle can any number of times for touchups.

Dimi
 
Thanks for the comments. Just need to decide what to do now, leave it in Alloy or coat it. More the issue of what I want to look at, black or scratched alloy!
 
If you like the allow best you can coat it and that will give you the best of both worlds.There are several types out there to choose from.

Bill
 
Nearly Ready for Colour!

All the hours of preparation are coming to an end. Gaps are looking good and the body has gone through a lot of checking. Trial fit to check and adjust gaps one more time and then is off to colour! I know we have all seen 1,000 of these images but when its your own car and its been a long time coming it is exciting.

GT40-Paint3.jpg


GT40-Paint1.jpg


GT40-Paint4.jpg


GT40-Paint5.jpg


GT40-Paint2.jpg
 

Randy V

Moderator-Admin
Staff member
Admin
Lifetime Supporter
Those are some of the nicest shut line / gaps I've seen.....
I know it takes a ton of work to achieve those with these bodies - so my hat's off to you!
 
Thanks for the comments guys. One of the key things that were all hinges and fixings were zero free play otherwise these gaps could not be maintained.
 
That is really nice....testament to the RCR body fit..I remember Tom got a similar result.....well done Jason....Cant wait to see it painted.
 
Chassis

Thanks for the comments guys. Tom's car was a really high watermark and to be compared to his car is definitely a compliment. The chassis gets a similar treatment to his car as well.

While the aluminium chassis looked great after 6 years it had scuffed and marked up. I did not want to polish it so I took the plunge and powder coated it satin black.

First I used the orbital to sand it all down and then washed it clean with detergent.

GT40-Chassis-1.jpg


All areas that I did not want powder coat on were masked.

GT40-Chassis-2.jpg


It was then primed with powder and given the top coat. Adhesion is really good. Its very hard to chip and does not peel off. The preparation and primer was worth it.

GT40-Chassis-3.jpg


Now to assemble some parts to allow body fitment to line up the panels for the stripe and roundels etc.
 
Reassembly Begins

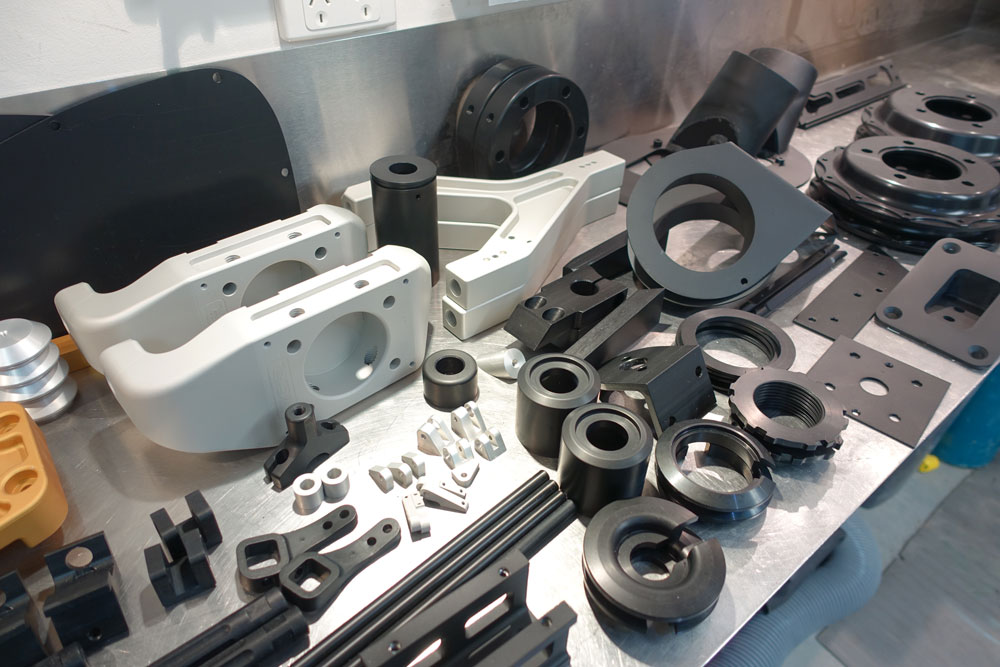
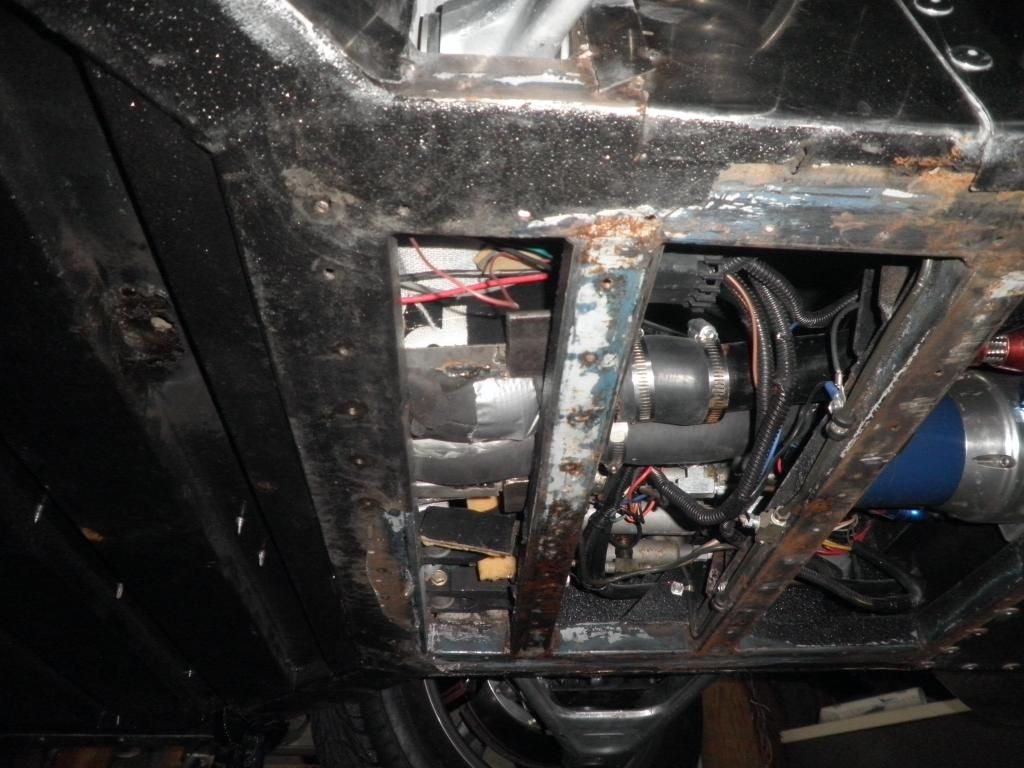
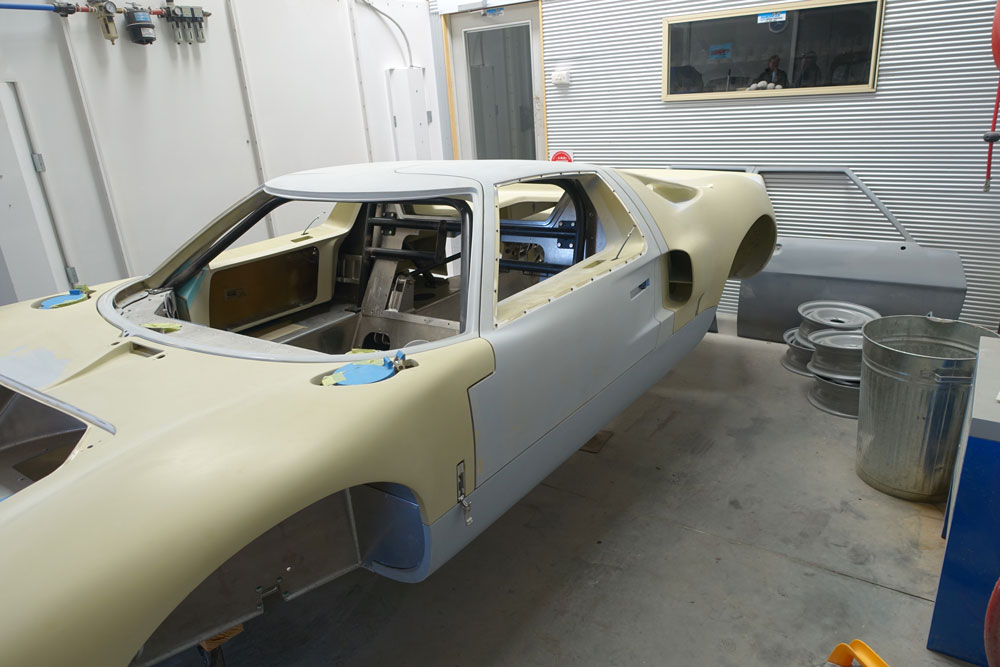
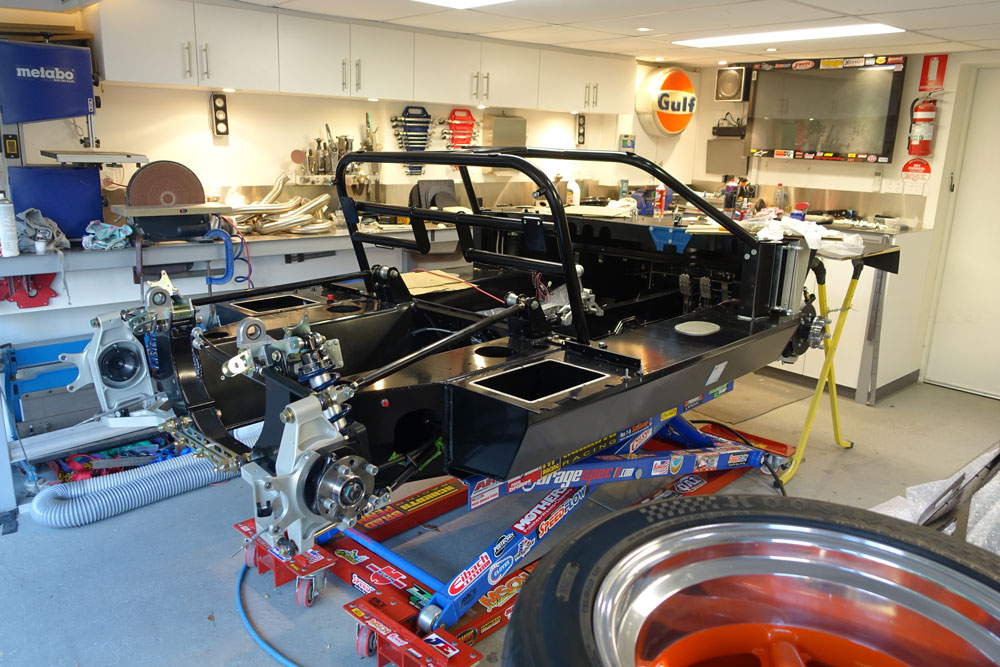
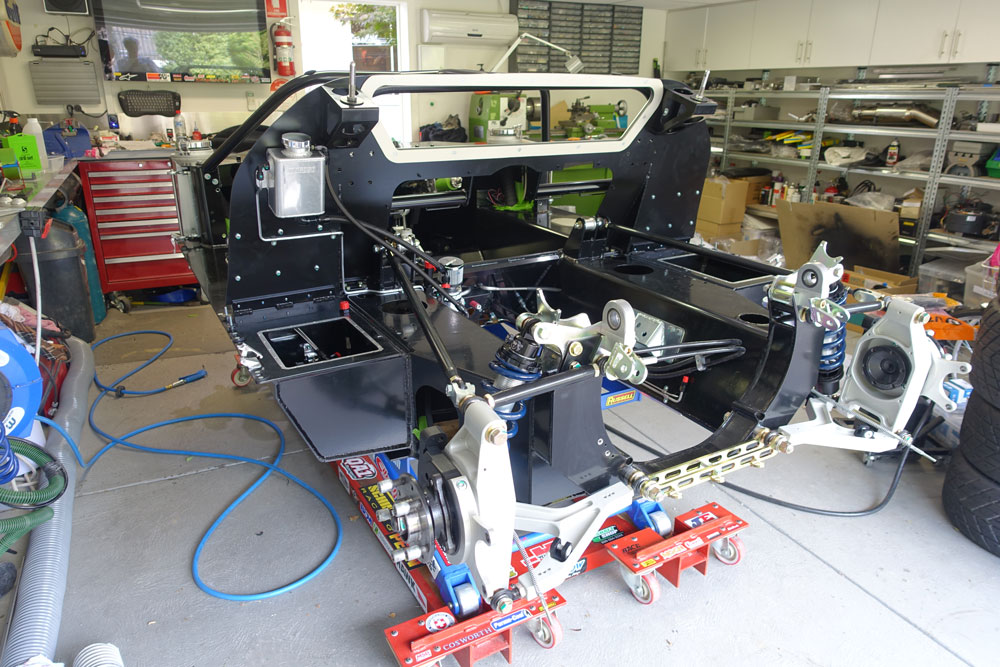
The reassembly of the Chassis in preparation for the painted body has begun. All parts that are finally torqued are marked so I know what is still loose. Some parts still need to come off to do the final job which is all electrical wiring.
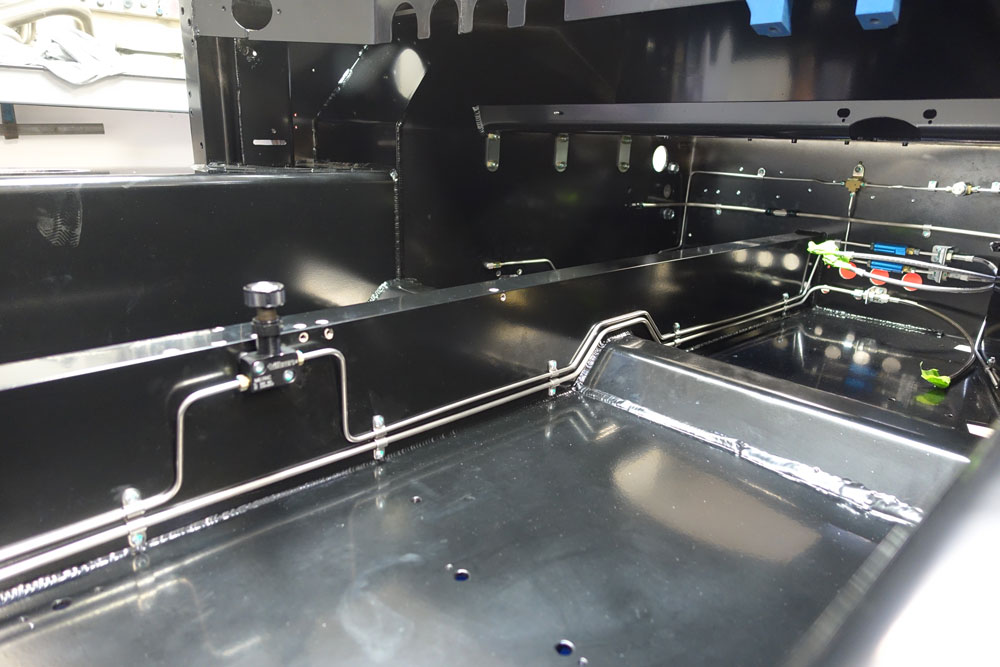
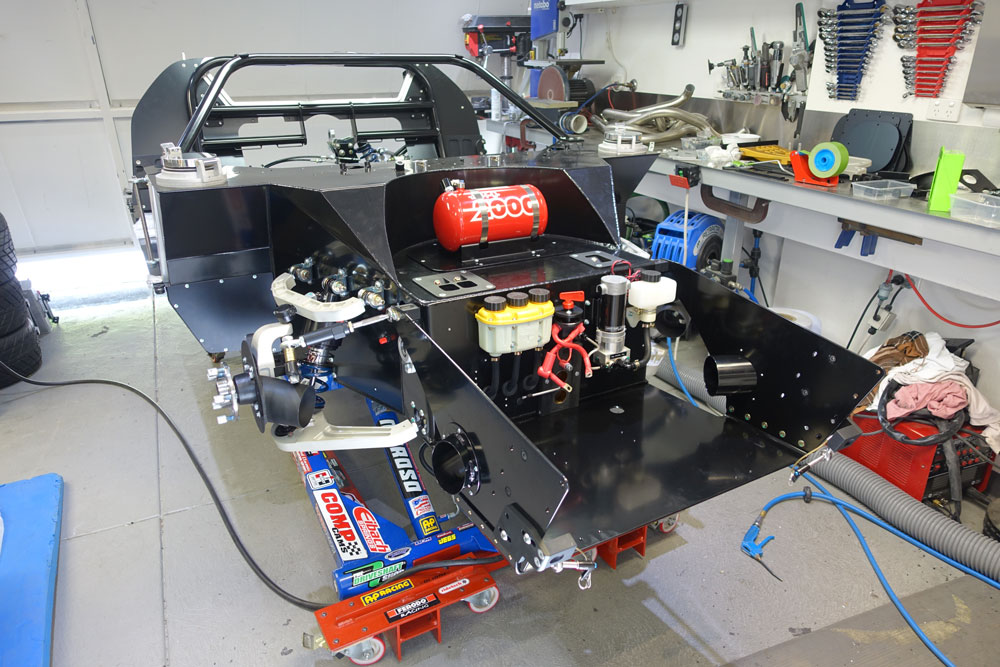
The final fix for the brakes, clutch and lift kit took some time. Lining up all those clip points was a bit of work.

GT40-reassembly-5.jpg


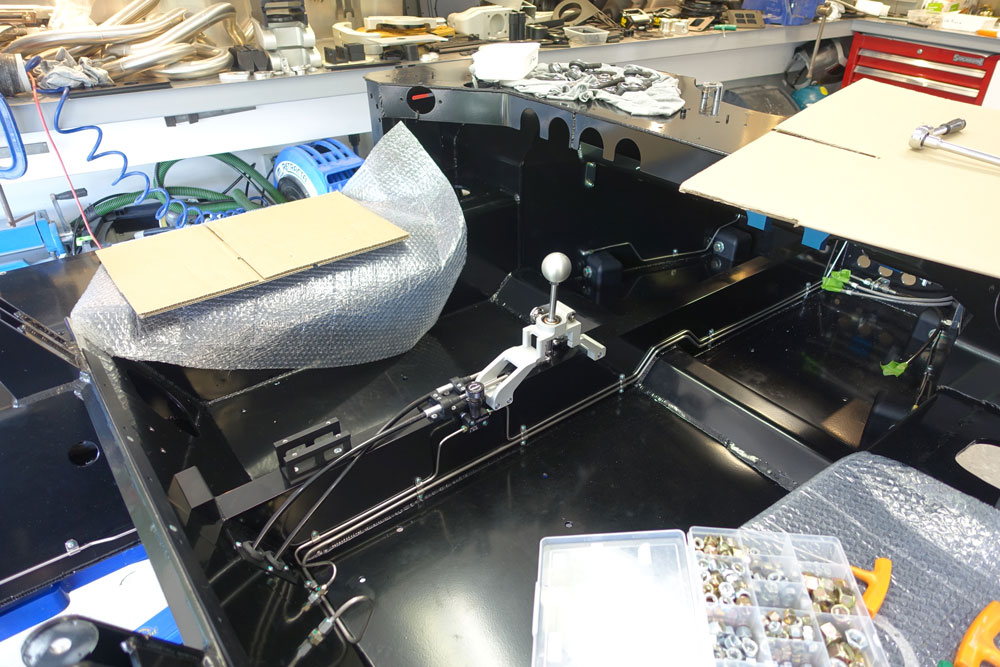
Fitting the gear shift was great. Having it in its final anodised finish looks great.

GT40-reassembly-4.jpg


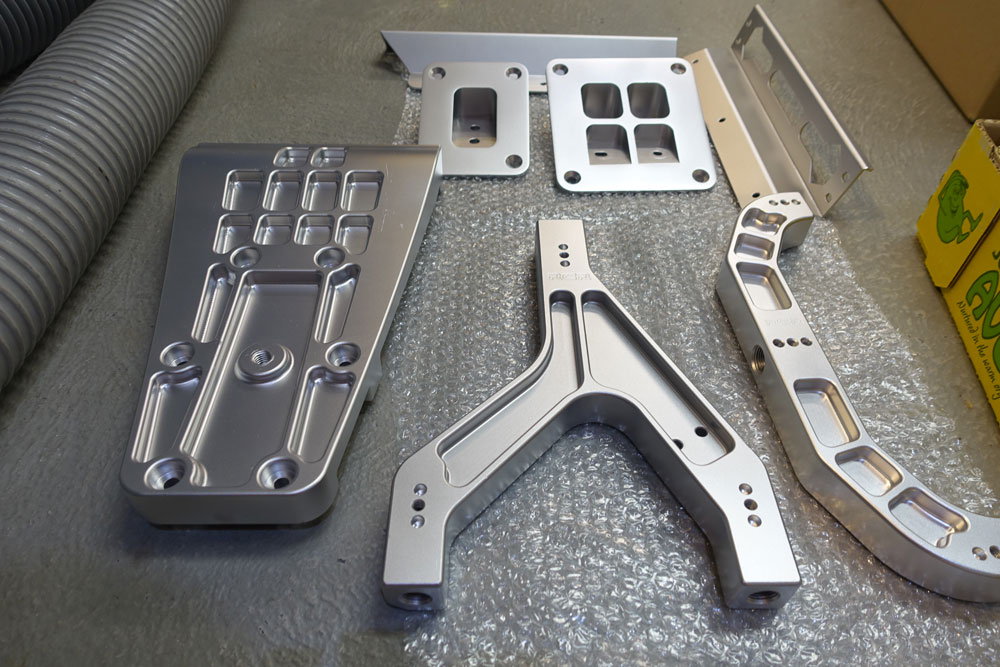
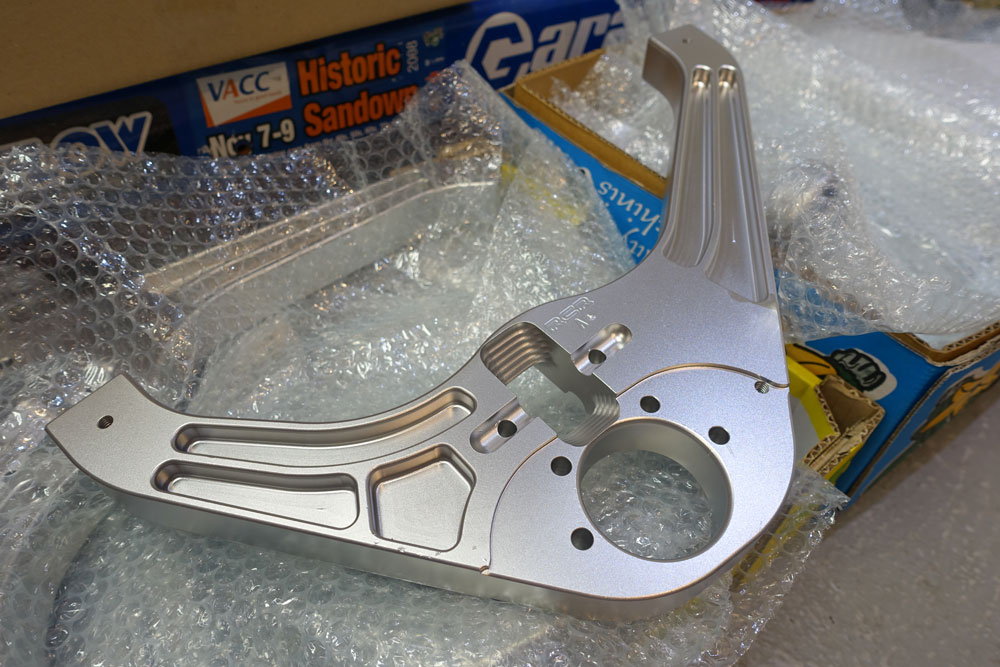
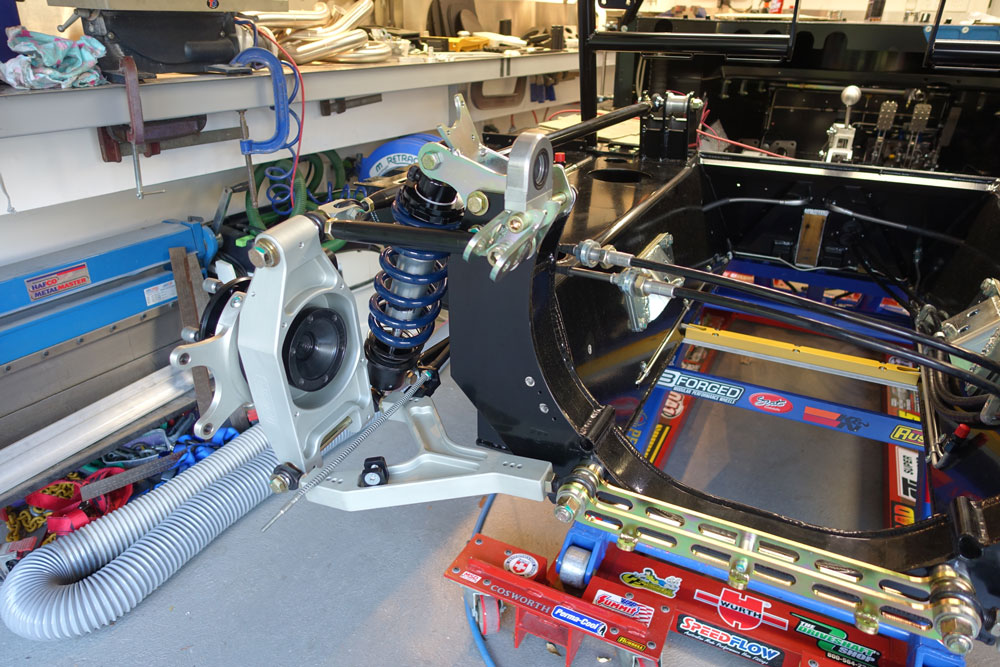
Assembly of the suspension went well. With all the modifications it was tricky to do. Having all the parts zinc plated for the first time looks great.

GT40-reassembly-3.jpg


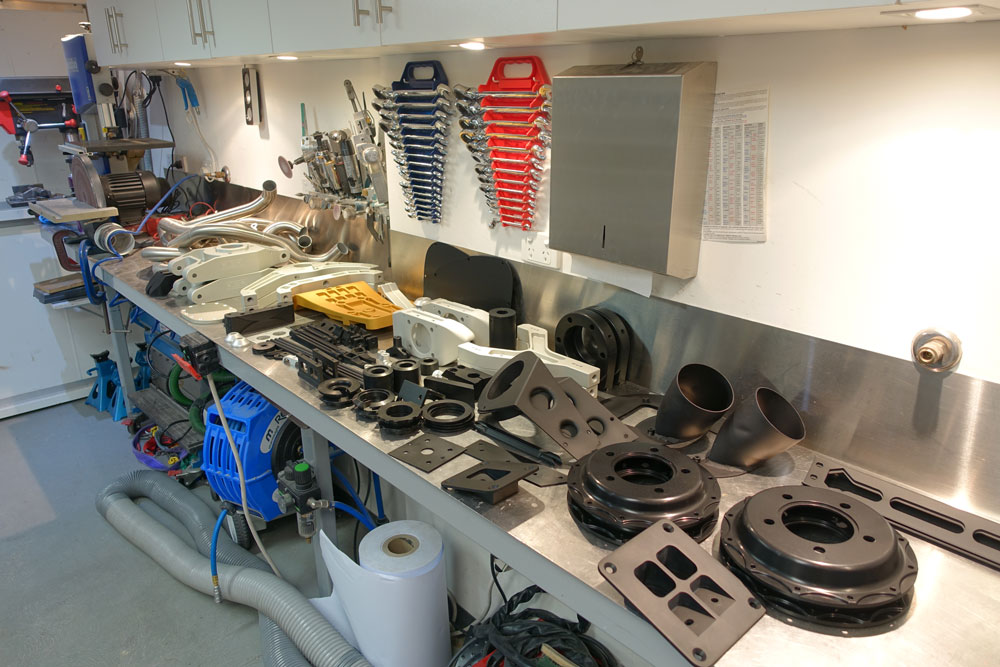
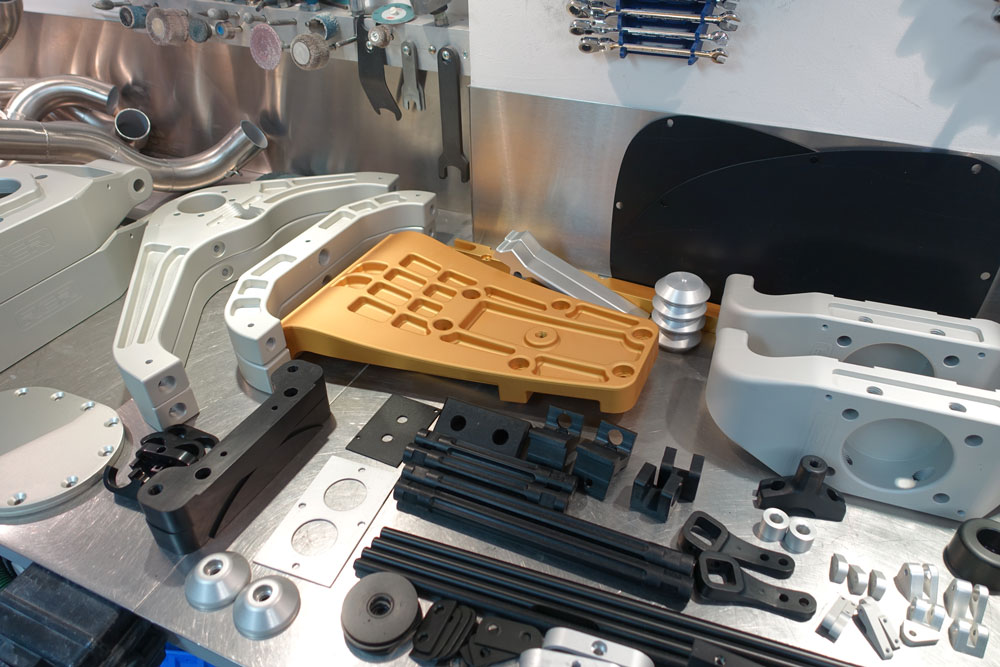
Having each part anodised black or zinc plated will allow this look to remain. No paint was used with the exception of the few black steel parts which really is limited to black suspension rods and roll cage which were powder coated.

GT40-reassembly-6.jpg


Finally with parts going on the car I'm getting some room back in my tiny workshop!
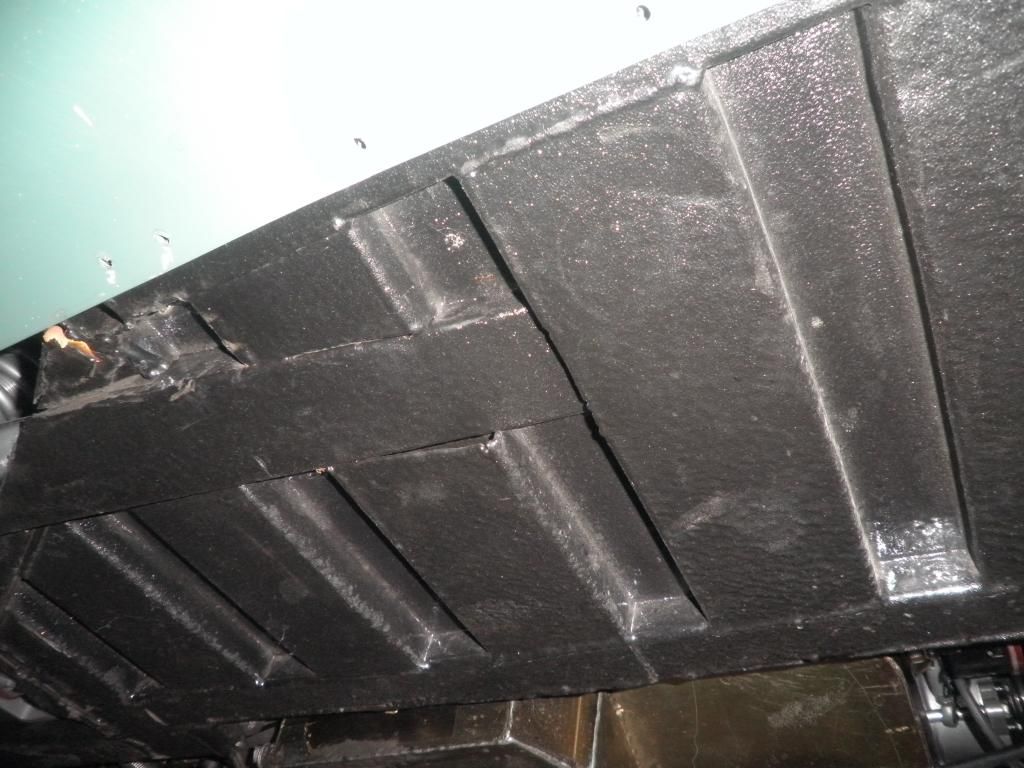
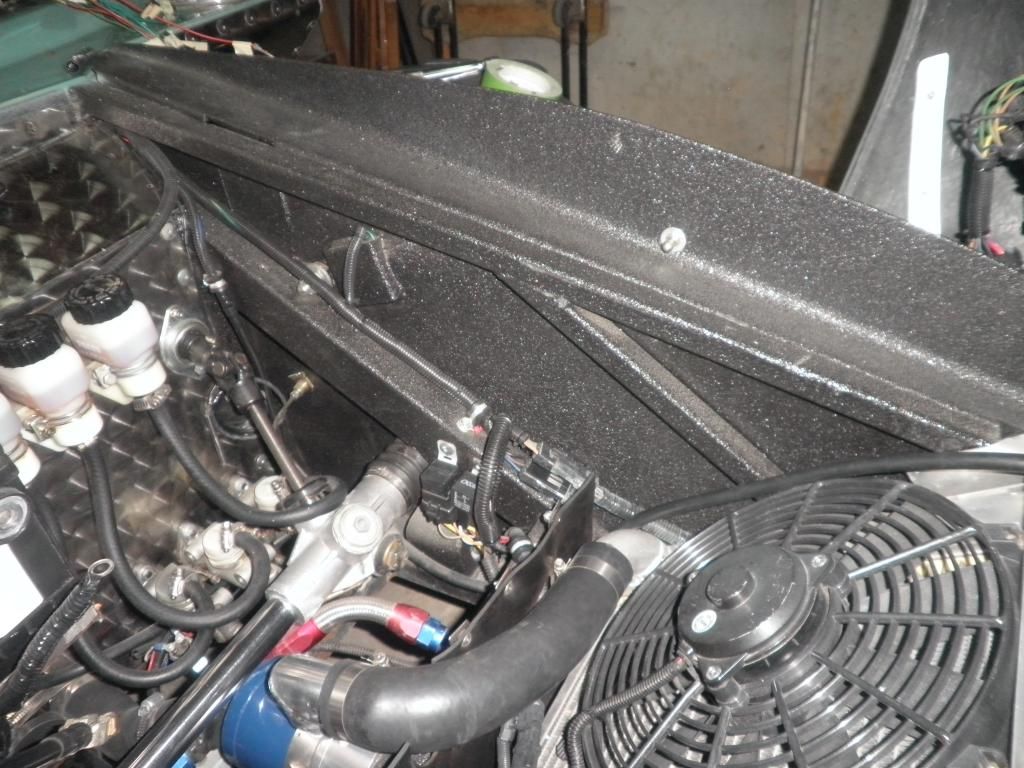
I have had the entire rear firewall ceramic coated in black. I would like to see if this reduces heat transfer enough to not require heat shielding. We will see!

GT40-reassembly-1.jpg


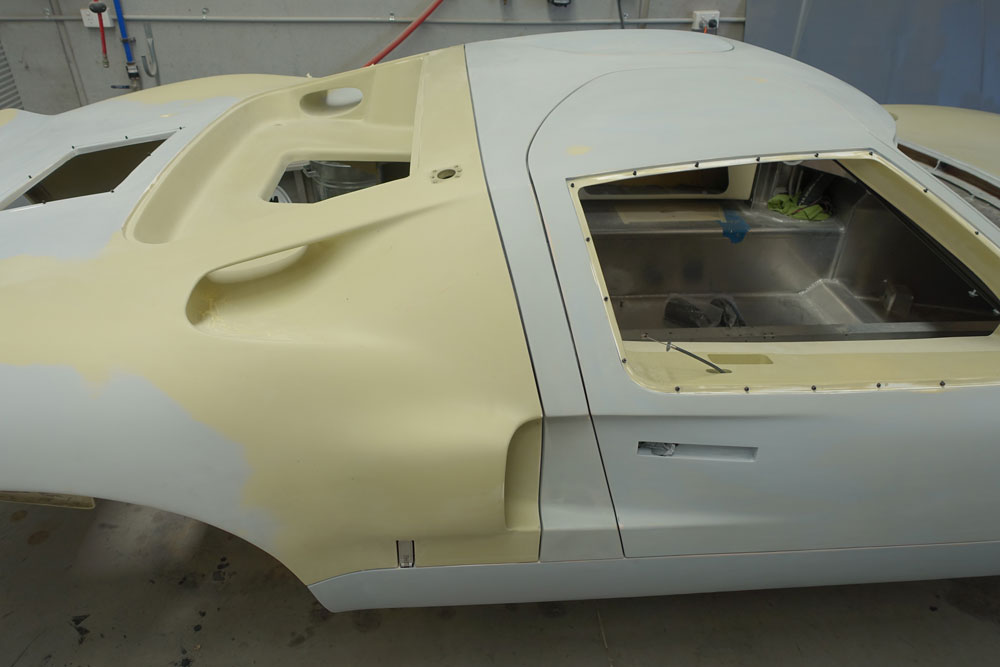
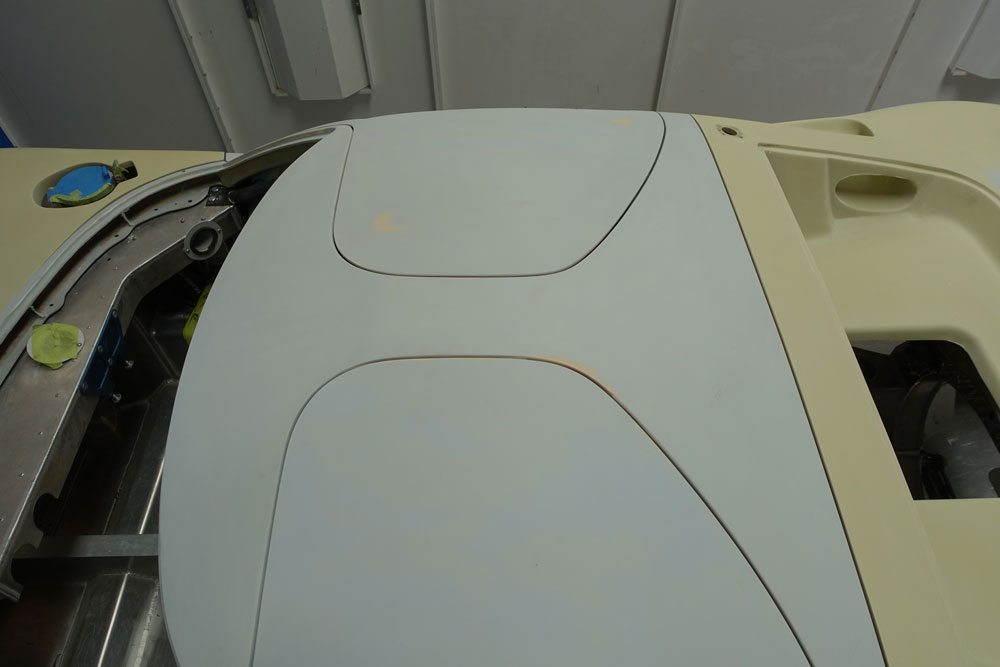
May make the rear window surround black anodise, the natural anodise stands out a bit.

GT40-reassembly-2.jpg


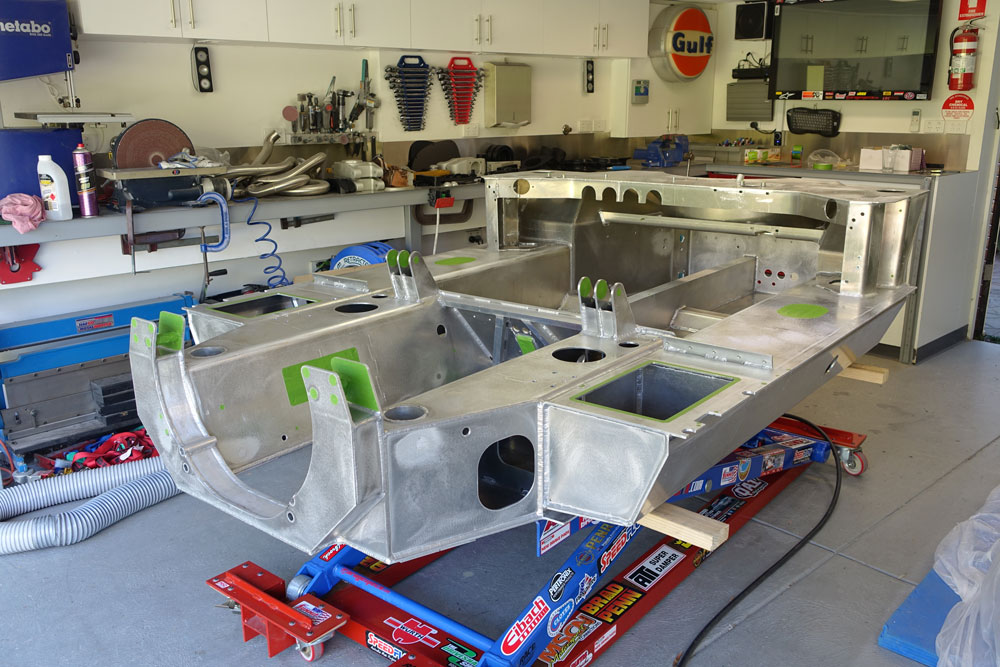
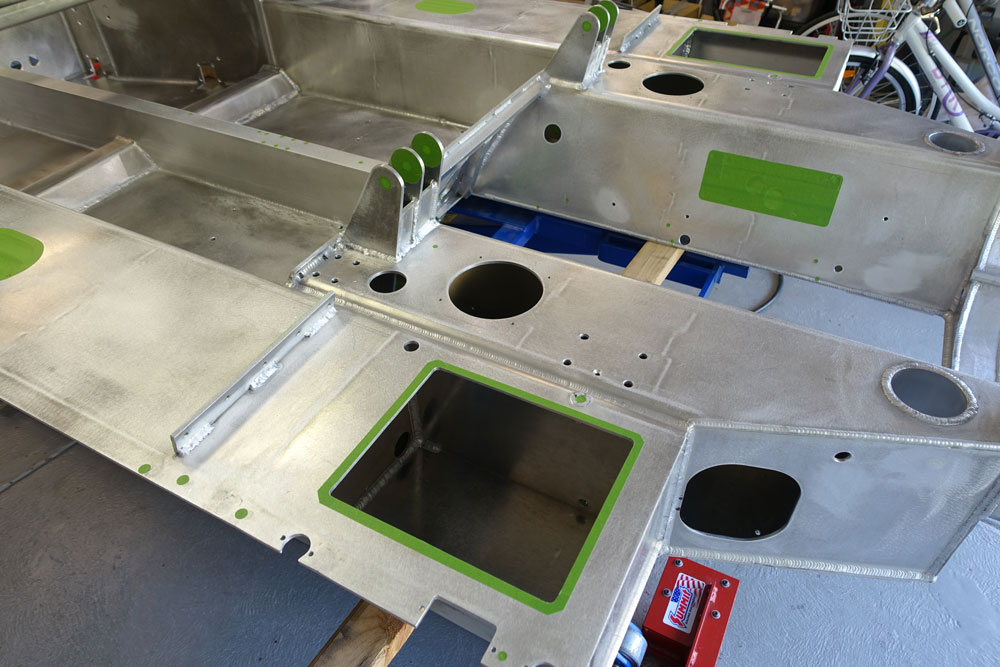
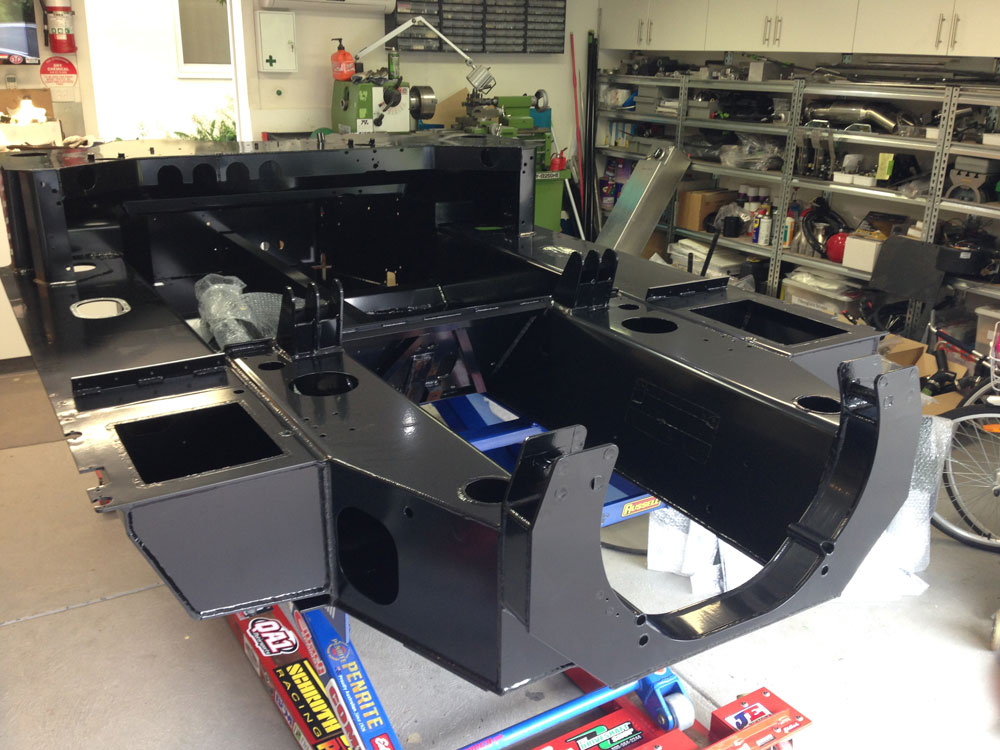
The decision to powdercoat that lovely alloy chassis was a tough one, but I am glad I did. I think it looks much better.

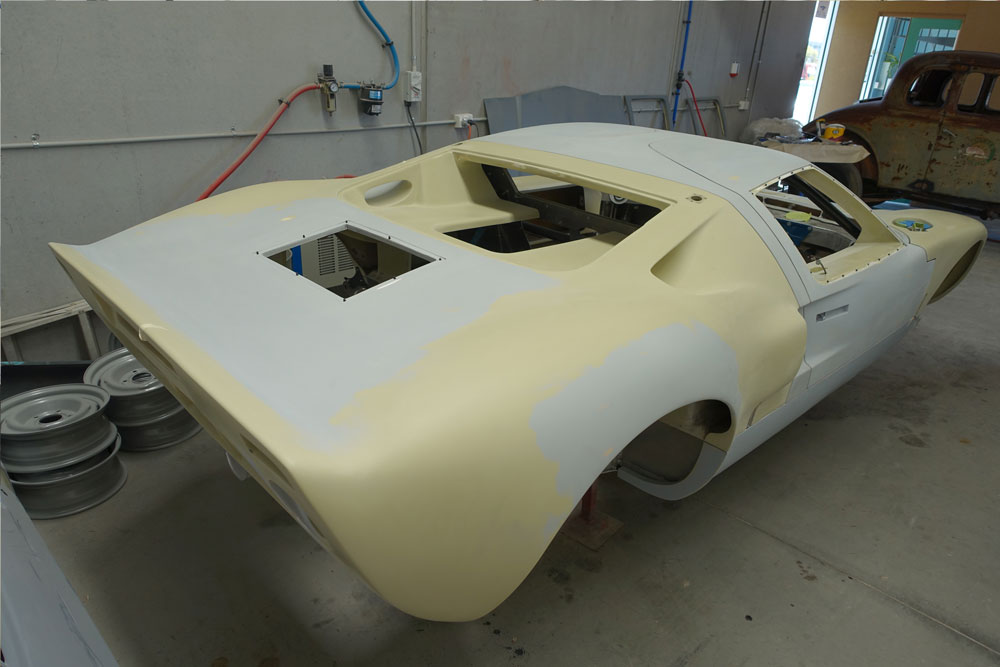
Next to fit the engine temporarily. I want the chassis in exact "position" as the body should be ready for a pre-fit to line up and mask out the orange stripe and roundels. Cannot wait for that!
 
Back
Top