
You are using an out of date browser. It may not display this or other websites correctly.
You should upgrade or use an alternative browser.
You should upgrade or use an alternative browser.
LOLA T70 scratch build...
- Thread starter marcus
- Start date


Terry Oxandale
Skinny Man
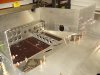
It´s coming on.
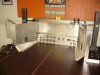
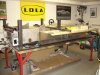
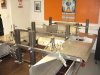
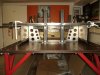
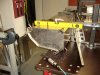
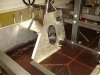
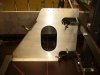
Marcus, what are we looking at (the tripod looking component) in the 4th photo?

Marcus
Supporter
Hello Marcus,
I am really impressed with your work/ project. Living in Stuttart and just starting to build an authentic Porsche 910 recreation, I would like to get in contact with you. I run my own business for replica parts (and complete cars) from 3d scanning, CAD design and production. Could you send a PM?
I am really impressed with your work/ project. Living in Stuttart and just starting to build an authentic Porsche 910 recreation, I would like to get in contact with you. I run my own business for replica parts (and complete cars) from 3d scanning, CAD design and production. Could you send a PM?
Hi Marcus.
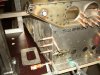
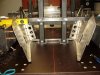
Your chassis is looking good....Im at a similar stage on my chassis. all I seem to do is drill holes, and debur them...its driving me nuts.....
Im geussing you will be useing at least 1500 rivets, ( I will have about 3000 on my chassis ) will they all be solid rivets, or will you use some blind rivets ?
Im looking forward to seeing updates on your chassis
Regards
Mick
Marcus
Supporter
Hi Mick,
yes, I can confirm all you said in terms of drilling and deburring and the mental state it gets you in as well as the number of rivets...
However, I´ve identified a few areas where I´d have to make do with blind resp. Cherry-rivets
because these particular areas can only be accessed from one side. An example is the floor pan to be riveted to the knee hump supports / stiffeners.
Best,
Marcus
Marcus
Supporter
There are days when you think you see some small light at the end of the endlessly long tunnel...
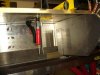
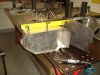
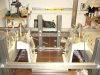
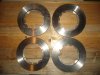
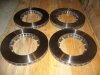
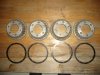
Today I picked up a complete set of original (even NOS) cast brake hats plus retainer rings and a set of brand new brake discs.
Today I picked up a complete set of original (even NOS) cast brake hats plus retainer rings and a set of brand new brake discs.
Attachments
Marcus !
This thing is going to be a work of art. The light at the end of the tunnel will keep getting brighter and brighter. I can't wait to see the end results. Keep up the great work !
Regards Brian
This thing is going to be a work of art. The light at the end of the tunnel will keep getting brighter and brighter. I can't wait to see the end results. Keep up the great work !
Regards Brian
Similar threads
- Replies
- 0
- Views
- 1K