McLaren replica build base on a Manta

Hi Terry,

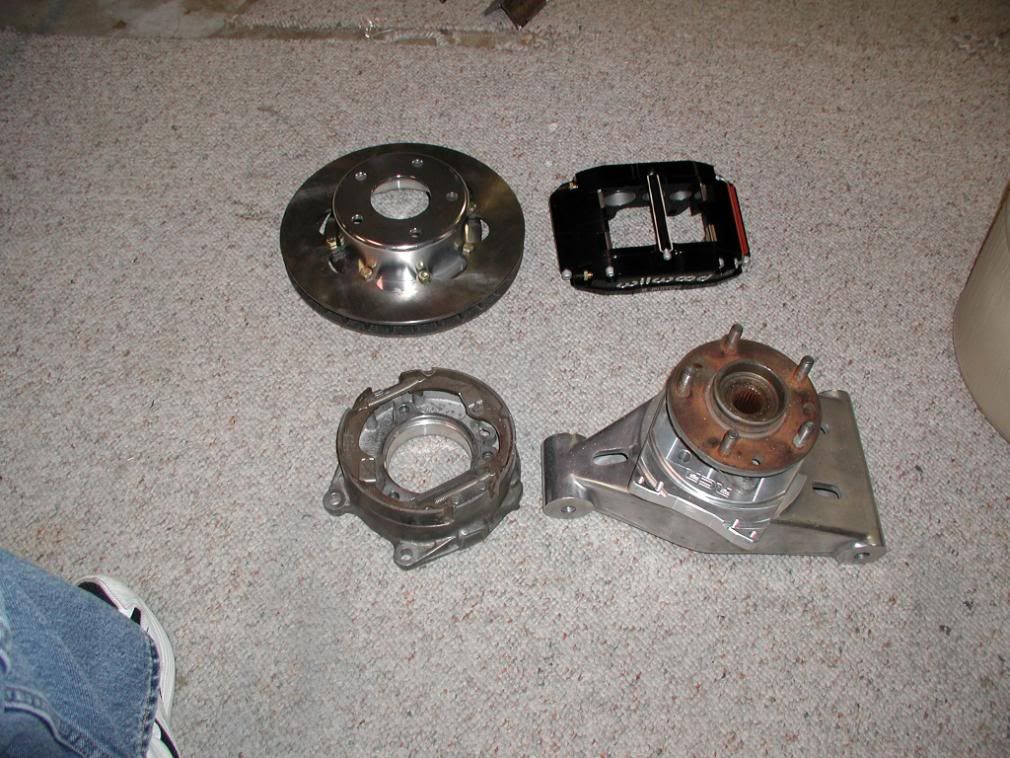
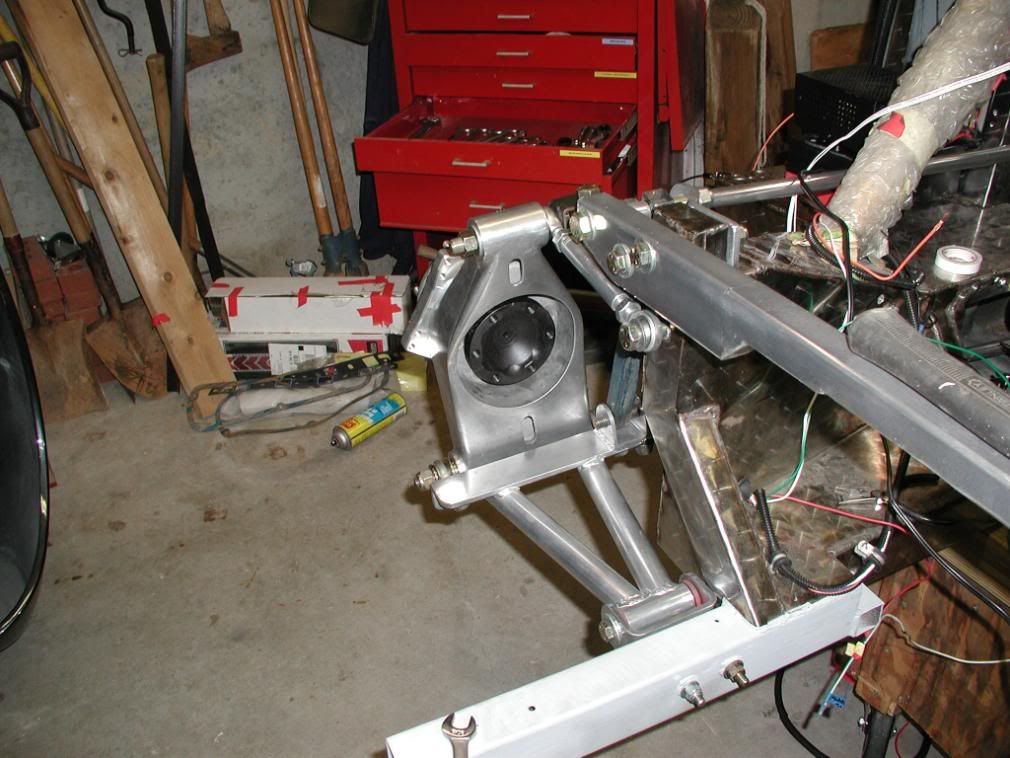
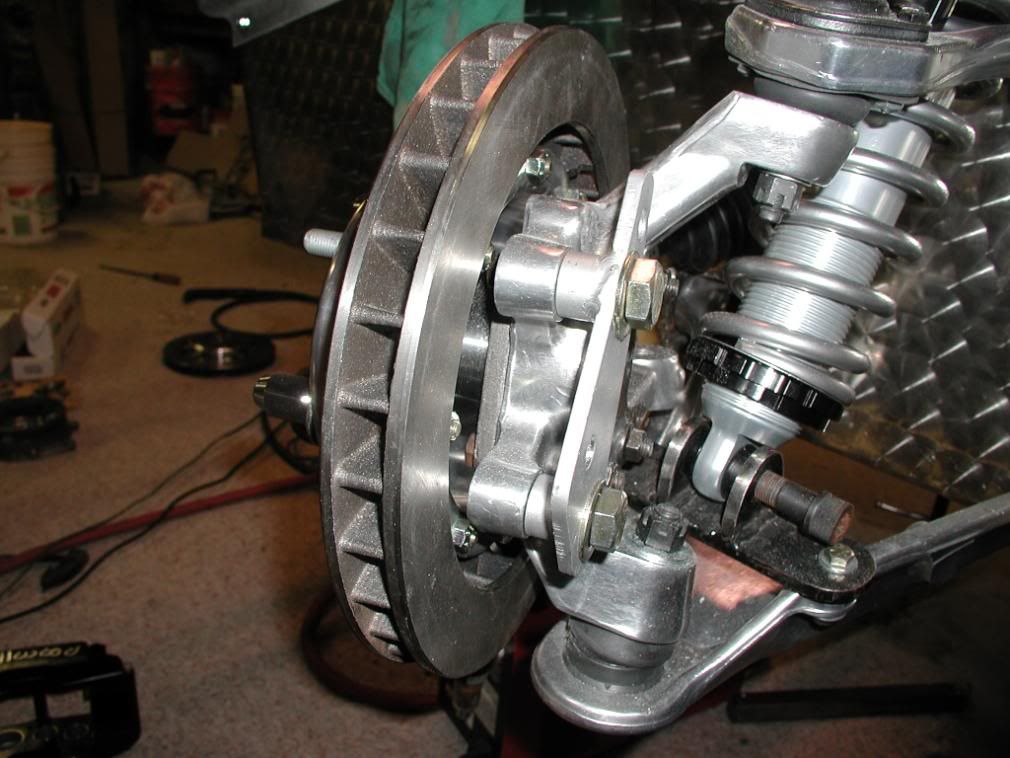
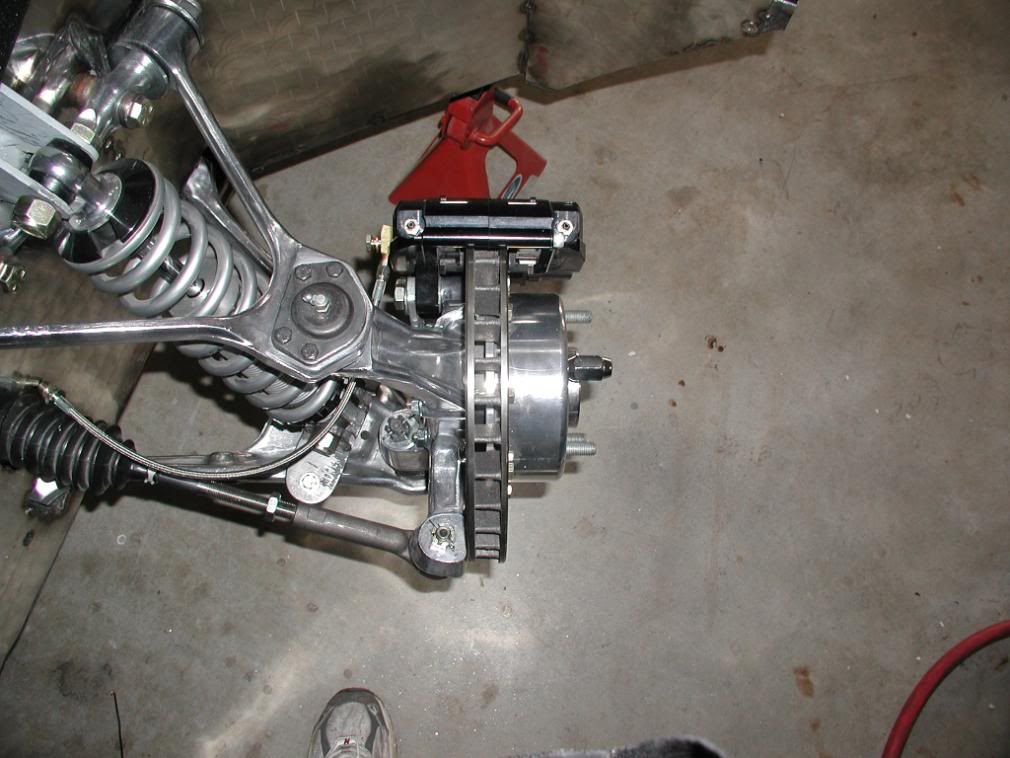
Is that weight with the hub installed? I think you will find there is not much weight to be saved doing them in alloy over the sheet steel as you need to be quite a bit thicker to get the same strength, I have now done some hollow core uprights and they are about 7 Kg I doubt I could get them much lighter with out going to Magnesium.
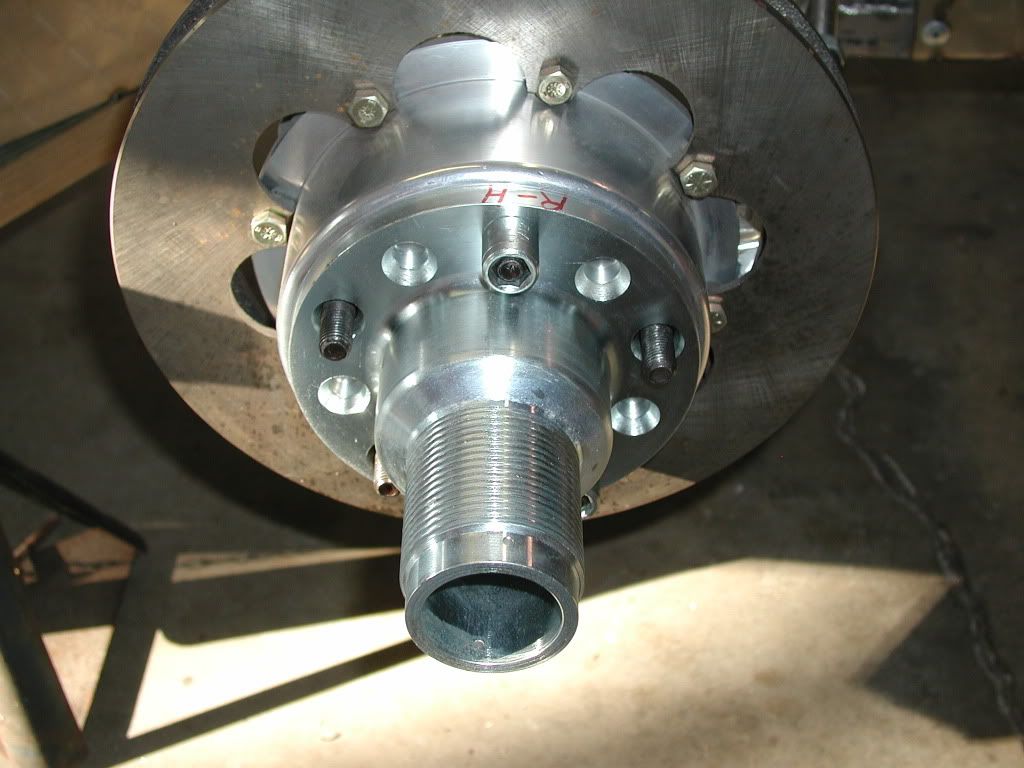
Very nice job.

Cheers Leon
 

Terry Oxandale

Skinny Man
Good to know Leon. The 5.4 kG weight is without the hubs. There are a few things I could have done to make it a tiny bit lighter (omitted the 1/2" threaded holes on each side for swaybar linking, 14 gauge on the front face only, bolts that thread into the hub instead of studs and nuts, reducing the width by an inch, etc). How's you project faring? T/A finished?
 
I have been real busy with work, did 40 days, home for 9 and now away until end of Feb so not much done, The T/A is close sent drawing away for the pinion shaft which is the last major part in the puzzle but also making uprights to go with it now so they have used up some time, they are also nearly finished and John has asked for more so all time away from the car. But it will be worth it to see the T/A and uprights on Johns new 5000.

Cheers Leon.
 

Terry Oxandale

Skinny Man
Tested the new rear uprights and got a 4 MPH increase at track out over what I had with the prior uprights, and a much more stable rear bite (very happy with that). So I decided it was time to improve on the front as well. I started with steel sheet construction, but quickly decided it was too complex and inflexible from a set-up perspective and instead went to a billet aluminum piece. So I cranked up the drill press and machined a set of front uprights that have 1/2 the scrub radius of the current uprights, taller to improve camber gain, and modular to the degree that I can quickly adjust the steering arm, caliper bracket, and upper pivot location without rebuilding the primary upright. Still using the Corvette C4 bearings and Outlaw calipers.

standard.jpg


standard.jpg


standard.jpg


standard.jpg


standard.jpg


Someday perhaps I'll get a real milling machine and/or a lathe, to make the parts look good as well.
 
Last edited:

Randy V

Moderator-Admin
Staff member
Admin
Lifetime Supporter
Very impressive work Terry!!!
I used to use my drill press as a mill and lathe also and it took extreme patience to get anything done...
I purchased a combo machine from Harbor Freight and have been fairly happy with it - although it does need a tuneup..
 

Attachments

  • IMG_4297.JPG
    IMG_4297.JPG
    233.3 KB · Views: 398
Last edited:
Looks fantastic Terry, just one question, where did you source the top and bottom ball joints from, ive been looking for some.
cheers John
 

Terry Oxandale

Skinny Man
Looks fantastic Terry, just one question, where did you source the top and bottom ball joints from, ive been looking for some.
cheers John

John,

They're not ball joints in the traditional sense (at least here). These are called Uniballs. They share some dimensions with normal sperical bearings, but have larger, wider races, and hence a stronger load rating. I sourced all my stuff from:

Race Ready > Fk Uniball Kits

Their site provided the best info and parts combined, included dimensional data. I used a 1" and a 7/8", but as heavy as these parts are, and oversized, I could have gone smaller and lighter.
 

Terry Oxandale

Skinny Man
Terry do you have any specs you could give im putting c4 stuff on my mirage this winter

I'll share whatever I can. Just let me know what specs you're looking for. The upright, hub, rotor are the early C4 pieces. The later C4 uprights are 1" taller (which was too tall for a 16" wheel or smaller), I've found the correct Willwood hat/rotor combo that is very close to the OEM C4 rotor offset (no kit for the smaller 12" rotors) if you want something other than OEM. The arms are all fabricated.

Terry
 
Last edited:
Terry can you give me the highth of the early uprights so I can check mine? I wouldn't mind fabbing my own uprights I would like to know how you like the new scrub. Or even pay you to Mae me a set if your willing and have time?
 
If any are interested,,,, I may be replacing my C-4 front suspension, and they may be available soon. Will know more next week. Also there is a set of rotors/hats and the pieces that are needed to adapt the "Wilwoods to the C-4(6 pot calipers) Back when I was looking for a set of calipers and rotors for DRB#5, Fran reached out to me and supplied them to me along with the taps necessary to make the swap. His front end is based on the C-4. I was able to retain the 15" wheels. Will post the pics of my setup this afternoon along with dimensions(if possible).

Bill
 
Here are the pieces for the fronts and rears. There was minimal grinding for the bolts to line up. The front uprights needed taping for the caliper to mount. and the steering connector required some grinding for the rotor to clear.
Here is the adapter after the parking brake was removed.

P1010095.jpg


P1010137.jpg


Here is the front caliper mount.

P1010131.jpg


Here you can see where the steering mouunt had to be ground away for clearance.
P1010019.jpg


P1010326.jpg


Bill
 

Terry Oxandale

Skinny Man
Got both sides installed this weekend. Can't wait to test drive it and see if it works out as expected.

standard.jpg


Passenger side still original C4 upright; Driver side with new fabricated upright.
standard.jpg
 

Terry Oxandale

Skinny Man
Oh yes, the worn circle on the radiator is the survivable damage done by a fan that spun up past it's max RPM limit. Lesson learned is to purchase some kind of fiber reinforced fan-blade fan, OR insert some kind of protective screen between the fans and the radiator, OR spend 2 minutes and remove the entire shroud and fans prior to track time (recommended action if allowed). As it was, both fans destroyed themselves, but one froze up broken, but somewhat intact, thus not spinning into the other side of the radiator.
 
Last edited:
Back
Top