Terry Oxandale
Skinny Man
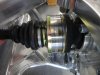
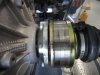
The easiest way to remove a pilot bearing is to find a nice bolt that fills the ID of the bearing completely with no gap. Then fill the bearing and the space behind it with grease, wax or even this paste like stuff they used to sell at auto parts stores for this specific purpose. Once filled put your bolt in the bearing and whack with a hammer. It may take a few times to get the bearing out but I have never had this fail. Obviously after each whack you need to apply more grease. Based on my experience this is pretty much the universally accepted way of removing pilot bearings, not some super secret trick. If you can locate the waxy paste stuff at the auto parts store it works the best. Comes in a little tear open packet. Can't for the life of me remember the name of it.
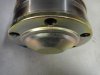
This turned out to be the wrong way for my LS2. The cranks on these LS series motors are rifle drilled down the middle of the crank using a 24mm freeze plug in the rear-most hole of the crank to prevent oil from leaving the crankcase out the back. Attempting to hydraulically push the bearing out ends up pushing the freeze plug out its hole, and into the crankcase pan. Not something I had planned on, and required infinitely more work than a simple replacement of the bearing in order to drive it again. The only good thing about the experience was the recognition that something wasn't right compared to all the other times I'd done this. Thank goodness it was recognized.
")