
You are using an out of date browser. It may not display this or other websites correctly.
You should upgrade or use an alternative browser.
You should upgrade or use an alternative browser.
Toms RCR 40 Trackracer
- Thread starter EGLITOM
- Start date
- Status
- Not open for further replies.
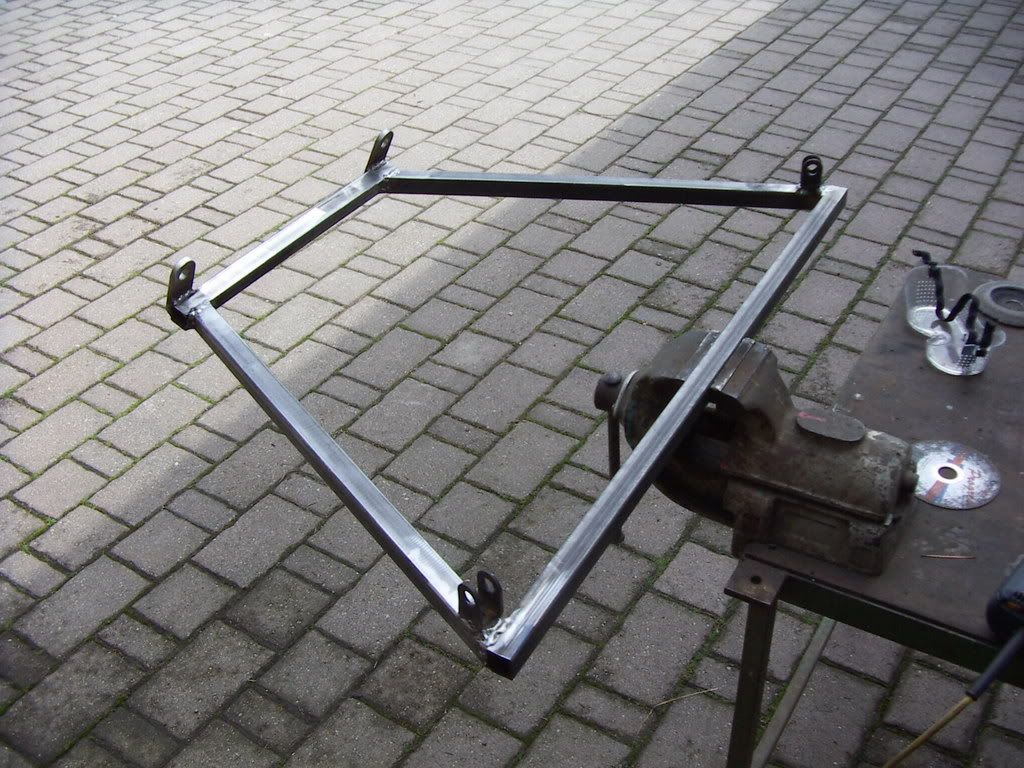
Original style front frame
Decided to built a original style front frame today, because i love the look of it.
Started with printing out a lot of pictures of original or original replicas.
Skteched it on the RCR front frame.
made a sketch with the main dimensions afterwards
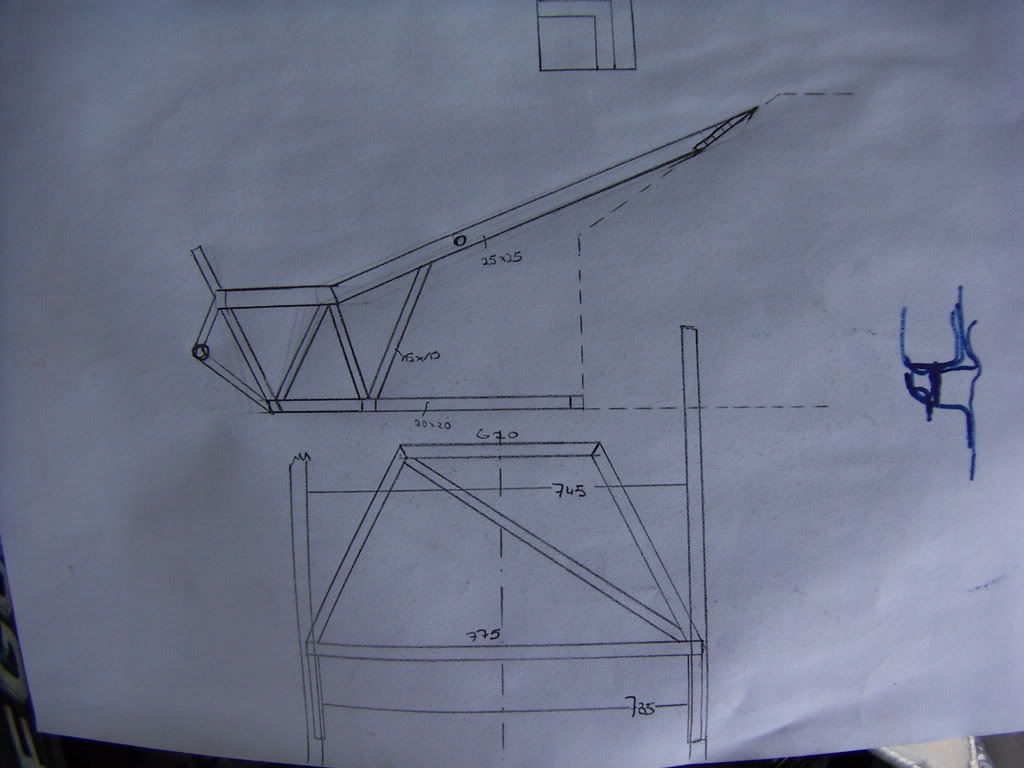
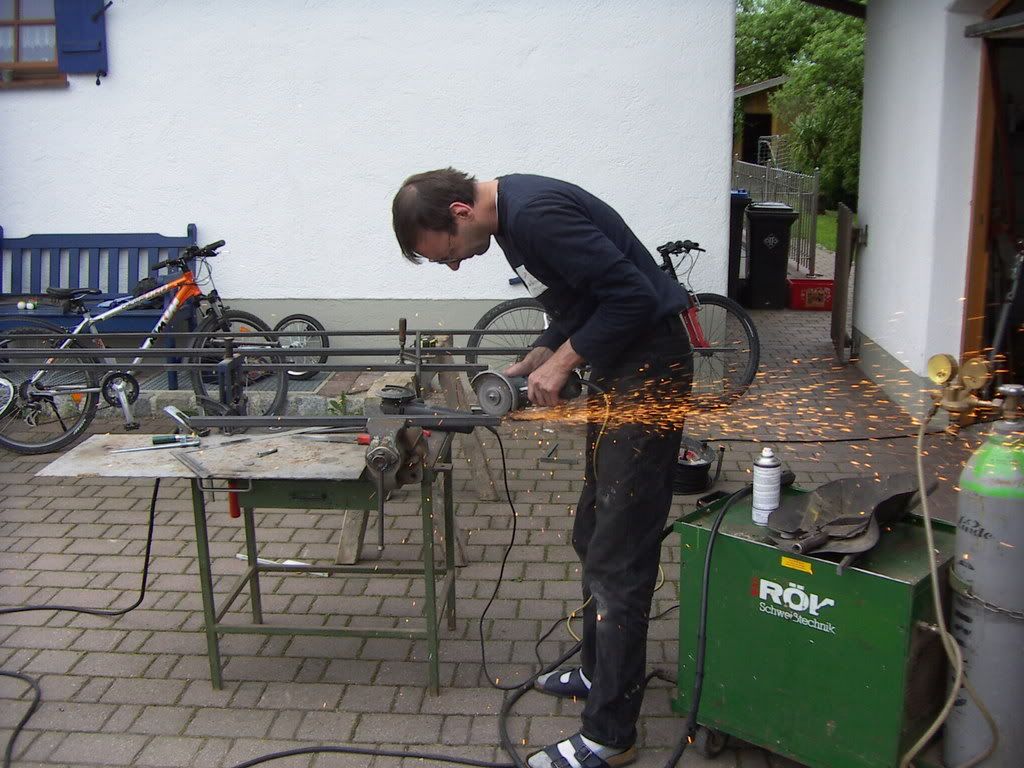
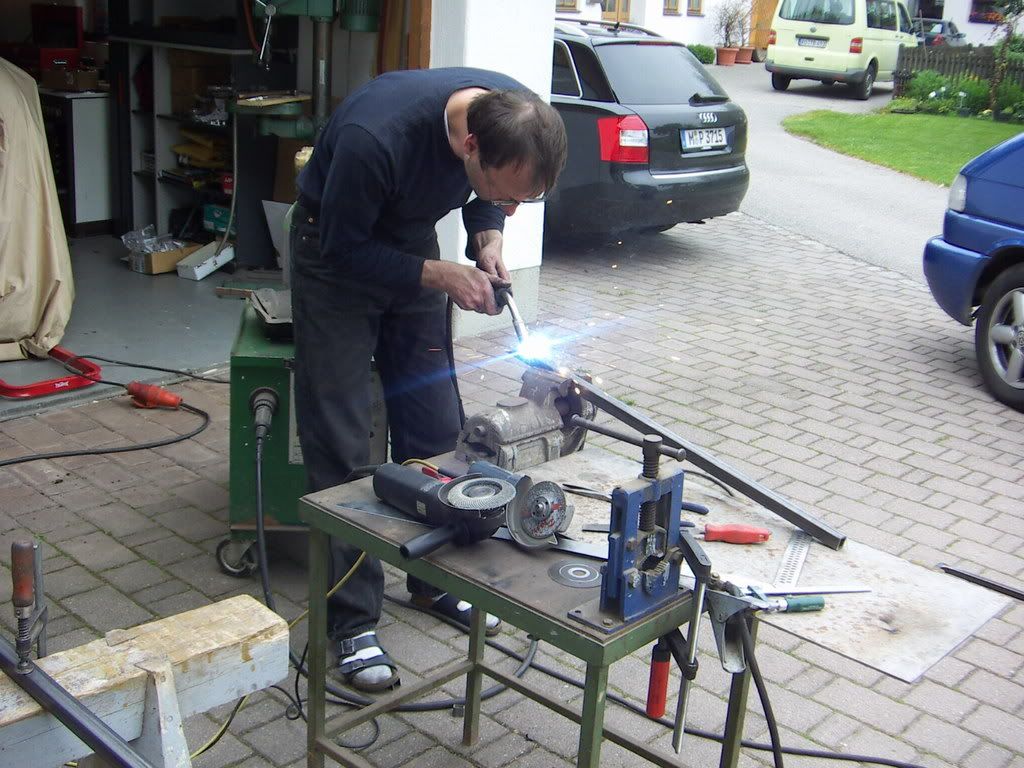
and started to build, using 25x25mm; 20x20mm, 15x15m square tubing to achieve the original look and also some thickwalled 12mm round tube for sleeving the mount and excenter holes.
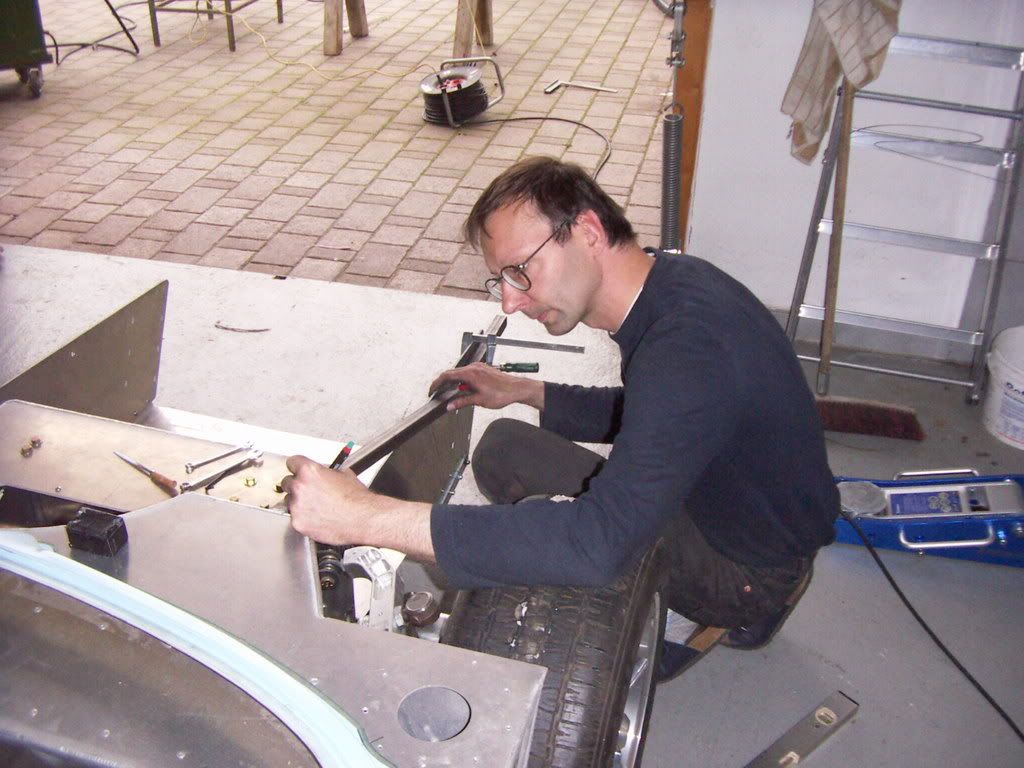
8 hours later i ended up with that. I utilised the strong RCR bottom alu plate ( rebend and cut to fit) It turned out exactly like i wanted, is stable like hell and shure looks like the real thing. Still need to add the front triangle and bar for the quick lift, finish and cleaning up some welds.
Afterwards it will be sandblasted and powdercoated.
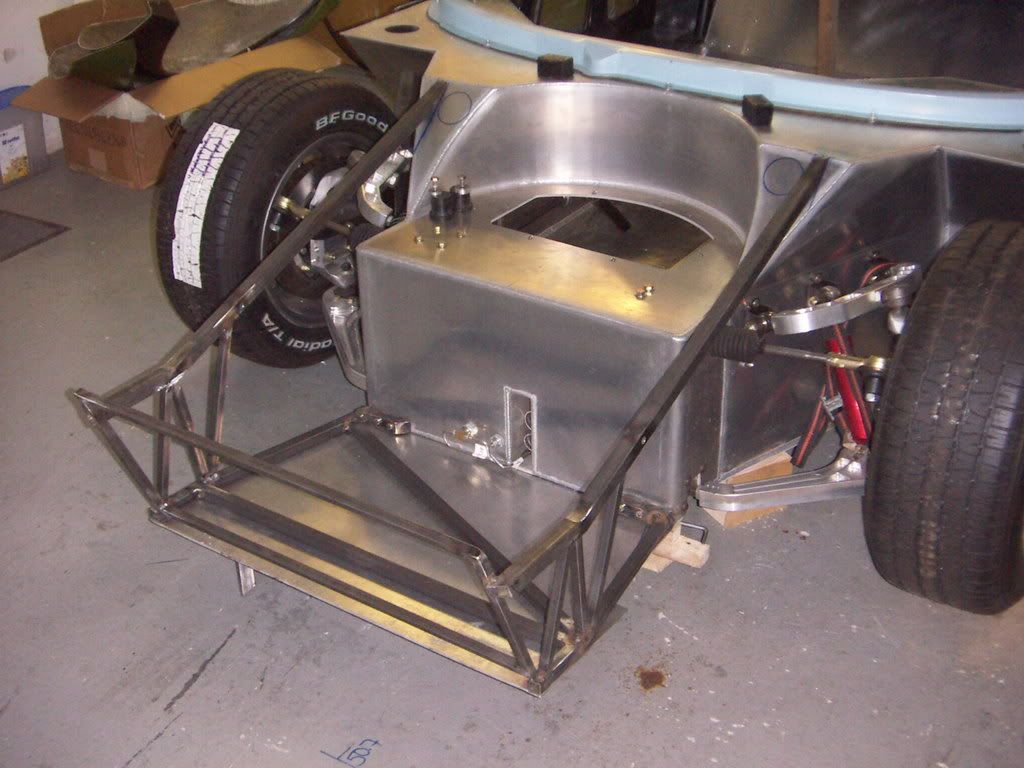
The top beams are connected to the chassis with 10mm screws front the inside, which screw into a tapped 10mm plate, welded inside the wedged tube .
TOM
Decided to built a original style front frame today, because i love the look of it.
Started with printing out a lot of pictures of original or original replicas.
Skteched it on the RCR front frame.
made a sketch with the main dimensions afterwards
and started to build, using 25x25mm; 20x20mm, 15x15m square tubing to achieve the original look and also some thickwalled 12mm round tube for sleeving the mount and excenter holes.
8 hours later i ended up with that. I utilised the strong RCR bottom alu plate ( rebend and cut to fit) It turned out exactly like i wanted, is stable like hell and shure looks like the real thing. Still need to add the front triangle and bar for the quick lift, finish and cleaning up some welds.
Afterwards it will be sandblasted and powdercoated.
The top beams are connected to the chassis with 10mm screws front the inside, which screw into a tapped 10mm plate, welded inside the wedged tube .
TOM
Great craftsmanship Tom!
So with the "Quick Lift" are you speaking of making the front clip a "Tilt Forward" unit like some of the others have here? It looks like you made provision for the front clip alignment bobbins as well..
The flairs will be quite an undertaking... I'll be watching carefully!") I'm still considering doing the same with mine..
I'm still considering doing the same with mine..
So with the "Quick Lift" are you speaking of making the front clip a "Tilt Forward" unit like some of the others have here? It looks like you made provision for the front clip alignment bobbins as well..
The flairs will be quite an undertaking... I'll be watching carefully!
I'm still considering doing the same with mine..Tom, that front looks great.
You are certainly going all out to make the car look authentic.
Are you planning on painting the chassis as well? Are you still going to use the RCR supplied aluminium radiator?
You are certainly going all out to make the car look authentic.
Are you planning on painting the chassis as well? Are you still going to use the RCR supplied aluminium radiator?
Randy:
No i won´t do a tilting front clip. I like the possibility of the originals to have it off in 1 minute to have complete access. I will use the original bobins mounting plus a additional security pin ( saw this at deans car , a very nice piece, have to ask him for the source)
Craig:
I will paint the chassis semigloss black . yes i will use the RCR radiator but will mount it in rubber.
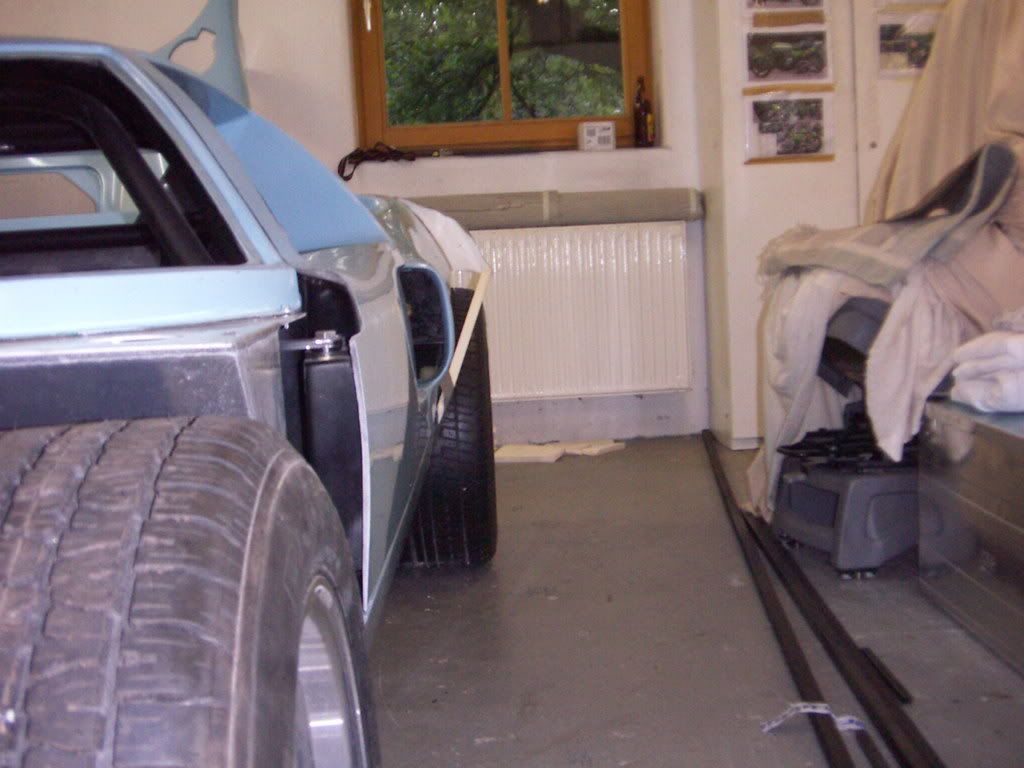
Found the quick lock pins

Button Handle Kwik-Lok Pins
Mounted the original RCr bobbins today ( shortened in my lay) and adjusted the front clip. It fits great with a nice and even gap and leveled heights.
TOM
Button Handle Kwik-Lok Pins
Mounted the original RCr bobbins today ( shortened in my lay) and adjusted the front clip. It fits great with a nice and even gap and leveled heights.
TOM
great progress tom
Wirklich schon lol
frank
Wirklich schon lol
frank
Hi Tom, what was the purpose of shortening the bobbins ?
SImon
SImon
Hi Tom, what was the purpose of shortening the bobbins ?
SImon
Hi Simon
As the sqare tubes are wider towards the outside of the car by almost 1" per side ( exact its 25mm minus the thickness of the original RCR alloy plate) i needed to shorten the bobbins by this to fit.
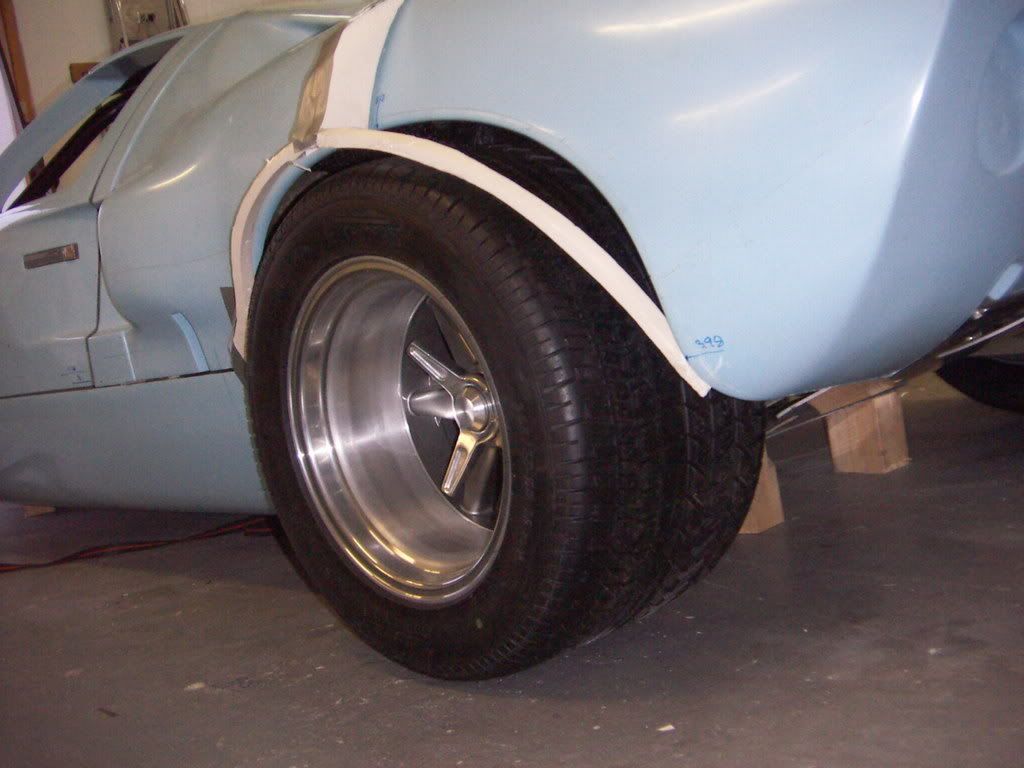
BTW saw your car in April when i visited frans shop. I liked the nice job on the +2" flares very much.
Thanks TOM
Thanks for that Tom.
Your solution to the full gulf flare is an inspired one and you're displaying great workmanship.
My RCR is now in the garage, i'm just letting it 'soak in' before i decide what to tackle first.
As it happens, i've actually sat in your car when i went to see it at Chris Melias house - at the time i did not think i was up to the job of building a project like this, but this forum has given me the confidence.
Keep up the good work.
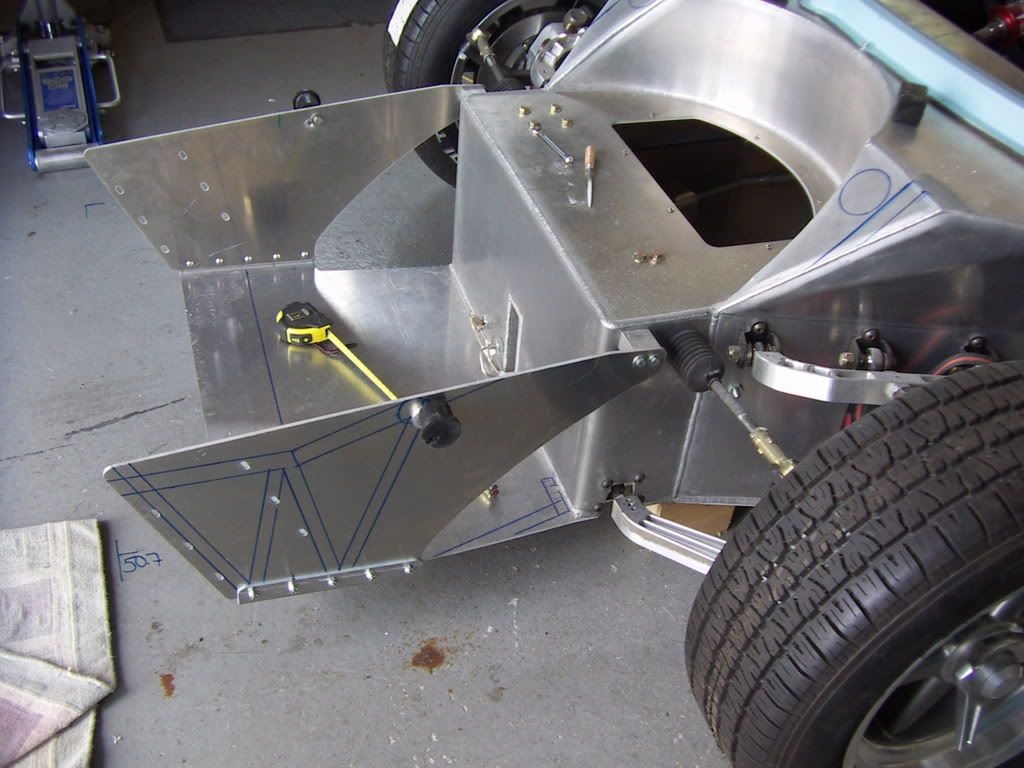
Original Style rear frame
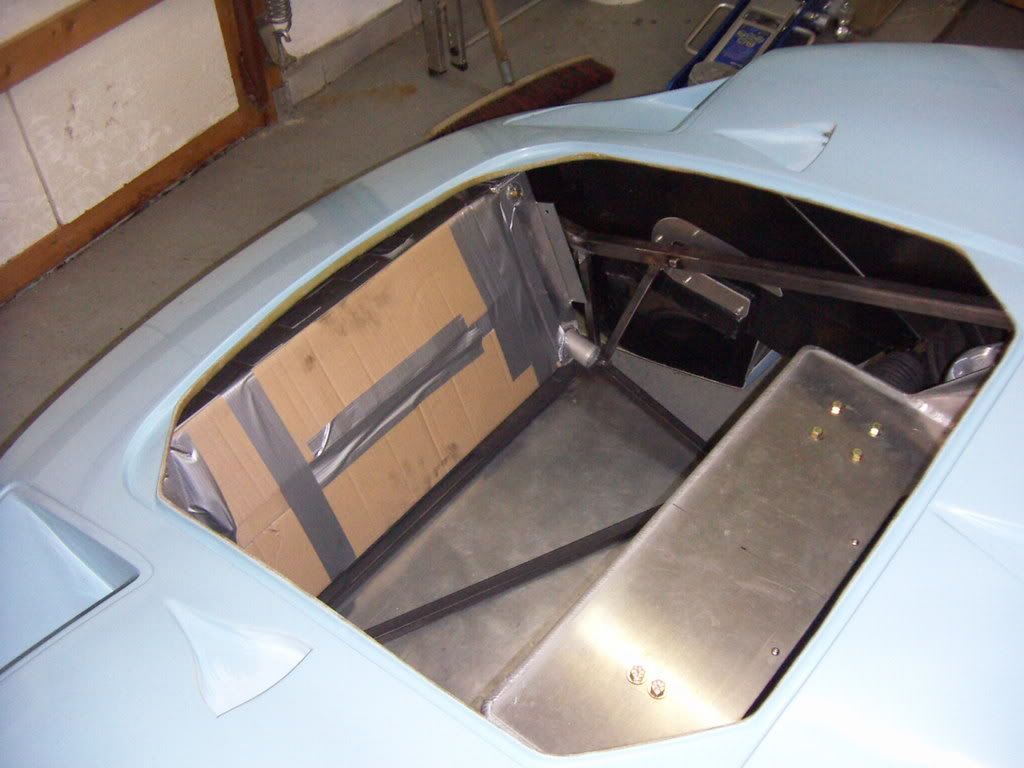
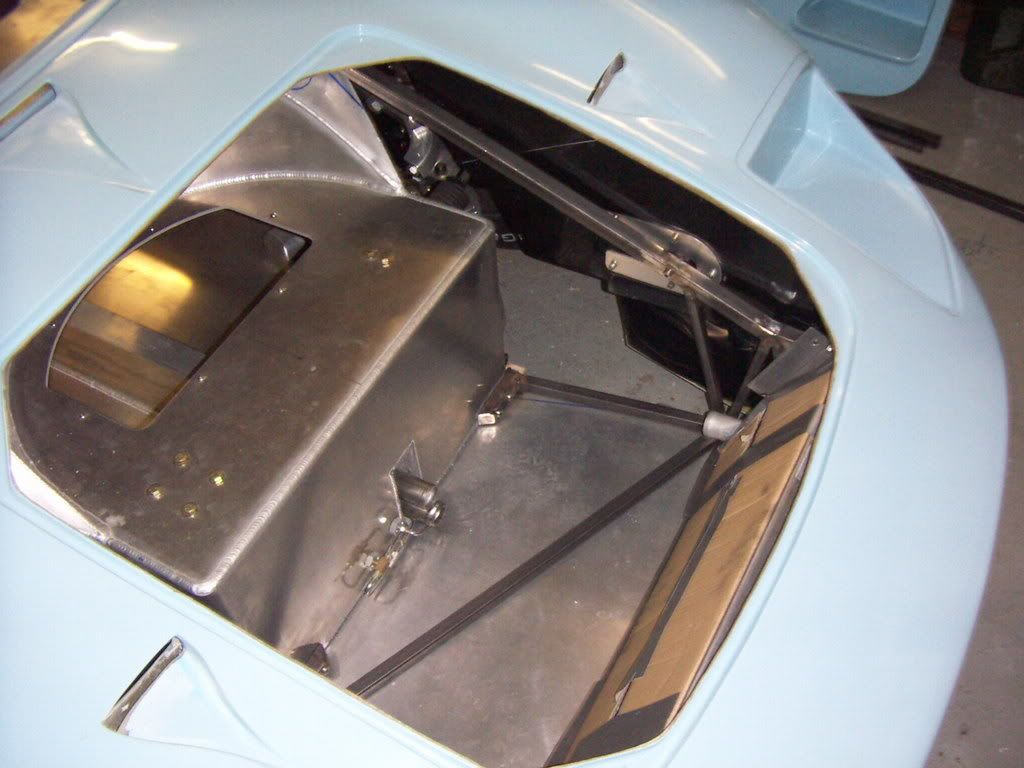
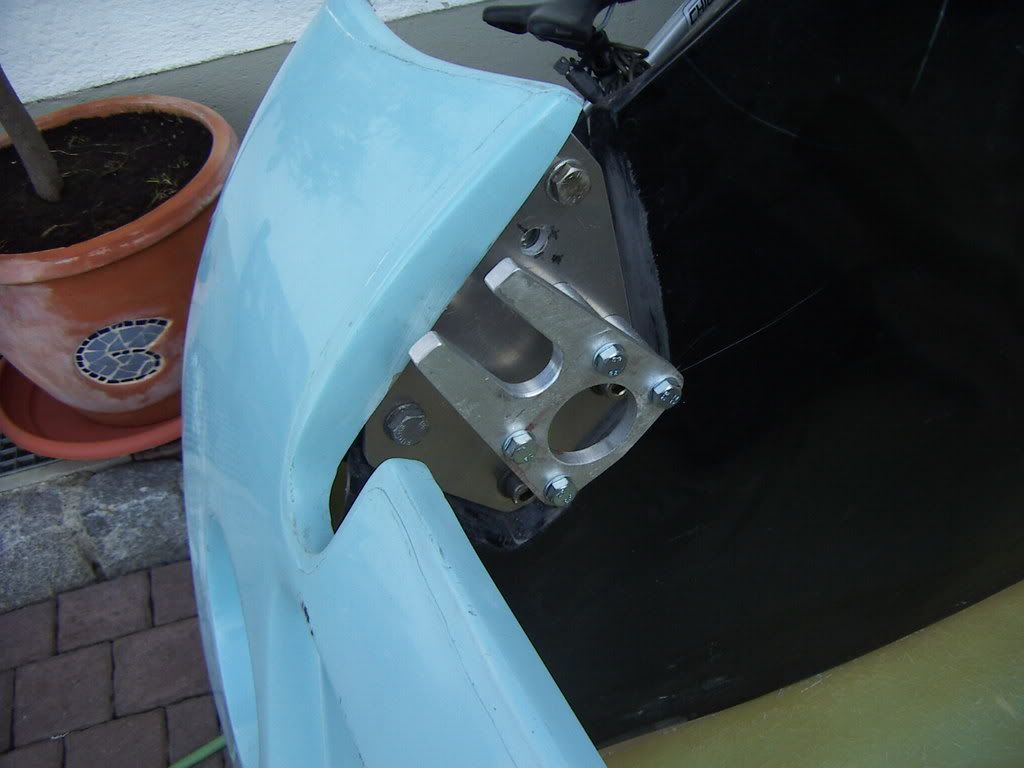
The originals and the RCR´s have the front clip mounted in a way which allows you to take it off in less then 2 minutes and put it back on without the need of readjusting anything. This is just perfect on the race track. As i would like to be able to do the same for the rear clip, i constructed a original style rear frame, incorporating the same concept ; excentric adjustable bobbins and sliders mounted in the rear clip.
The original RCR set up is a great one, especially the adjustability of it, makes the rear clip aligning very easy. I wanted to keep this advantage and mounted the bobbins on a slotted base plate.
I looked to some of original pics and coppied this style basicly but not to the last detail. My target was also to reuse the original RCR bottom plate plus the heimjointed top struts.
This is what i came up with.
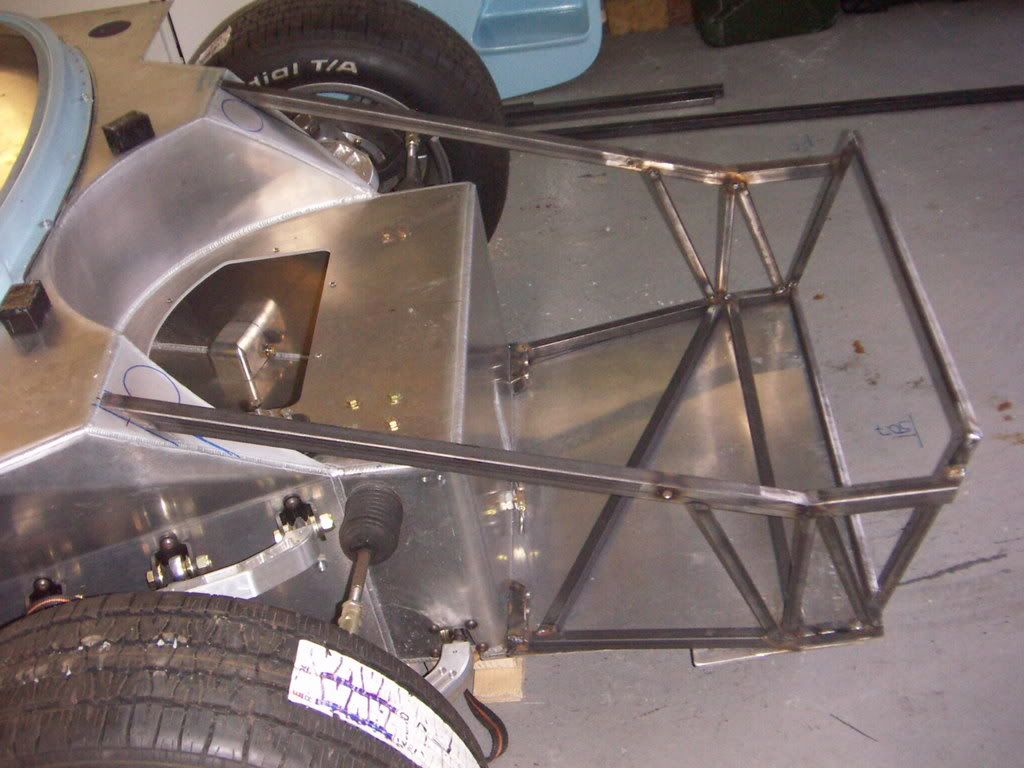
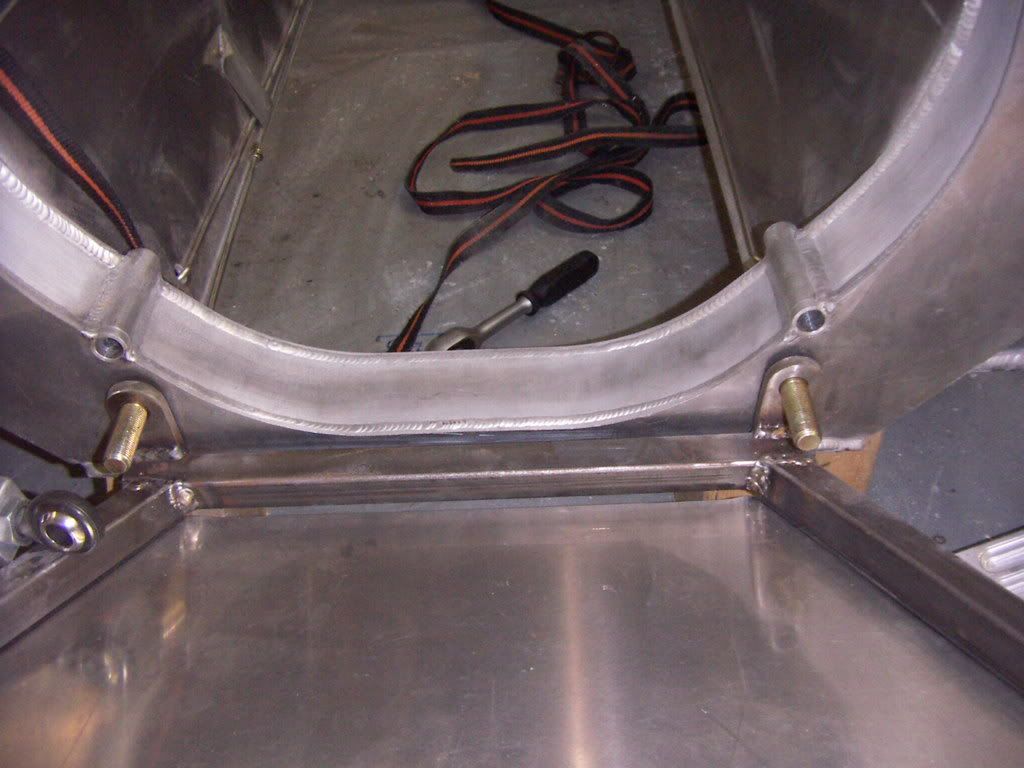
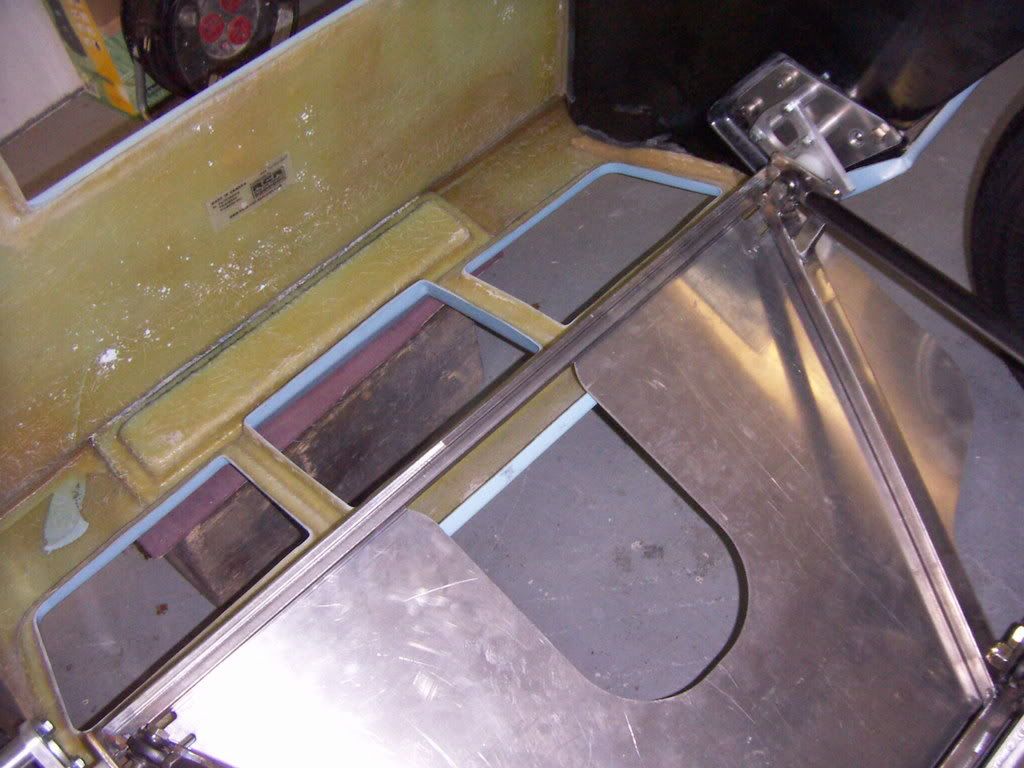
First step: the basic rear frame
made out of 25mmx25mm steel
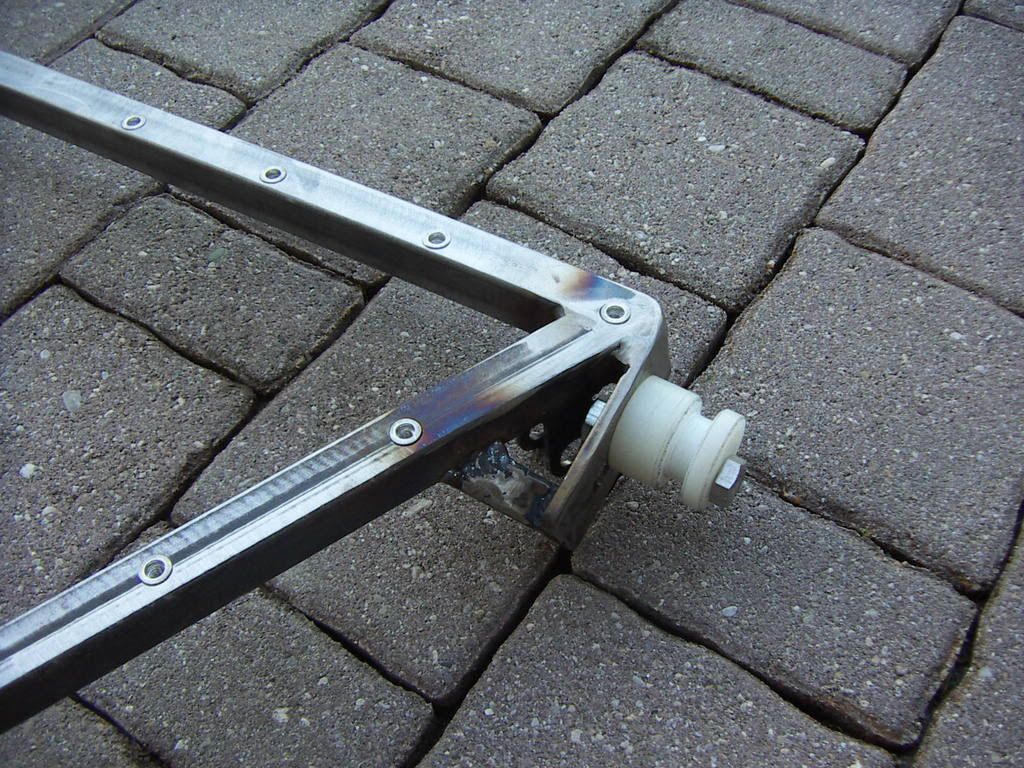
Step 2: the slottet base plate for the bobbins, the bobbins itself ( just mock ups will be replaced by black PU ones and threaded rivets for mounting the original RCR base plate installed
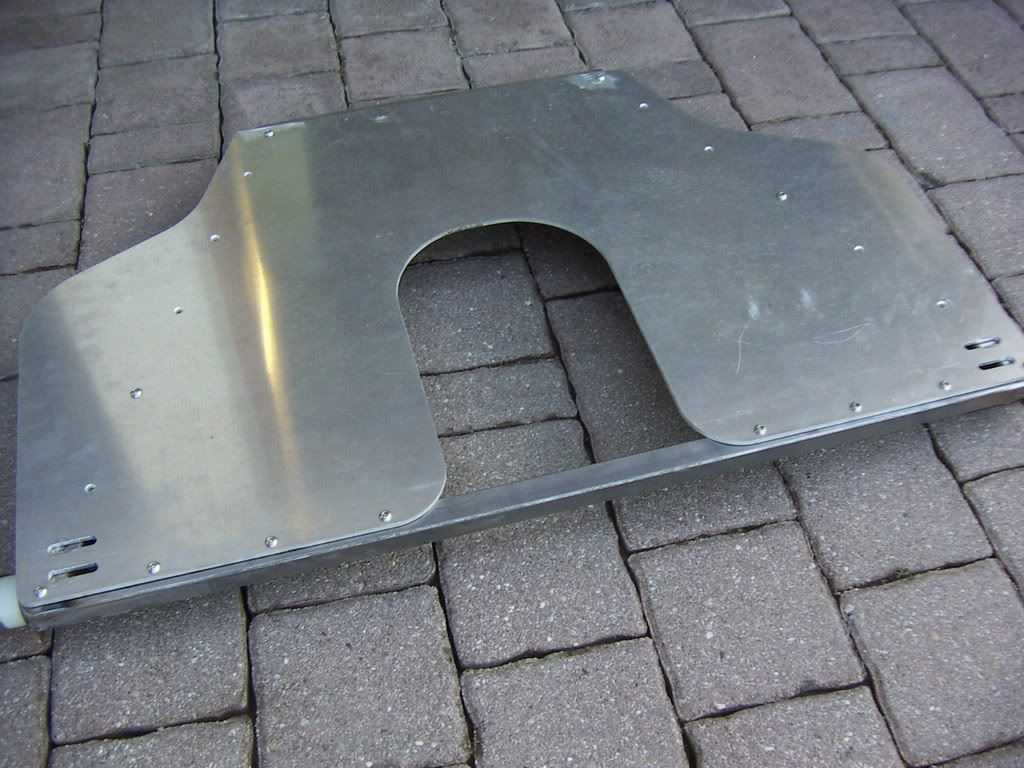
Step 3: the RCR base plate screwed on
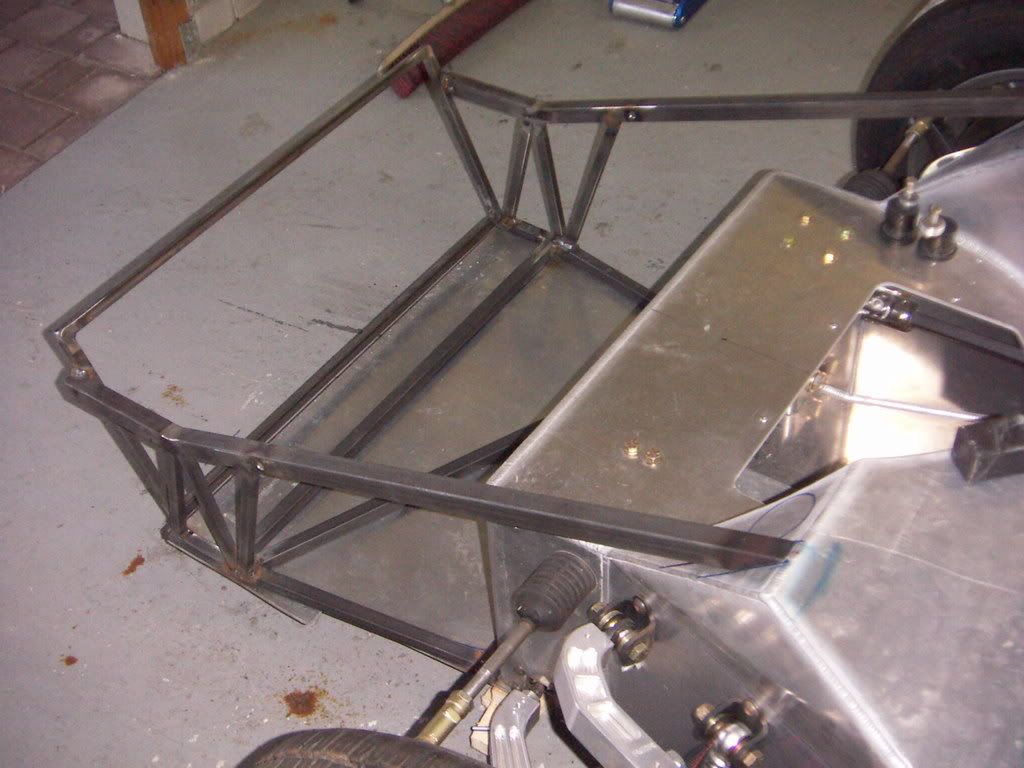
Step 4: rear frame mounted to RCR mounting points on the chassis, utilizing the RCR heimjointed struts.
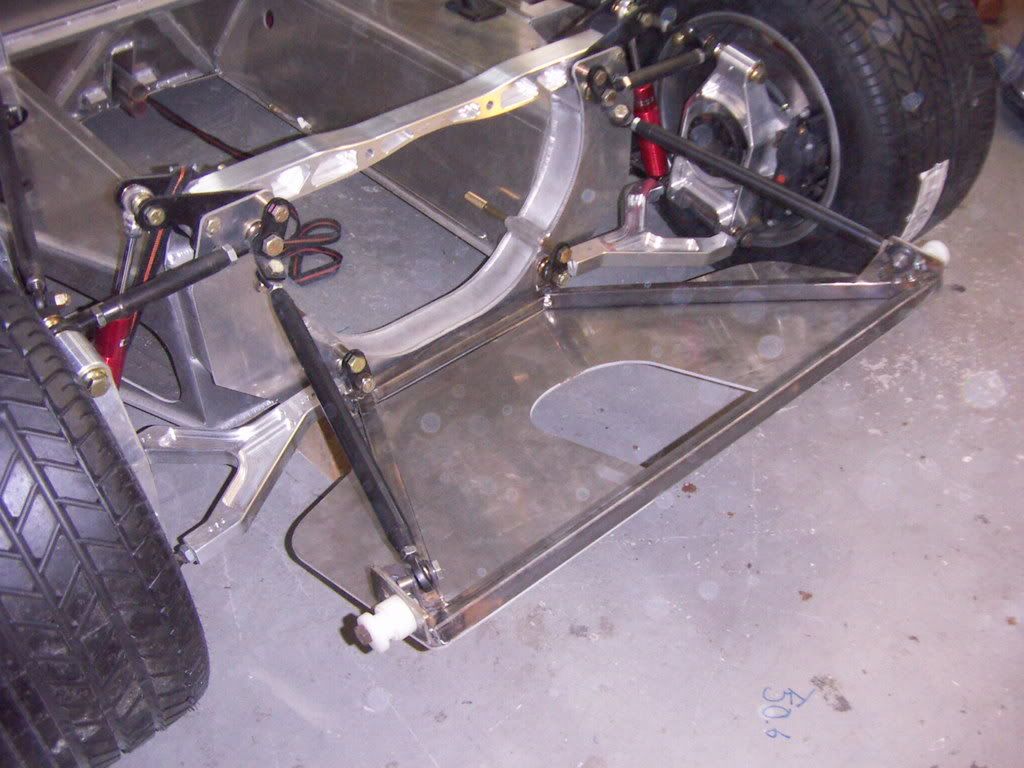
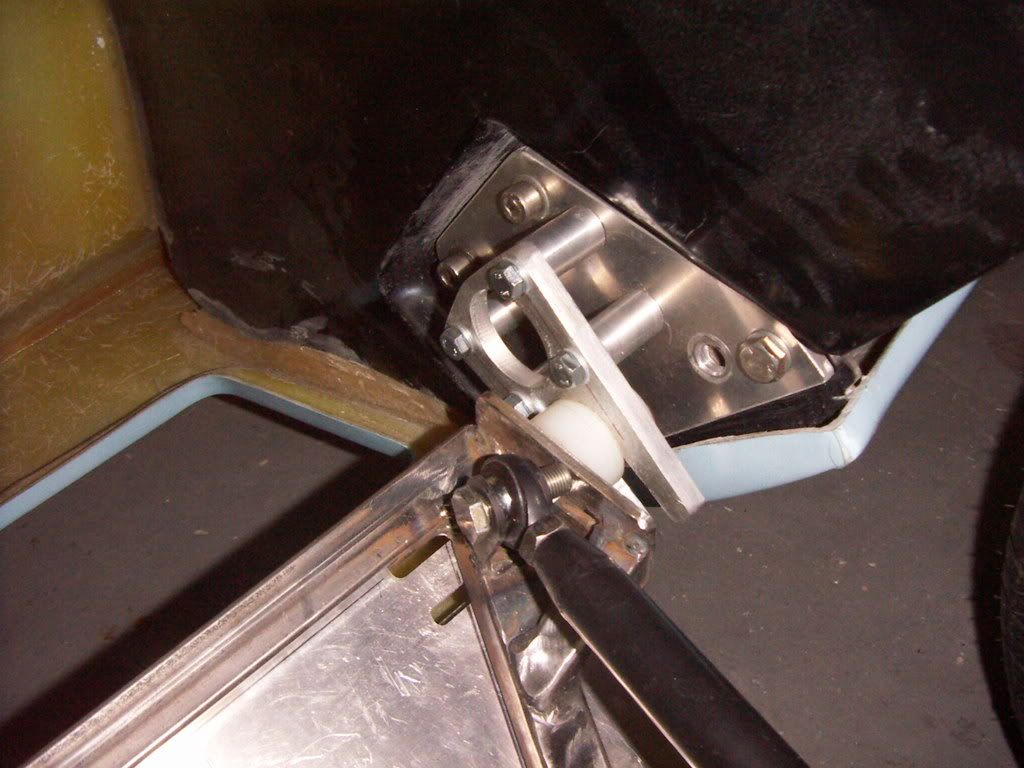
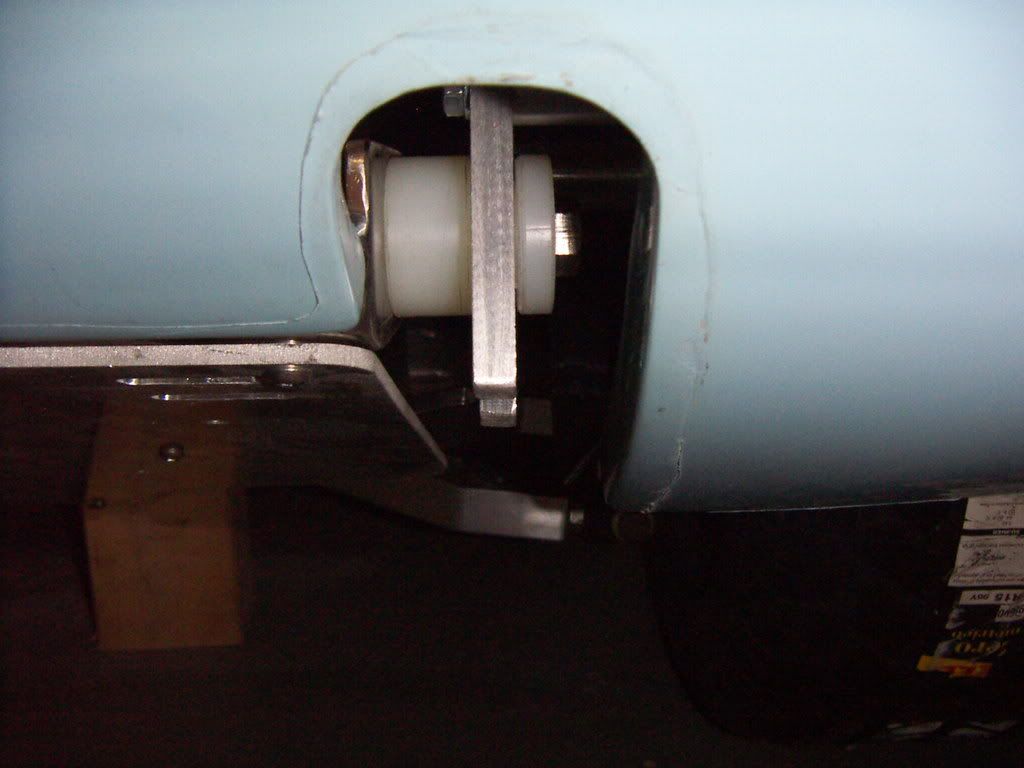
Step 5: fabrication and mounting of the slider plates. This i made of 10mm aluminium. THis is also a mock up design to check the correcttness of dimensions and function, will be replaced by one with a close to original design. After mounting the rear frame i placed the clip in the final position and measured the dimensions from the slider plate to the mounting plates of the rear clip to get the correct spacer size, which i than made on my lay.
The angle of the slot was choosen in a way that if the clip is closed it faces slightly backwards, so it can not be lifted as long as the latches are closed. In open position they still point downwards the floor so that the clip can not slide of.
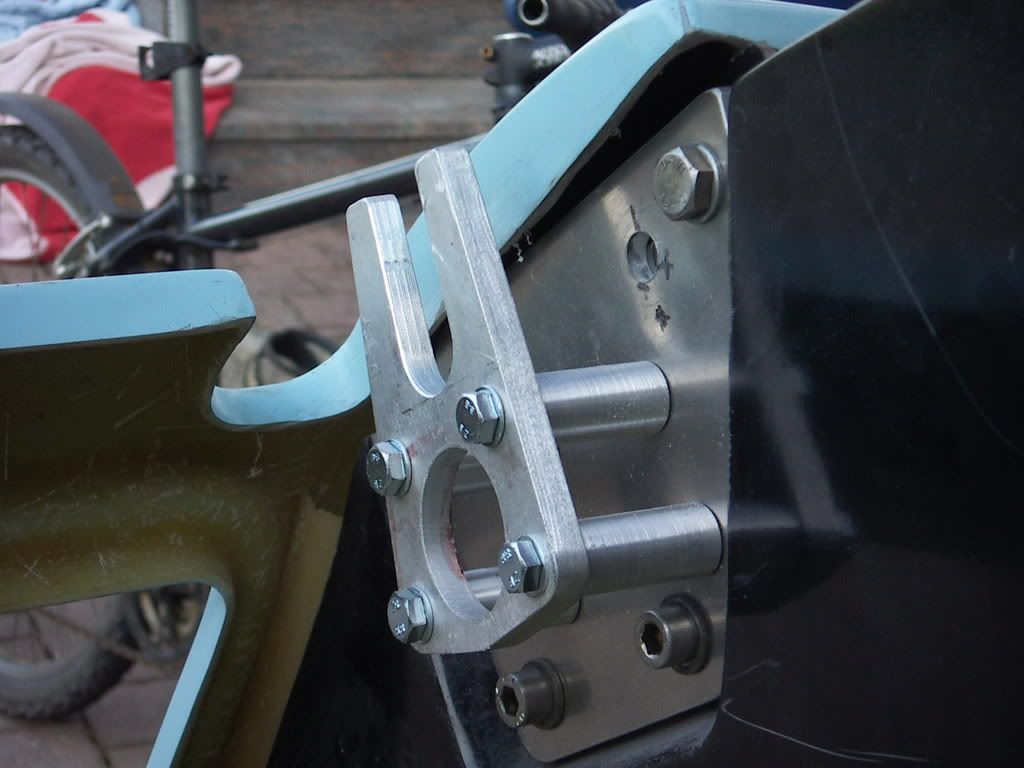
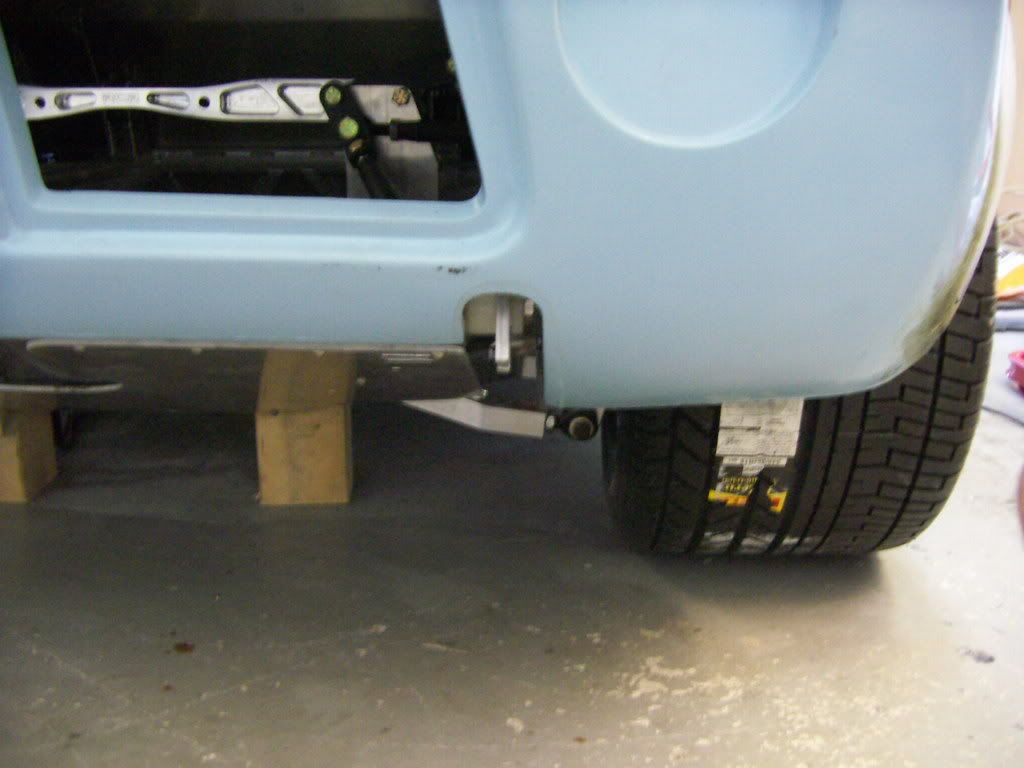
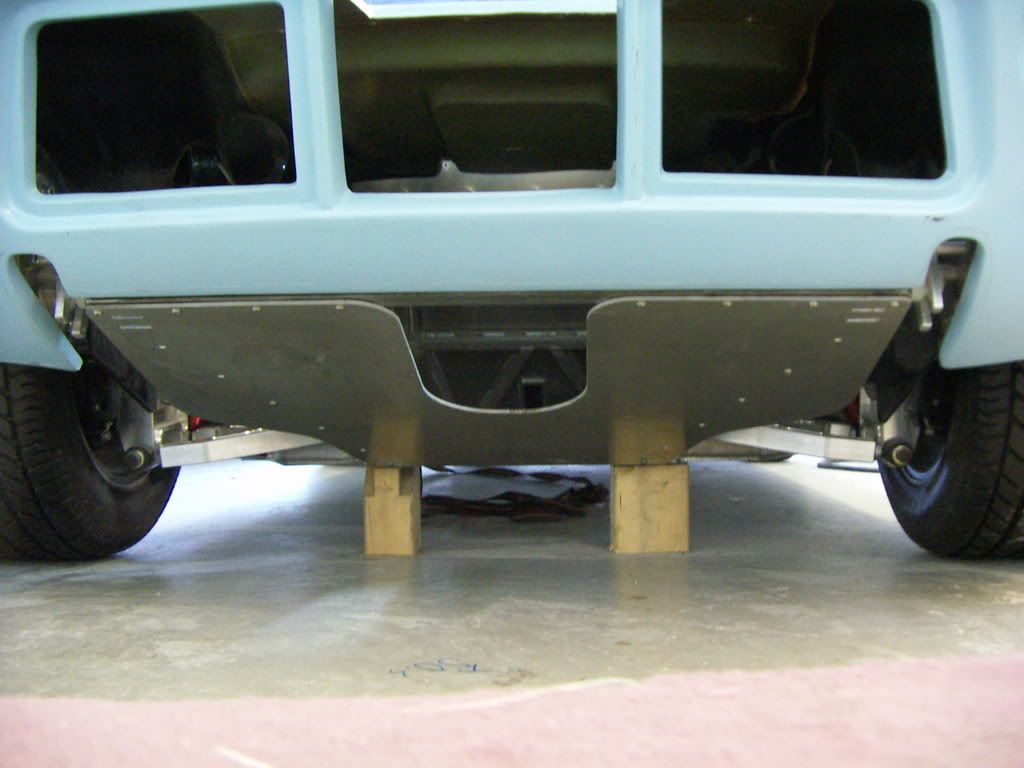
Step 6 ; mounting the rear clip: it all went good, the clip adjustment was just fine. The excentric bobbins allowed me to adjust the height correct and the slotted base plate the fore and aft position. Last test was the opening curve. This also went fine. The whole construction is rock solid and allows me to take the rear clip on and off in less than a few minutes without the need for readjusting. I dimensioned the bobbins that the slider plates are centered in the rear clip slot. I like this clean view. The slot in the slider plate will also be locked later on with on of JERGENS KWIK LOCK PINS.
TOM
The originals and the RCR´s have the front clip mounted in a way which allows you to take it off in less then 2 minutes and put it back on without the need of readjusting anything. This is just perfect on the race track. As i would like to be able to do the same for the rear clip, i constructed a original style rear frame, incorporating the same concept ; excentric adjustable bobbins and sliders mounted in the rear clip.
The original RCR set up is a great one, especially the adjustability of it, makes the rear clip aligning very easy. I wanted to keep this advantage and mounted the bobbins on a slotted base plate.
I looked to some of original pics and coppied this style basicly but not to the last detail. My target was also to reuse the original RCR bottom plate plus the heimjointed top struts.
This is what i came up with.
First step: the basic rear frame
made out of 25mmx25mm steel
Step 2: the slottet base plate for the bobbins, the bobbins itself ( just mock ups will be replaced by black PU ones and threaded rivets for mounting the original RCR base plate installed
Step 3: the RCR base plate screwed on
Step 4: rear frame mounted to RCR mounting points on the chassis, utilizing the RCR heimjointed struts.
Step 5: fabrication and mounting of the slider plates. This i made of 10mm aluminium. THis is also a mock up design to check the correcttness of dimensions and function, will be replaced by one with a close to original design. After mounting the rear frame i placed the clip in the final position and measured the dimensions from the slider plate to the mounting plates of the rear clip to get the correct spacer size, which i than made on my lay.
The angle of the slot was choosen in a way that if the clip is closed it faces slightly backwards, so it can not be lifted as long as the latches are closed. In open position they still point downwards the floor so that the clip can not slide of.
Step 6 ; mounting the rear clip: it all went good, the clip adjustment was just fine. The excentric bobbins allowed me to adjust the height correct and the slotted base plate the fore and aft position. Last test was the opening curve. This also went fine. The whole construction is rock solid and allows me to take the rear clip on and off in less than a few minutes without the need for readjusting. I dimensioned the bobbins that the slider plates are centered in the rear clip slot. I like this clean view. The slot in the slider plate will also be locked later on with on of JERGENS KWIK LOCK PINS.
TOM
Last edited:
Tom,
Very nicely done!
Howard
________________________________________________________________
RCR 40 two weeks away!
Very nicely done!
Howard
________________________________________________________________
RCR 40 two weeks away!
Are you going to incorporate a rear transmission mount with that structure?
Yes, that´s my intention. It´s definitely rigid enough to do so.
Thought about swapping the end cap of my G50/05 vs one of a short G50 ( 01 or 02) and using their original mounting points. Will see after the first dry fits of the engine/trans combo what i will come up with.
But
This will be in another few months after finishing the bodywork
TOM
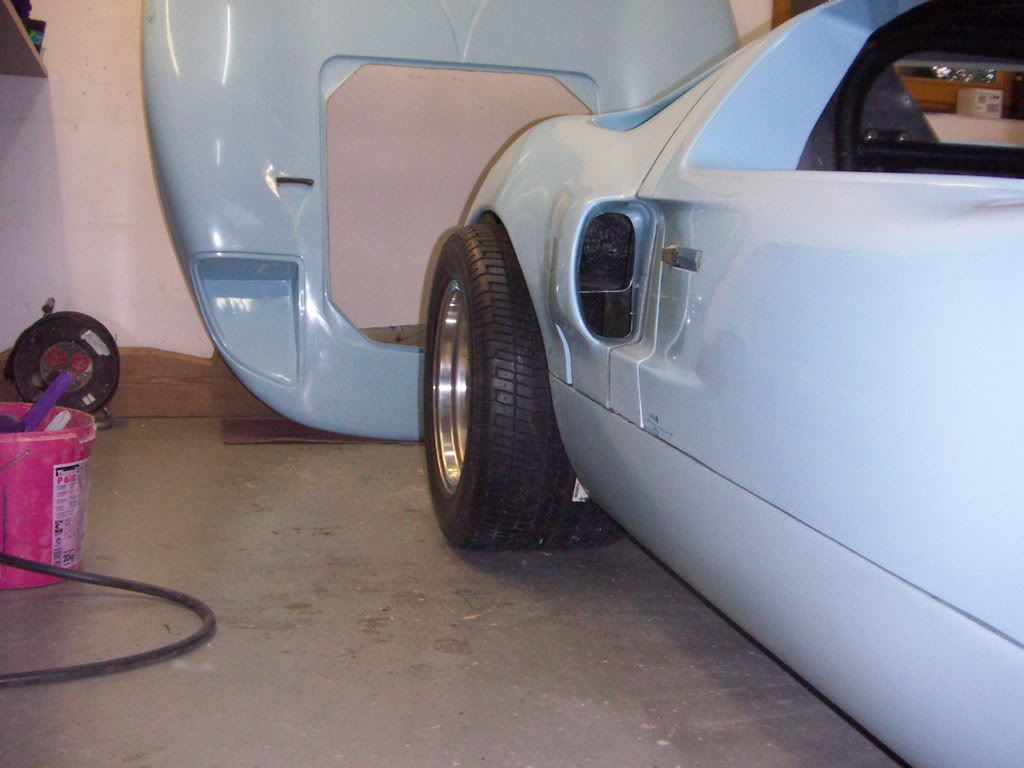
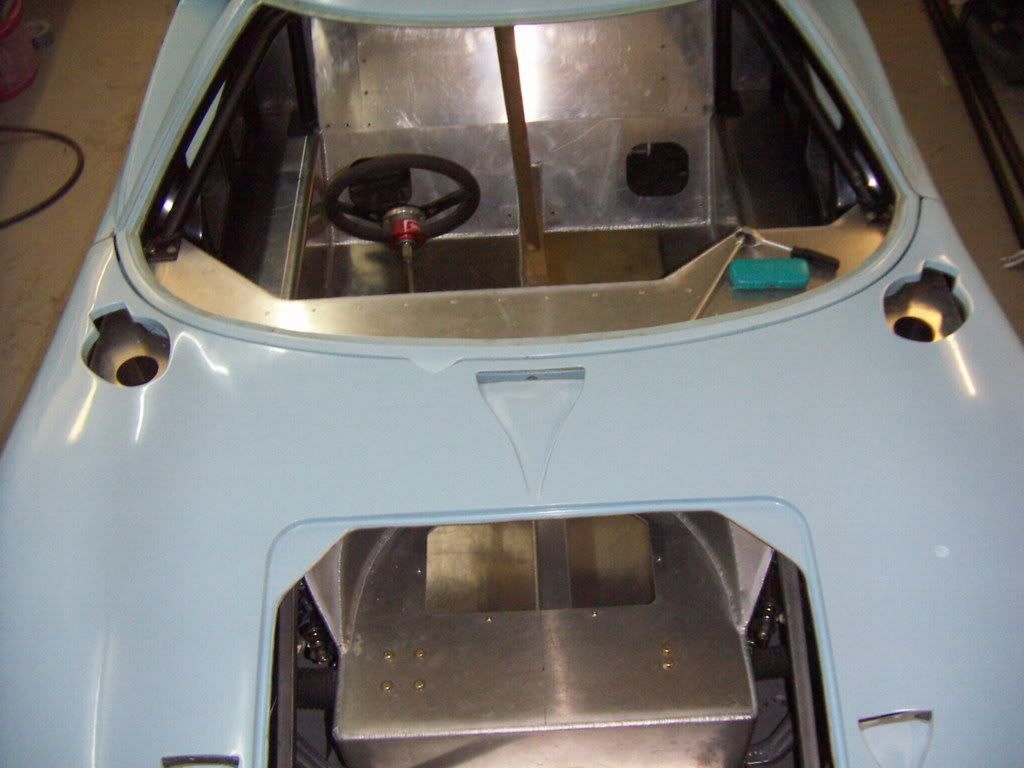
Engine compartment air ducts
The nice thing on the RCR is, that not only the outer body shell is a copy of an original, also the inner body panels are the exact same design.
To make the most use of this i decided to do also the brake and engine ducting like original cars have it. The brake ducting i purchased from Bill Hough. The engine air duct i made by myself.
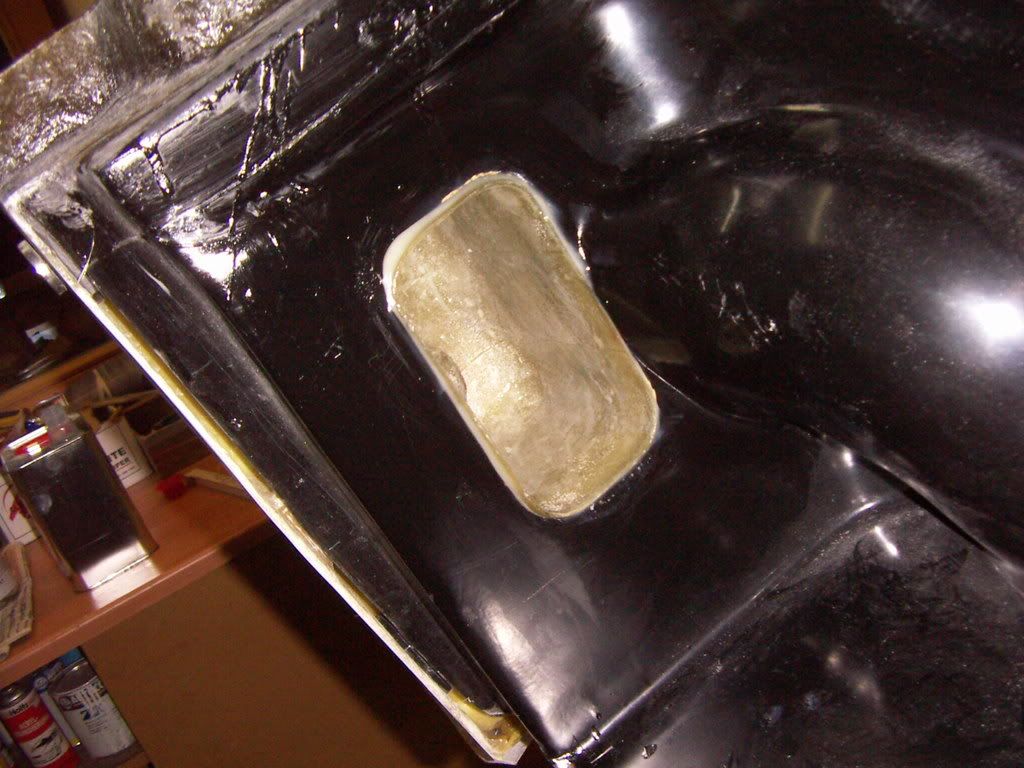
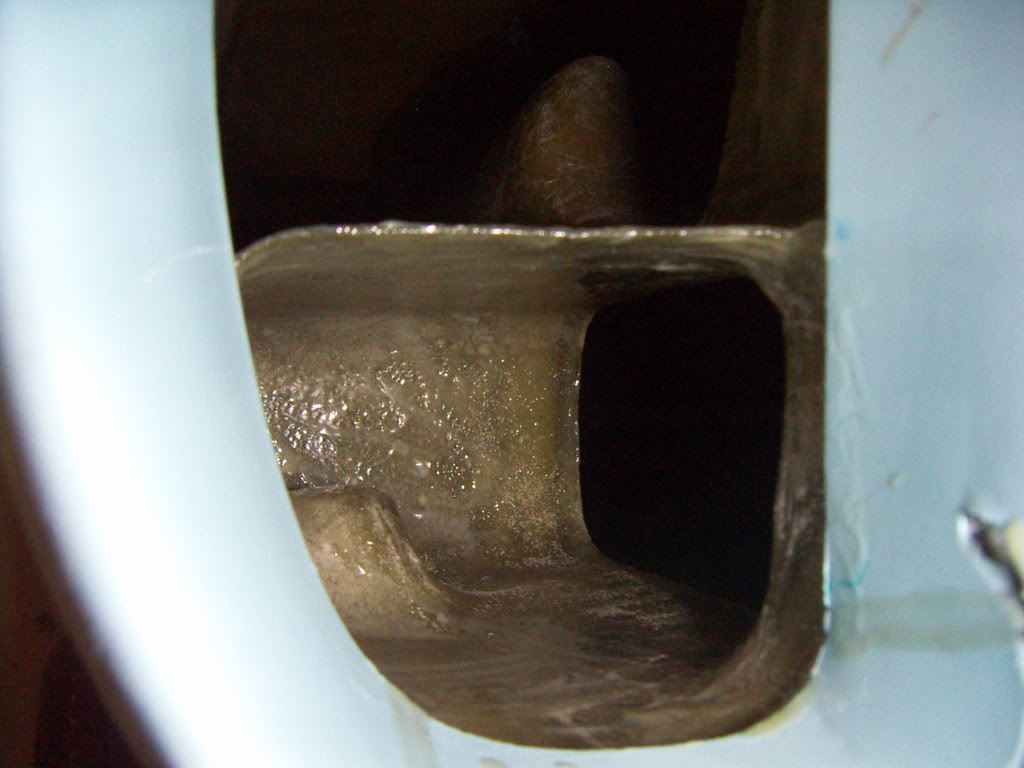
Original style RCR inner panel with cutout for engine air duct
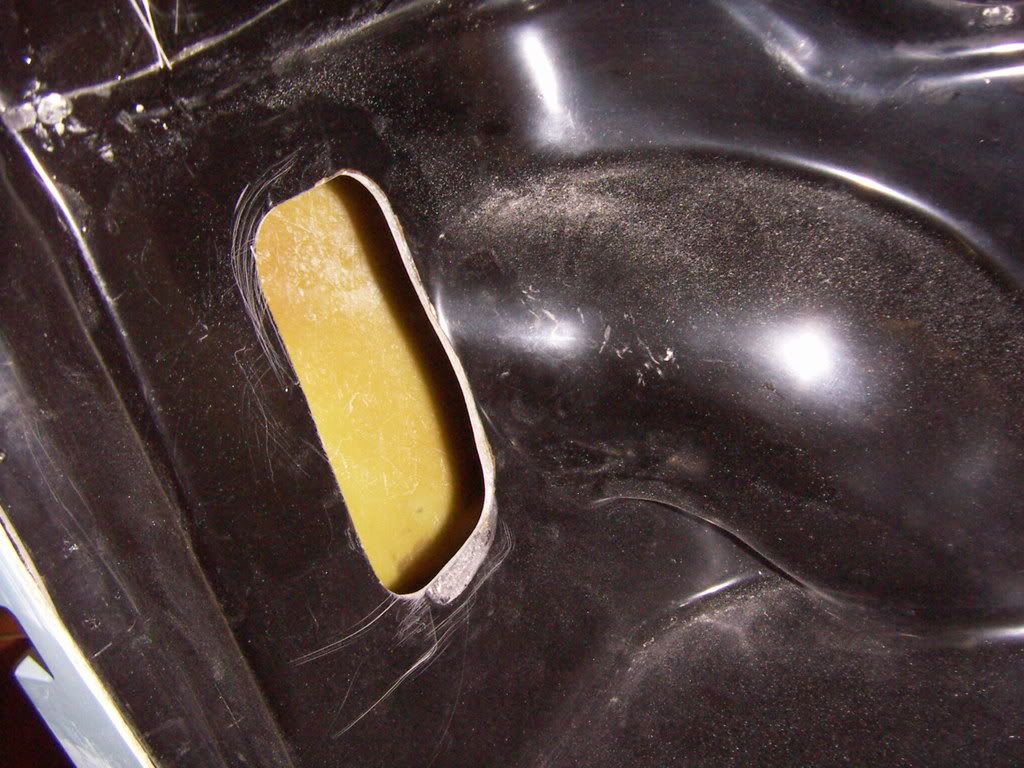
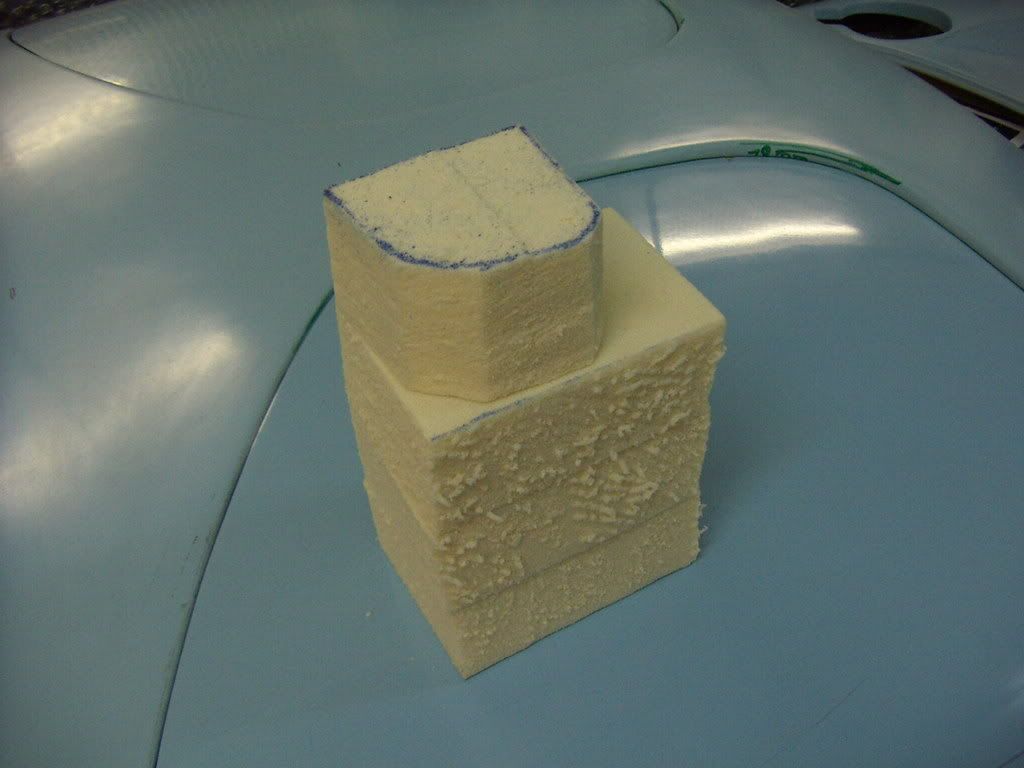
I decided to do lost positive molds out of PU foam. This material works great. one can glue it with hotmelt, shape it, than cover it with standard PE resin to produce nice parts. After sanding also the surface is perfect. Next time i will tray it with one or two layers of form wax before , may be the surface will come out nicer.
PU raw foam mold
finished part
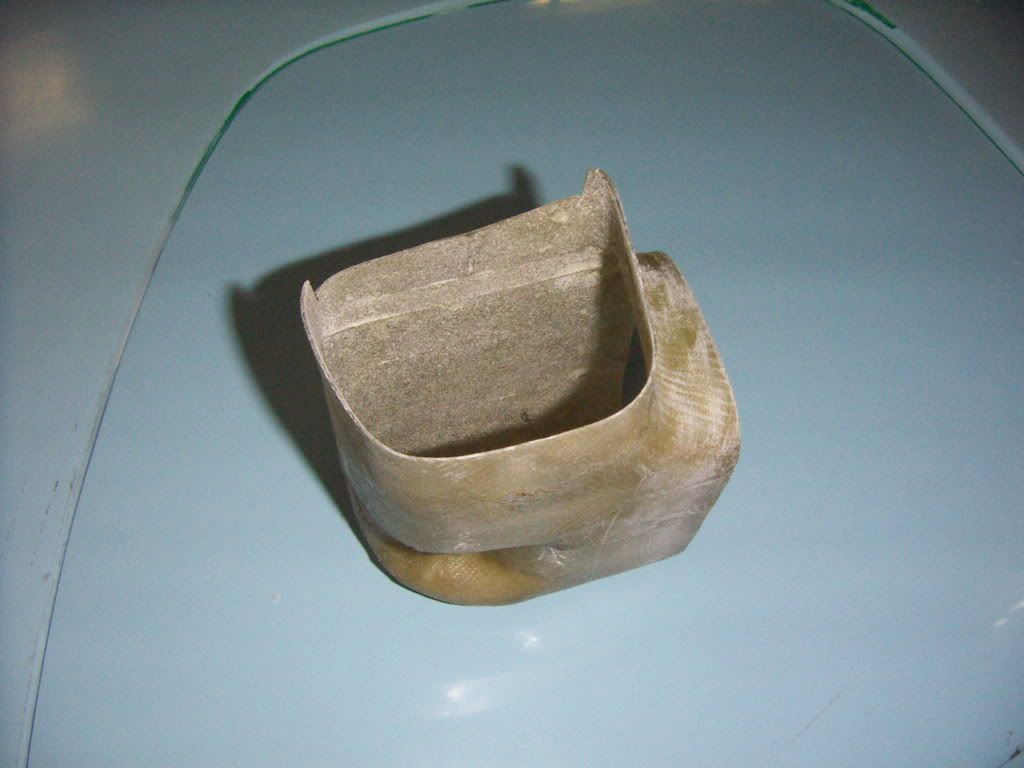
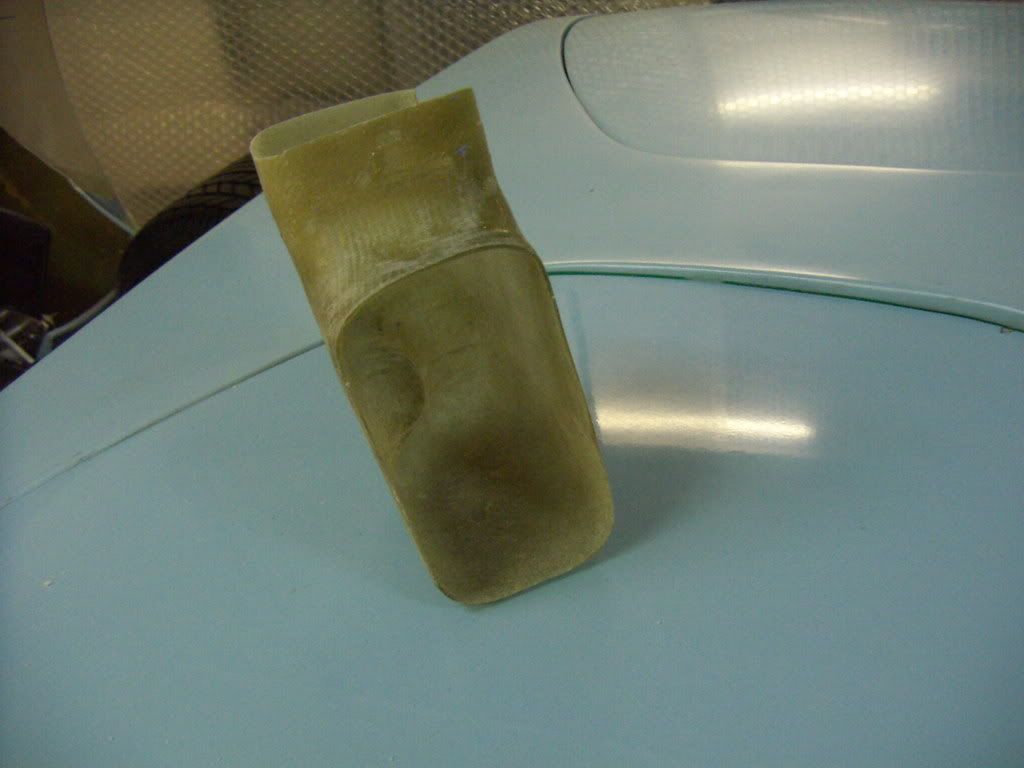
After having the duct, i proceeded to glue it in with a very viscose 2 K epoxy glue, which is normaly used in high sheer application like laminated bows( a friend of mine makes wonderful and exceptional fast custom recurves and longbows). Depending on the mix of the 2 components it stays flexible or get rockhard with every desired nuance inbetween.
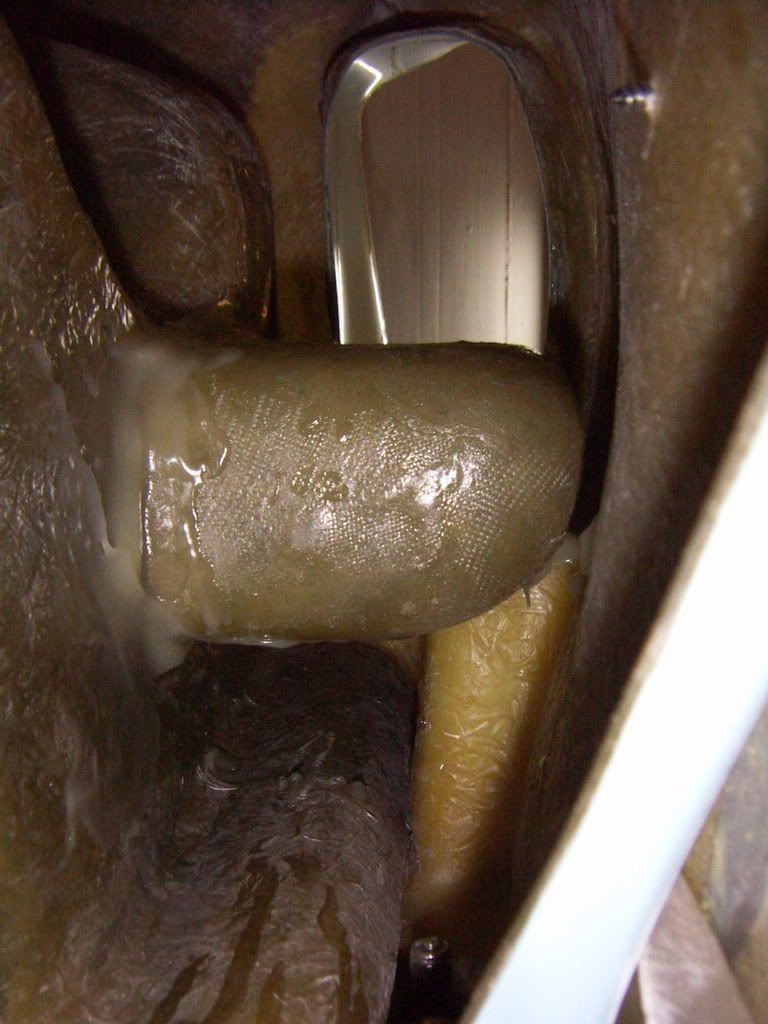
TOM
The nice thing on the RCR is, that not only the outer body shell is a copy of an original, also the inner body panels are the exact same design.
To make the most use of this i decided to do also the brake and engine ducting like original cars have it. The brake ducting i purchased from Bill Hough. The engine air duct i made by myself.
Original style RCR inner panel with cutout for engine air duct
I decided to do lost positive molds out of PU foam. This material works great. one can glue it with hotmelt, shape it, than cover it with standard PE resin to produce nice parts. After sanding also the surface is perfect. Next time i will tray it with one or two layers of form wax before , may be the surface will come out nicer.
PU raw foam mold
finished part
After having the duct, i proceeded to glue it in with a very viscose 2 K epoxy glue, which is normaly used in high sheer application like laminated bows( a friend of mine makes wonderful and exceptional fast custom recurves and longbows). Depending on the mix of the 2 components it stays flexible or get rockhard with every desired nuance inbetween.
TOM
- Status
- Not open for further replies.
Similar threads
- Replies
- 46
- Views
- 9K