Tornado TS40 #875

Hi Guy's,

Bill,

Thanks so much for the continued compliments.

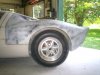
My 15 inch BRM's have silver spokes with a polished rim, whereas 1027 had black Halibrands. I prefer the BRM wheel though:thumbsup:

Tom,

You're welcome!

I wanted to build our Deluxe Component Package to showcase how it really is a GT40 in a box, so mods were not in mind.

Yes this car has been lots of fun to build, all 116 days of it!

I am sure it will be a blast to drive.

My UN1-26 with 3:44 F/D, has no "Mods" either. It will work well with the 385HP 289 that is installed.

To your point on a 200 MPH UN1 equipped GT40, if you were to upgrade one, I don't see why 200 mph is not possible. What you really need for that is an engine capable of turning at or above 6770 rpm in 5th gear.

Assuming a 3:44 F/D, .76 5th gear, and a 26 inch tire.

Also assuming that I didn't make a math error!

The question is, where will you go 200 MPH on the road in Kent:stunned:

Keep saving Tom and we will put you in a carbon fiber mono GT40!

.................................................................................

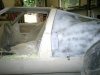
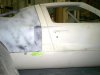
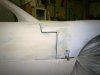
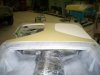
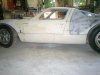
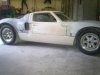
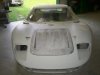
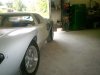
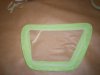
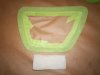
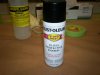
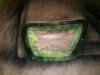
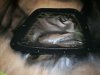
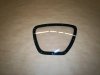
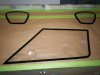
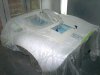
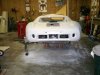
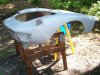
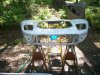
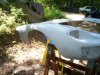
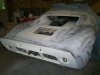
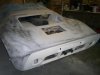
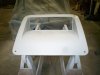
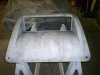
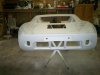
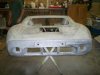
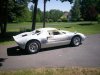
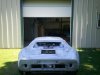
Today just some spot putty work on the rear clip.

S
 

Attachments

  • 001.jpg
    001.jpg
    48 KB · Views: 688
Last edited:
Some progress pics,


Front clip almost done wet sanding and ready for PPG DP 48 white primer sealer.

After that Black down the center of the clip for the stripes, then Begian racing yellow and clear on top!

Next, the rear clip in guide coat.

S
 

Attachments

  • 005.jpg
    005.jpg
    63 KB · Views: 679
  • 006.jpg
    006.jpg
    79.5 KB · Views: 588
  • 007.jpg
    007.jpg
    59.9 KB · Views: 631
  • 003.jpg
    003.jpg
    30.6 KB · Views: 704
  • 004.jpg
    004.jpg
    31.6 KB · Views: 663
Scott
I'm really impressed with your progress and all aspects of the kit. This will truly showcase your talents and the Tornado kit.

Back to the wheels...you might consider a second set of BRM's and paint the centers black. I just think that will make your car look super bad!!! Just my $.02 :)
 
Thanks Bill!

I had a hard enough time trying to decide on paint, now you have me thinking of black wheels:stunned:

Yesterday just a little work.

Finished body prep on the front hatch and rear clip.

After a 320 grit wetsand they should be ready to seal and paint.

Spider, doors and sills are next.

S
 

Attachments

  • 008.jpg
    008.jpg
    31.6 KB · Views: 634
  • 013.jpg
    013.jpg
    33.3 KB · Views: 631
  • 009.jpg
    009.jpg
    37 KB · Views: 580
  • 014.jpg
    014.jpg
    38.5 KB · Views: 623
  • 010.jpg
    010.jpg
    39.6 KB · Views: 774
  • 012.jpg
    012.jpg
    39.1 KB · Views: 964
Last edited:
Great build Scott
will be avery nice car. What does your build time of now app 118 d mean in hours put into the car ?
Thanks
TOM
 
Hi Tom,

Why do you ask?

Quite a few, but less than you would think :rolleyes:.

The Complete Tornado Deluxe Kits can be built very quickly.

As demonstrated.

The industries only complete self built component GT40 replica.

Thanks,
Scott
 
Hi Everybody,

Sorry I have not posted about progress on 875 for a few weeks.

My bodyman has run into some health issues of late and had to have an unforseen operation.

He is not able to complete this job, so I have decided to move 875 to a different shop.

I am pleased to announce I have partnered with Spikes Custom Paint.

They are well known custom paint shop, here in New England.

Very soon a "paint build thread" of 875 will be featured on their website, and of course here too!

They do amazing work!

Check them out here;

spikescustompaint

Cheers,
S
 
Last edited:
:thumbsup:

TS40 #875 arrived at Spike's today.

Here are a few pictures showing the mirrors, rear bulkhead supports, twin pumps & filters and the oil cooler and coolant tank.

Also Spike's shop truck and building.

More to come as the car moves forward.

Cheers,
S
 

Attachments

  • 001.jpg
    001.jpg
    46.9 KB · Views: 769
  • 002.jpg
    002.jpg
    52.5 KB · Views: 818
  • 003.jpg
    003.jpg
    39.9 KB · Views: 693
  • 004.jpg
    004.jpg
    52.2 KB · Views: 890
  • 005.jpg
    005.jpg
    48.8 KB · Views: 899
  • 006.jpg
    006.jpg
    76 KB · Views: 644
  • 007.jpg
    007.jpg
    40.9 KB · Views: 617
  • 008.jpg
    008.jpg
    37.4 KB · Views: 672
Hi Scott,
Looking really good. I presume the oil cooler is only in a temporary position. Otherwise you have effectively blanked a third of it with the bulkhead support and you will get heat-soak from the engine (even though you have wrapped the manifolds). Ideally it wants to be mounted above the battery or the other side, with air ducted in from the side scoop.<?xml:namespace prefix = o ns = "urn:schemas-microsoft-com<img src=" /><o:p></o:p>
<o:p></o:p>
Regards<o:p></o:p>
<o:p></o:p>
Andy<o:p></o:p>
 
Last edited:
Tornado oil coolers may work well in this position, but before the ‘new’ bulkhead support was added.
I was only trying to point you in the right direction so that you have a car that is fit for purpose. It’s your baby.<?xml:namespace prefix = o ns = "urn:schemas-microsoft-com<img src=" /><o:p></o:p>
<o:p></o:p>
Regards<o:p></o:p>
Andy<o:p></o:p>
 
Last edited:
Hi All,

Just some update pictures from spikescustompaint .

Notice the Green pearl flamed old school fridge, complete with spider web grill :thumbsup:

Cheers,
S
 

Attachments

  • 001.jpg
    001.jpg
    28.2 KB · Views: 654
  • 002.jpg
    002.jpg
    29.4 KB · Views: 628
  • 003.jpg
    003.jpg
    37.2 KB · Views: 643
  • 004.jpg
    004.jpg
    39.2 KB · Views: 686
  • 005.jpg
    005.jpg
    46.3 KB · Views: 733
  • 006.jpg
    006.jpg
    66.7 KB · Views: 572
Hi All,

More body update pictures.

Gaps are pretty much completed and the N.A.C.A. duct's are being opened.

The body will probably be disassembled tomorrow for primer coat.

Cheers,
Scott
 

Attachments

  • 007.jpg
    007.jpg
    39.2 KB · Views: 585
  • 008.jpg
    008.jpg
    36.9 KB · Views: 601
  • 009.jpg
    009.jpg
    31.1 KB · Views: 591
  • 010.jpg
    010.jpg
    42.3 KB · Views: 558
  • 011.jpg
    011.jpg
    35.4 KB · Views: 556
  • 012.jpg
    012.jpg
    44.8 KB · Views: 652
Scott,

What kind of paint did you use to paint the headlights covers? How did you mask the covers to get such a sharp line?
 
Hi Victors,

It was real easy, childs play.

I have to do the lower covers and drivers side window today.

I'll photo document it here for you.

Cheers,
Scott
 
Hi Victors,

Ok here you go;

Remember that this must only be done after the covers are completely fit and final drilled for the attachment screws.

You will need;

Latex or nitrile gloves

1 pair small needle nose pliers or hemostats

Isopropyl Alcohol and paper towels for degreasing

2 inch painters tape

3/4 inch painters tape

1/4 inch striping tape of good quality

black spray paint

1 white scotchbrite pad (Doodlebug I think is the 3M tradename)

Butchers paper

Scissors

Several new razor blades

Basically you use the 3/4 inch tape to establish a border on the inside of the cover, then next to the 3/4 inch tape you apply the vinyl striping tape.

Then remove the 3/4 inch tape, mask both sides, then clean the border lightly with the scotchbrite pad and alcohol.

I have found that the paint pictured adheres well to the material our light covers are made of, with just this simple prep.

Let the alcohol flash off, run your thumbnail around the striping tape edge, then paint with just enough light coats to cover completely, waiting a few minutes between coats.

Oh and make sure to paint the edges too.

Then use the needle nose pliers to help remove the tape after the paint has set up.

The sequence of the pictures tells the story.

Hope this helps.

Cheers,
Scott


PS,

For the latest pictures of 875's body prep, check out the amazing work of spikescustompaint !
 

Attachments

  • 003.jpg
    003.jpg
    31.5 KB · Views: 680
  • 004.jpg
    004.jpg
    25.4 KB · Views: 738
  • 005.jpg
    005.jpg
    26.8 KB · Views: 710
  • 006.jpg
    006.jpg
    24.3 KB · Views: 703
  • 007.jpg
    007.jpg
    25.5 KB · Views: 692
  • 008.jpg
    008.jpg
    23.2 KB · Views: 616
  • 009.jpg
    009.jpg
    24.2 KB · Views: 598
  • 010.jpg
    010.jpg
    27.8 KB · Views: 624
  • 011.jpg
    011.jpg
    28.9 KB · Views: 709
  • 012.jpg
    012.jpg
    35 KB · Views: 723
  • 013.jpg
    013.jpg
    38.1 KB · Views: 679
  • 014.jpg
    014.jpg
    31.7 KB · Views: 649
  • 015.jpg
    015.jpg
    25.2 KB · Views: 709
  • 016.jpg
    016.jpg
    33.5 KB · Views: 729
Last edited:
Just a couple of booth pics today.

The color should go on starting this Monday.

Looks like it may be six months ... crates - to - plates!

:pepper::pepper::pepper:

S
 

Attachments

  • 001.jpg
    001.jpg
    30.9 KB · Views: 609
  • 002.jpg
    002.jpg
    33.8 KB · Views: 562
Last edited:
Back
Top