S2's Build Thread

That's pretty much my extent of what I can do... Take a 2D and extrude it to make 3D objects in CAD. I can probably draw some simple stuff, just need a project that'll require it. I'm glad to see you are using it for the SLC and excelling at it! I'll have to check out and take a corse in SolidWorks, that's the program I hear alot about for 3D modeling.

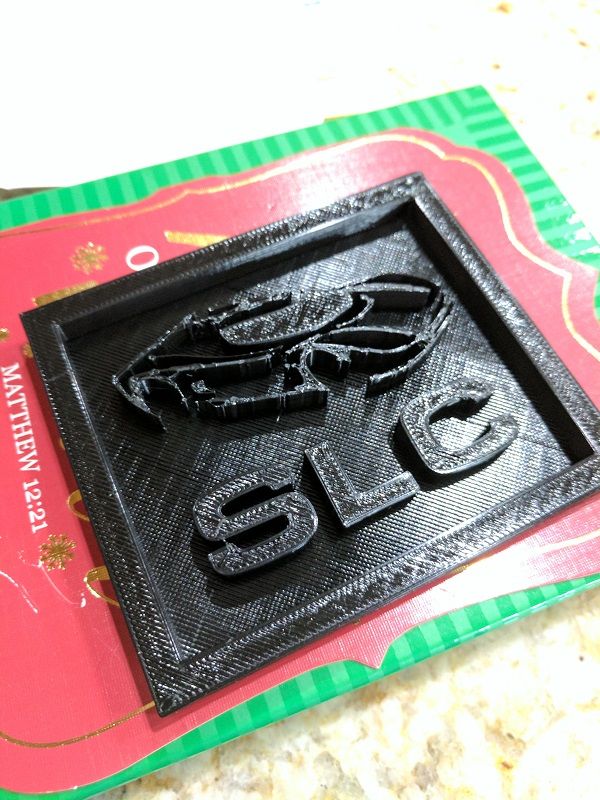
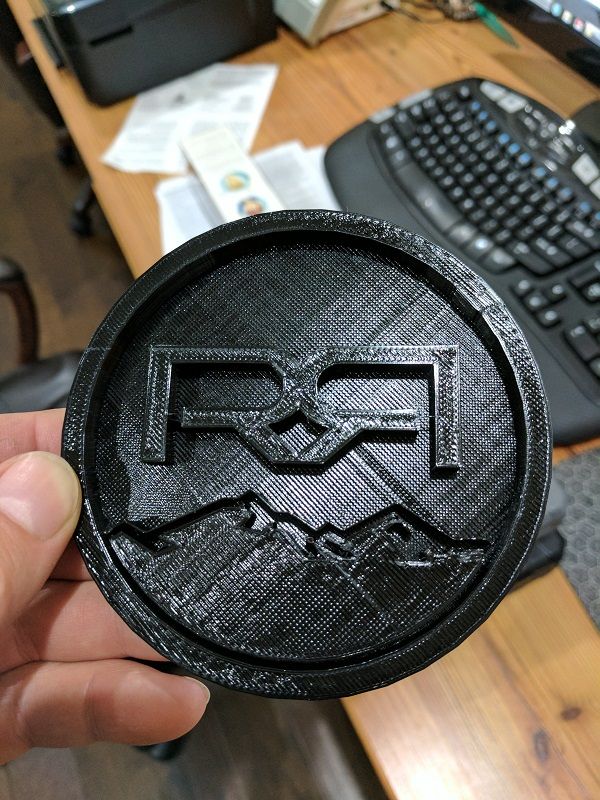
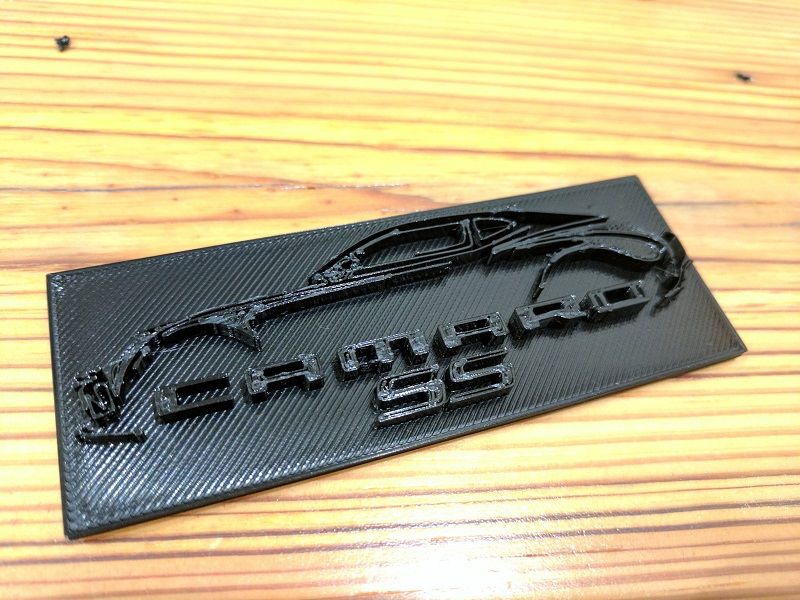
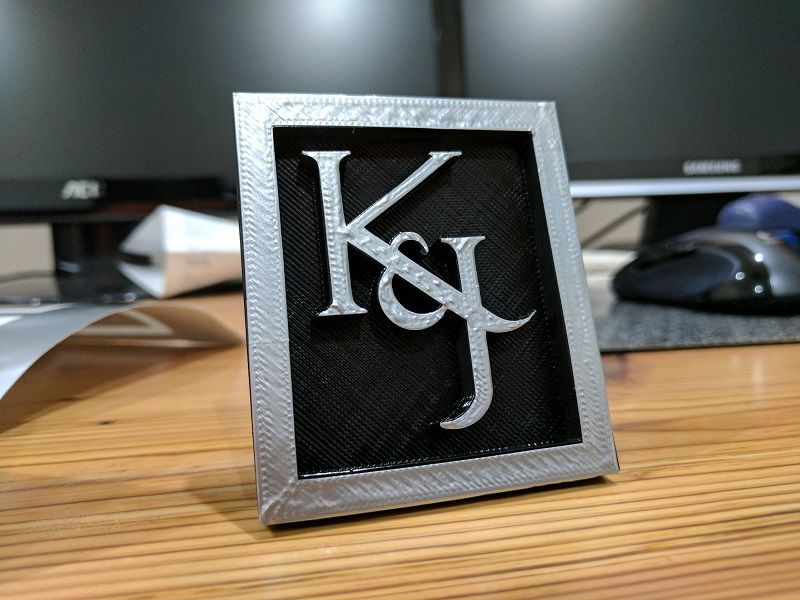
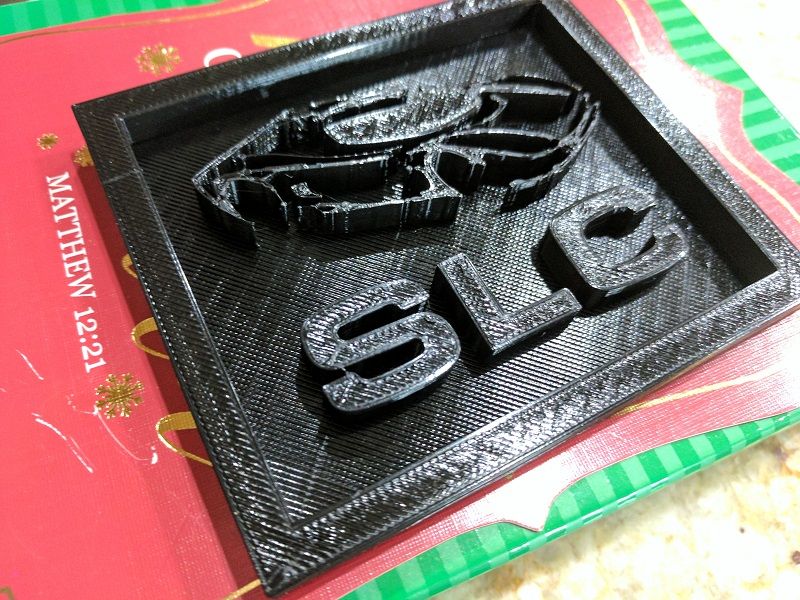
I got a cheap XYZ Davinci Jr 3D printer. I wasn't sure how much I'd use it, but ended up using it alot more than expected. I'll need to upgrade at some point, especially when my SLC gets here. Here's a few things I've drawn and made. The K&J was a present to a couple of buddy's that opened their own engineering firm. I used wife's Silhouette vinyl cutter to see if I could cut same logo out in vinyl and it match up dimension-wise to the 3D print.

IMG_20161223_153219.jpg

IMG_20161223_153211.jpg

IMG_20161227_193904.jpg

IMG_20161223_002122.jpg

IMG_20161215_195558.jpg
 

Scott

Lifetime Supporter
Del,
Nice work! I don’t think it’s an issue to have an inexpensive printer because if you want to print things that require strength or heat tolerance you would need to spend a fair amount. You can use your current printer to prototype things and have those types of end-use parts printed elsewhere. Using www.3dhubs.com you can probably find someone close by to print most things. Just create an account and upload one of your STL files to see what’s in your area.
<?xml:namespace prefix = "o" ns = "urn:schemas-microsoft-com<img src=" /><o:p></o:p>
I think that SolidWorks is one of the best for designing parts, but make sure that you will have long-term access to it before you spend any time learning it. They seem to have very tight control on their licensing and after the 30-day trial you only have a couple of choices: buy it (~$5k entry), prove you’re a student, pirate it (illegal) or find someone who will let you use their copy. Given how good some of the free CAD software is, I would have thought that SolidWorks would have a lower entry price for non-commercial use.

Whichever one you pick, use Lynda.com or similar to get a good baseline course.
 
Del,
Nice work! I don’t think it’s an issue to have an inexpensive printer because if you want to print things that require strength or heat tolerance you would need to spend a fair amount. You can use your current printer to prototype things and have those types of end-use parts printed elsewhere. Using www.3dhubs.com you can probably find someone close by to print most things. Just create an account and upload one of your STL files to see what’s in your area.
<font size="3"><!--?xml:namespace prefix = "o" ns = "urn:schemas-microsoft-com
font><br> <font face=
I think that SolidWorks is one of the best for designing parts, but make sure that you will have long-term access to it before you spend any time learning it. They seem to have very tight control on their licensing and after the 30-day trial you only have a couple of choices: buy it (~$5k entry), prove you’re a student, pirate it (illegal) or find someone who will let you use their copy. Given how good some of the free CAD software is, I would have thought that SolidWorks would have a lower entry price for non-commercial use.

Whichever one you pick, use Lynda.com or similar to get a good baseline course.

Holy crap, $5k! I guess it compares to CAD. I have no clue what it costs, but I know you can pay by the month to use it. That's what a few friends do that have their own engineering firm. I may get lucky if I use it, my wife is actually going for her RN Master's degree right now so I could get her to buy it. I need to look into student cost for sure.......or acquire other ways, lol.

Great idea on using mine to print prototypes and just sending them off to get made with better material. Although if I do upgrade, I can follow what you did and upgrade the printer to do more materials. Nothing I own remains "stock" for long, I'll even buy certain things just because I know i can modify them, ha.

Thanks for the info sir, I appreciate it. I'm sorry for hijacking your thread about 3D printing, I just can see me doing similar and like seeing other peoples work! Keep up the awesome work on the build!
 
I have just been trying to choose between solidworks and autodesk360. Autodesk360 can be had on a $30 a month basis. I havn't contacted solidworks about their monthly charges, but the fact they are charging $150 for the student version, and $5,000 for the basic program and it looks like you have to pour in another $1300 to unlock all features, my decision may already be made. Seems like a brilliant way to lock in customers by having it be the main program college students learn on, which will force them to pay the big bucks when out of college.
I don't agree with forced buying structures. Luckily, I have two friends that work at autodesk also. Just need to make sure autodesk files can be widely used as manufacturing language/files.
 
Scott:

AutoCAD 360 is simply a drawing viewer / editor and is very unlike Solidworks. You won't be able to generate 3D parts or .stl file structures for 3D printing. You'll need AutoCAD Inventor for that if you choose Autodesk.
 
At this point, I am mostly looking for a parts design and analysis program that i can then send the files out for production. I need to sit back with my friend and really discuss what i need it to do, and if it can do it. In some quick preliminary talks, it seemed to.
I have 2-3 other friends that are engineers, so I need to get them all together at my next party and pick their brain on the subject more in depth.
Thanks for the heads up.
 
You're welcome Scott ..

I am an Engineer and I use 3-D software on a daily basis as well. I've also done quite a bit of 3-D printing over the last few years. I'm just letting you know not to spend your money on that software because is not capable of doing what you want. :)

My vote is for SolidWorks but if you're going to be doing surfacing then you really need to take a harder look. I also agree that the price point for SolidWorks is not very nice for the home user.

Honestly you're probably better off just drawing up the parts on paper and giving them to your engineer friends to develop the parts in solid works for you. Normal parts only usually take a minute or two to draw. They might even do it for the cost of a beer.
 
Last edited:

Scott

Lifetime Supporter
Scott, the $5k was off a little. They have three package: Standard ($3,995.00), Professional ($5,490.00) and Premium ($7,995.00). I think the $1,300 that you mentioned is for optional annual support and maintenance which doesn't get you any additional features.

Standard is a very powerful, parametric CAD package. It includes FEA capability to perform static & stress analysis on parts (as opposed to assemblies), sheet metal capeabilities, animation, etc. So while it's their entry, it's anything but basic. The more advanced versions have photo-realistic rendering, standard parts library, costing, broader FEA(i.e. assemblies), circuit design etc.

One of the things that I really didn't like about several of the packages that I experimented with was that they used a direct modeling approach. Basically, if you want to go back and change something that you did in a previous step, you can't (i.e., beyond an undo). For example you applied a 0.2" chamfer and you'd like change it to a 0.1" chamfer -- nope it's gone like you carved it off and you need to add material back on and then chamfer that. With Solidworks, you back to the tree that shows you the steps and change one number. Imagine that with evey aspect of the drawing. Not a big deal for simple parts, but given that I knew how the other stuff worked it really bothered me not having it -- but that's me;-)

IMO SolidWorks is the best for complex mechancial parts and it's priced as such. The standard package does more than I'll ever need. You might find this decision tree helpful (Which 3D software should I learn for 3D printing? by gillespinault - Thingiverse) and there's a good list of packages here (Software & Tools for 3D Printing | 3D Printing for Beginners).

Friends with a comptency in a package would be very useful. I wish I had some firends that knew SolidWorks!
 

Scott

Lifetime Supporter
I agree with Aaron that if you can sketch it a friend could quickly upload it into a CAD program. That said, I'm now addicted to the draw, print, try, refine cycle.

Aaron also points out that you'll need to take a harder look if you want surfacing which is very important pint. If you at the decision tree in the above link, the first big decision point is "organic shapes" (i.e., surfacing) OR "precise dimensions". The next decision point is what you want to spend. SolidWorks is the top package in "precise" and "boss is paying"
 
Thanks both Aaron and Scott for explaining in more detail. The explanation of the "tree" or steps is a pretty important one. I have run into this problem before and ended up wiping out entire parts due to the fact of trying to go back and manipulate a previous piece of the part. It has deterred me away from taking the time to really learn those types of programs.
For most parts, whether for my car or for a work project, I have been sketching them out for many years and luckily due to the relative simplicity, they have created the files for me. Alas, the things I am interested in building now and the future are highly complex and require stress analysis. In one part, I could eat up that $5000 just in time for the piece to be made into a file, let alone trying to put it on paper in a manner others could understand. Lol. It will also give me some secrecy to the part if I can do myself. The cat will only be out of the bag once the part is ready for production, instead of at the conception of it.

I ran into this very recently with the design of some of my stainless steel railing parts that I designed and sent off to a manufacturer in china, scribbled on a piece of paper I emailed them. They took about 3 months longer to make the pieces (promise was 45 days to ship, it ended up being 4.5 months to ship) than promised, and I found out why in a very crappy fashion. Posting these parts up for sale and finding my bespoke piece was already being sold for about a month in the U.S. at a 20% lower price point than I was planning to introduce it at. So, not only did I lose exclusivity of the part, but now competing at a 20% loss on the first day. They are selling the EXACT same part which is VERY specific in application. The manufacturer told their main U.S. importer about the part, tagged their order onto mine, and shipped theirs to them first, then my order at their leisure. So, I had to learn the hard way. Won't happen again. :) So, I watch their items, priced mine $0.05 less each, and will continue to fuck them (while in turn fucking myself) with a lower price until I run out of what is a pretty massive stock. Luckily, it is parts my business uses for install also, and the online sales of it is more of an attempt at passive income, rather than main income. So I can play their game.

Sorry for the rant. But ya, creating the files myself is becoming a requirement. Luckily future plans are much more complicated parts, and each section to be sent off to a different company, and listed to them under a false use, or false classification of the product. No one will have a clear picture of the finished piece.
Thanks again for the advice. I will contact Solidworks about their monthly subscription price. It should get me by long enough for the parts to start making income, to then move into the full purchase price. I have been sitting on a few ideas for a few years, and it is time to finally start prototyping.
 
Last edited:
Long-time lurker, first time poster. I almost feel like this should be a separate thread but it seems to lodge nicely in this one for the time being. Some history: I've been co-builder on two experimental airplanes, am about to finish a wood-strip kayak, and someday hope to build a component car; space is the biggest constraint right now. The SLC is top of the list by far.

Anyway, I'm a mechanical engineer/project manager and have extensive experience with SolidWorks. What everyone has said about SolidWorks is true, except I would not encourage any 3rd party training at all. If you purchase/acquire SolidWorks, the built-in training is absolutely phenomenal. My company hires probably 10 or so engineers a year and we only use the training sessions within SolidWorks. Depending on skill/computer learning level a newbie could be very proficient with mid-level SolidWorks models within 3-4 days easily. I've not seen the Student version for probably 8 years but it was pretty good. I think prints created with that version came out with a watermark to discourage professionals from using it on the cheap but, other than that, it was feature rich and the limitations were mostly in the higher level features.

Keep posting car stuff, it's great and keeps me lurking!

-Alan
 
What industry and discipline are the engineers here in? I'm from the instrument/electrical side in the industrial area. I'm not an engineer but a senior designer (BS & AS degrees) and in my line of work we do all the drawings and obviously design of how stuff will be installed. Engineers spec out motors/instruments and project management.

I definitely agree, we need a 3D printing and software specific thread so we don't junk up his thread. I think it'd be beneficial to everyone since there's more than just a couple of people interested in 3D.
 
We have 2 3D printers. I use Autodesk Fusion 360 (free for commercial < $100k/yr income). My son uses Solidworks (he is a student). Solidworks is better, but Fusion is OK. Both will generate files for 3D printing or CAM.
 

Scott

Lifetime Supporter
Like the QA1 shocks, the Penske shocks came with the shock bodies mounted to the control arms. I called Penske to check if the orientation mattered and they said that it would work either way, but that most people mount the shock body to the chassis Flipping the orientation of the shock absorber and the lift ram reduces un-sprung weight, keeps both the lift ram and shock reservoir hoses stationary, simplifies replacing the spring and most importantly the logo is right side up LOL

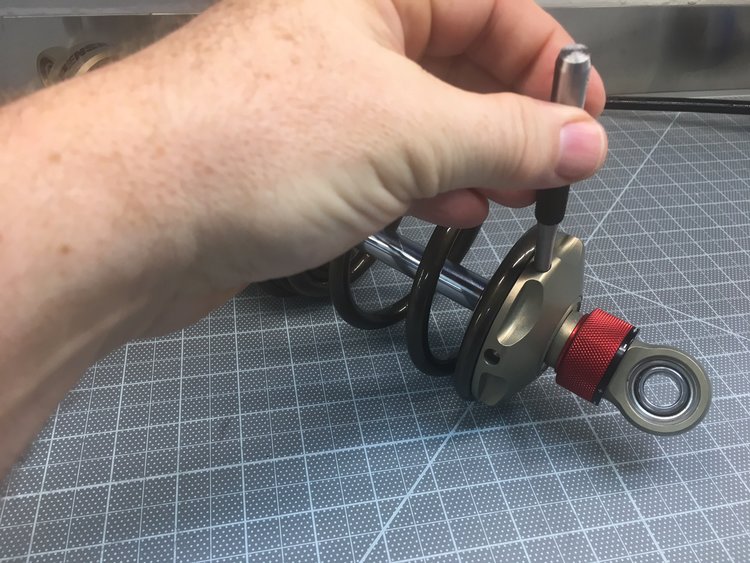
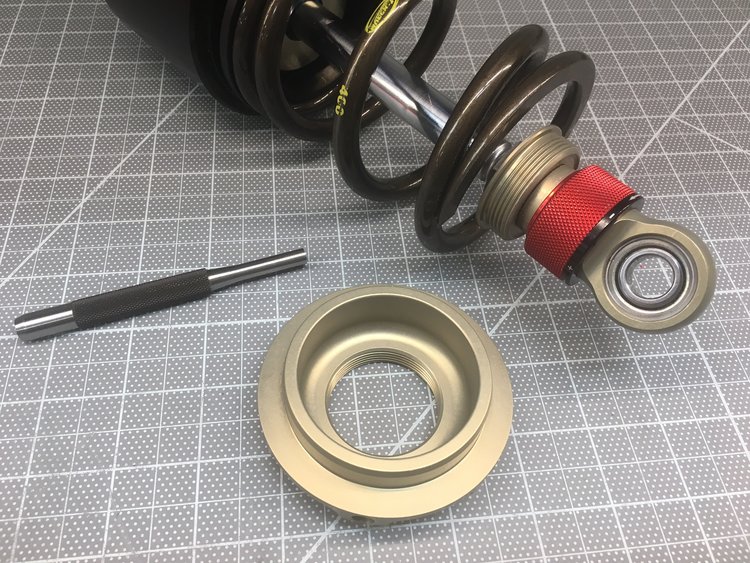
Even after reading all of the documentation, I wasn't sure how to remove the springs. I called Allan and he indicated that he couldn't figure it either when he built Preston's car and he had to call them -- so, I guess my man card is in tack;-) In any event, it's very simple. You insert something with a 0.25" diameter (I used a pin punch) into one of the holes in the spring retainer and rotate it counter clockwise.


<NOSCRIPT></NOSCRIPT>

<NOSCRIPT></NOSCRIPT>
IMG_1237.JPG
<STYLE id=design-grid-css type=text/css> #block-yui_3_17_2_1_1484348344757_27394 .sqs-gallery-block-grid .sqs-gallery-design-grid { margin-right: -4px; } #block-yui_3_17_2_1_1484348344757_27394 .sqs-gallery-block-grid .sqs-gallery-design-grid-slide .margin-wrapper { margin-right: 4px; margin-bottom: 4px; } </STYLE> Penske offers the TL-76W tool for $22.50 which will work a little better than the punch. Steve at Penske also told me that when I reinstalled the spring retainer to "Tighten it until it was snug and then a little more -- probably less that 20 lb.-ft."
 

Scott

Lifetime Supporter
The last five or so posts are missing from this thread. I assume that the outage last night required the forum to be restored from a backup which might be preformed weekly...

Cam, could you post the part number for the safety washer that you mentioned in one of the missing posts?
 
Sure thing - I purchased these from Pegasus.

https://www.pegasusautoracing.com/productselection.asp?Product=3068

3068-08 and 3068-10; I didn't go through and replace everything in the car, just the areas I thought were highly or would see shock loading. In all I think I ordered 50x of the -08s and 22 of the -10s which gave me a few spares. They're not cheap but as I said, any yielding of the aluminum pieces will introduce and accelerate wear. Given the large number and difficulty of inspection I think these are a good upgrade. Note they are slightly thinner (0.022" IIRC). If you're cutting custom shims then that's easy to account for. Otherwise I've found the pickup ears are flexible enough to take this up without any issue (in the few areas I've played with, my suspension is still in pieces on the garage floor!)

uyoFPG2.jpg


UYpGzZA.jpg
 

Scott

Lifetime Supporter
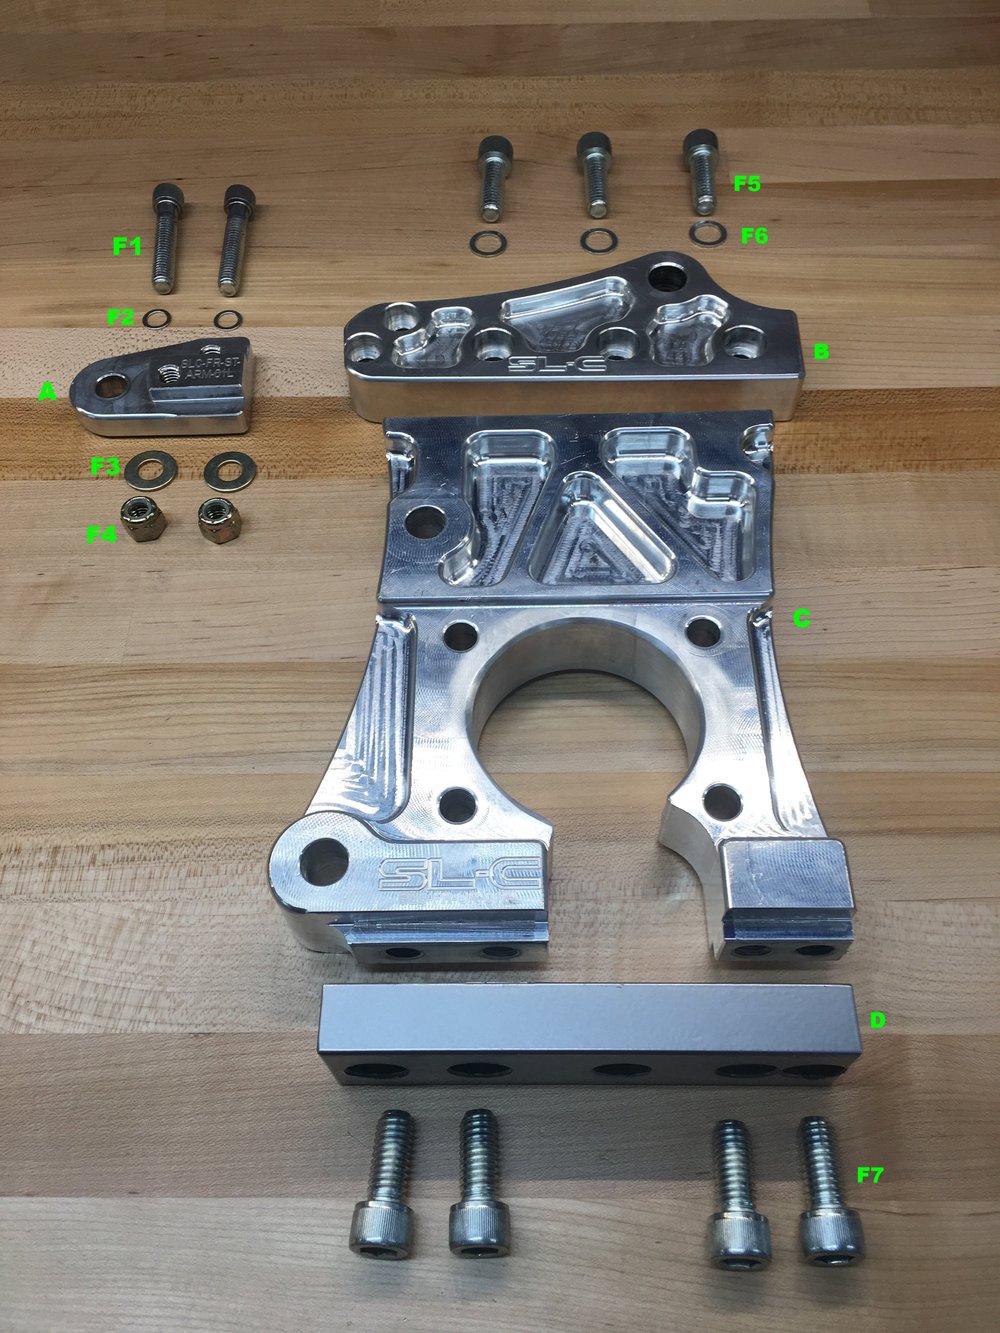
I'm interested in how people torqued the steering arm to the top of the upright (see picture below). The two 3/8”-16 socket head cap screws (F1) are threaded into the steering arm (A) and then further held in place by the nylocs (F4).

Using the chart below, I would use anti-seize on F1 and torque to 39 foot-pounds (oiled socket head cap screw). I would then clean the protruding thread and torque F4 to either 49 foot-pounds (dry socket head cap screw) OR 45 foot-pounds (dry grade 8). I think that I’d go with the former. Irrespective of which option you chose for the nut there will be two separate torque values on the same screw. How would you go about it and why?

I’m also interested in what torque settings people used on the 4 rounded head screws that are used on the lower front control arm. I’ve only seen torque tables for socket head screws and hex head screws.

Bolt torque specs for socket head cap screws for machine repair assembly bolt torq CNC

IMG_1284.JPG
 
In looking at the ball joints today I noticed that one had a zerk fitting and that the other three were just open to the elements. If you haven't already done so, you should check that the fittings are in place.

The manual is mute on the topic (we can fix that)... are you greasing the ball joints and if so what type of grease are you using?

Has there been a change to the ball joints recently? My front ball joints do not have any threaded holes to accommodate a zerk fitting. The rears came with fittings already installed.
 

Scott

Lifetime Supporter
I went to reinstall the shocks the other day and I couldn't compress them at all, let alone the couple of inches required to fit them between the mounting points. This is because they are filled with about 150 psi of nitrogen (apparently the national championship SL-C ran 175 psi). There are three approaches to reinstalling the shocks:

  1. Bleed the nitrogen. This makes it easy for a single person to do it. The downside is that you need to refill them with nitrogen.
  2. Compress the shock in place. This requires careful use of a crowbar and two people. You might want to tape the top of the shock absorber to prevent it from being scratched by the crowbar
  3. Compress the shock on the bench. This requires you to compress it to the correct length and use wire to keep it compressed while you position it in place at which point you cut the wire.
I really didn't want to struggle getting it in place so option one seemed best. The only downside with that approach means that you need to refill it with nitrogen which means that you need to buy more tools. The upside is that you get to buy more tools and you're set up to tune the pressure when you go to shake out the car.

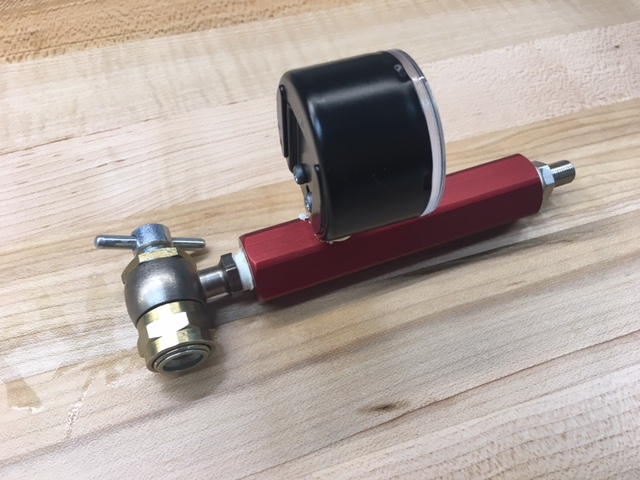
I told my wife that these were "man accessories"... a dress needs shoes and purse and Penskees need the following LOL

•Shock inflator
•High-pressure regular
•High-pressure hose
•Nitrogen bottle

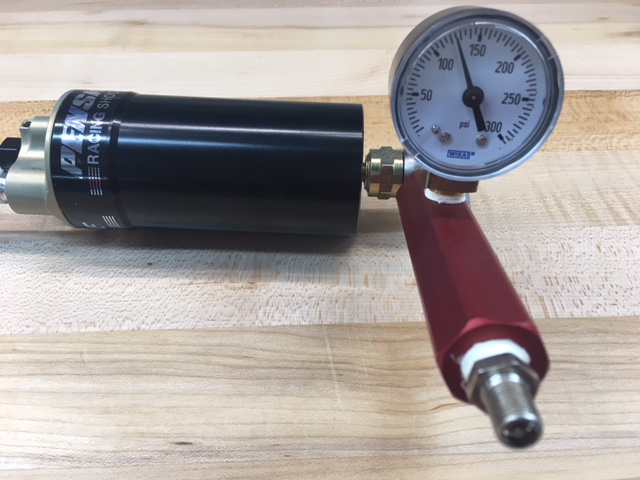
The oil reservoirs have a standard Schrader valve like you'd find on a car tire. However, you don't want to use standard tire inflation tools, but that's not ideal for two reasons: (1) the pressure is 150-200 psi which is 4-6 times higher and (2) there is a very small volume of nitrogen which means that pressure is extremely sensitive to leakage when connecting or disconnecting. In fact, even specially designed shock inflators will reduce pressure by 15-20 psi when checking the pressure. Note that the gauge will read the lowered pressure, not the pressure before you connected.

465_1539_600x400_CHK-4009.jpg

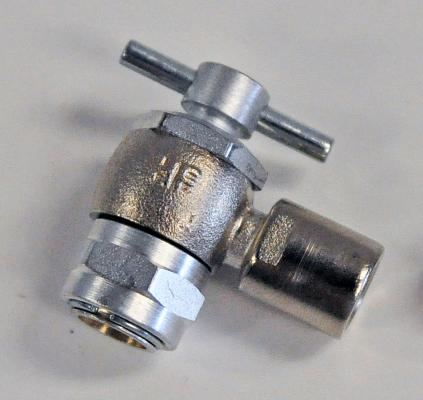
A shock inflator has a special high-pressure, no-loss chuck. It's used as follows:

•Rotate the T-handle counterclockwise until it stops. This retracts the plunger.
•Attach the chuck to Schrader valve. It uses a copper seal ring so it needs to be tightened a little with a wrench or it will leak. Be very careful not to damage or twist the Schrader valve. Ideally you would use a second wrench to hold the Schrader valve, but I couldn't get my thin Snap-on box wrench to fit.
•Slowly rotate the T-Handle clockwise to extend the plunger. If you hear any leaking, rotate the opposite way and repeat the above step. Keep rotating until the gauge shows the pressure.

At this point you can bleed the nitrogen from the Schrader valve on the inflator. Remember there is a very small volume of nitrogen... it's not like bleeding pressure out of a tire. Note that according to If you bleed all of the nitrogen out you'll want to re-inflate to at least 50 psi to keep pressure on the seals (I'll write that up later). When you've reached the desired pressure:

•Rotate the T-handle counter clockwise until it stops. This retracts the plunger.
•Loosen the chuck from the Schrader valve.
IMG_1295.JPG


IMG_1294.JPG
 
Back
Top